Use the Preview window to audition input and output media
Use real-time previews to audition Filter and Geometry settings
Output test clips to preview Encoder and Frame Control settings
Compressor allows you to create and efficiently organize a series of encoding jobs and then process them unattended. This works especially well if you are comfortable with your encoder settings and have confidence in the output file quality.
But what do you do when you are not sure of the final quality or you want to experiment with different targets to find the perfect match for your source media? Encoding multiple test compressions of a two-hour movie is not an efficient use of your time. Fortunately, Compressor supports real-time previews and test-render workflows that accurately represent the final output quality without requiring you to encode the entire source media.
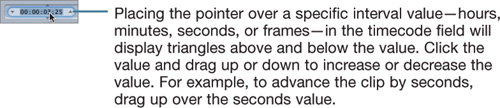
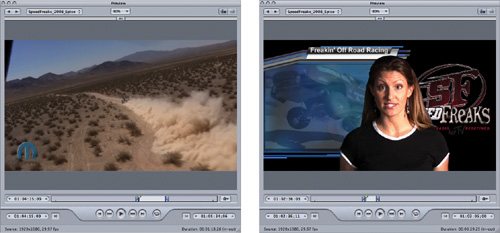
The Preview window displays real-time playback of source media originating from QuickTime files, Motion projects, or Final Cut Pro sequences. Additionally, target settings applied to source media will play back in real time with some limitations. Selecting source media or targets in the Batch window automatically loads the content into an active Preview window. If the Preview window is currently closed, choose Window > Preview or click the Preview button on the Batch window toolbar.


Note
The Preview window will display only Filters and Geometry settings during realtime playback. To see Encoder or Frame Controls settings use the Test Clip workflow described in the following section.
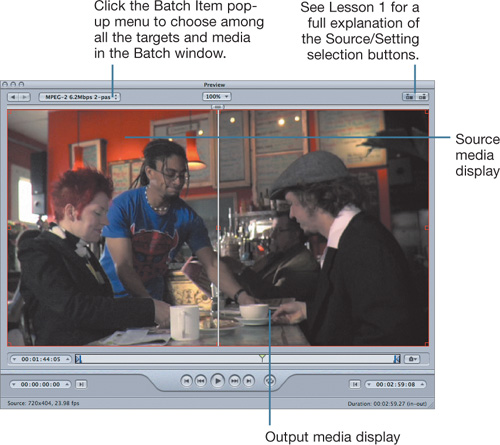
The presence of the Split Screen slider indicates that a target is loaded into the Preview window.
Compressor can work with Final Cut Pro to encode sequences in the background, but only one at a time. This dialog will appear if you attempt to access a Final Cut Pro batch in the Preview window, while another sequence is processing:
Viewing real-time previews on your computer screen is especially useful for testing settings destined for formats that use the RGB color space, such as movies for the web or Apple devices. Non-RGB formats such as Blu-ray Disc or DVD, however, are often best tested in their native environments to verify output quality. During the encoding process, you can significantly improve your efficiency, as well as your quality control, by applying targets to small sections of the source media, encoding the batch, and then burning the results to optical media for playback. Test encoding 30 to 60 seconds of the source is often more than enough material to evaluate settings that, once approved, can then be applied to the entire source media—and it is much faster than processing a full 30- to 60-minute movie.
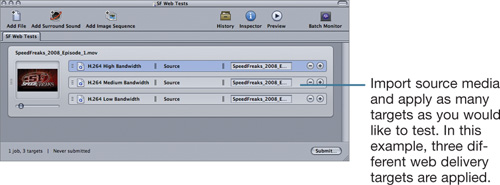
The first step when creating test clips is to define the section of the imported source media that you want to encode with single or multiple target settings.
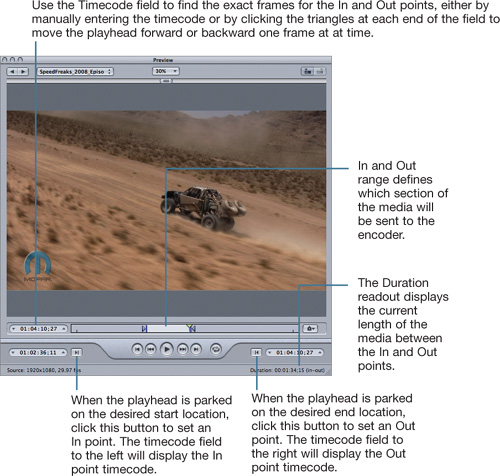
Next, select the job—not any of the targets—to load it into the Preview window. Use the Preview window to set In and Out points that limit the duration of the test range; by default, all clips have their In and Out points set at the beginning and the end of the media.
Tip
The fastest way to set In and Out points is to scrub the playhead to your desired In point location and press I on the keyboard to set the In point. Set the Out point by scrubbing the playhead and pressing O at the desired end frame.
The absence of the Split Screen slider indicates that source media is loaded into the Preview window.
Once you have applied targets to test in the Batch window and have defined the output clip’s duration in the Preview window, you can submit the entire batch for encoding.
When you have determined the final settings, re-import the job from the History window (for more information, see “Using the History Window” in this lesson). Use the target that produced the best output, and make sure that the In and Out points in the Preview window are placed at the beginning and end of the source media, otherwise you will encode only the test section of the source media. Choose an output destination, make any desired adjustments to the filename, and submit the batch for encoding.
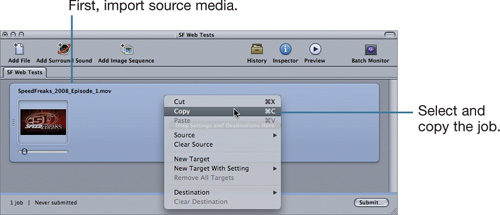
You may have source media that changes significantly throughout the program, so testing just one section may not provide a broad enough sample for you to make an accurate determination of a specific target’s performance quality.
The trick is to apply the same target to different sections of the source media and then encode the different samples as one batch.
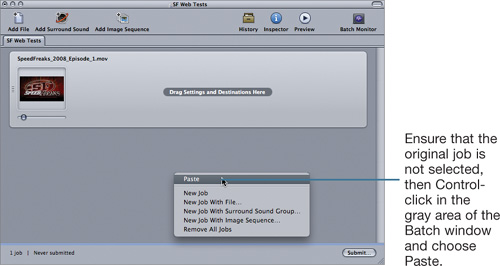
If you have more than two sections to test, continue pasting the source media into the active Batch tab until you’ve created enough jobs to satisfy all the sections.
Select the first job to open it in the Preview window and then set In and Out points for the first section you want to test. Repeat this process for as many jobs as you want to test, each time defining a different section of the source media.
You can quickly apply the same target to several jobs in the batch by Command-clicking each job and then choosing Target > New Target With Setting. From the drop-down window, select the target and choose Add. When the batch is ready to encode, click Submit.
Compressor also lets you independently apply multiple targets to each of the test jobs. You could even apply multiple targets to one job and a single target to all the others. The options are many and varied.
Because only 30- to 60-second sections are sent to the encoder, even complex batches compress quickly.
After you find the best target for your delivery requirements, the challenge is managing all the test clips so that you can easily return to Compressor and apply that test clip’s target to the entire movie.
You can easily accomplish this by creating custom destinations (see Lesson 4) and custom presets (see Lesson 3) and modifying the output filenames so that each test is uniquely identified.
The History window provides convenient access to previously encoded jobs and is particularly handy when encoding multiple test clips because you can drag the job that rendered the most successful output back into the Batch window for resubmission. You can also click the Magnifying Glass icon next to a particular job to view the output media in the Finder.
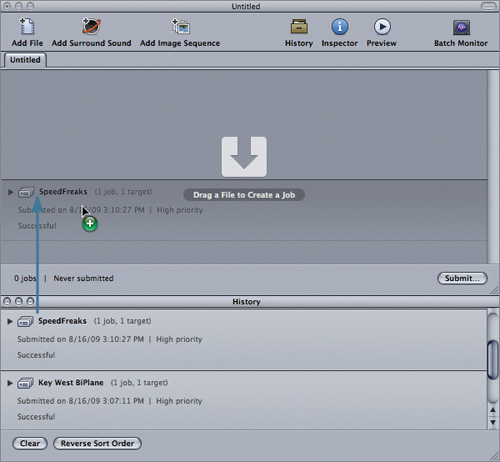
Drag batches directly from the History window into the Batch window.
When the batch is re-imported, delete the targets that did not meet your requirements. When you’re ready to export the full source media, make sure to select the job—not one of the targets—and reset the In and Out points of the source media to the beginning and end of the entire clip.
Tip
You can expand or collapse batches in the History window by clicking the disclosure triangles or double-clicking the entries in the list.
To evaluate your understanding of the concepts covered in this lesson and to prepare for the Apple Pro Certification Exam, download the online quiz at www.peachpit.com/apts.compressor.