In the last chapter, you successfully deployed a module to your IoT Edge device, but you used a module that was already in the marketplace. In this chapter, you will learn how to develop your own module and deploy it. Sound interesting? I cannot wait to show you how to do that. Let’s start.
Prerequisites
Before we start, it is a good idea to list all the prerequisites you’ll need. As usual, we will be using the Visual Studio Code for development. I am developing the module on a Windows computer intending to target a Linux device running IoT Edge, the Raspberry Pi. Other things to note are:
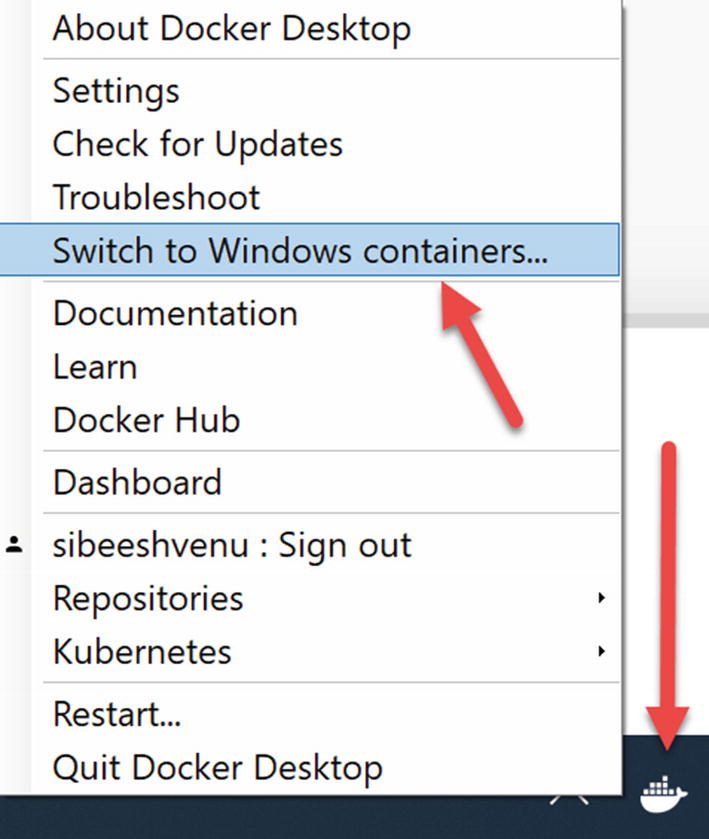
Your development machine should support nested virtualization. This is needed to run a container engine. We use Docker Desktop to develop the containers. You can easily switch between Linux containers and Windows containers using Docker Desktop (see Figure 9-1). This gives you the power to create modules for different types of IoT Edge devices. You can install Docker Desktop from the Docker Hub (docs.docker.com/docker-for-windows/install).
Figure 9-1
Docker switch to Windows containers
You should install Git, in order to pull the module template package C# extension powered by OmniSharp. Remember that we added this to Visual Studio?
Setting Up VSCode
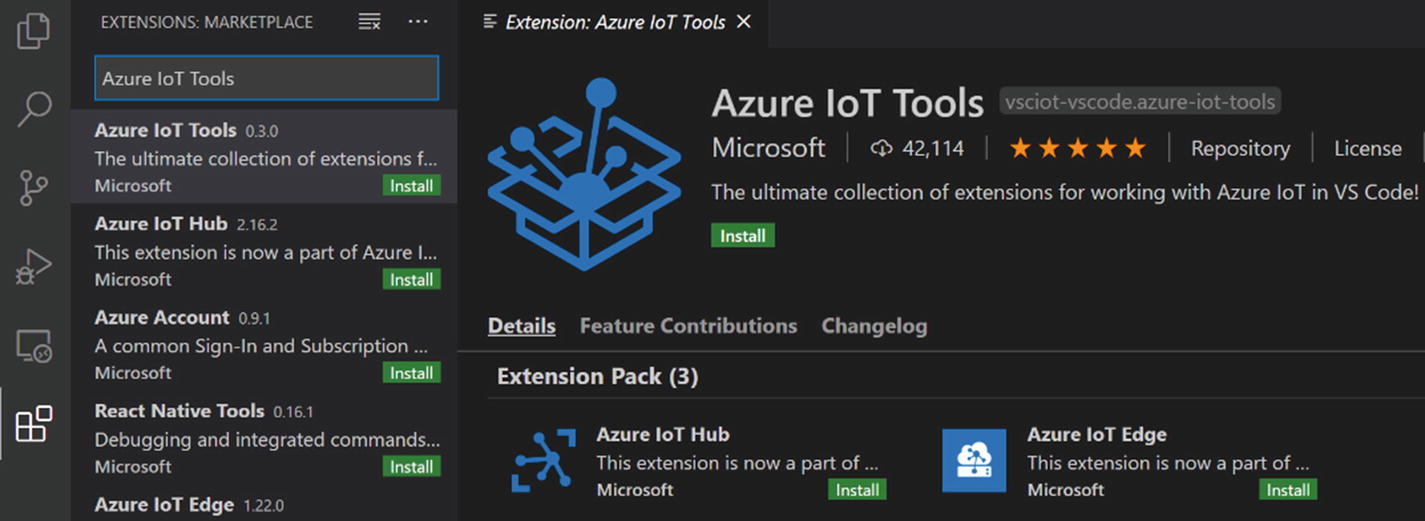
Because of the Azure IoT Tools extension, creating IoT solutions with VSCode has never been easier. With this extension, you can easily create projects using the given project templates, automate the deployment, and monitor and manage IoT devices. Go to the Extensions tab in VSCode and install Azure IoT Tools (see Figure 9-2).
Figure 9-2
Azure IoT Tools
Once the extension is installed, go to the View menu and click Command Palette. Search for and select Azure: Sign in. Azure will ask you to sign in with your existing Azure account; remember to sign in with the account you used to create the Azure IoT Hub.
Once you sign in, open the Command Palette again. Search for and select Azure IoT Hub: Select IoT Hub, which will give you an option to select your IoT Hub. When you are finished, you can see your devices in the VSCode Explorer (choose View ➤ Explorer), as shown in Figure 9-3.
Figure 9-3
Azure IoT Explorer
Creating an Azure Container Registry
This chapter aims to deploy the container image of the modules created by using the Azure IoT Tool in any Docker-compatible registry. We will use the Azure Container Registry in this example, but you can also use Docker Hub. Let’s create an Azure Container Registry in the Azure Portal now. Search for the Container Registry service and create it. Creating this service is as easy as creating other services in Azure. It is recommended to create the resource in the same resource group.
All the SKUs provide the same programmatic capabilities; however, choosing the higher SKU will provide more performance and scale. Table 9-1 shows some of the differences between the SKUs.
Table 9-1
Container Registry Capabilities and Differences
Capability
Basic
Standard
Premium
Price per day
$0.17
$0.67
$1.67
Included storage (GiB)
10
100
500
Offers enhanced throughput for docker pulls across multiple, concurrent nodes
Total web hooks
2
10
500
Geo Replication
Not Supported
Not Supported
Supported
$1.667 per replicated region
In this example, we will use the Basic SKU. When you are done, review and create the resource. See Figure 9-4.
Figure 9-4
Azure Container Registry
Now go to the resource you just created and click the Access Keys from the menu located under settings. From the given page, enable the Admin user so that you can use the registry name as the username and use the password generated to log in to your container registry. See Figure 9-5.
Figure 9-5
Container Registry admin access
Creating a New Project
As discussed earlier, it is very easy to create a new project with the IoT Tools. To do this, open the Command Palette and search for and select Azure IoT Edge: New IoT Edge Solution. Once you press Enter, it will ask you to select the folder where the files should be saved and then to provide a solution name. I named it raspberrypi.edge. Select C# Module when asked to select the module template. You can name your module anything; I named this example SendTelemetry. When you’re asked for the Docker image repository for the module, provide the Login Server value that you see in the Access Key section of your Azure Container Registry. It looks similar to apresscr.azurecr.io/sendtelemetry. You can always edit this value in the module.json file. See Figure 9-6.
Figure 9-6
Image repository
Once the solution is created, go to the module. You’ll see the module.json file there. This is how it looks:
The modules folder will contain all the modules. Right now, there is only one module, which is where you write all of the main program code, module metadata, and Dockerfiles.
The .env file stores the credentials of your container registry. These credentials will be shared with your IoT Edge device to pull the container images.
To deploy these modules, we need a deployment manifest file. This file defines which modules will be deployed, how they should be configured, and how they will communicate with each other and with the cloud. The deployment.template.json and deployment.debug.template.json files help create this manifest file. Here are the contents of these files:
"SendTelemetryToIoTHub": "FROM /messages/modules/SendTelemetry/outputs/* INTO $upstream",
"sensorToSendTelemetry": "FROM /messages/modules/SimulatedTemperatureSensor/outputs/temperatureOutput INTO BrokeredEndpoint("/modules/SendTelemetry/inputs/input1")"
"SendTelemetryToIoTHub": "FROM /messages/modules/SendTelemetry/outputs/* INTO $upstream",
"sensorToSendTelemetry": "FROM /messages/modules/SimulatedTemperatureSensor/outputs/temperatureOutput INTO BrokeredEndpoint("/modules/SendTelemetry/inputs/input1")"
},
"storeAndForwardConfiguration": {
"timeToLiveSecs": 7200
}
}
}
}
}
As you can see, there are two modules in the deployment.template.json file—SendTelemetry and SimulatedTemperatureSensor. Note that the values for the username and password in the registry credentials section come from the .env file when the deployment manifest is created. It is also worth mentioning that the .env file is Git-ignored. Here are the contents of the .gitignore file:
config/
.env
The credentials in the .env file are created automatically; however, if they are not generated, you can copy and paste the username and password from the Azure Container Registry.
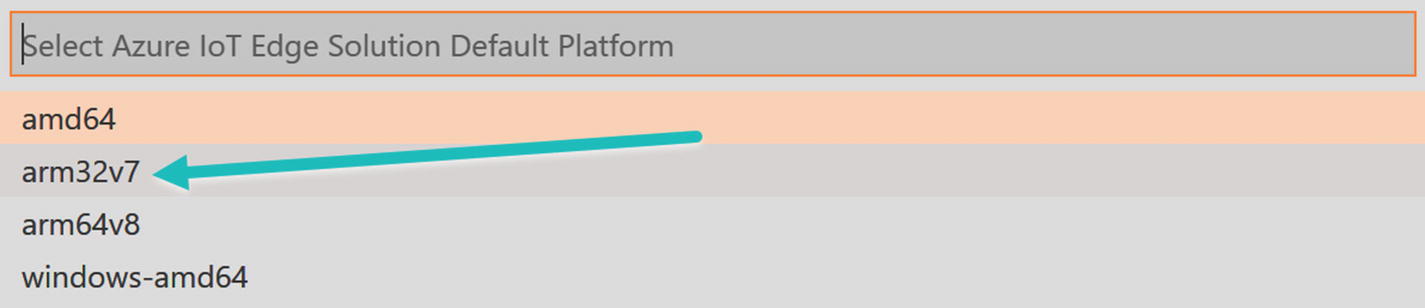
Set the target architecture to arm32v7, since you are using Raspberry Pi as the device here. To do this, open the Command Palette and search for and select Azure IoT Edge: Set Default Target Platform for Edge Solution. Then select arm32v7, as shown in Figure 9-7.
Figure 9-7
Select the default architecture
You should now see the message"azure-iot-edge.setDefaultPlatform: The default platform is arm32v7 now." in the output window. The solution that we just created includes sample code for an IoT Edge module. The sample code demonstrates how communication between modules works. The IoT Hub running on the device routes messages from the output of one module to the input of one or more modules. This communication is controlled or performed using the routes configured in $edgeHub. You can see the desired properties of $edgeHub in the deployment.template.json file:
"$edgeHub": {
"properties.desired": {
"schemaVersion": "1.0",
"routes": {
"SendTelemetryToIoTHub": "FROM /messages/modules/SendTelemetry/outputs/* INTO $upstream",
"sensorToSendTelemetry": "FROM /messages/modules/SimulatedTemperatureSensor/outputs/temperatureOutput INTO BrokeredEndpoint("/modules/SendTelemetry/inputs/input1")"
},
"storeAndForwardConfiguration": {
"timeToLiveSecs": 7200
}
}
}
As you can see, there are two routes—one sends the output of the SendTelemtry module to IoT Hub, and the other sends the output of SimulatedTemperatureSensor to the input of the SendTelemetry module. Every route should have a source and sink property. We can also have a where condition in the route to filter the messages, but that is optional. Here is the syntax of the route:
"$edgeHub": {
"properties.desired": {
"routes": {
"route1": "FROM <source> WHERE <condition> INTO <sink>",
"route2": "FROM <source> WHERE <condition> INTO <sink>"
},
}
}
The source field specifies where the message comes from. Table 9-2 shows the possible values for the source.
Table 9-2
Possible Source Properties
Source
Description
/*
All device-to-cloud messages or twin change notifications from any module or leaf device
/twinChangeNotifications
Any twin change (reported properties) coming from any module or leaf device
/messages/*
Any device-to-cloud message sent by a module through some or no output, or by a leaf device
/messages/modules/*
Any device-to-cloud message sent by a module through some or no output
/messages/modules/<moduleId>/*
Any device-to-cloud message sent by a specific module through some or no output
/messages/modules/<moduleId>/outputs/*
Any device-to-cloud message sent by a specific module through some output
/messages/modules/<moduleId>/outputs/<output>
Any device-to-cloud message sent by a specific module through a specific output
Here is an example of a route with a filter in it:
FROM /messages/* WHERE NOT IS_DEFINED($connectionModuleId) INTO $upstream
All the messages coming from the modules include a system property called connectionModuleId, so if you want to exclude module messages, you can use this query with the condition.
The sink defines where the messages are sent. There are a few things to note:
Only modules and IoT Hub can receive messages
Messages can’t be routed to other devices
There are no wildcard options in the sink property
Send the message to a specific input of a specific module
If you look in the Program.cs file, which is inside the modulesSendTelemetry folder, you should see a handler called SetInputMessageHandlerAsync, which will be called when a message is received by the module.
The SetInputMessageHandlerAsync method registers a new delegate for the particular input. If a delegate is already associated with the input, it will be replaced with the new one. Here is the Init method:
static async Task Init()
{
MqttTransportSettings mqttSetting = new MqttTransportSettings(TransportType.Mqtt_Tcp_Only);
As you can see, a message handler is the second parameter of the SetInputMessageHandlerAsync method. This message handler pipes the message and sends the event to the IoT device. Here is the PipeMessage method:
The SendEventAsync method processes the messages and sets up an output queue (output1) to pass them. As we have gone through the files and code, now we can try building our solution and generate the manifest. Before we build the container image, we must perform a Docker login with our Azure Container Registry credentials. Run the following command in the Terminal (choose View ➤ Terminal).
You should now see the Login Succeeded message in the terminal window. Let’s log in to the Azure Container Registry, right after performing az login. When you run the az login command, it will ask you to log in with your Azure account. After you do that, run the following command.
az acr login -n apresscr
If you get this error:
'az' is not recognized as an internal or external command, operable program or batch file
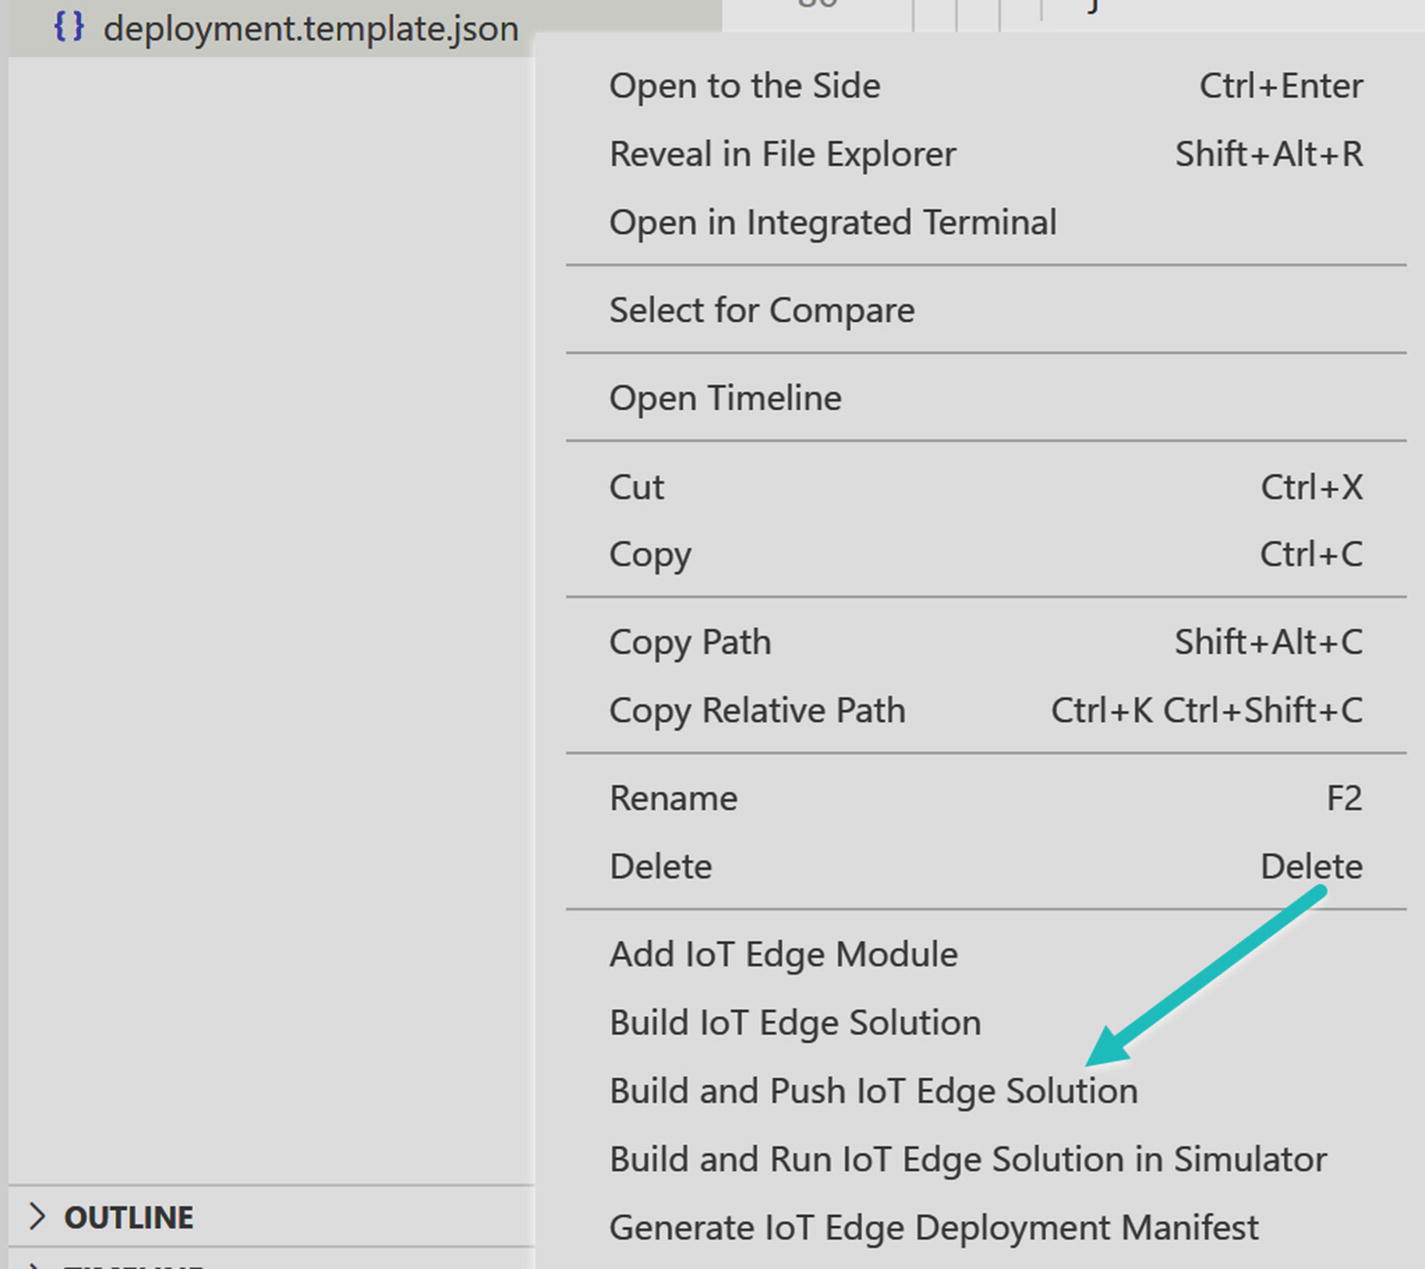
You need to install Azure CLI. The command uses the token created when you executed az login. To build the solution, right-click the deployment.template.json file and select Build and Push IoT Edge Solution, as shown in Figure 9-8.
Figure 9-8
Choose Build and Push IoT Edge Solution
This will run the Docker commands and you’ll be able to see the progress in the terminal window. The build and push command performs three operations:
Creates a config folder that contains the full deployment manifest, built out of information in the deployment template.
Runs a Docker build to build the container image based on the appropriate Dockerfile for your target architecture. Since we set the default architecture to Arm32, it will use the Dockerfile.arm32v7 Dockerfile.
In the end, it pushes the image repository to your container registry by running the Docker push command.
We also have to change the base image in the Dockerfile.arm32v7 file, since we are using a Windows 64 bit machine and our target device has an arm32 architecture. You can easily check this by running the following commands:
If the uname -m command says armv7l, it is 32-bit. In my case, it is arm71. So I had to build an arm32 container image on my 64-bit Windows host machine and use it on my Raspberry Pi 4. Luckily, you can always build arm32 and arm64 images on x64 machines, but will not be able to run them.
As we already have a device running on Raspberry Pi, running is not a problem for us. Open the Dockerfile.arm32v7 file and change the first line from:
FROM mcr.microsoft.com/dotnet/core/sdk:3.1-buster-arm32v7 AS build-env
to:
FROM mcr.microsoft.com/dotnet/core/sdk:3.1-buster AS build-env
This is how your Dockerfile should look now:
FROM mcr.microsoft.com/dotnet/core/sdk:3.1-buster AS build-env
WORKDIR /app
COPY *.csproj ./
RUN dotnet restore
COPY . ./
RUN dotnet publish -c Release -o out
FROM mcr.microsoft.com/dotnet/core/runtime:3.1-buster-slim-arm32v7
WORKDIR /app
COPY --from=build-env /app/out ./
RUN useradd -ms /bin/bash moduleuser
USER moduleuser
ENTRYPOINT ["dotnet", "SendTelemetry.dll"]
Note that it may take a while the first time and will be faster when you run it the next time. A new file called deployment.arm32v7.json is created in the config folder; if you check the contents of this file, you can see that all the credential values are updated from the .env file. Here is the sample generated file:
"SendTelemetryToIoTHub": "FROM /messages/modules/SendTelemetry/outputs/* INTO $upstream",
"sensorToSendTelemetry": "FROM /messages/modules/SimulatedTemperatureSensor/outputs/temperatureOutput INTO BrokeredEndpoint("/modules/SendTelemetry/inputs/input1")"
},
"storeAndForwardConfiguration": {
"timeToLiveSecs": 7200
}
}
}
}
}
Now log in to the Azure Portal and open the Container Registry resource that you created. Click the Repositories menu item on the left pane. This will show the module name there, which is sendtelemetry. See Figure 9-9.
Figure 9-9
Azure container registry repository
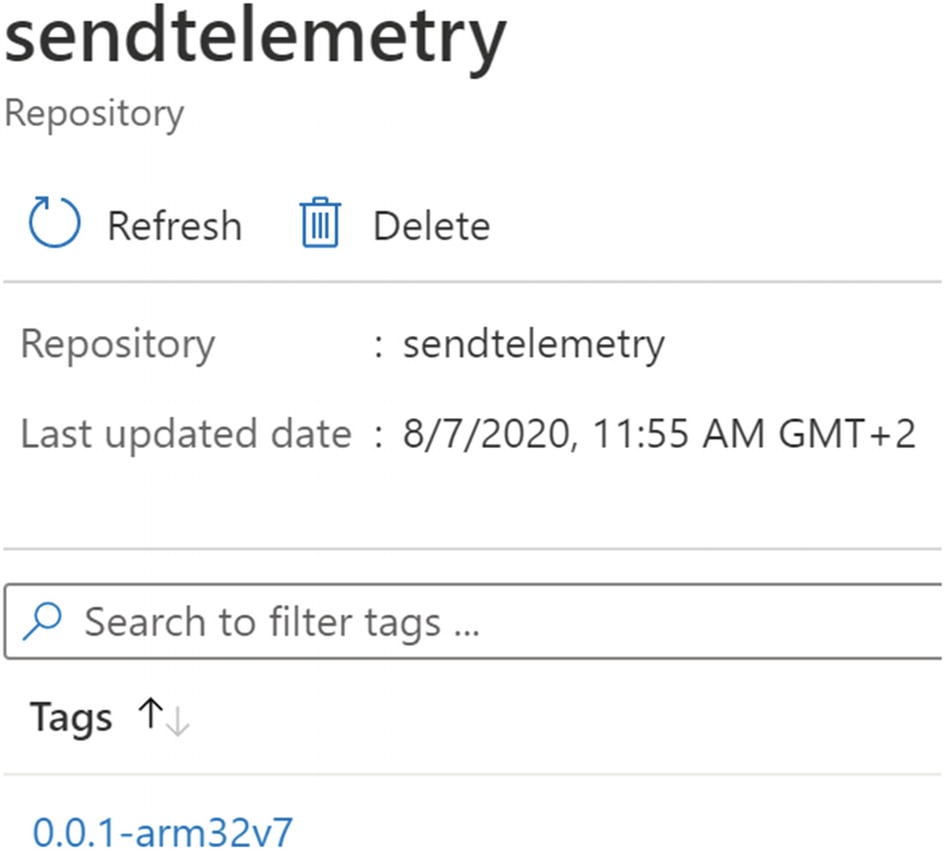
Now click the sendtelemetry repository. You should see your image with the right version number and tag there, as shown in Figure 9-10.
Figure 9-10
Send telemetry image
If you click the tag, you’ll see full details of your image with the manifest; see Figure 9-11.
Figure 9-11
Send telemetry image details
You can also change the version number of these container images. This will help you have a separate set of functionalities in each version and test the functionalities in a small set of devices before you deploy the changes to the production. To change this version number, open the module.json file inside your module folder—in our case, it is the modulesSendTelemetry folder—and update the property version to the new number. See Figure 9-12.
Figure 9-12
Change module version number
When you are done, right-click the deployment.template.json file and select Build and Push IoT Edge Solution. This will build a new image and push it to the container registry. Note that if you don’t change this version number, it will overwrite the previous image in the container registry.
When it’s done, go to your repository and refresh it. You should see two images with appropriate version numbers, as shown in Figure 9-13.
Figure 9-13
New docker image in the container registry
Deploying the Modules to the Device
The container images are ready for action in our Container Registry, so it is time to deploy them to our device. The question is, are you ready? If you are ready, make sure that your device is up and running.
Go to the Visual Studio Code Explorer. Under the Azure IoT Hub, expand the Devices menu, which will list all of your devices. Right-click the device and select Create Deployment for Single Device, as shown in Figure 9-14.
Figure 9-14
Deploy to the device
This will open a Windows Explorer window. Navigate to the config folder and select deployment.arm32v7.json. You should now see the following output in the output window.
[Edge] Start deployment to device [rpiedge]
[Edge] Deployment succeeded.
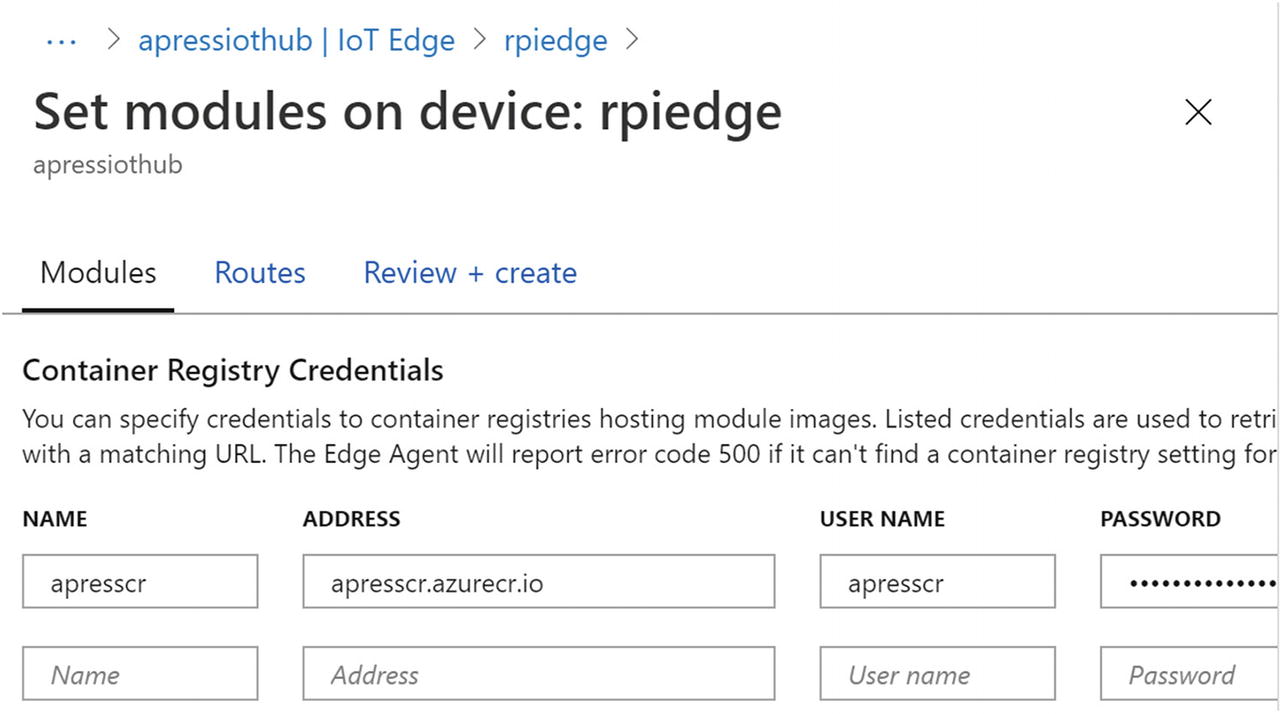
This will also add the Azure Container Registry credentials to the Set Module page of your IoT Edge device (choose IoT Hub ➤ IoT Edge ➤ IoT Edge Device ➤ Set Module). See Figure 9-15.
Figure 9-15
Container registry credentials
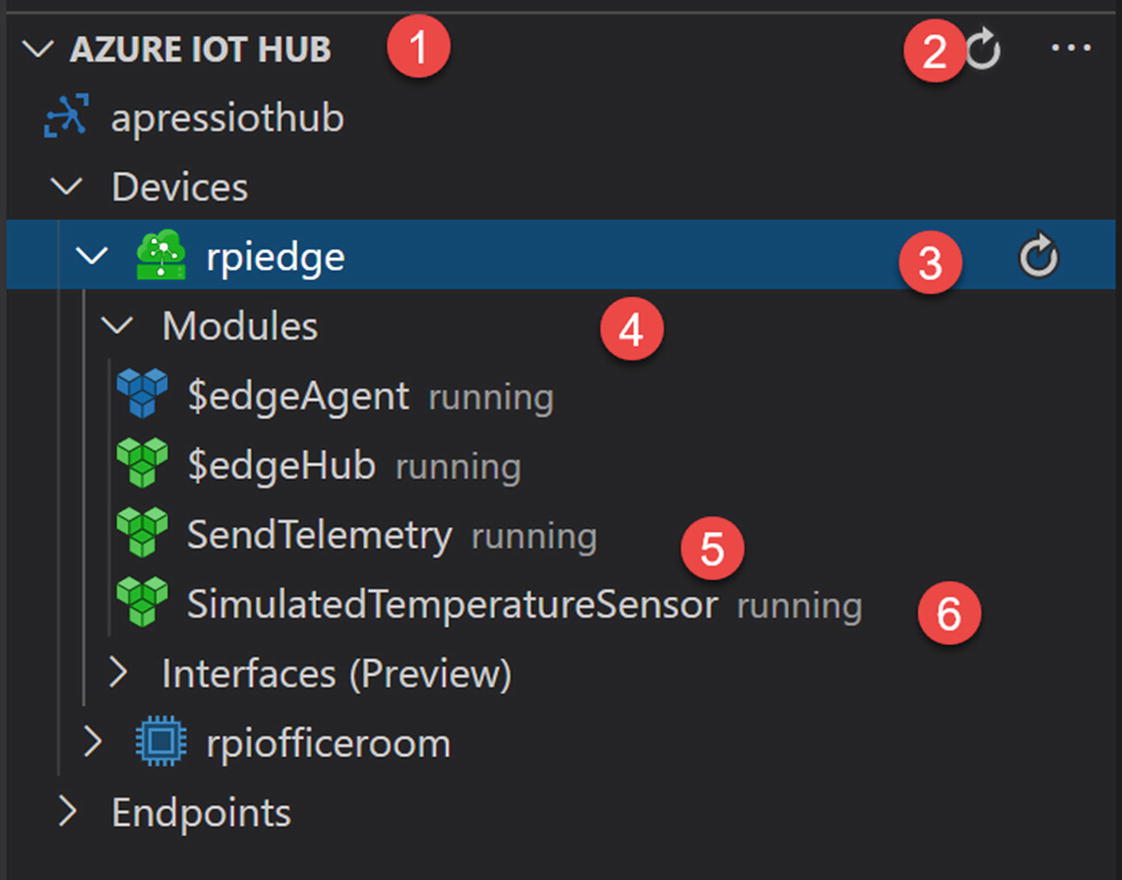
Now, click the device from the Azure IoT Hub section, and then click the Refresh button. Go to the Modules section under your device; you should see that the modules are running, as shown in Figure 9-16.
Figure 9-16
Modules running on the IoT Edge device
It may take a few minutes to start the modules, as the IoT Edge runtime needs to get the new manifest and then update the new images from the Azure Container Registry.
If you notice that your modules are in the “backoff” status, make sure that you set the default architecture correctly and updated the Dockerfile accordingly. You can also try restarting the Docker and IoT Edge services.
sudo systemctl restart docker
sudo systemctl restart iotedge
Viewing Device Messages
One amazing thing about the IoT Tools extension is that you can see everything in one place. To see the device messages, right-click the device and select Start Monitoring Built-in Event Endpoint, as shown in Figure 9-17.
Figure 9-17
Viewing the device messages
You should now see the messages in the output window, as shown in Figure 9-18.
Figure 9-18
View device messages output
You can also SSH to your Raspberry Pi and see the logs there. Let’s do that now. The IoT Edge list command will show you all the modules in the device, as shown in Figure 9-19.
Figure 9-19
IoT Edge list
To see the logs, run the iotedge logs SendTelemetry command. Note that the module name is case-sensitive. See Figure 9-20.
Figure 9-20
Send Telemetry module logs
Summary
Wow, this was a long chapter, I know. I hope you found it interesting and that you learned a lot about the following topics:
The prerequisites for creating IoT Edge modules.
How to set up Visual Studio Code to build IoT Edge Solutions with custom modules?
How to create an Azure Container Registry?
How to create a new Azure IoT Edge Solution?
How modules are connected through routes?
How to deploy modules to a device?
How to view messages from a device?
Are you ready for the next chapter? Just grab a coffee or a beer and join me. I will wait for you there.