In the last few chapters, we were busy setting up the Raspberry Pi device. In this chapter, we concentrate on setting up our machine to create a custom application so we can deploy and run it in our Raspberry Pi. This chapter assumes that you have already set up your device. If you have not, read the previous two chapters.
We will be developing the application using .NET Core, for several reasons:
It is an open source, general-purpose development platform.
It can be used to create applications for Windows, macOS, Linux, and ARM64 processors.
It is widely supported and maintained by the community, so there are frameworks available for cloud, IoT, machine learning, and so on.
It supports multiple languages, such as C#, F#, C++, and Visual Basic .NET.
Good documentation is available to help users learn and use it.
It is worth mentioning that the Pi Zero and Pi 1 models are not supported. This is because the .NET Core JIT depends on armv7 instructions and they are not available in the earlier Pi versions.
Developing the Application
To develop the application, we are going to use Visual Studio code. Here are some reasons why I love Visual Studio Code (VSCode):
It’s lightweight and powerful.
It’s available for Windows, macOS, and Linux.
It has built-in support for JavaScript, TypeScript, and Node.js.
It has support for other languages, as provided by its wide varieties of extensions.
First, let’s discuss what Windows Subsystem for Linux (WSL) is. The key points of WSL are as follows:
It allows developers to run a GNU/Linux environment directly on Windows.
It includes many command-line-tools, utilities, and applications.
If there is no WSL, you have to create an additional Linux VM and run the programs there, which is a lot of work.
WSL vs. WSL2
The new version of WSL is WSL2. It has many advantages over the WSL version. WSL2 has better file system performance and it uses the latest virtualization technology. Since WSL2 uses a lightweight utility VM, it also uses less memory on startup.
To install WSL2, you should be running Windows 10 with build 19041 or higher (version 2004).
You can easily determine your Windows version by running the winver command in the command window (press the Windows key+R, and then type winver). You’ll see a screen similar to Figure 3-1.
Figure 3-1
Windows 10 version
As you can see in Figure 3-1, my Windows version is 1909. I am using Surface Book 2, and the latest update is not yet compatible (as of writing this book).
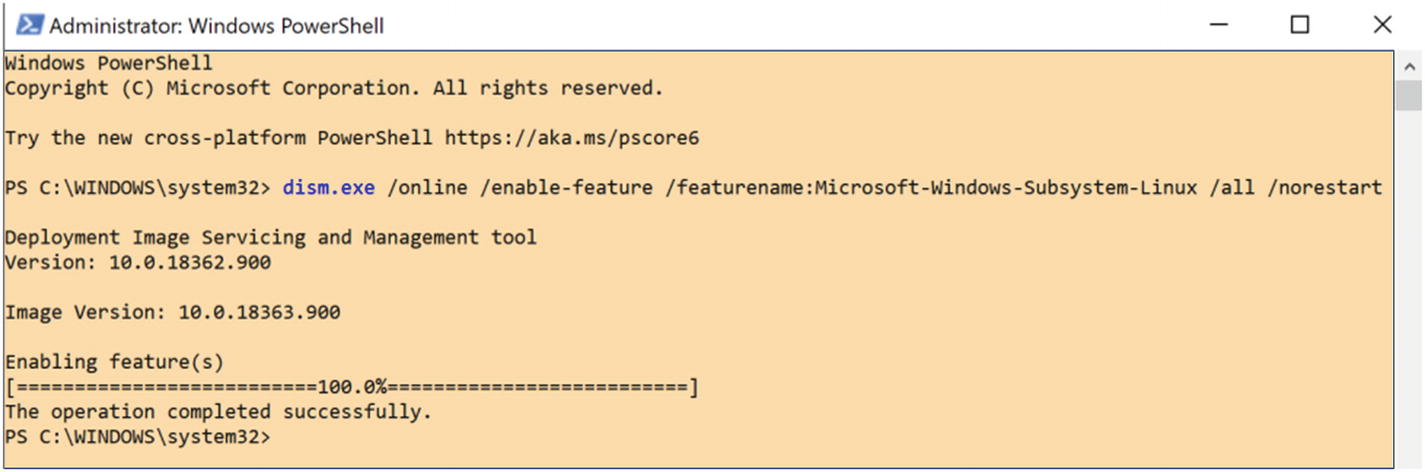
Installing WSL
The optional feature, called Windows Subsystem for Linux, must be enabled before you can install any Linux distributions. To do that, run the following command in your PowerShell as the administrator:
If your system meets the criteria needed to install WSL2, you must enable the Virtual Machine Platform feature. You can do that by running the following PowerShell command:
You can also set WSL2 as your default version. This comes in handy when you install a new Linux distribution.
wsl --set-default-version 2
Don’t forget to restart your machine before you go to the next step. If you do not restart it, you will get the error shown in Figure 3-3.
Figure 3-3
Optional component is not enabled
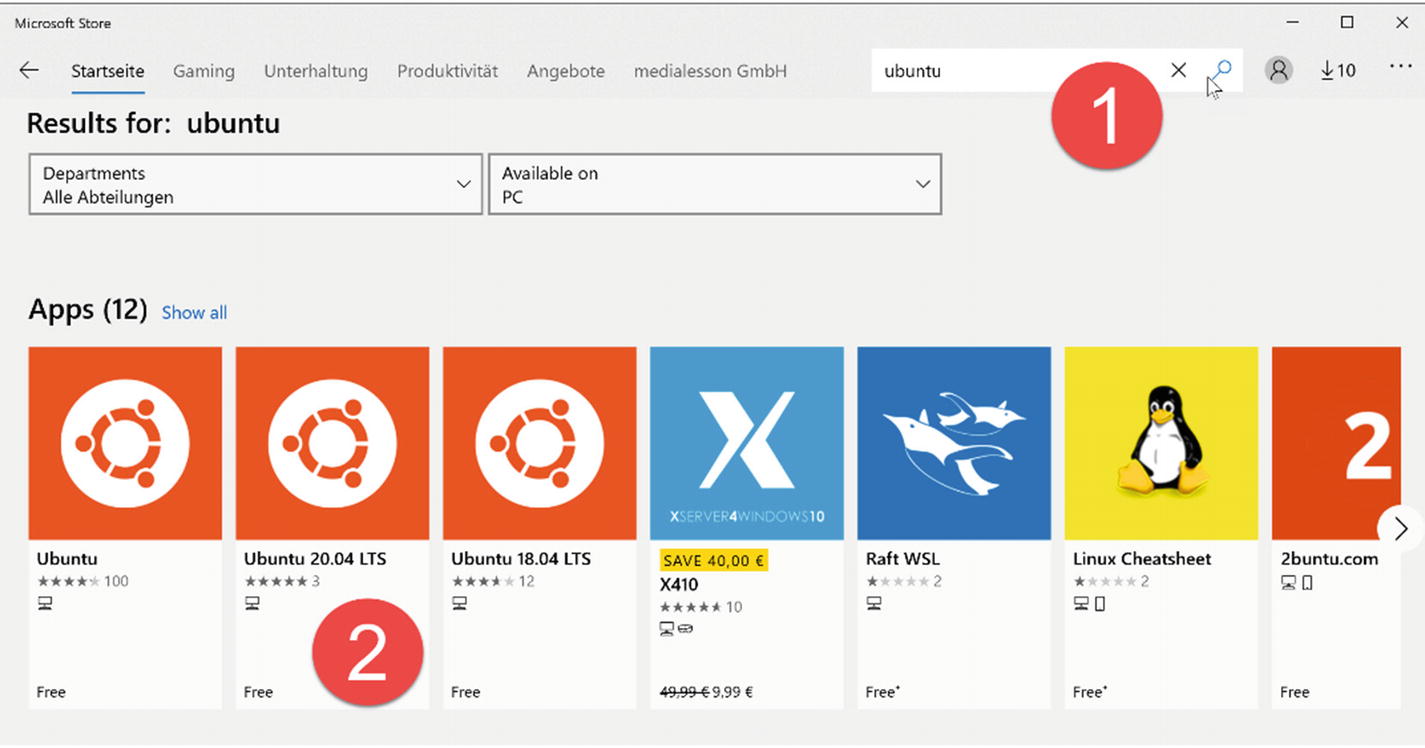
Installing the Linux Distribution
We are going to install the Linux distribution from the Microsoft Store. I recommend Ubuntu 20.04 LTS, as it is the latest version of Ubuntu. You can either open the https://aka.ms/wslstore URL in the browser, or search the Microsoft Store app and then search for Ubuntu (see Figure 3-4).
The system will start downloading Ubuntu. The file is around 500MB, so the download can take a few minutes, depending on your network speed. Once the installation is complete, you can click the Launch button in the Microsoft Store.
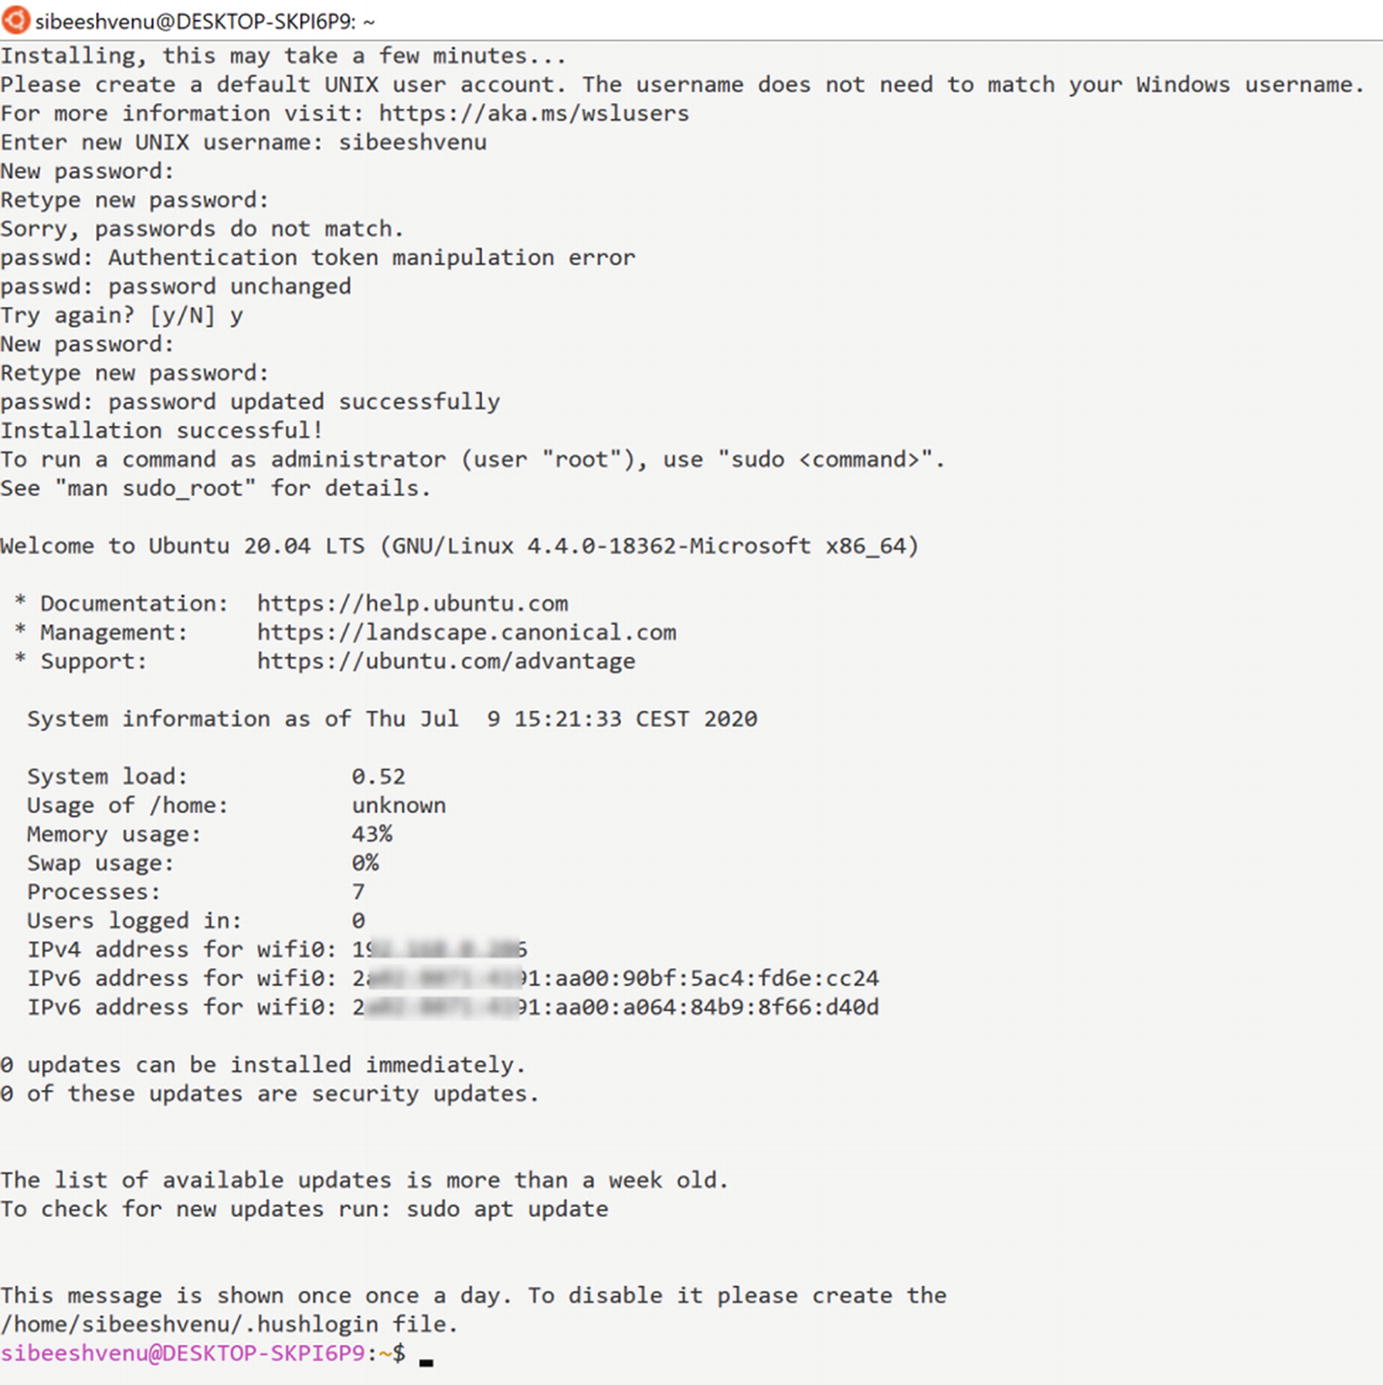
The initial installation may take some time and the command screen will ask you to enter your proposed UNIX username. This username doesn’t need to match your Windows username. You can be selective here.
After you set your username, you’ll need to enter a password. Make sure you enter the correct password when asked to retype it. Figure 3-6 is for your reference.
Figure 3-6
Ubuntu setup screen
Boom, you have successfully set up Subsystem for Linux in Windows!
Setting Up the Connection to Raspberry Pi
In this section, you will do the following tasks:
Create a new SSH key.
Copy the public key to Raspberry Pi. If you don’t do this, you will be asked to type the password every time you deploy your app to Raspberry Pi.
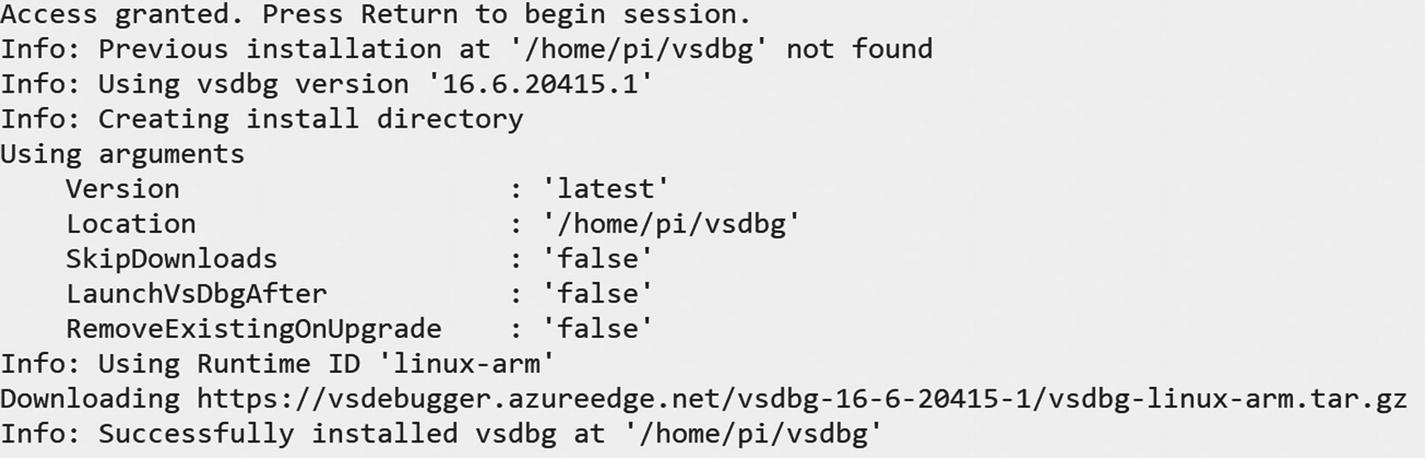
Install the Visual Studio debugger on the Raspberry Pi, which is needed in the next step, as you will be deploying your application.
This section assumes that your Raspberry Pi is known as raspberrypi.local. You need to make sure that you can connect to the Raspberry Pi via SSH. If you are on Linux, just open a new Terminal and type the following command.
If you are on Windows, search for the keyword wsl in the Windows search box and then open the WSL Run Command to start a new Linux terminal command prompt. Once the prompt is opened, type the ssh [email protected] command to connect to your Raspberry Pi.
If you are using WSL1, you will receive this error:
ERROR: ssh: Could not resolve hostname raspberrypi.local: Name or service not known"
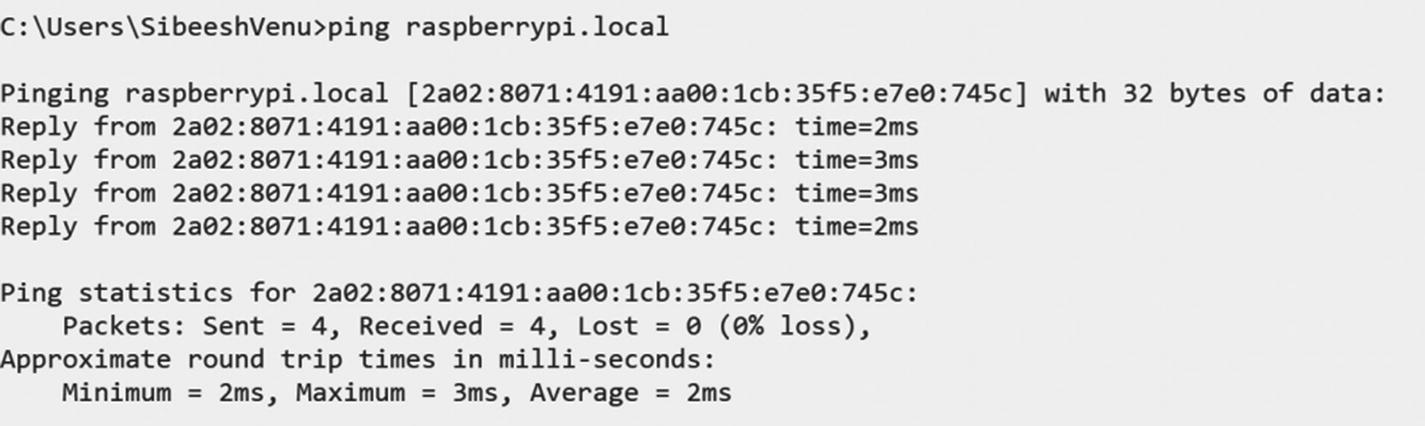
Note that this issue has been fixed in WSL2. To fix this error in WSL1, you have to change the hostname to the IP address of the Raspberry Pi. To get the IP address, run the ping command, as shown in Figure 3-7.
Figure 3-7
Ping raspberrypi.local
As you can see, the ping command shows the IPV6 address, but we need the IPV4 address. To get that, run the same command with -4 on the end. Here is how the command will look:
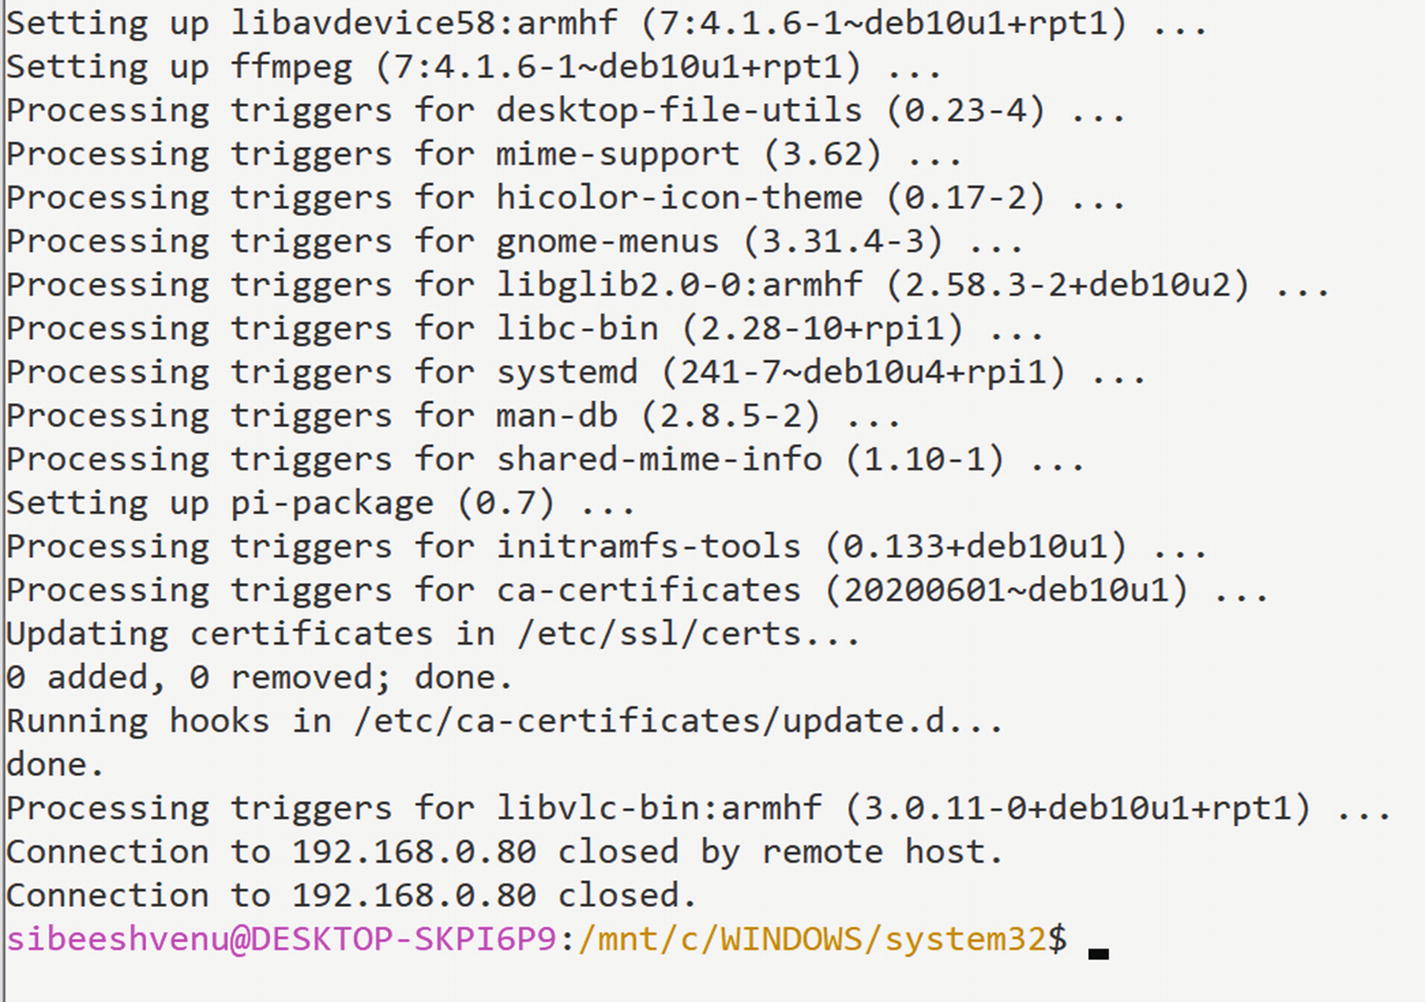
We now need to generate a new SSH certificate and copy the public certificate to Raspberry Pi. To do that, we’ll run the previous command in the same command prompt. First make sure that you are in the current user’s home directory before you run the command. By default, the command prompt will open in the Windows System32 folder. It is not recommended you modify this folder. Figure 3-10 shows the results when we run the cd command.
To install the Visual Studio Code .NET debugger in Raspberry Pi, you simply run the following command. Keep in mind that you can use your Raspberry Pi name instead of the IP address if you are running WSL2.
Since we will be creating a .NET Core application, we need to install NET Core next. Go to the .NET Core download page at https://dotnet.microsoft.com/download and install the .NET Core SDK. If you are running WSL in Windows 10 like me, you need to install the SDK on the Windows WSL Linux distribution.
First, add the Microsoft package signing key to your list of trusted keys and add the package repository. To do that, run the following command at the WSL command prompt:
This command will ask you to type the user password. If you forgot the password, you can open a new command window and run the following command to open the WSL as a root user:
wsl --user root
Now type the following command to change the user password. You will be asked to type the new password: