In the last chapter, you learned how to read the CPU temperature of your Raspberry Pi device and write the data to the console. The plan was to send this data to Azure IoT Hub, as there are many advantages to doing so. In this chapter, you will create an Azure IoT Hub and make your application send the temperature data to it.
Using Azure IoT Hub
Azure IoT Hub is an Azure service that helps you ingest telemetry data (for example, the CPU temperature we read from Raspberry Pi) from your IoT devices into the cloud to store and process. It acts as a central hub for bi-directional communication (from the device to the cloud and from the cloud to the device) between your IoT application and the managed devices.
Once the data is in the cloud, we can do many things with it. We will discuss these uses in the coming sections. Before you create an Azure resource, you should have a valid Azure subscription. If you don’t have a subscription, no worries, you can always create one for free. All you have to do is go to https://azure.microsoft.com/en-us/free/ and click the Start Free button. You will have to sign in with your Microsoft account or sign up for a new one.
Creating an Azure IoT Hub
Creating an Azure IoT Hub is as easy as drinking a glass of water. Lol, I mean it. There are two ways that you can create it.
Using Azure Cloud Shell.
Using Azure Portal.
We will discuss both of these options so that you can select the one that is more convenient for you.
Using Azure Cloud Shell
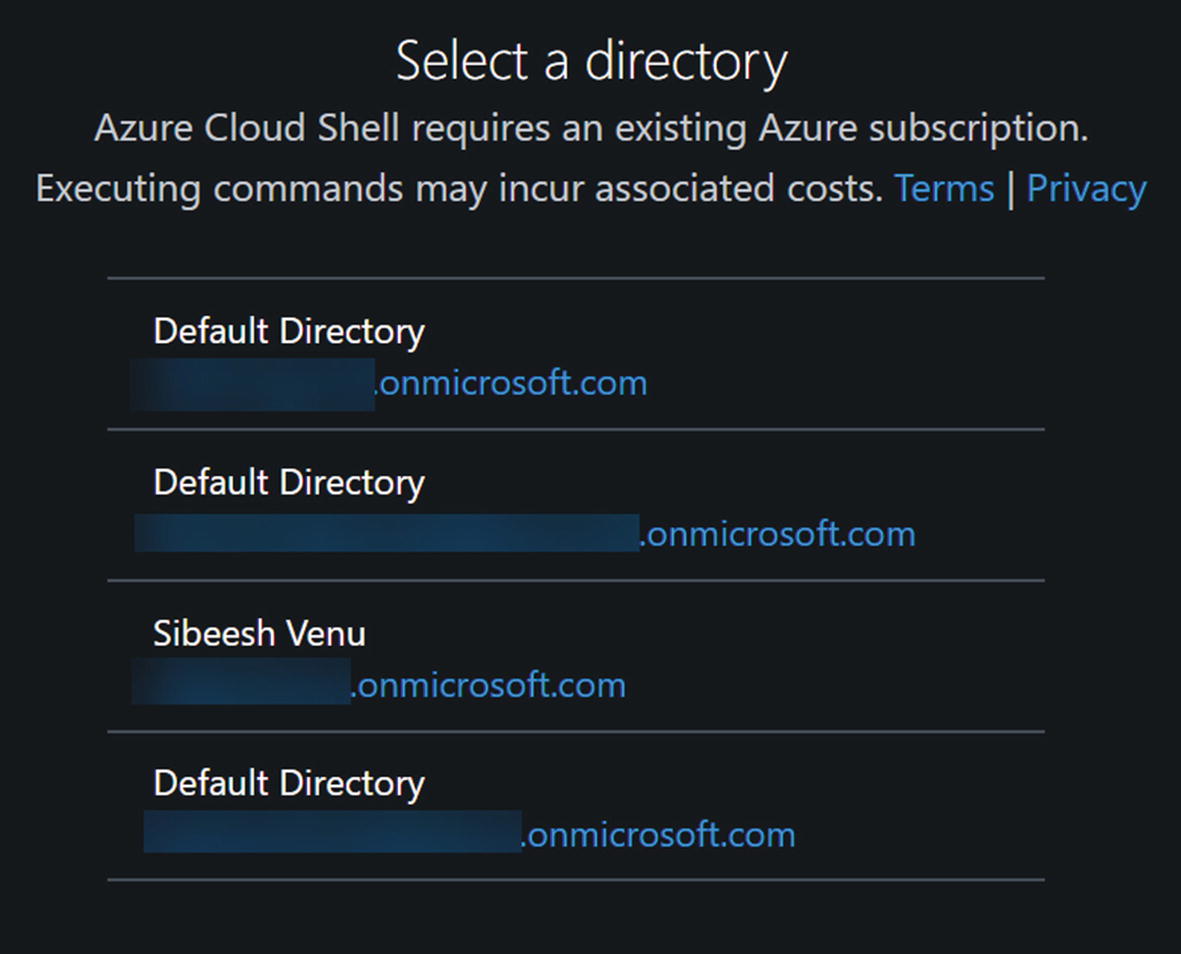
To create Azure services using a Cloud Shell, you must sign in to your Azure Portal (https://portal.azure.com/) and go to https://shell.azure.com/. You will be asked to select a directory if you have multiple directories in your Azure Portal. See Figure 5-1.
Figure 5-1
Select a directory in the shell
Clicking the directory will start the process. If you get the message saying that "No storage account mounted", you will have to create a storage account. If you are wondering why you need a storage account, it’s used to persist the files of this shell. Note that creating a storage account will incur a small monthly cost. You can always see the pricing details at https://azure.microsoft.com/en-us/pricing/details/storage/files/.
The default subscription will be selected on the screen, but you can also change this. Click the Show Advanced Settings link, which is where you set the right resource group, storage, and so on. See Figure 5-2. You can use the existing resources or create a new resource. A resource group is just a collection of resources that share the same lifecycle, permissions, and policies.
Figure 5-2
Cloud Shell advanced settings
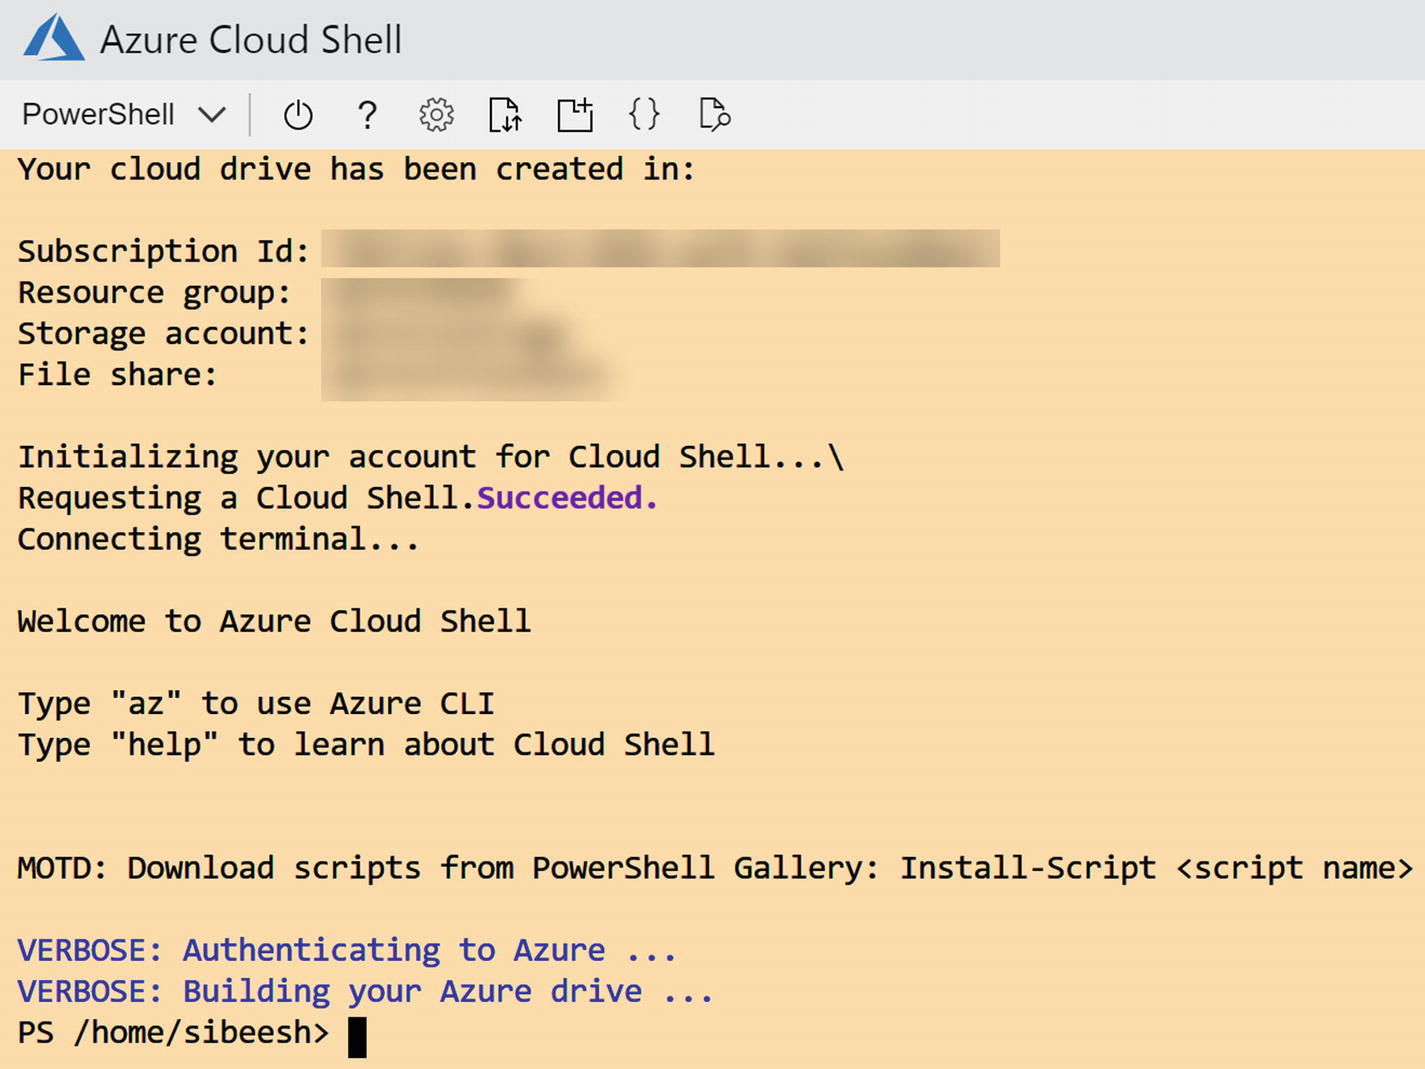
Once you fill out the details, click the Create Storage button. This will start a new Cloud Shell for you, as shown in Figure 5-3.
Figure 5-3
Azure Cloud Shell first login
Now it’s time to run the command to create an IoT Hub. Paste the following command in the shell and press Enter. (Remember to change the resource group name to the one you chose in the previous section.)
az iot hub create --name apressiothub --resource-group apressbook --sku S1
The command will run for a few minutes and a JSON will appear in the shell, with all the details of your IoT. You can also delete the IoT Hub with the following command.
az iot hub delete --name apressiothub --resource-group apressbook
Using Azure Portal
Log in to Azure Portal(https://portal.azure.com/) and, from the Home page, click the +Create a Resource button. Now search for the keywords IoT Hub in the search box provided. Click the Create button on the next page (see Figure 5-4).
Figure 5-4
Creating IoT Hub
This will redirect you to the page where you can create IoT Hub. In the first step, you will be asked to select the subscription you have. You can either create a new resource group here or you can select the existing one. Next, select the region and give a valid name to your IoT Hub. (Keep in mind that you should select the region closest to you.) Boom, you did it! See Figure 5-5 for your reference.
Figure 5-5
Creating IoT Hub, Step 1
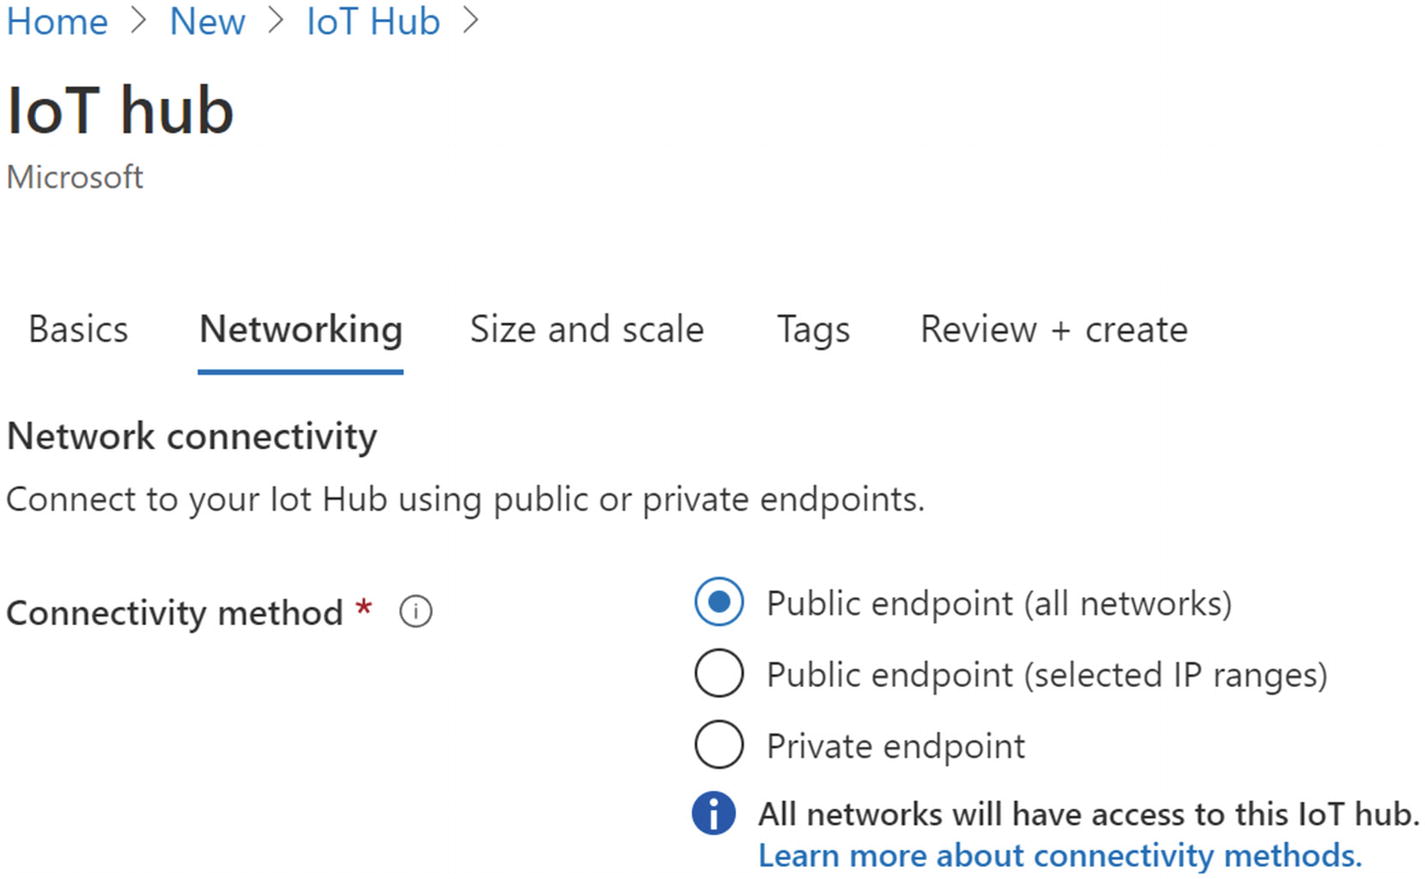
You can either click the Review + Create button to get to the last step or click the Next button. If you click the Next button, you will see an option for selecting how your IoT Hub should be connected, whether using public or private endpoints. See Figure 5-6.
Figure 5-6
Creating IoT Hub, Step 2 Networking
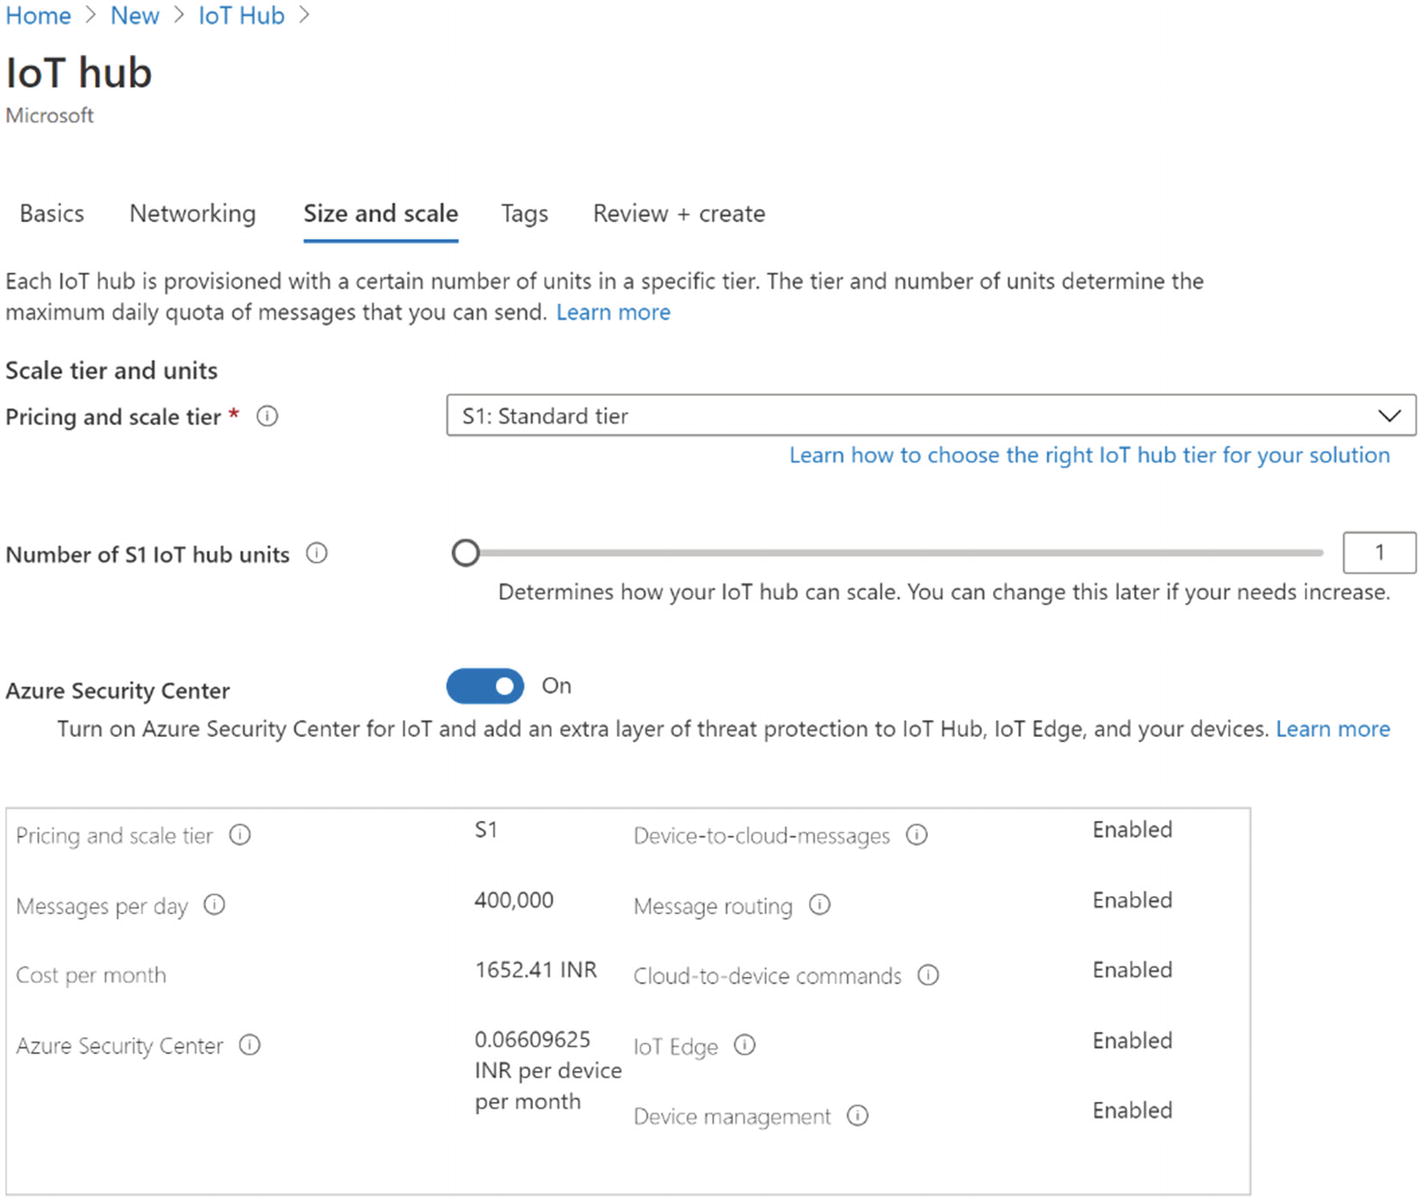
In the next step, you will learn how to size and scale IoT Hub (see Figure 5-7). You should be sure to select the right pricing and scale tier. There are some significant differences between them. For example, the standard tier enables all features, including bi-directional communication capabilities, whereas the basic tier provides only a subset of features and doesn’t include bi-directional communication. It is also worth mentioning that, with the free tier, you can only send 8,000 messages per day and can have 500 devices connected. Each Azure subscription can create only one IoT Hub in the free tier. Table 5-1 shows the supported capabilities.
Table 5-1
IoT Hub Tier Capabilities
Capability
Basic Tier
Free/Standard Tier
Device-to-cloud telemetry
Yes
Yes
Per-device identity
Yes
Yes
Message routing, message enrichments, and event grid integration
Yes
Yes
HTTP, AMQP, and MQTT protocols
Yes
Yes
Device provisioning service
Yes
Yes
Monitoring and diagnostics
Yes
Yes
Cloud-to-device messaging
Yes
Device twins, module twins, and device management
Yes
Device streams (preview)
Yes
Azure IoT Edge
Yes
IoT plug-and-play preview
Yes
Figure 5-7
Creating IoT Hub, Step 3 Size and Scale
The IoT Hub Units is the number of messages allowed per unit, per day. This depends on the selection of the pricing tier. With one S1 IoT Hub unit, you can send 400,000 messages per day. If you wish to send more, you can add an S1 IoT Hub unit, which will give you another 400,000 messages. Keep in mind that the price will also increase as you choose the units. If you choose free tier, this option will not be enabled.
The Azure Security Center is an extra layer of threat protection and security. This is not available on the free tier.
The Device-to-Cloud-Partitions under the Advanced settings relate the device-to-cloud message to the number of simultaneous readers of the messages.
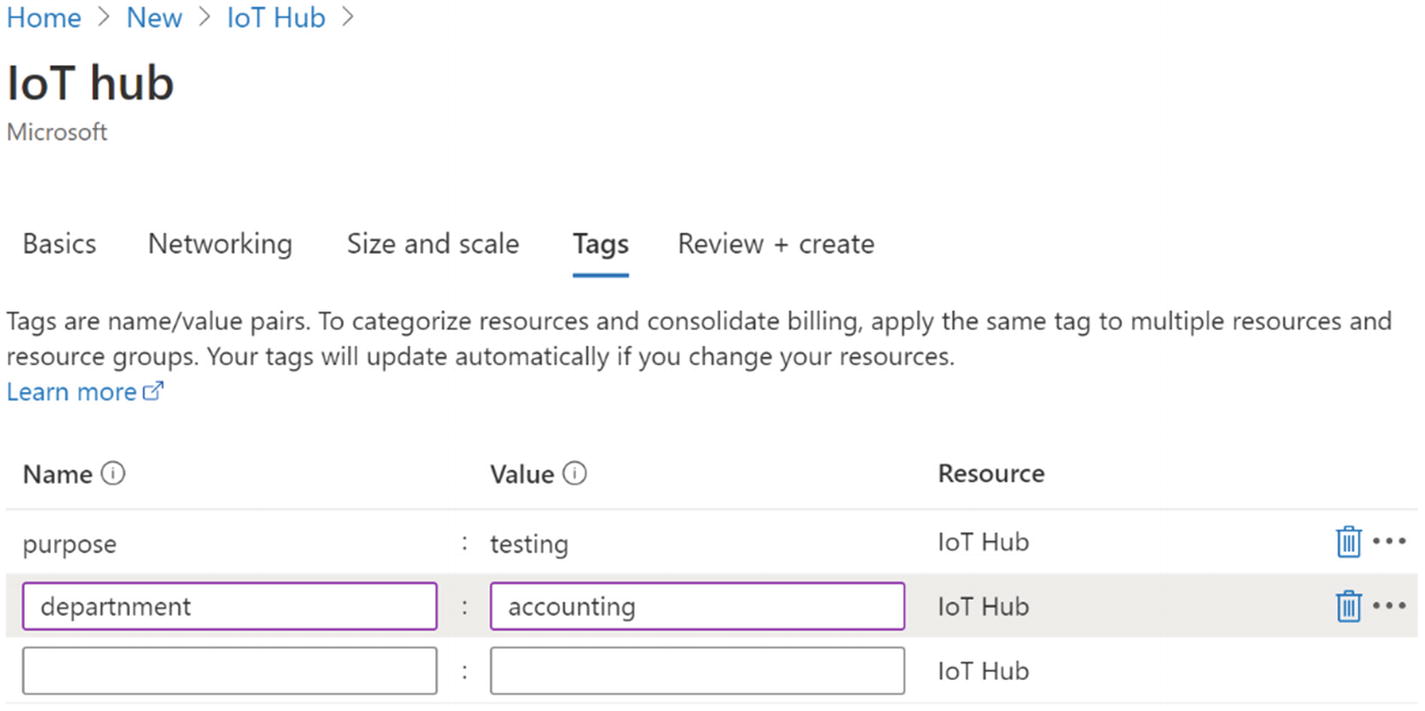
Once you select the options you want, click the Next button, which will give you an option to add tags, as shown in Figure 5-8.
Figure 5-8
Creating IoT Hub, Step 4 Tags
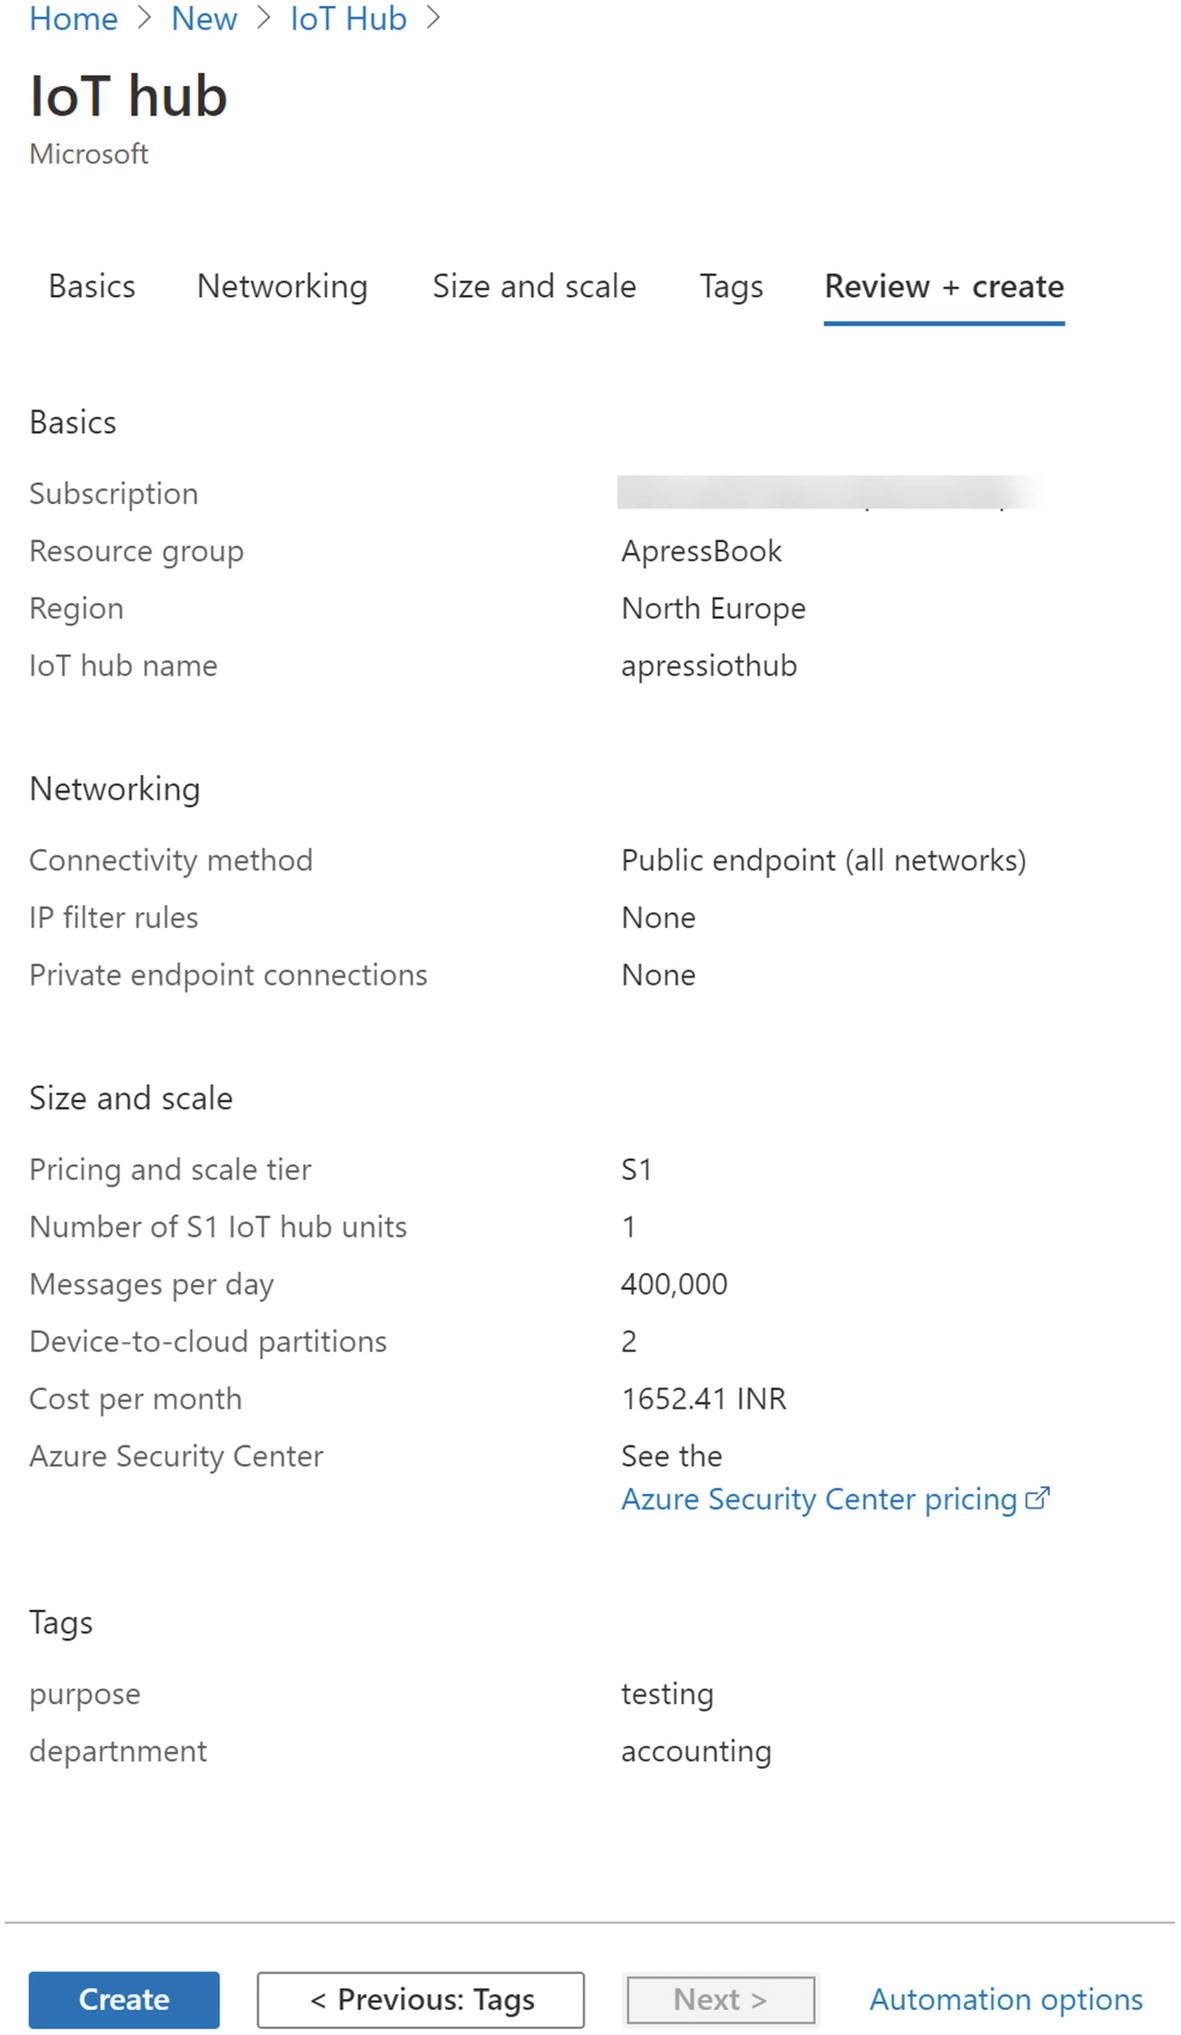
Tags are the name/value pairs that categorize the resources and resource groups and consolidate in billing. You can apply the same tags to multiple resources and resource groups. Clicking the Next button will give you a screen with the values you have selected. See Figure 5-9.
Figure 5-9
Creating IoT Hub, Step 5 Review and Create
Now click the Create button, which will initialize your IoT Hub. After a while, your resource will be ready for action.
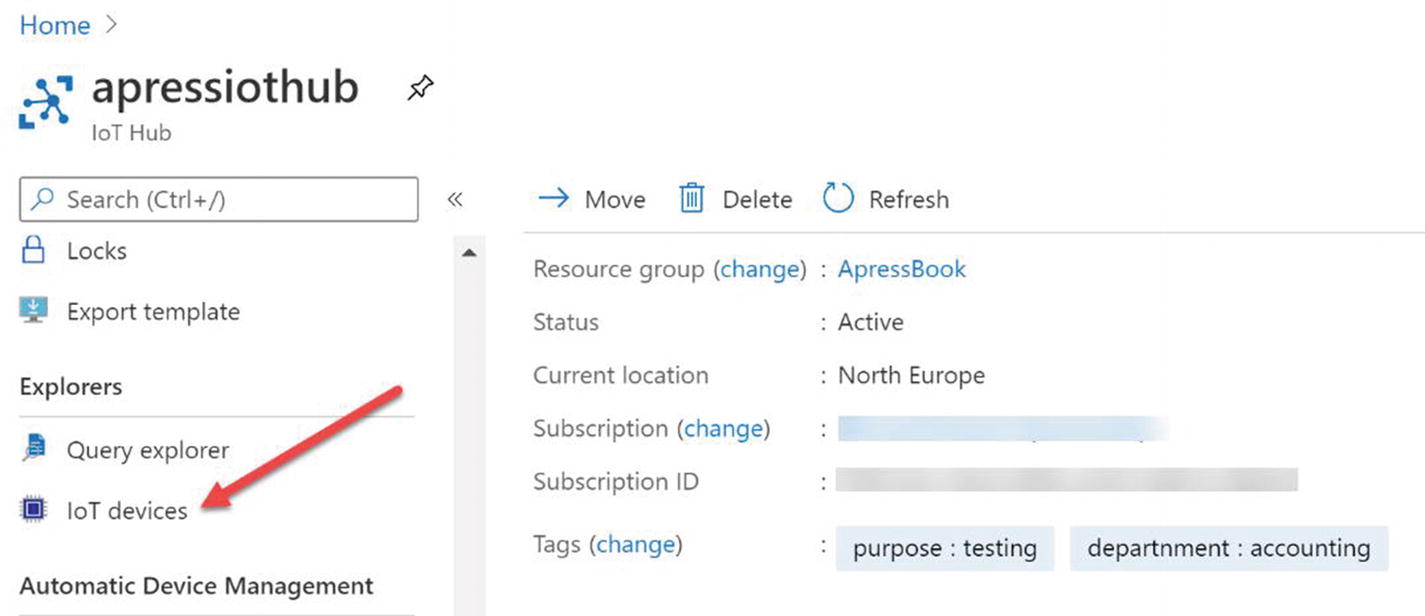
Registering a Device in the IoT Hub
A device must be registered in your IoT Hub before it can connect. To create a device, go to your IoT Hub and then go to the IoT Devices section, as shown in Figure 5-10.
Figure 5-10
The IoT Devices menu
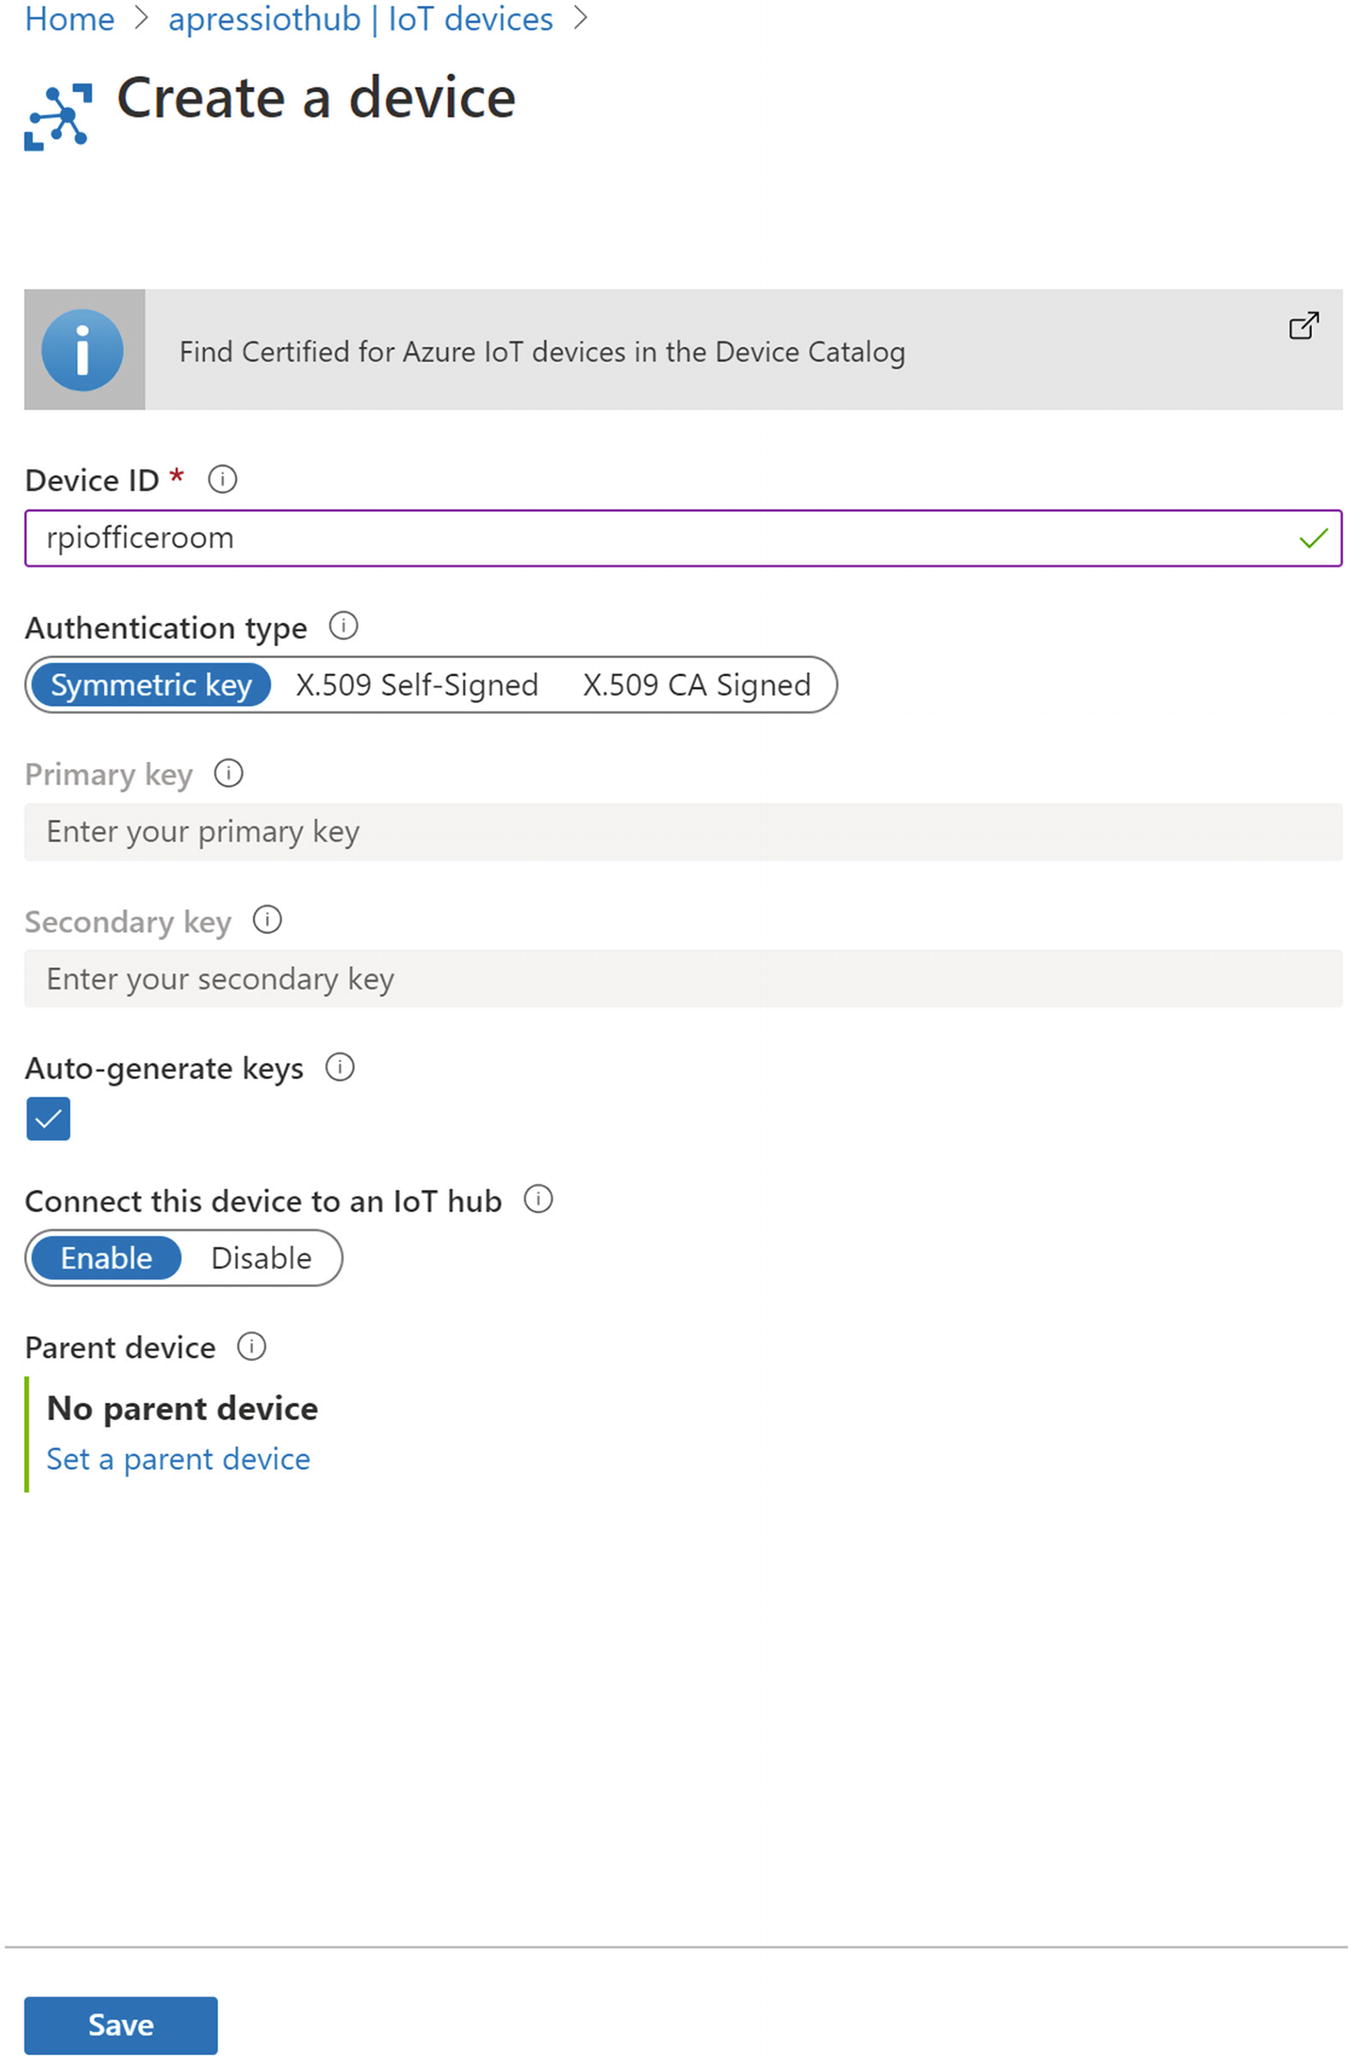
Now click the +New button on the top, which will open a new page where you can register a device. See Figure 5-11.
Figure 5-11
Create a device
Here, the Device ID is the name of your device. It’s used for device authentication and access control. Clicking the Save button will create a device and the page will be redirected to the device list.
Connecting Raspberry Pi to Azure IoT Hub
To connect your Raspberry Pi to Azure IoT Hub, you must add a package named Microsoft.Azure.Devices.Client to the solution. You can add this by running the following command.
dotnet add package Microsoft.Azure.Devices.Client
If you check your .csproj file now, you should see that the package reference entry is been added there.
You can also add an entry here if you don’t link to run the previous command. It works both ways.
Let’s create a model class for our telemetry data now. We’ll call this class DeviceData, but feel free to give it any name you wish. We will have three properties in that class for now. Install the Newtonsoft.Jsonpackage in your application so that you can easily serialize and deserialize your data. Run the following command:
dotnet add package Newtonsoft.Json
Here is how your DeveiceData model class should look at this point.
using Newtonsoft.Json;
namespace raspberrypi.net.core.Models
{
public class DeviceData
{
[JsonProperty(PropertyName="temperature")]
public double Temperature { get; set; } = 0;
[JsonProperty(PropertyName="messageid")]
public int MessageId { get; set; } = 0;
[JsonProperty(PropertyName="deviceid")]
public string DeviceId {get;set;} = Program.DeviceId;
}
}
Now let’s rewrite the program, as follows.
using System;
using System.Text;
using Iot.Device.CpuTemperature;
using System.Threading;
using System.Threading.Tasks;
using Microsoft.Azure.Devices.Client;
using Newtonsoft.Json;
using raspberrypi.net.core.Models;
namespace raspberrypi.net.core
{
class Program
{
private static CpuTemperature _rpiCpuTemp = new CpuTemperature();
The SentToIoTHub method is responsible for sending the Message data to Azure IoT Hub by using the SendEventAsync function in the DeviceClient. Note that this DeviceClient is part of the Microsoft.Azure.Devices.Client namespace, so make sure to add it to the using statements.
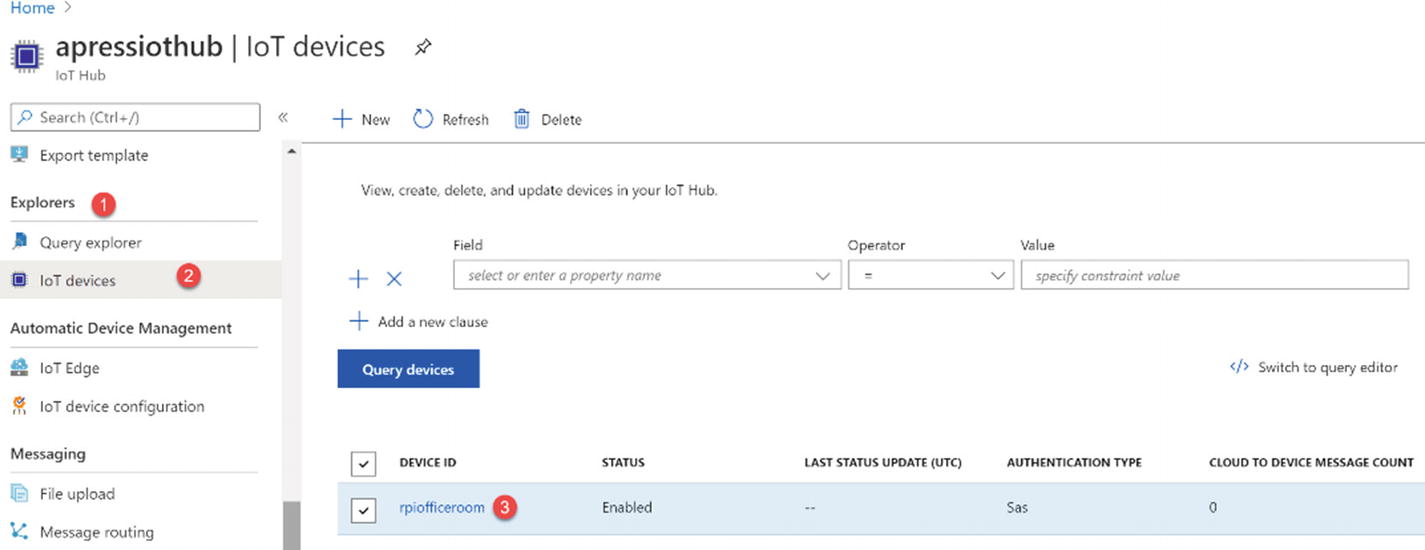
Now we just need to update the connection string and device ID from IoT Hub. Go to your IoT Hub resource and click the IoT Devices menu under the Explorers section. You will see your device listed on the page, as shown in Figure 5-12.
Figure 5-12
IoT Devices list
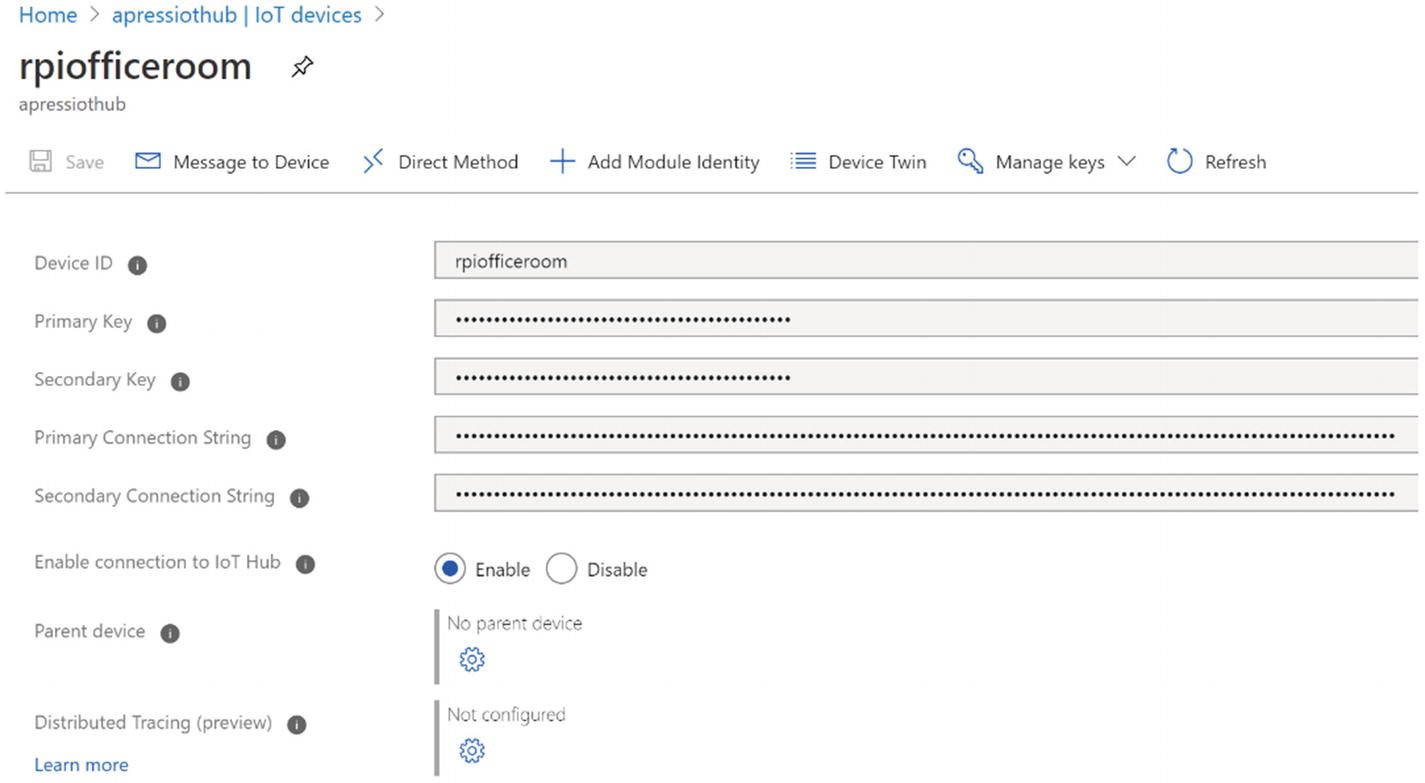
Click the device name to see a page with all the information about that device, as shown in Figure 5-13.
Figure 5-13
IoT Device properties
From those properties, you need both the Primary Connection String and the Device ID. Your connection string will look like this:
Now that you have updated the program with the connection string and device ID, all you have to do is run the build task. Do you remember how to do that? Just press F5 and make sure that you select the Rpi Publish and Debug task.
The new program will be redeployed to Raspberry Pi, will attach the debugger, and will run the application. If you still have the debugger, it will hit any issues and you can see the values. If there is no debugger attached, just double-click the left side of any line, See Figure 5-14.
Figure 5-14
Sending data to the IoT Hub Debug screen
Monitoring the Device Data and IoT Hub
To monitor data communication, Microsoft introduced an amazing extension called Azure IoT Tools. There are many things that you can do with this extension. First, let’s install it. See Figure 5-15.
Figure 5-15
Install Azure IoT Tools
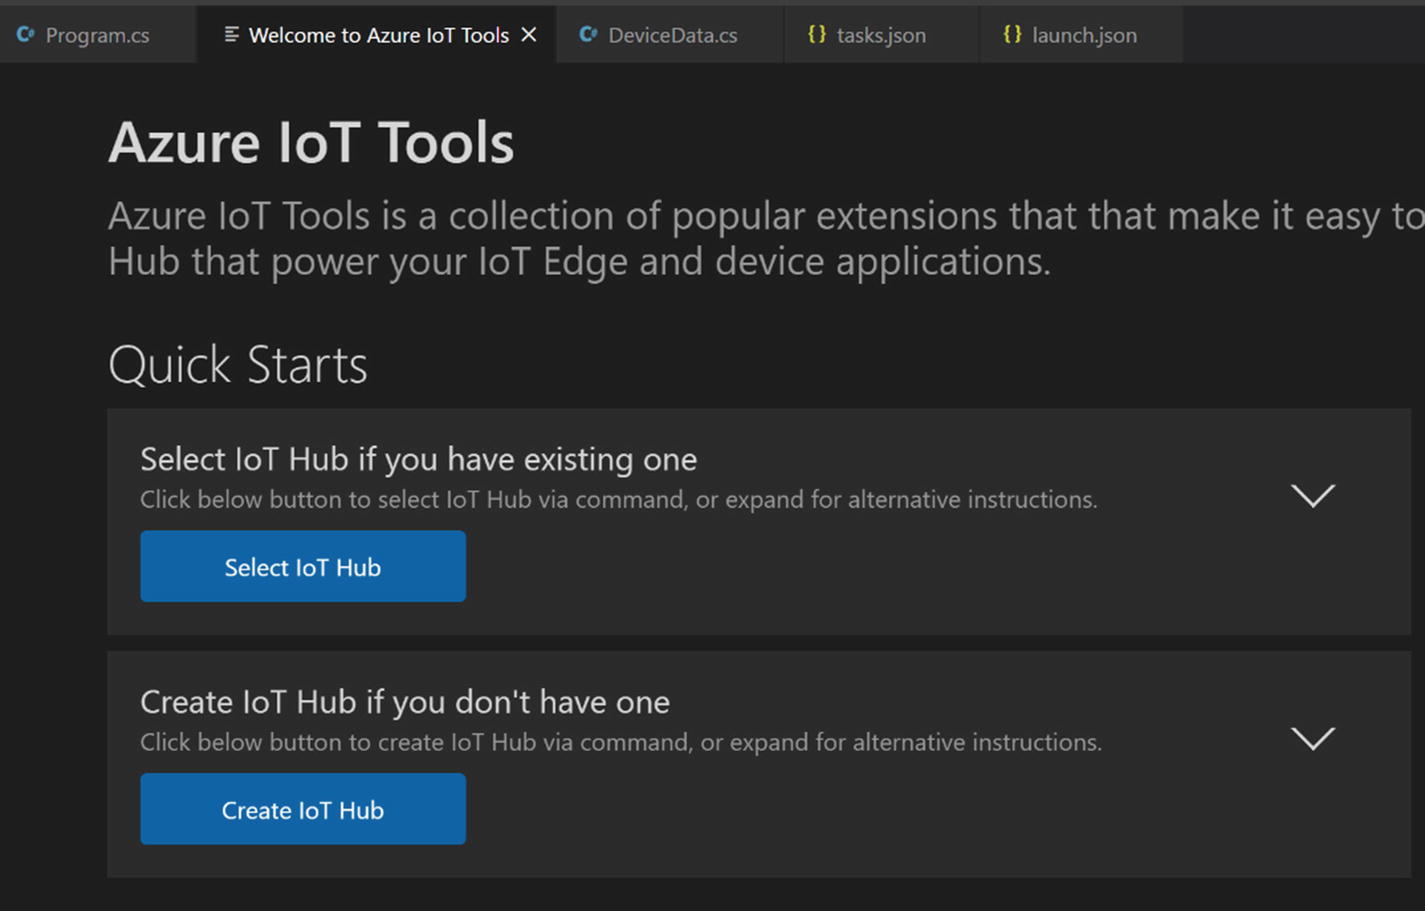
Once you install the extension, you have to restart your VSCode to load it. You should see a page like Figure 5-16 open once you have done that.
Figure 5-16
Azure IoT Tools first page
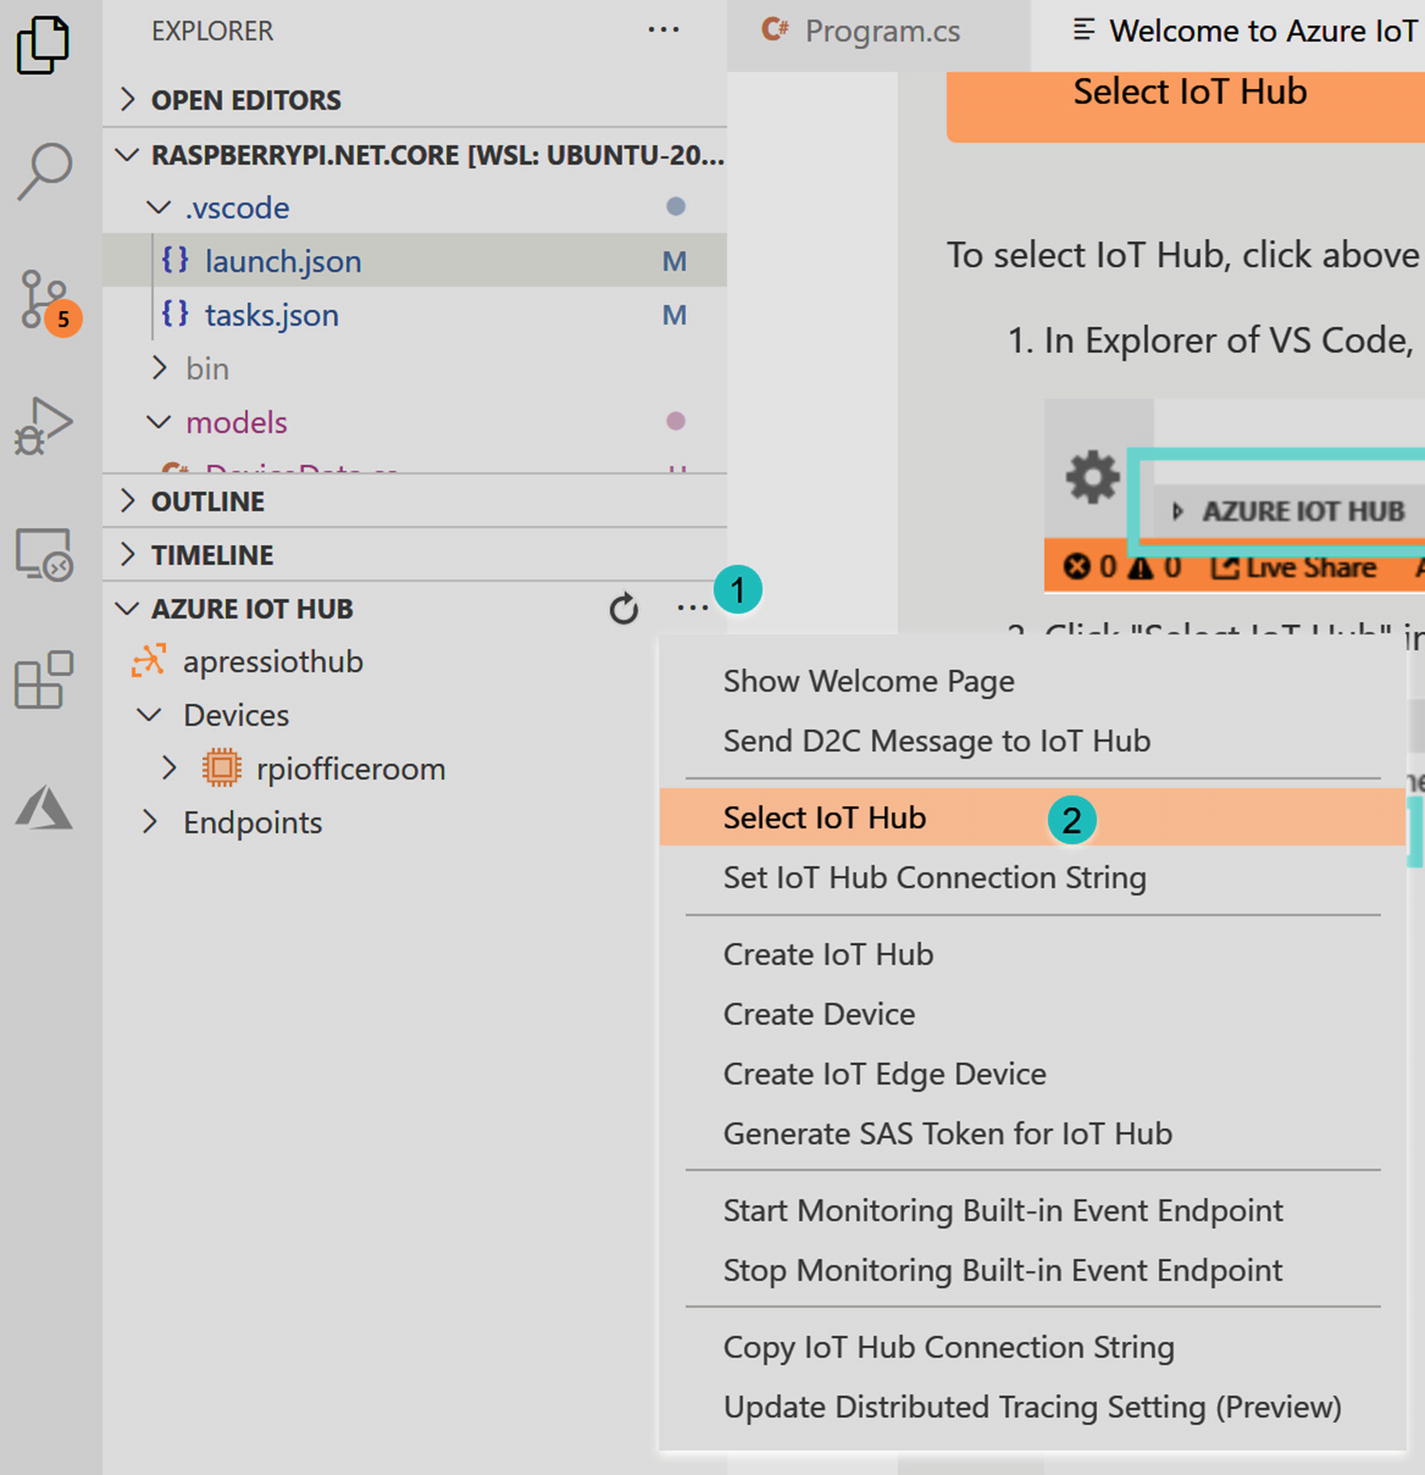
Click the Select IoT Hub button and log in with your account. You will see all of your subscriptions listed. Now select the Azure subscription where you created your IoT Hub, and then select IoT Hub. It is as simple as that. You should see your IoT Hub device in the tool now. See Figure 5-17.
Figure 5-17
IoT Hub Devices list
You can also select the IoT Hub from the Azure IoT Hub menu, as shown in Figure 5-18.
Figure 5-18
Select IoT Hub
You can easily interact with the device using this tool. Some of the options are given here:
Send D2C messages to IoT Hub
Send C2D messages to the device
Start monitoring
For now, we can go ahead and start monitoring our device. What do you think? To do that, you just right-click the device name and choose the Start Monitoring Built-in Event Endpoint menu item (see Figure 5-19).
Figure 5-19
Azure IoT Hub Tool options
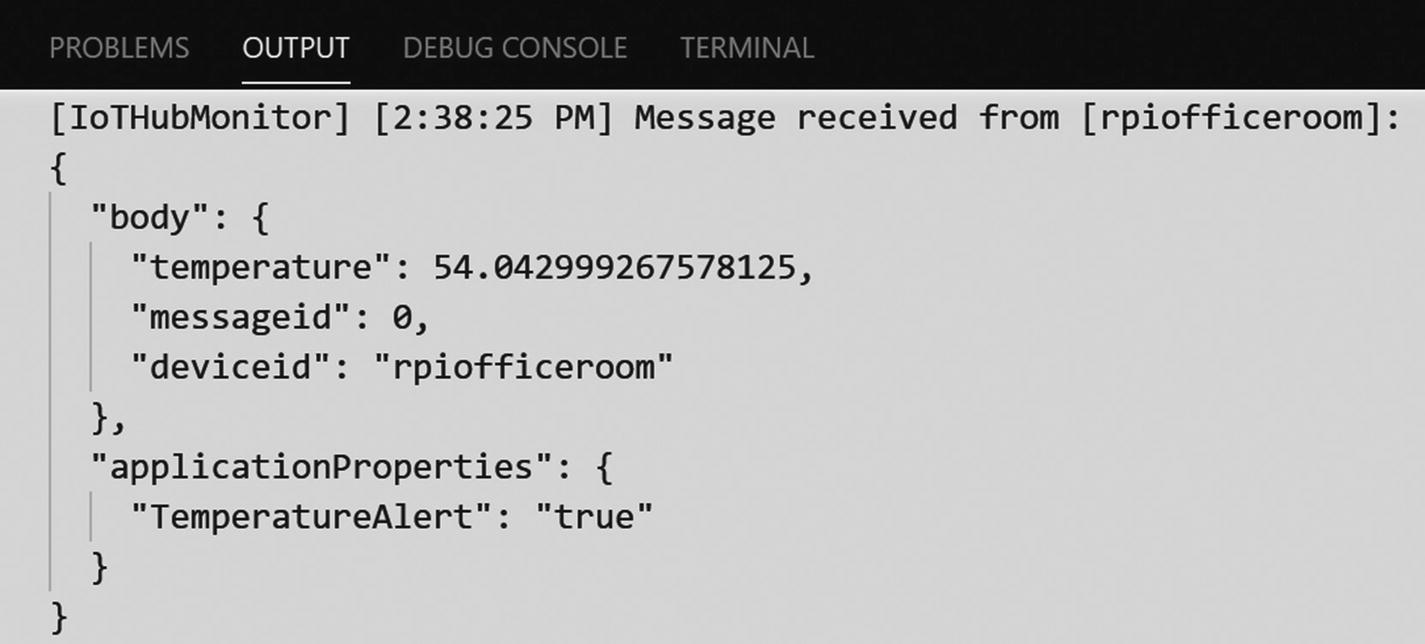
You should see the communication in the output window, as shown in Figure 5-20.
Figure 5-20
IoT Hub device monitoring
Adding Custom Event Message Properties
You can also add a custom event message property while you send the data to the Azure IoT Hub. Let’s see how you do it. Update your SendToIoTHub function as follows: