The instructions under the heading Creating an empty project for Away3D stepped you through the process of creating an empty project ready to accept code that uses the Away3D engine. In order to run the Away3DTemplate class, we now need to add that class to the empty project. We also need to specify the class as the application entry point, meaning it will be executed when the application is first run.
The following steps show you how to add the Away3DTemplate class to the Flex and Flash Builder projects we created earlier:
- When using the previous instructions to create an empty project, Flex/Flash Builder will create a default ActionScript file for you with the same name as the project, for example,
Away3D.as. This file needs to be deleted, so right-click on the file in the Project Explorer | Flex Navigator pane and click on the Delete option. - Click on the Yes button to confirm the deletion of the file.
- Click File | New | ActionScript Class.
- In the New ActionScript Class dialog box, type
Away3DTemplatein the Name textbox and click on the Finish button. - Paste the code for the
Away3DTemplateclass into the newAway3DTemplate.asfile, overwriting any default code that may be present. - Right-click on the
Away3DTemplate.asfile in the Project Explorer | Flex Navigator pane and click on the Set as Default Application option. The icon for the file should include a green triangle and a blue sphere.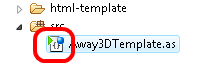
- To compile and run the application click Run | Run | Away3DTemplate.
The following steps show you how to add the Away3DTemplate class to the FlashDevelop project we created earlier:
- Using the previous instructions to create an empty project, FlashDevelop will create a default file called
Main.asin thesrcdirectory. This needs to be deleted. Right-click on the file in the Project pane and click on the Delete option. - Press the OK button to confirm the deletion of the file.
- Click File | New | AS3 Document.
- Paste the code for the
Away3DTemplateclass into the new file, overwriting any default code that may be present. - Click File | Save. Save the new file as
Away3DTemplate.asunder the projectsrcdirectory by clicking the Save button. - Right-click on the
Away3DTemplate.asfile in the Project pane and click on the Always Compile option. The icon for the file should change to include a green arrow pointing down.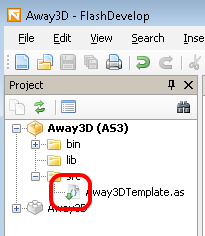
- To compile and run the application click Project | Test Movie.
The following steps show you how to add the Away3DTemplate class to the Adobe Flash CS4 project we created earlier:
- Click File | New….
- Select ActionScript File from the General tab and click on the OK button.
- Paste the code for the
Away3DTemplateclass into the new file. - Click File | Save.
- Save the file as
Away3DTemplate.asin the same directory as theFLAfile from the previous instructions. - Go back to the
FLAfile and click File | Publish Settings…. - Click on the Flash tab, and click on the Settings… button.
- Type in Away3DTemplate into the Document Class textbox, and click on the OK button to save the changes.

- Click on the OK button to close the Publish Settings window.
- To compile and run the application click Control | Test Movie.
When you compile and run the application you will see, well, nothing. However, this is fine, because it is the expected result. The Away3DTemplate class has provided a foundation that takes care of the initialization and updating of the Away3D engine, but does not create any visible objects that will be shown on the screen.