In order to create an Away3D application, you first need to create and configure a project within your authoring tool. In addition, to make use of Away3D engine the new project will have to be configured so that it can access the Away3D source code.
The following steps show you how to create a new project in Flash and Flex Builder that uses the Away3D library:
- Open up Adobe Flex and click File | New | ActionScript project.
- You will now be asked to Specify the location of the files in the new project. Type the name of the project in the Project name textbox and click on the Next button.
- You will now be asked to Set the build paths for the new ActionScript Project. Under the Source Path tab, click on the Add Folder button.
- Click on the Browse button to select to the location where you saved the Away3D source code, or type it directly into the textbox.
- With the Away3D source code folder selected, click on the OK button.
- The Away3D source code directory is now listed in the Source Path list. Click on the Finish button to create the project.
FlashDevelop is a free Integrated Development Environment, or IDE, that can be used to create Flash applications. When used in conjunction with the Flex SDK, which is also free, FlashDevelop can be used to write and compile Flash applications. FlashDevelop can be found on its website at http://www.flashdevelop.org.
The following steps show you how to create a new project in FlashDevelop that uses the Away3D library:
- Open FlashDevelop and click Project | New Project….
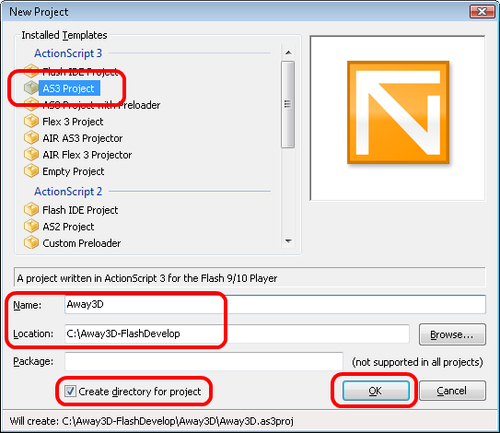
- Select AS3 Project from the ActionScript 3 group in the Installed Templates list. Type a name for the project in the Name textbox, and specify a location for the project in the Location textbox. Enabling the Create directory for project checkbox will create a subdirectory for the project in the Location directory. Click on the OK button to create the project.
- Click Project | Properties….
- Click on the Classpaths tab, and click the Add Classpath… button.
- Browse to the location where you saved the Away3D source code and click on the OK button.
- The Away3D source code directory is now listed in the Project Classpaths list (note that FlashDevelop uses relative paths for the classpath entries that exist on the same drive as the project). Click on the OK button to save the changes.
Adobe Flash is the original Flash authoring tool. Adobe Flash places a large emphasis on providing a visual environment in which to create Flash animations, but it can also be used to create Flash applications using only ActionScript. The following steps show you how to create a new project in Adobe Flash CS4 that uses the Away3D library:
- Open up Adobe Flash CS4 and click File | New….
- Select Flash File (ActionScript 3.0) from the General tab and click on the OK button.
- Click File | Publish Settings….
- Click on the Flash tab, and click the Settings… button.
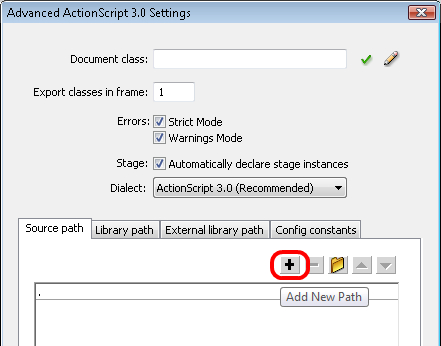
- Click on the button with the plus icon under the Source Path tab.
- Click on the button with the folder icon.
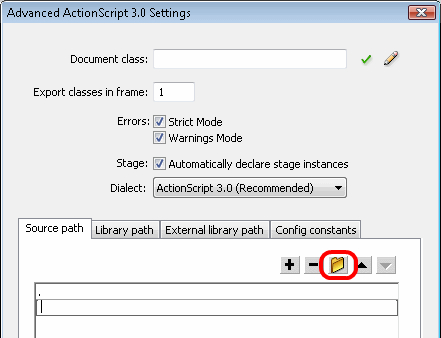
- Browse to the Away3D source code directory, or type it directly into the list, and click on the OK button to save the changes.
- Click on the OK button to close the Advanced ActionScript 3.0 Settings window.
- Click on the OK button to close the Publish Settings window.
- Click File | Save and save the FLA file to a directory of your choice.