
Chapter 8
Getting Fancy with Lists
The humble ListView is one of the most important widgets in all of Android, simply because it is used so frequently. Whether choosing a contact to call, an e-mail message to forward, or an e-book to read, ListView widgets are employed in a wide range of activities. Of course, it would be nice if they were more than just plain text. The good news is that Android lists can be as fancy as you want (within the limitations of a mobile device's screen, obviously). However, making them fancy takes some work, as you will learn in this chapter.
Getting to First Base
The classic Android ListView is a plain list of text—solid but uninspiring. We hand the ListView a bunch of words in an array, and then tell Android to use a simple built-in layout for pouring those words into a list.
However, you can have a list whose rows are made up of icons, icons and text, check boxes and text, or whatever you want. It is merely a matter of supplying enough data to the adapter and helping the adapter to create a richer set of View objects for each row.
For example, suppose we want a ListView whose entries are made up of an icon, followed by some text. We could construct a layout for the row that looks like this, found in the FancyLists/Static sample project:
<?xml version="1.0" encoding="utf-8"?>

<LinearLayout xmlns:android="http://schemas.android.com/apk/res/android"

  android:layout_width="fill_parent"

  android:layout_height="wrap_content"

  android:orientation="horizontal"

>

  <ImageView

    android:id="@+id/icon"

    android:layout_width="22px"

    android:paddingLeft="2px"

    android:paddingRight="2px"

    android:paddingTop="2px"

    android:layout_height="wrap_content"

    android:src="@drawable/ok"
  />

  <TextView

    android:id="@+id/label"

    android:layout_width="wrap_content"

    android:layout_height="wrap_content"

    android:textSize="44sp"

  />

</LinearLayout>
This layout uses a LinearLayout to set up a row, with the icon on the left and the text (in a nice big font) on the right.
However, by default, Android has no idea that we want to use this layout with our ListView. To make the connection, we need to supply our Adapter with the resource ID of our custom layout:
public class StaticDemo extends ListActivity {

  TextView selection;

  String[] items={"lorem", "ipsum", "dolor", "sit", "amet",

          "consectetuer", "adipiscing", "elit", "morbi", "vel",

          "ligula", "vitae", "arcu", "aliquet", "mollis",

          "etiam", "vel", "erat", "placerat", "ante",

          "porttitor", "sodales", "pellentesque", "augue",

          "purus"};


  @Override

public void onCreate(Bundle icicle) {
super.onCreate(icicle);
setContentView(R.layout.main);
setListAdapter(new ArrayAdapter<String>(this,
R.layout.row, R.id.label,
items));
selection=(TextView)findViewById(R.id.selection);
}
public void onListItemClick(ListView parent, View v,
int position, long id) {
selection.setText(items[position]);
}
}
This follows the general structure for the previous ListView sample. The key difference is that we have told ArrayAdapter that we want to use our custom layout (R.layout.row) and that the TextView where the word should go is known as R.id.label within that custom layout.
NOTE: Remember that to reference a layout (row.xml), use R.layout as a prefix on the base name of the layout XML file (R.layout.row).
The result is a ListView with icons down the left side. In this case, all the icons are the same, as shown in Figure 8–1.
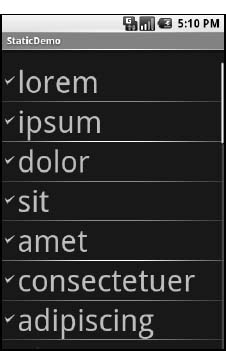
Figure 8–1. The StaticDemo application
A Dynamic Presentation
Supplying an alternate layout to use for rows, as in the preceding example, handles simple cases very nicely. However, it falls down when you have more complicated scenarios for your rows, such as the following:
- Not every row uses the same layout (e.g., some rows one line of text and others have two).
- You need to configure the widgets in the rows (e.g., use different icons for different cases).
In those cases, the better option is to create your own subclass of your desired Adapter, override getView(), and construct your rows yourself. The getView() method is responsible for returning a View, representing the row for the supplied position in the adapter data.
As an example, let's rework the code shown in the previous section to use getView(), so we can show different icons for rows. We'll use one icon for short words and one for long words (from the FancyLists/Dynamic sample project).
public class DynamicDemo extends ListActivity {

  TextView selection;

  String[] items={"lorem", "ipsum", "dolor", "sit", "amet",

          "consectetuer", "adipiscing", "elit", "morbi", "vel",

          "ligula", "vitae", "arcu", "aliquet", "mollis",

          "etiam", "vel", "erat", "placerat", "ante",

          "porttitor", "sodales", "pellentesque", "augue",

          "purus"};
  @Override

public void onCreate(Bundle icicle) {
super.onCreate(icicle);
setContentView(R.layout.main);
setListAdapter(new IconicAdapter());
selection=(TextView)findViewById(R.id.selection);
}
public void onListItemClick(ListView parent, View v,
int position, long id) {
selection.setText(items[position]);
}
class IconicAdapter extends ArrayAdapter {
IconicAdapter() {
super(DynamicDemo.this, R.layout.row, items);
}
public View getView(int position, View convertView,
ViewGroup parent) {
LayoutInflater inflater=getLayoutInflater();
View row=inflater.inflate(R.layout.row, parent, false);
TextView label=(TextView)row.findViewById(R.id.label);
label.setText(items[position]);
ImageView icon=(ImageView)row.findViewById(R.id.icon);
if (items[position].length()>4) {
icon.setImageResource(R.drawable.delete);
}
else {
icon.setImageResource(R.drawable.ok);
}
return(row);
}
}
}
The theory is that we override getView() and return rows based on which object is being displayed, where the object is indicated by a position index into the Adapter. However, if you look at the preceding implementation, you will see a reference to a LayoutInflater class, which requires a bit of an explanation.
In this case, “inflation” means the act of converting an XML layout specification into the actual tree of View objects the XML represents. This is undoubtedly a tedious bit of code: take an element, create an instance of the specified View class, walk the attributes, convert those into property setter calls, iterate over all child elements, lather, rinse, and repeat. The good news is that the fine folks on the Android team wrapped up all that into a class called LayoutInflater, which we can use ourselves. For our fancy list, we want to inflate a View for each row shown in the list, so we can use the convenient shorthand of the XML layout to describe what the rows are supposed to look like.
In our example, we inflate the R.layout.row layout we created. This gives us a View object, which, in reality, is our LinearLayout with an ImageView and a TextView, just as R.layout.row specifies. However, rather than needing to create all those objects ourselves and wire them together, the XML and LayoutInflater handle the “heavy lifting” for us.
So, we have used LayoutInflater to give us a View representing the row. This row is “empty,” since the static layout file has no idea what actual data goes into the row. It is our job to customize and populate the row as we see fit before returning it, as follows:
- Fill in the text label for our label widget, using the word at the supplied position.
- See if the word is longer than four characters and, if so, find our
ImageViewicon widget and replace the stock resource with a different one.
Now, we have a ListView with different icons based on the context of the specific entry in the list, as shown in Figure 8–2.

Figure 8–2. The DynamicDemo application
Obviously, this was a fairly contrived example, but you can see where this technique could be used to customize rows based on any sort of criteria, such as other columns in a returned Cursor.
Better. Stronger. Faster.
The getView() implementation shown in the preceding section works, but it's inefficient. Every time the user scrolls, we must create a bunch of new View objects to accommodate the newly shown rows. This is bad.
It might be bad for the immediate user experience, if the list appears to be sluggish. More likely, though, it will be bad due to battery usage—every bit of CPU that is used eats up the battery. This is compounded by the extra work the garbage collector needs to do to get rid of all those extra objects we create. So the less efficient our code, the more quickly the phone's battery will be drained, and the less happy the user will be. And we want happy users, right?
So, let's take a look at a few tricks to make your fancy ListView widgets more efficient.
Using convertView
The getView() method receives, as one of its parameters, a View named, by convention, convertView. Sometimes, convertView will be null. In those cases, you need to create a new row View from scratch (e.g., via inflation), just as in the previous example. However, if convertView is not null, then it is actually one of your previously created View objects. This will happen primarily when the user scrolls the ListView. As new rows appear, Android will attempt to recycle the views of the rows that scrolled off the other end of the list, to save you from needing to rebuild them from scratch.
Assuming that each of your rows has the same basic structure, you can use findViewById() to get at the individual widgets that make up your row and change their contents, and then return convertView from getView(), rather than create a whole new row. For example, here is the getView() implementation from the previous example, now optimized via convertView (from the FancyLists/Recycling project):
public class RecyclingDemo extends ListActivity {

  TextView selection;

  String[] items={"lorem", "ipsum", "dolor", "sit", "amet",

          "consectetuer", "adipiscing", "elit", "morbi", "vel",

          "ligula", "vitae", "arcu", "aliquet", "mollis",

          "etiam", "vel", "erat", "placerat", "ante",

          "porttitor", "sodales", "pellentesque", "augue",

          "purus"};


  @Override

public void onCreate(Bundle icicle) {
super.onCreate(icicle);
setContentView(R.layout.main);
setListAdapter(new IconicAdapter());
selection=(TextView)findViewById(R.id.selection);
}
public void onListItemClick(ListView parent, View v,
int position, long id) {
selection.setText(items[position]);
}
class IconicAdapter extends ArrayAdapter {
IconicAdapter() {
super(RecyclingDemo.this, R.layout.row, items);
}
public View getView(int position, View convertView,
ViewGroup parent) {
View row=convertView;
if (row==null) {
LayoutInflater inflater=getLayoutInflater();
row=inflater.inflate(R.layout.row, parent, false);
}
TextView label=(TextView)row.findViewById(R.id.label);
label.setText(items[position]);
ImageView icon=(ImageView)row.findViewById(R.id.icon);
if (items[position].length()>4) {
icon.setImageResource(R.drawable.delete);
}
else {
icon.setImageResource(R.drawable.ok);
}
return(row);
}
}
}
Here, we check to see if the convertView is null. If so, we inflate our row; otherwise, we just reuse it. The work to fill in the contents (icon image and text) is the same in either case. The advantage is that we avoid the potentially expensive inflation step.
Using the Holder Pattern
Another somewhat expensive operation commonly done with fancy views is calling findViewById(). This dives into your inflated row and pulls out widgets by their assigned identifiers, so you can customize the widget contents (e.g., to change the text of a TextView or change the icon in an ImageView). Since findViewById() can find widgets anywhere in the tree of children of the row's root View, this could take a fair number of instructions to execute, particularly if you need to find the same widgets repeatedly.
In some GUI toolkits, this problem is avoided by having the composite View objects, like rows, be declared totally in program code (in this case, Java). Then accessing individual widgets is merely a matter of calling a getter or accessing a field. And you can certainly do that with Android, but the code gets rather verbose.
What would be nice is a way where you can still use the layout XML, yet cache your row's key child widgets so you need to find them only once. That's where the holder pattern comes into play. All View objects have getTag() and setTag() methods. These allow you to associate an arbitrary object with the widget. The holder pattern uses that “tag” to hold an object that, in turn, holds each of the child widgets of interest. By attaching that holder to the row View, every time you use the row, you already have access to the child widgets you care about, without needing to call findViewById() again.
So, let's take a look at one of these holder classes (taken from the FancyLists/ViewWrapper sample project):
class ViewWrapper {

  View base;

  TextView label=null;

  ImageView icon=null;
ViewWrapper(View base) {
this.base=base;
}
TextView getLabel() {
if (label==null) {
label=(TextView)base.findViewById(R.id.label);
}
return(label);
}
ImageView getIcon() {
if (icon==null) {
icon=(ImageView)base.findViewById(R.id.icon);
}
return(icon);
}
}
ViewWrapper not only holds onto the child widgets, but it also lazy-finds the child widgets. If you create a wrapper and don't need a specific child, you never go through the findViewById() operation for it, and never have to pay for those CPU cycles.
The holder pattern has some other advantages:
- It allows you to consolidate all your per-widget type casting in one place, rather than needing to cast everywhere you call
findViewById(). - You could use it to track other information about the row, such as state information you are not yet ready to flush to the underlying model.
Using ViewWrapper is a matter of creating an instance whenever we inflate a row and attaching said instance to the row View via setTag(), as shown in this rewrite of getView():
public class ViewWrapperDemo extends ListActivity {

  TextView selection;

  String[] items={"lorem", "ipsum", "dolor", "sit", "amet",

          "consectetuer", "adipiscing", "elit", "morbi", "vel",

          "ligula", "vitae", "arcu", "aliquet", "mollis",

          "etiam", "vel", "erat", "placerat", "ante",

          "porttitor", "sodales", "pellentesque", "augue",

          "purus"};


  @Override

public void onCreate(Bundle icicle) {
super.onCreate(icicle);
setContentView(R.layout.main);
setListAdapter(new IconicAdapter());
selection=(TextView)findViewById(R.id.selection);
}
private String getModel(int position) {
return(((IconicAdapter)getListAdapter()).getItem(position));
}
public void onListItemClick(ListView parent, View v,
int position, long id) {
selection.setText(getModel(position));
}
class IconicAdapter extends ArrayAdapter<String> {
IconicAdapter() {
super(ViewWrapperDemo.this, R.layout.row, items);
}
public View getView(int position, View convertView,
ViewGroup parent) {
View row=convertView;
ViewWrapper wrapper=null;
if (row==null) {
LayoutInflater inflater=getLayoutInflater();
row=inflater.inflate(R.layout.row, parent, false);
wrapper=new ViewWrapper(row);
row.setTag(wrapper);
}
else {
wrapper=(ViewWrapper)row.getTag();
}
wrapper.getLabel().setText(getModel(position));
if (getModel(position).length()>4) {
wrapper.getIcon().setImageResource(R.drawable.delete);
      }

      else {

wrapper.getIcon().setImageResource(R.drawable.ok);
}
return(row);
}
}
}
Just as we check convertView to see if it is null in order to create the row View objects as needed, we also pull out (or create) the corresponding row's ViewWrapper. Then accessing the child widgets is merely a matter of calling their associated methods on the wrapper.
Making a List…
Lists with pretty icons next to them are all fine and well. But can we create ListView widgets whose rows contain interactive child widgets instead of just passive widgets like TextView and ImageView? For example, there is a RatingBar widget that allows users to assign a rating by clicking on a set of star icons. Could we combine the RatingBar with text in order to allow people to scroll a list of, say, songs and rate them directly inside the list?
There is good news and bad news.
The good news is that interactive widgets in rows work just fine. The bad news is that it is a little tricky, specifically when it comes to taking action when the interactive widget's state changes (e.g., a value is typed into a field). You need to store that state somewhere, since your RatingBar widget will be recycled when the ListView is scrolled. You need to be able to set the RatingBar state based on the actual word you are viewing as the RatingBar is recycled, and you need to save the state when it changes so it can be restored when this particular row is scrolled back into view.
What makes this interesting is that, by default, the RatingBar has absolutely no idea which model in the ArrayAdapter it is looking at. After all, the RatingBar is just a widget, used in a row of a ListView. You need to teach the rows which model they are currently displaying, so when their rating bar is checked, they know which model's state to modify.
So, let's see how this is done, using the activity in the FancyLists/RateList sample project. We'll use the same basic classes as our previous demo, showing a list of nonsense words that you can rate. In addition, words given a top rating are put in all uppercase.
public class RateListDemo extends ListActivity {

  String[] items={"lorem", "ipsum", "dolor", "sit", "amet",

          "consectetuer", "adipiscing", "elit", "morbi", "vel",

          "ligula", "vitae", "arcu", "aliquet", "mollis",

          "etiam", "vel", "erat", "placerat", "ante",

          "porttitor", "sodales", "pellentesque", "augue",

          "purus"};
  @Override

public void onCreate(Bundle icicle) {
super.onCreate(icicle);
ArrayList<RowModel> list=new ArrayList<RowModel>();
for (String s : items) {
list.add(new RowModel(s));
}
setListAdapter(new RatingAdapter(list));
}
private RowModel getModel(int position) {
return(((RatingAdapter)getListAdapter()).getItem(position));
}
class RatingAdapter extends ArrayAdapter<RowModel> {
RatingAdapter(ArrayList<RowModel> list) {
super(RateListDemo.this, R.layout.row, list);
}
public View getView(int position, View convertView,
ViewGroup parent) {
View row=convertView;
ViewWrapper wrapper;
RatingBar rate;
if (row==null) {
LayoutInflater inflater=getLayoutInflater();
row=inflater.inflate(R.layout.row, parent, false);
wrapper=new ViewWrapper(row);
row.setTag(wrapper);
rate=wrapper.getRatingBar();
RatingBar.OnRatingBarChangeListener l=
new RatingBar.OnRatingBarChangeListener() {
public void onRatingChanged(RatingBar ratingBar,
float rating,
boolean fromTouch) {
Integer myPosition=(Integer)ratingBar.getTag();
RowModel model=getModel(myPosition);
model.rating=rating;
LinearLayout parent=(LinearLayout)ratingBar.getParent();
TextView label=(TextView)parent.findViewById(R.id.label);
label.setText(model.toString());
}
};
rate.setOnRatingBarChangeListener(l);
}
else {
wrapper=(ViewWrapper)row.getTag();
rate=wrapper.getRatingBar();
}
RowModel model=getModel(position);
wrapper.getLabel().setText(model.toString());
rate.setTag(new Integer(position));
rate.setRating(model.rating);
return(row);
}
}
class RowModel {
String label;
float rating=2.0f;
RowModel(String label) {
this.label=label;
}
public String toString() {
if (rating>=3.0) {
return(label.toUpperCase());
}
return(label);
}
}
}
Here are the differences in this activity and getView() implementation compared with the previous examples:
- While we are still using
String[] items as the list of nonsense words, rather than pour thatStringarray straight into anArrayAdapter, we turn it into a list ofRowModelobjects.RowModelis the mutable model. It holds the nonsense word plus the current checked state. In a real system, these might be objects populated from aCursor, and the properties would have more business meaning. - Utility methods like
onListItemClick()needed to be updated to reflect the change from a pureStringmodel to use aRowModel. - The
ArrayAdaptersubclass (RatingAdapter), ingetView(), looks to see ifconvertViewisnull. If so, we create a new row by inflating a simple layout and also attach aViewWrapper. For the row'sRatingBar, we add an anonymousonRatingChanged()listener that looks at the row's tag (getTag()) and converts that into anInteger, representing the position within theArrayAdapterthat this row is displaying. Using that, the rating bar can get the actualRowModelfor the row and update the model based on the new state of the rating bar. It also updates the text adjacent to theRatingBarwhen checked to match the rating bar state. - We make sure that the
RatingBarhas the proper contents and has a tag (viasetTag()) pointing to the position in the adapter the row is displaying.
The row layout is just a RatingBar and a TextView inside a LinearLayout:
<?xml version="1.0" encoding="utf-8"?>

<LinearLayout xmlns:android="http://schemas.android.com/apk/res/android"

  android:layout_width="fill_parent"

  android:layout_height="wrap_content"

  android:orientation="horizontal"

>

  >RatingBar

    android:id="@+id/rate"

    android:layout_width="wrap_content"

    android:layout_height="wrap_content"

    android:numStars="3"

    android:stepSize="1"

    android:rating="2" />

  <TextView

    android:id="@+id/label"

    android:paddingLeft="2px"

    android:paddingRight="2px"

    android:paddingTop="2px"

    android:textSize="40sp"

    android:layout_width="fill_parent"

    android:layout_height="wrap_content"/>

</LinearLayout>
The ViewWrapper simply extracts the RatingBar and the TextView from the row View:
class ViewWrapper {

  View base;

  RatingBar rate=null;

  TextView label=null;
ViewWrapper(View base) {
this.base=base;
}
RatingBar getRatingBar() {
if (rate==null) {
rate=(RatingBar)base.findViewById(R.id.rate);
}
return(rate);
}
TextView getLabel() {
if (label==null) {
label=(TextView)base.findViewById(R.id.label);
}
return(label);
}
}
And the visual result is what you would expect, as shown in Figure 8–3. This includes the toggled rating bars turning their words into all uppercase, as shown in Figure 8–4.
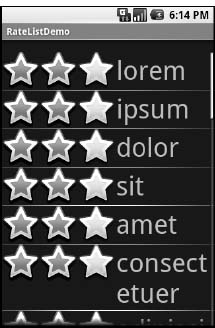
Figure 8–3. The RateListDemo application, as initially launched

Figure 8–4. The same application, showing a top-rated word
…And Checking It Twice
The rating list in the previous section works, but implementing it was very tedious. Worse, much of that tedium would not be reusable, except in very limited circumstances. We can do better.
What we would really like is to be able to create a layout like this:
<?xml version="1.0" encoding="utf-8"?>

<com.commonsware.android.fancylists.seven.RateListView

  xmlns:android="http://schemas.android.com/apk/res/android"

  android:id="@android:id/list"

  android:layout_width="fill_parent"

  android:layout_height="fill_parent"

  android:drawSelectorOnTop="false"

/>
In our code, almost all of the logic that might have referred to a ListView before “just works” with the RateListView we put in the layout:
String[] items={"lorem", "ipsum", "dolor", "sit", "amet",

          "consectetuer", "adipiscing", "elit", "morbi", "vel",

          "ligula", "vitae", "arcu", "aliquet", "mollis",

          "etiam", "vel", "erat", "placerat", "ante",

          "porttitor", "sodales", "pellentesque", "augue",

          "purus"};


  @Override

public void onCreate(Bundle icicle) {
super.onCreate(icicle);
setContentView(R.layout.main);
setListAdapter(new ArrayAdapter<String>(this,
android.R.layout.simple_list_item_1,
items));
}
}
Where things get a wee bit challenging is when you stop and realize that, in everything up to this point in this chapter, we never actually changed the ListView itself. All our work was with the adapters, overriding getView() and inflating our own rows.
So, if we want RateListView to take in any ordinary ListAdapter and just work—putting rating bars on the rows as needed—we are going to need to do some fancy footwork. Specifically, we need to wrap the “raw” ListAdapter in some other ListAdapter that knows how to put the rating bars on the rows and track the state of those rating bars.
First, we need to establish the pattern of one ListAdapter augmenting another. Here is the code for AdapterWrapper, which takes a ListAdapter and delegates all of the interface's methods to the delegate (from the FancyLists/RateListView sample project):
public class AdapterWrapper implements ListAdapter {

  ListAdapter delegate=null;


public AdapterWrapper(ListAdapter delegate) {
this.delegate=delegate;
  }

public int getCount() {
return(delegate.getCount());
}
public Object getItem(int position) {
return(delegate.getItem(position));
}
public long getItemId(int position) {
return(delegate.getItemId(position));
}
public View getView(int position, View convertView,
ViewGroup parent) {
return(delegate.getView(position, convertView, parent));
}
public void registerDataSetObserver(DataSetObserver observer) {
delegate.registerDataSetObserver(observer);
}
public boolean hasStableIds() {
return(delegate.hasStableIds());
}
public boolean isEmpty() {
return(delegate.isEmpty());
}
public int getViewTypeCount() {
return(delegate.getViewTypeCount());
}
public int getItemViewType(int position) {
return(delegate.getItemViewType(position));
}
public void unregisterDataSetObserver(DataSetObserver observer) {
delegate.unregisterDataSetObserver(observer);
}
public boolean areAllItemsEnabled() {
return(delegate.areAllItemsEnabled());
}
public boolean isEnabled(int position) {
return(delegate.isEnabled(position));
}
}
We can then subclass AdapterWrapper to create RateableWrapper, overriding the default getView() but otherwise allowing the delegated ListAdapter to do the real work:
public class RateableWrapper extends AdapterWrapper {

  Context ctxt=null;

  float[] rates=null;
public RateableWrapper(Context ctxt, ListAdapter delegate) {
super(delegate);
this.ctxt=ctxt;
this.rates=new float[delegate.getCount()];
for (int i=0;i<delegate.getCount();i++) {
this.rates[i]=2.0f;
}
}
public View getView(int position, View convertView,
ViewGroup parent) {
ViewWrapper wrap=null;
View row=convertView;
if (convertView==null) {
LinearLayout layout=new LinearLayout(ctxt);
RatingBar rate=new RatingBar(ctxt);
rate.setNumStars(3);
rate.setStepSize(1.0f);
View guts=delegate.getView(position, null, parent);
layout.setOrientation(LinearLayout.HORIZONTAL);
rate.setLayoutParams(new LinearLayout.LayoutParams(
LinearLayout.LayoutParams.WRAP_CONTENT,
LinearLayout.LayoutParams.FILL_PARENT));
guts.setLayoutParams(new LinearLayout.LayoutParams(
LinearLayout.LayoutParams.FILL_PARENT,
LinearLayout.LayoutParams.FILL_PARENT));
RatingBar.OnRatingBarChangeListener l=
new RatingBar.OnRatingBarChangeListener() {
public void onRatingChanged(RatingBar ratingBar,
float rating,
boolean fromTouch) {
rates[(Integer)ratingBar.getTag()]=rating;
}
};
rate.setOnRatingBarChangeListener(l);
layout.addView(rate);
layout.addView(guts);
wrap=new ViewWrapper(layout);
wrap.setGuts(guts);
layout.setTag(wrap);
rate.setTag(new Integer(position));
rate.setRating(rates[position]);
      row=layout;

    }

    else {

wrap=(ViewWrapper)convertView.getTag();
wrap.setGuts(delegate.getView(position, wrap.getGuts(),
parent));
wrap.getRatingBar().setTag(new Integer(position));
wrap.getRatingBar().setRating(rates[position]);
}
return(row);
}
}
The idea is that RateableWrapper is where most of our rate-list logic resides. It puts the rating bars on the rows, and it tracks the rating bars' states as they are adjusted by the user. For the states, it has a float[] sized to fit the number of rows that the delegate says are in the list.
RateableWrapper's implementation of getView() is reminiscent of the one from RateListDemo, except that rather than use LayoutInflater, we need to manually construct a LinearLayout to hold our RatingBar and the “guts” (a.k.a., whatever view the delegate created that we are decorating with the rating bar). LayoutInflater is designed to construct a View from raw widgets. In our case, we don't know in advance what the rows will look like, other than that we need to add a rating bar to them. However, the rest is similar to the one from RateListDemo, including using a ViewWrapper, hooking up onRatingBarChanged() to have the rating bar update the state, and so forth:
class ViewWrapper {

  ViewGroup base;

  View guts=null;

  RatingBar rate=null;
ViewWrapper(ViewGroup base) {
this.base=base;
}
RatingBar getRatingBar() {
if (rate==null) {
rate=(RatingBar)base.getChildAt(0);
}
return(rate);
  }


void setRatingBar(RatingBar rate) {
this.rate=rate;
}
View getGuts() {
if (guts==null) {
guts=base.getChildAt(1);
}
return(guts);
}
void setGuts(View guts) {
this.guts=guts;
}
}
With all that in place, RateListView is comparatively simple:
public class RateListView extends ListView {

public RateListView(Context context) {
super(context);
}
public RateListView(Context context, AttributeSet attrs) {
super(context, attrs);
}
public RateListView(Context context, AttributeSet attrs,
int defStyle) {
super(context, attrs, defStyle);
}
public void setAdapter(ListAdapter adapter) {
super.setAdapter(new RateableWrapper(getContext(), adapter));
}
}
We simply subclass ListView and override setAdapter() so we can wrap the supplied ListAdapter in our own RateableWrapper.
Visually, the results are similar to the RateListDemo, albeit without top-rated words appearing in all uppercase, as shown in Figure 8–5.

Figure 8–5. The RateListViewDemo sample application
The difference is in reusability. We could package RateListView in its own JAR and plop it into any Android project where we need it. So while RateListView is somewhat complicated to write, we need to write it only once, and the rest of the application code is blissfully simple.
NOTE: Of course, the sample RateListView could use some more features, such as programmatically changing states (updating both the float[] and the actual RatingBar itself) and allowing other application logic to be invoked when a RatingBar state is toggled (via some sort of callback). These and other enhancements are left as exercises for the reader.
Adapting Other Adapters
All adapter classes can follow the ArrayAdapter pattern of overriding getView() to define the rows. However, CursorAdapter and its subclasses have a default implementation of getView().
The getView() method inspects the supplied View to recycle. If it is null, getView() calls newView(), then bindView(). If it is not null, getView() just calls bindView().
If you are extending CursorAdapter, which is used for displaying results of a database or content provider query, you should override newView() and bindView(), instead of getView(). All this does is remove your if() test you would have in getView() and put each branch of that test in an independent method, akin to the following:
public View newView(Context context, Cursor cursor,
ViewGroup parent) {
LayoutInflater inflater=context.getLayoutInflater();
View row=inflater.inflate(R.layout.row, null);
ViewWrapper wrapper=new ViewWrapper(row);
row.setTag(wrapper);
return(row);
}
public void bindView(View row, Context context, Cursor cursor) {
ViewWrapper wrapper=(ViewWrapper)row.getTag();
// actual logic to populate row from Cursor goes here
}
Chapter 22 provides details about using a Cursor.