
Chapter 31
Alerting Users via Notifications
Pop-up messages, tray icons with their associated "bubble" messages, bouncing dock icons, and so on—you are no doubt used to programs trying to get your attention, sometimes for good reason. Your phone also probably chirps at you for more than just incoming calls: low battery, alarm clocks, appointment notifications, incoming text messages, and so on.
Not surprisingly, Android has a whole framework for dealing with these sorts of alerts, collectively called notifications, which is the subject of this chapter.
Types of Pestering
A service, running in the background, needs a way to let users know something of interest has occurred, such as when e-mail has been received. Moreover, the service may need some way to steer users to an activity where they can act on the event, such as reading a received message. For this, Android supplies status bar icons, flashing lights, and other indicators collectively known as “notifications”.
Your current phone may already have such icons, to indicate battery life, signal strength, whether Bluetooth is enabled, and the like. With Android, applications can add their own status bar icons, with an eye toward having them appear only when needed (e.g., a message has arrived).
In Android, you can raise notifications via the NotificationManager. The NotificationManager is a system service. To use it, you need to get the service object via getSystemService(NOTIFICATION_SERVICE) from your activity.
The NotificationManager gives you three methods: one to pester (notify()) and two to stop pestering (cancel() and cancelAll()).
The notify() method takes a Notification, which is a data structure that spells out the form your pestering should take. The capabilities of this object are described in the following sections.
Hardware Notifications
You can flash LEDs on the device by setting lights to true, also specifying the color (as an #ARGB value in ledARGB) and the pattern in which the light should blink (by providing off/on durations in milliseconds for the light via ledOnMS and ledOffMS). Note, however, that Android devices will apply best efforts to meet your color request, meaning that different devices may give you different colors, or perhaps no control over color at all. For example, the Motorola CLIQ reportedly has only a white LED, so you can ask for any color you want, and you will still get white.
You can play a sound, using a Uri to a piece of content held, perhaps, by a ContentManager (sound). Think of this as a “ringtone” for your application.
You can vibrate the device, controlled via a long[] indicating the on/off patterns (in milliseconds) for the vibration (vibrate). You might do this by default, or you might make it an option the user can choose when circumstances require a more subtle notification than a ringtone. To use this approach, you will need to request the VIBRATE permission (see Chapter 28 for more on permissions).
Icons
While the flashing lights, sounds, and vibrations are aimed at getting users to look at the device, icons are designed to take them the next step and tell them what's so important.
To set up an icon for a Notification, you need to set two public fields: icon, where you provide the identifier of a Drawable resource representing the icon, and contentIntent, where you supply an PendingIntent to be raised when the icon is clicked. You should make sure the PendingIntent will be caught by something—perhaps your own application code—to take appropriate steps to let the user deal with the event triggering the notification. You can also supply a text blurb to appear when the icon is put on the status bar (tickerText).
If you want all three, the simpler approach is to call setLatestEventInfo(), which wraps an icon, contentIntent, and tickerText in a single call.
Seeing Pestering in Action
Let's now take a peek at the Notifications/Notify1 sample project, in particular the NotifyDemo class:
package com.commonsware.android.notify;


import android.app.Activity;

import android.app.Notification;

import android.app.NotificationManager;

import android.app.PendingIntent;

import android.content.Intent;

import android.os.Bundle;

import android.view.View;

import android.widget.Button;

import java.util.Timer;

import java.util.TimerTask;


public class NotifyDemo extends Activity {

  private static final int NOTIFY_ME_ID=1337;

  private Timer timer=new Timer();

  private int count=0;


  @Override

  public void onCreate(Bundle savedInstanceState) {

    super.onCreate(savedInstanceState);

    setContentView(R.layout.main);


    Button btn=(Button)findViewById(R.id.notify);


    btn.setOnClickListener(new View.OnClickListener() {

      public void onClick(View view) {

        TimerTask task=new TimerTask() {

          public void run() {

            notifyMe();

          }

        };


        timer.schedule(task, 5000);

      }

    });


    btn=(Button)findViewById(R.id.cancel);


    btn.setOnClickListener(new View.OnClickListener() {

      public void onClick(View view) {

        NotificationManager mgr=

          (NotificationManager)getSystemService(NOTIFICATION_SERVICE);


        mgr.cancel(NOTIFY_ME_ID);

      }

    });

  }


  private void notifyMe() {

    final NotificationManager mgr=

      (NotificationManager)getSystemService(NOTIFICATION_SERVICE);

    Notification note=new Notification(R.drawable.red_ball,

                                         "Status message!",

                                         System.currentTimeMillis());

    PendingIntent i=PendingIntent.getActivity(this, 0,

                           new Intent(this, NotifyMessage.class),

                                             0);

    note.setLatestEventInfo(this, "Notification Title",

                            "This is the notification message", i);

    note.number=++count;


    mgr.notify(NOTIFY_ME_ID, note);

  }

}
As shown in Figure 31–1, this activity sports two large buttons: one to kick off a notification after a 5-second delay and one to cancel that notification (if it is active).
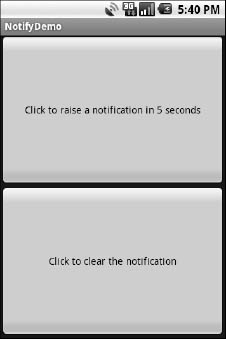
Figure 31–1. The NotifyDemo activity main view
Creating the notification, in notifyMe(), is accomplished in six steps:
- Get access to the
NotificationManagerinstance. - Create a
Notificationobject with our icon (red ball), a message to flash on the status bar as the notification is raised, and the time associated with this event. - Create a
PendingIntentthat will trigger the display of another activity (NotifyMessage). - Use
setLatestEventInfo()to specify that, when the notification is clicked, we are to display a certain title and message, and if that is clicked, we launch thePendingIntent. - Update the number associated with the notification.
- Tell the
NotificationManagerto display the notification.
Hence, if we click the top button, after 5 seconds, our red ball icon will appear in the status bar, along with a brief display of our status message, as shown in Figure 31–2. The red ball will have our number (initially 1) superimposed on the lower-right corner (you might use this to signify the number of unread messages, for example).
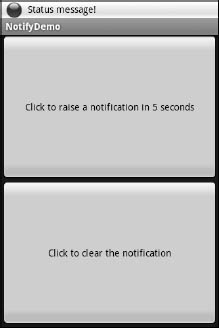
Figure 32-2. Our notification as it appears on the status bar, with our status message
If you click the red ball, a drawer will appear beneath the status bar. Drag that drawer all the way to the bottom of the screen to see the outstanding notifications, including our own, as shown in Figure 32-3.

Figure 32-3. The notifications drawer, fully expanded, with our notification
If you click the notification entry in the drawer, you'll be taken to a trivial activity displaying a message. In a real application, this activity would do something useful based on the event that occurred (e.g., take users to the newly arrived mail messages).
Clicking the button to clear the notification will remove the red ball from the status bar.