
Before we run our remittance application, make sure the following actions have been carried out:
- The Stellar private network has been set up and is online.
- The USD asset has been issued and the Stellar accounts for the banks have been created and funded.
- The bank's internal databases have been created and test customer data has been entered.
- The federation servers have been set up.
- The compliance servers have been set up.
- The bridge servers have been set up.
- The callbacks servers have been set up.
- The app interface and backend server have been built.
If even one of these has not been completed, please ensure that you do so before going through this section. First, let's bring all the backend components and servers online:
- Navigate to the /federationA and /federationB directories and bring the servers online using the ./federation command.
- Navigate to the /complianceA and /complianceB directories and bring the servers online using the ./compliance command.
- Navigate to the /bridgeA and /bridgeB directories and bring the servers online using the ./bridge command.
- Navigate to your nodejs project directory, specifically the apps for CallbacksA and CallbacksB, and bring the apps online with the node CallbacksA.js and node CallbacksB.js commands.
- Next, bring the bank portal backend server online with the node DBServerA.js and node DBServerB.js commands.
Let's start our bank portal app. Navigate to the React app directory. Run the app with the following command:
npm start
The app should launch in the browser as follows:

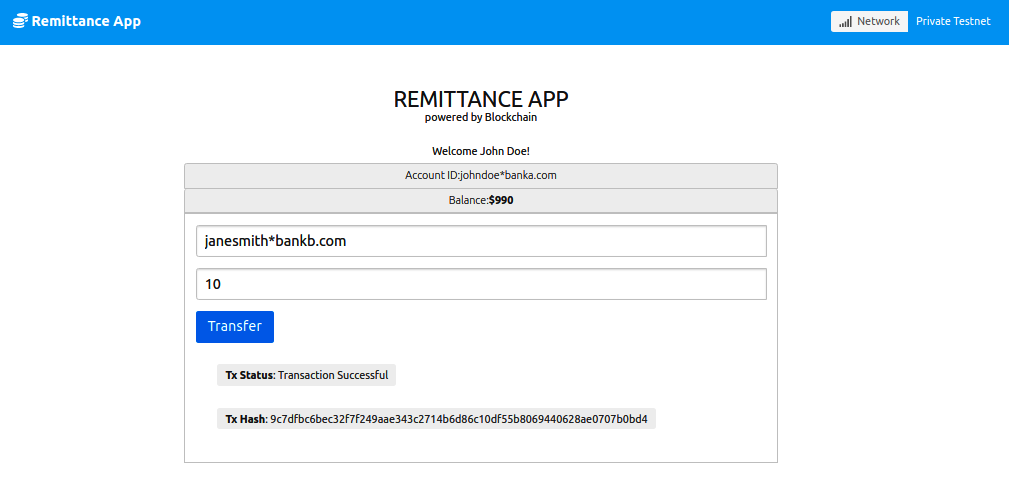
- Enter the friendly ID of the customer to log in. As you may recall, we set the customer ID to johndoe*banka.com in our users table while entering test data:

- Click on Submit to log in. You should see the customer transfer screen:

- Enter the details of the payment and click on the Transfer button. I'm transfering 10 USD to janesmith*bankb.com:

- Once the transaction goes through, a message stating Transaction Successful and the Tx Hash from the blockchain will printed on the screen:
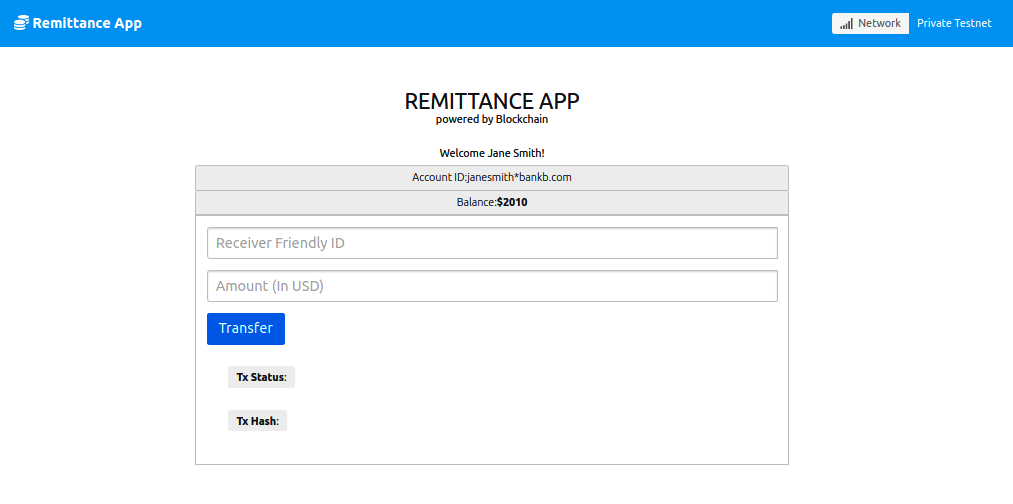
- Now, let's configure our bank portal for Bank B. Simply swap the DBServer constant in App.js to the following value. You can find it at the top of the code where we imported our dependencies:
const DBServer = 'localhost:3602';
- Now, refresh the app in the browser. Log into the app, this time using the friendly ID janesmith*bankb.com:

Notice how the balance has changed from $2,000 (which we set manually while entering the test data into our users table) to $2,010:
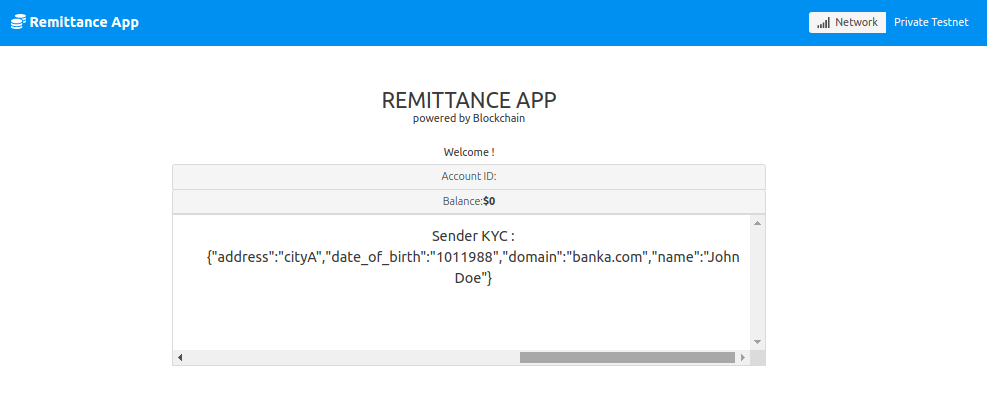
- Now, refresh the app and log into the main page by clicking on the Bank User button. You should be taken to the Bank User screen, where you will be able to see the transactions details, including the sender's KYC details:
That brings us to the end of our demo for the remittance app.
If you rerun this demo, make sure you remove the logged transactions from the bridgeA, bridgeB, complianceA, and complianceB databases. Since transaction IDs need to be unique, the bridge and compliance server will disallow a transaction if they find that a transaction with the same ID already exists.