
Let's run the entire application and see how it works. If you have not already done so, start your Ganache blockchain and run a Quickstart blockchain at localhost:8545, as shown in the following screenshot:

Make sure the USD token contract and LC Master contract are deployed. If you haven't already done so, you might want to revisit this again by looking at the previous steps.
Before we can deploy LCs, we need to provide funds to the LC Master smart contract. The LC Master will distribute these funds whenever it creates a new escrow—that is, a new LC smart contract.
To do so, we need to allocate some USD tokens to the LC Master smart contract. These tokens will act as the USD balance for the LC issuer. Take the following steps:
- Navigate to the truffle console. In the command line, set your web3 default account to the first account in your Ganache HD wallet using the following command:
web3.eth.defaultAccount = '0x60f569790e9b87f93aB6bF9bBb3118f6E1C1598b'
- Next, enter the following command into the truffle console. It will mint (generate) a 10000000 USD token to the LC Master contract address. Your LC Master smart contract address is the one you get after deploying the contract through truffle:
USD.deployed().then(function(instance) { return instance.mint("<Your LC Master contract address>",10000000); }).then(function(responseb) {console.log("response", responseb.toString(10));});
- Before we can start, we also need to set up the MetaMask wallet so that we can use the application. We'll be using three Ethereum accounts for our demo. We need to import all three into MetaMask. Navigate back to the Ganache interface, as shown in the following screenshot:
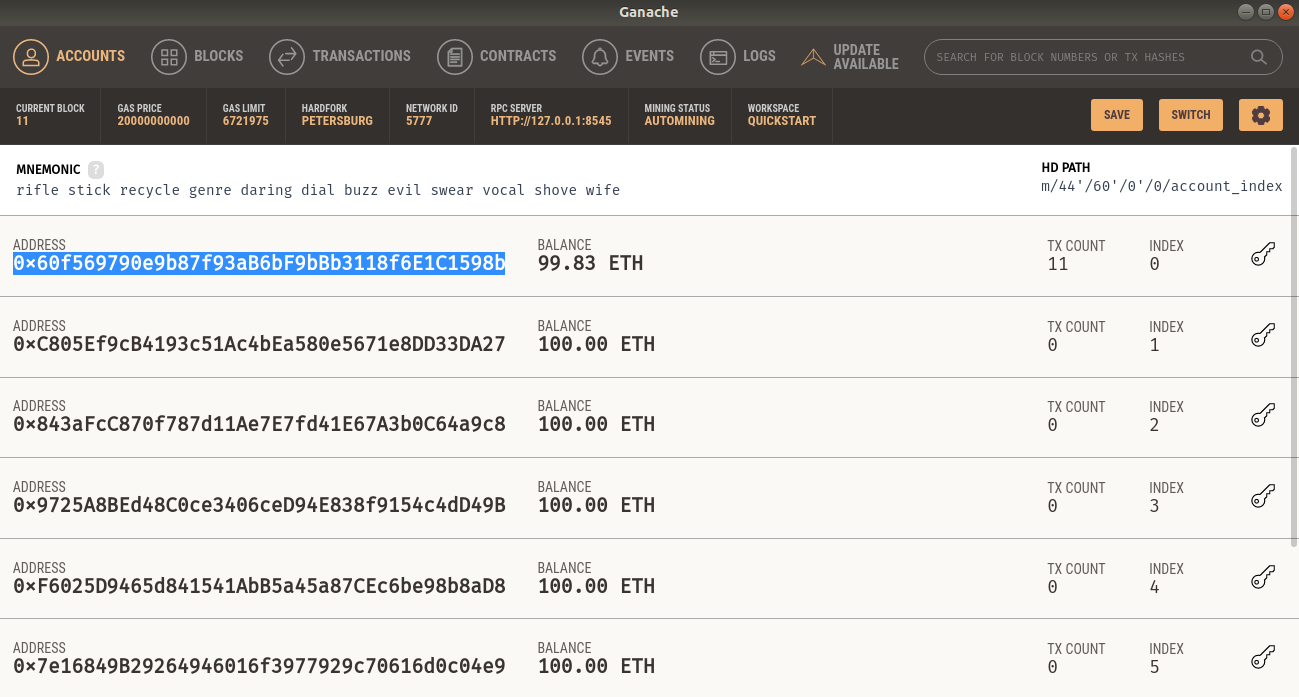
We will be using the first account in the preceding list as the bank account, the second account as the buying merchant's account, and the third as the selling merchant's account.
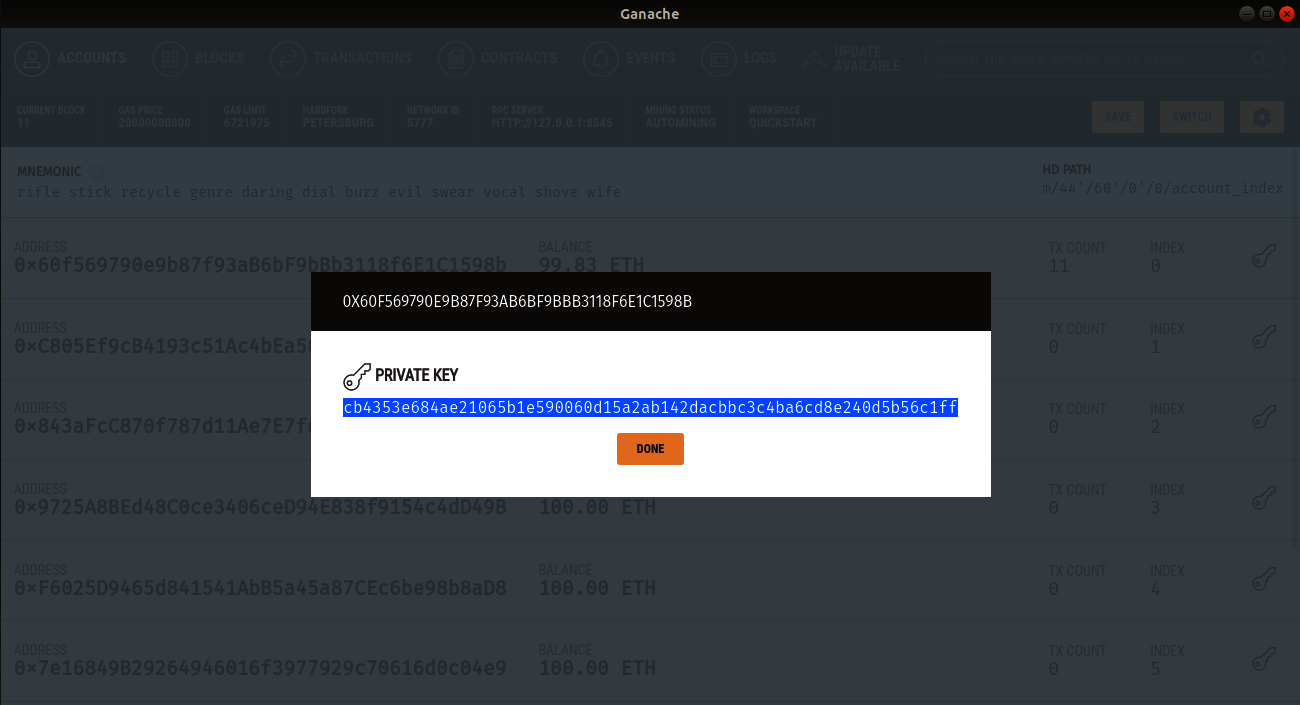
- To import an account, click on the key icon on the extreme right, next to the Index column. A screen will pop up with the secret key, like the one in the following screenshot:
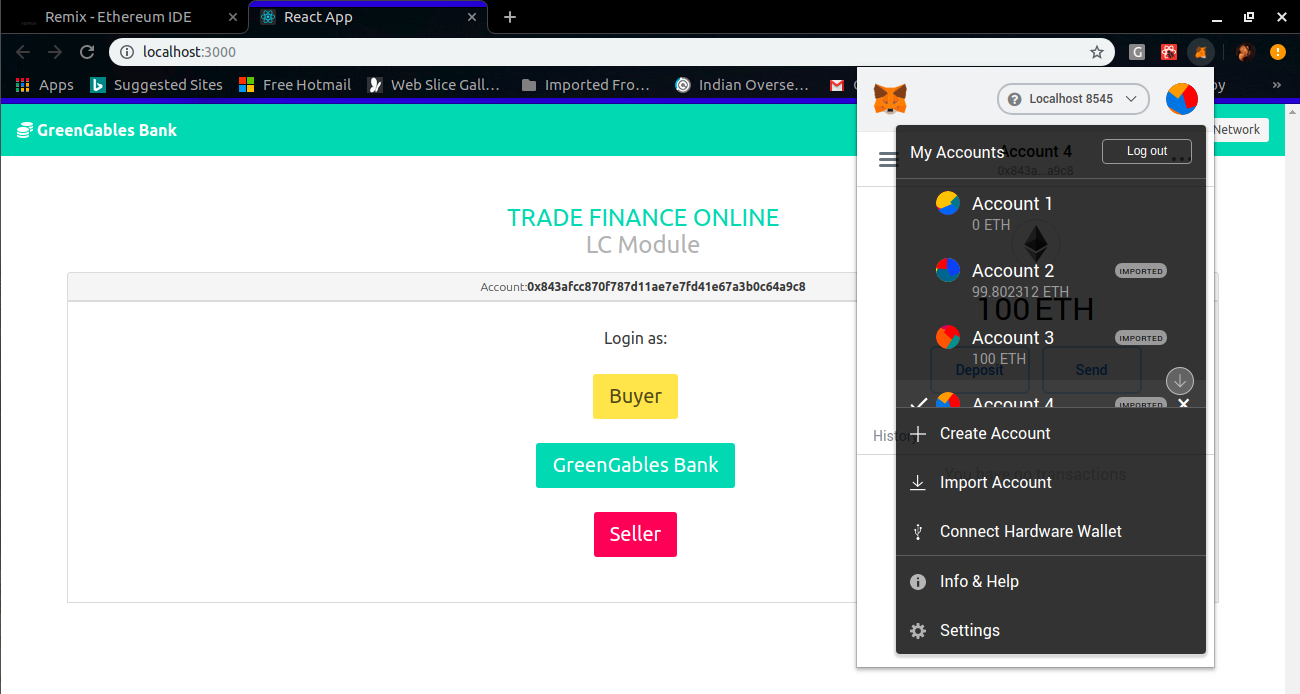
- Copy this key and open your MetaMask wallet. Make sure you are connected to localhost:8545 as your Ethereum network source.
- Click on the circular pie icon at the top-right corner. Select Import Account from the menu that opens, as shown in the following screenshot:

- Make sure the Import tab is selected and that Type is selected as Private Key, as shown in the following screenshot:
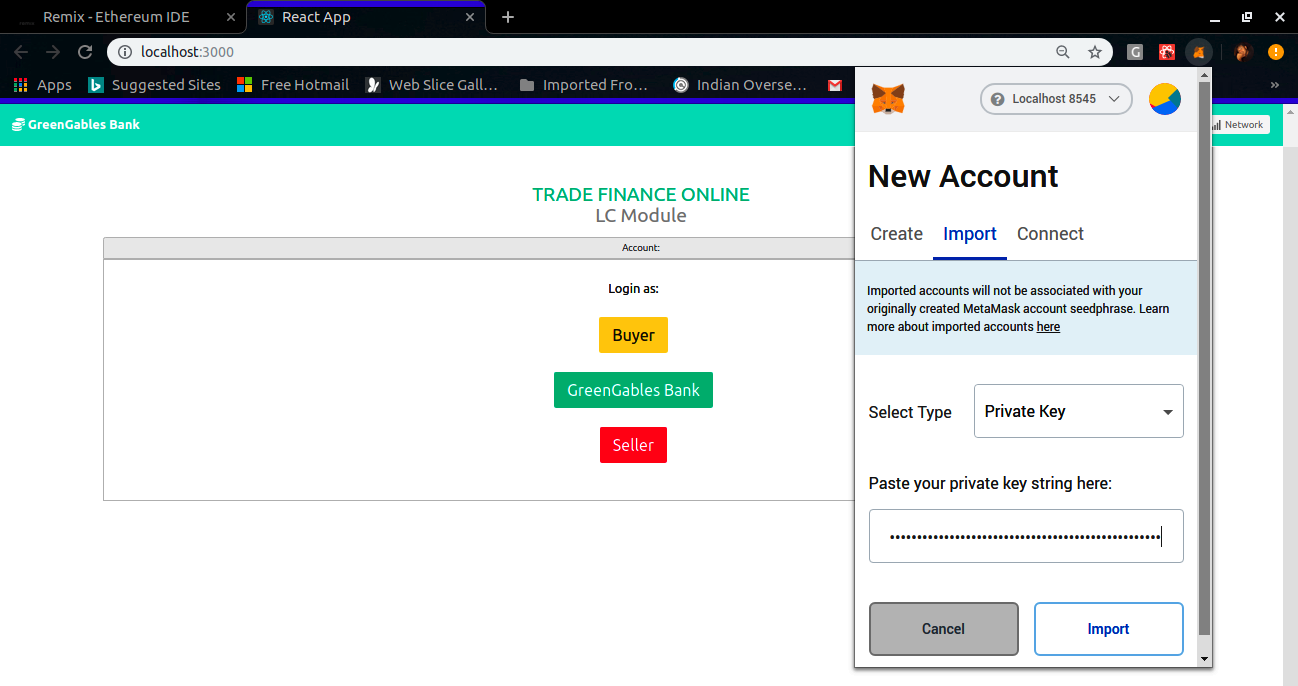
- Paste the secret key you copied earlier and click on Import. The account should now appear in your wallet, as shown in the following screenshot:

- Do this for the first three accounts in the Ganache blockchain list. The accounts should appear in your Metamask wallet, as shown in the following screenshot:

OK. Now, we are ready to start our LC module.
Navigate to your React project directory and into the LCApp folder. Start the application by running the following command:
npm start
After a while, the app will open in the browser, as follows:
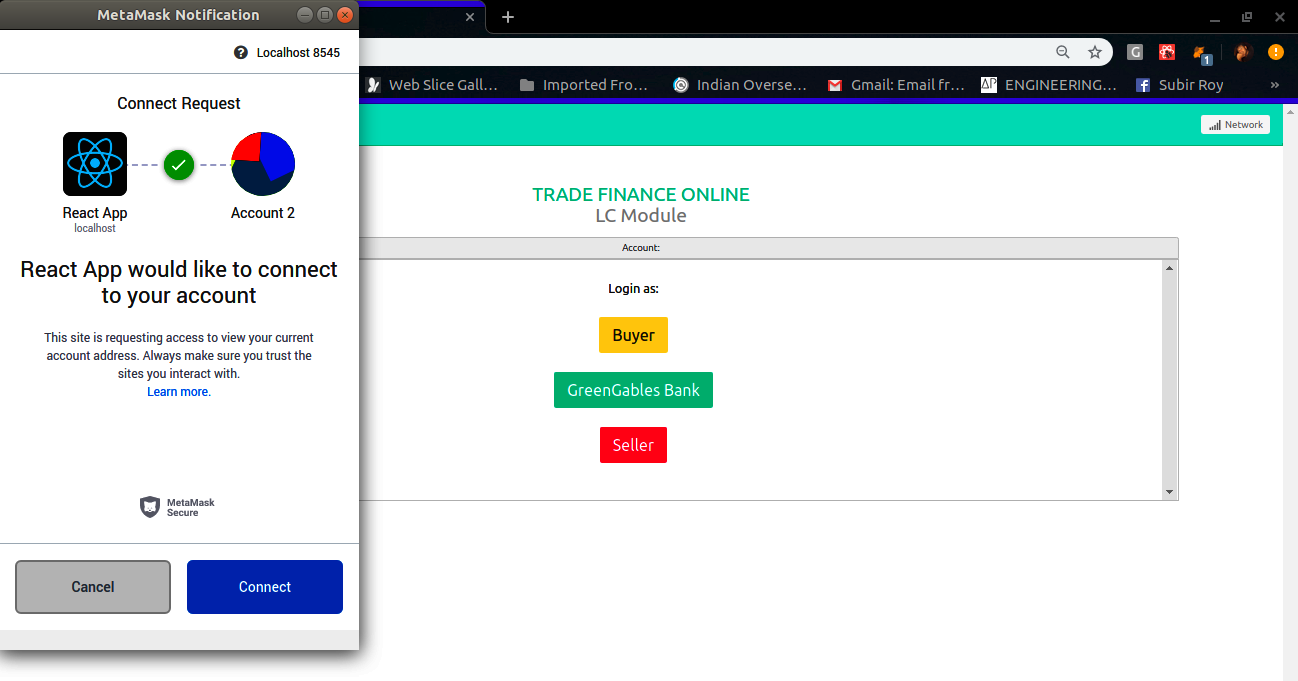
In the MetaMask popup that appears, select Connect to allow our React app to use MetaMask's injected web3 instance.
You might have to sign in to MetaMask if you have signed out. Sign in and repeat the preceding steps. You will then see the following screen:

Now, we are ready to start with our demo, as follows:
- First, we will go through the app as the bank user. Let's say a new LC has been requested by a customer to the bank. The bank verifies their credit rating and ascertains the customer is liquid. Then, they agree to issue an LC.
Make sure the bank's Ethereum account is selected in MetaMask. If it's not, go back to MetaMask, and from the account dropdown, select the account. If you have followed the steps correctly, this should be Account 2 in your MetaMask wallet, as shown in the following screenshot:

- After selecting the current account, the app should look like the one shown in the following screenshot. Notice the Account: tab, with the bank's Ethereum account displayed:

- Click on the GreenGables Bank button to log in as a bank user. You'll be navigated to a new screen containing the Create LC and View LC buttons, as shown in the following screenshot:
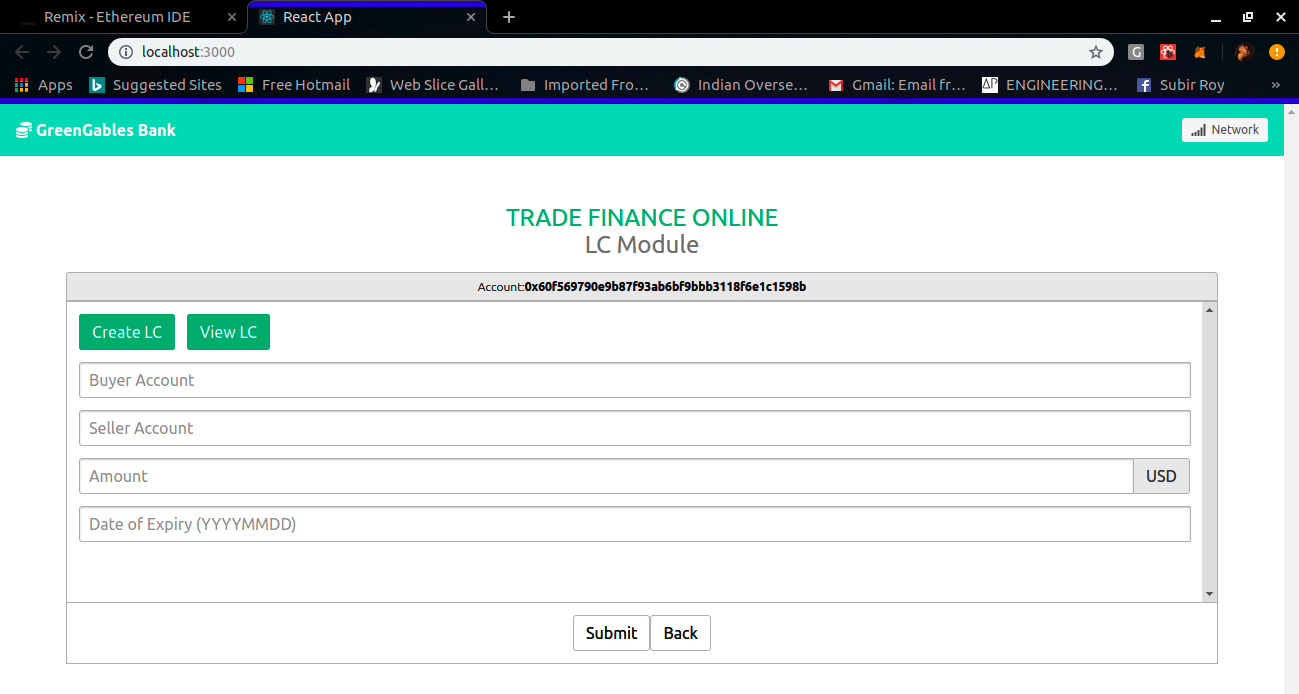
Let's start by creating a new LC.
- Enter the details in the form in the Create LC screen. The Buyer account and the Seller account are the second and third accounts we imported from Ganache, respectively. Under the MetaMask wallet, these will be available as Account 3 and Account 4. Paste these details into the MetaMask screen. Let's issue an LC with a small amount, around $1,000, due to expire on September 1, 2019, as follows:

- Click on the Submit button at the bottom of the screen to continue. On clicking on Submit, the createLC method is called. MetaMask will pop up with a notification, asking if you want to send the transaction, as shown in the following screenshot:

- Click on Confirm. The transaction will be submitted and you'll get a notification at the top of your browser screen, as shown in the following screenshot:

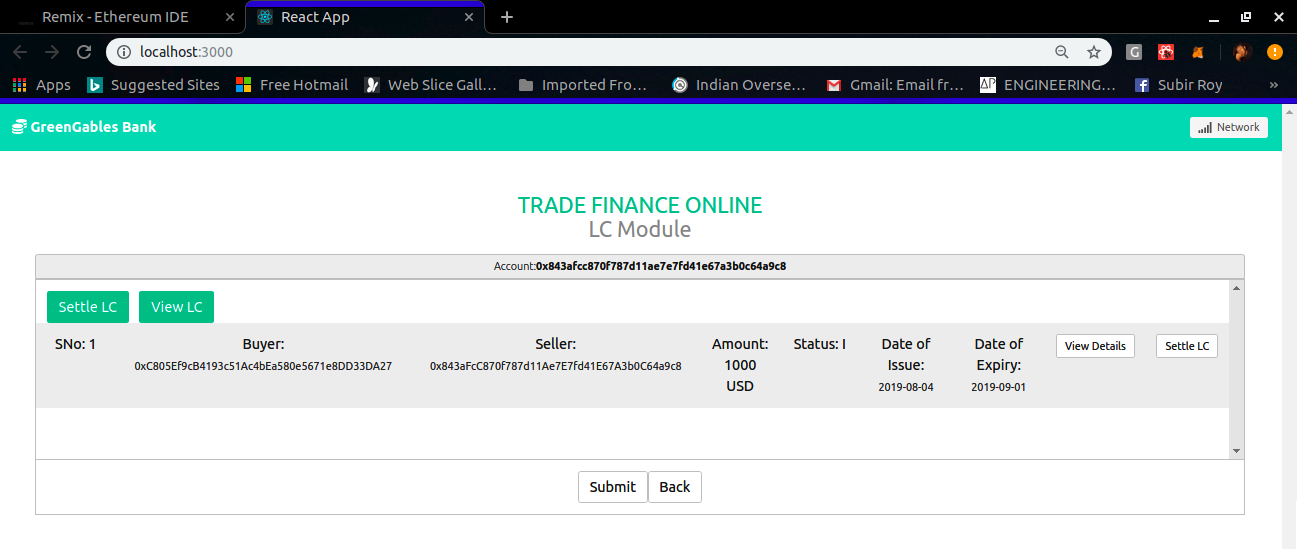
- Log in again as the bank user (GreenGables Bank). Click on View LC. You should be able to see the newly issued LC here, as follows:

- Click on View Details. This is a call to the viewLCdetails method in the newly deployed smart contract. It will show you the details of the LC, as shown in the following screenshot:

- Now, let's log back into the app as a buyer. Go back to the app home screen by clicking the GreenGables Bank icon at the top left-hand side.
- In your MetaMask wallet, switch to Account 3, which is the Buyer's account, and reload the app. The Account tag should now reflect the Buyer's address. Click on the Buyer button on the home page to log in. You should be able to see the View LC screen, as follows:

- Click on View Details; you should see the following screen:

- OK. Now, let's log in as the Seller merchant and try to view and settle the LC. Switch to the Seller's account in MetaMask (Account 4), as follows:
- Navigate back to the app screen and reload the app. Log in as Seller and navigate to the View LC screen by clicking on the View LC button, as follows:
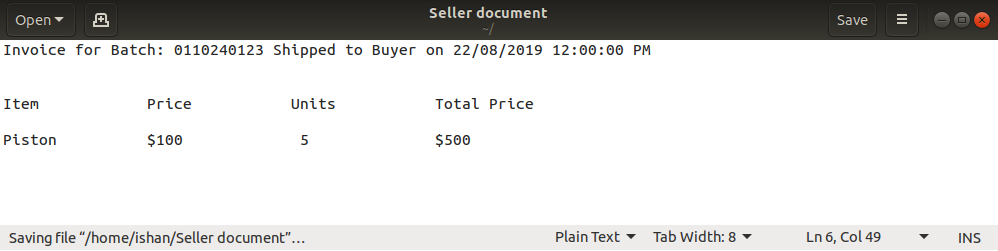
- Now, let's try to settle this LC. Let's create a mock invoice document whose hash we'll be submitting for audit purposes, as follows:
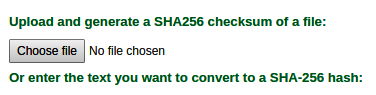
- Save the file. To calculate the hash, you can upload it to an online hash converter and convert the file into a SHA256 or SHA3 hash. Alternatively, you can build a hash connector Node.js utility to upload the file and return its hash.
- Here, I am using an online hash converter to get the SHA256 hash. Now, you will have to upload the file, as follows:
- Browse and select the file, as follows:
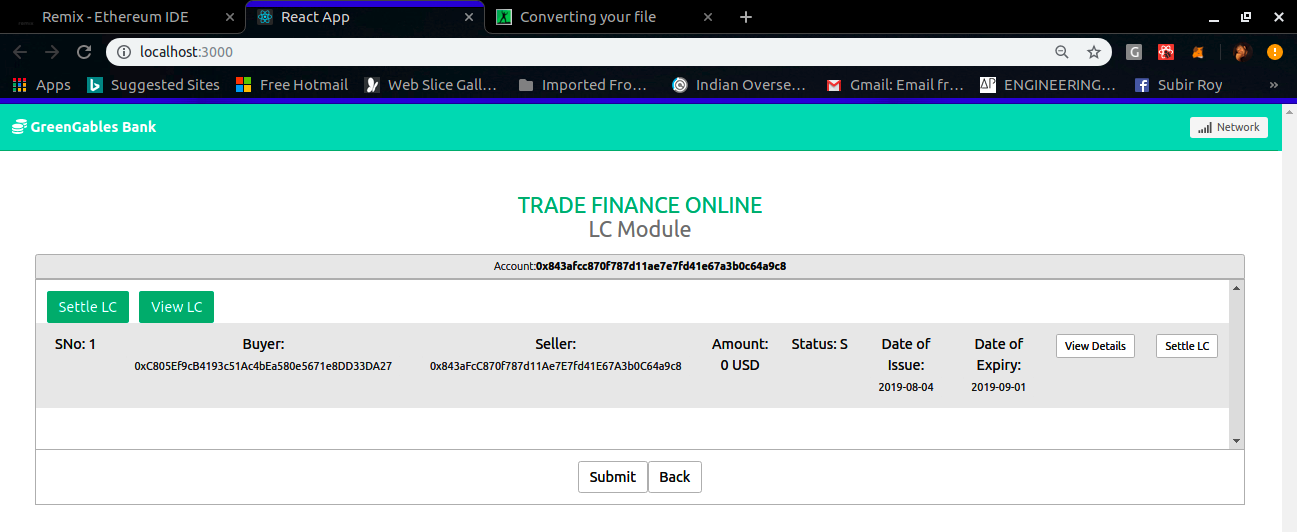
- Click on Convert to get the hex hash representation, as follows:

- Now, go back to the Settle LC screen on our LC app. Click on the Settle LC button next to the LC you want to settle, as follows:
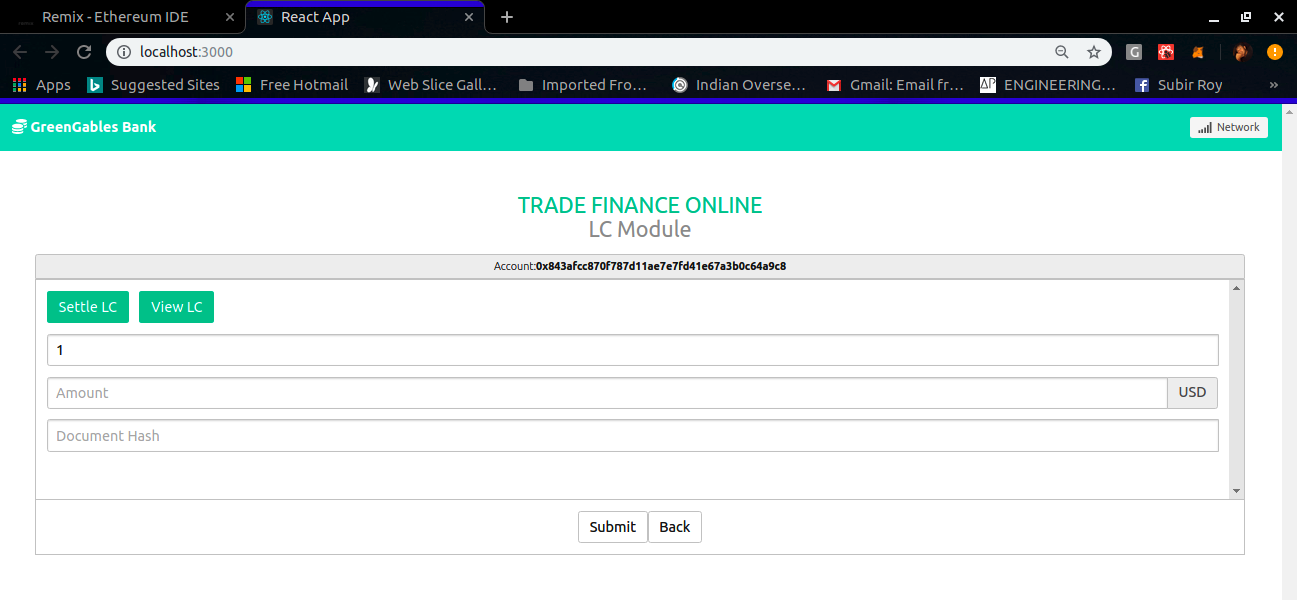
The Settle LC screen should pop up with the LC number populated, as shown in the following screenshot:

Let's try a partial settlement first. Let's raise a settlement claim for $500.
- Put the amount as 500 USD and paste the SHA256 hash we generated. Make sure you add 0x at the front of the hash as Ethereum supports checksum hex, as follows:

- Click on the Submit button to continue. MetaMask will open a window, asking if you want to permit the transaction. Click on Confirm to continue, as follows:

After a successful transaction submission, you'll get a notification in the browser at the top of the screen, as shown in the following screenshot:

- Navigate to the View LC screen. You'll see that the LC status has changed from I to P, indicating partial settlement. The amount available has gone down to 500 USD from 1000 USD, as shown in the following screenshot:

If you click on the View Details button, you should be able to see the initial amount as 1000 USD and the current amount as 500 USD. You should also be able to see the Document hash.
- Now, transfer the rest of the amount. Create a new invoice and document hash. Go to the Settle LC screen and submit a new Settle LC request for 500 USD, as follows:

- Allow MetaMask to submit the transaction by clicking on Confirm. After a successful transaction execution, you should see the LC status change to S and Amount change to 0 USD, as shown in the following screenshot:
With that, we come to the end of our LC life cycle.