Creating a Project Archetype
In Creating Content Using Archetypes, you learned about the default archetype that Hugo automatically includes when you generate a new site. When you created new pages, this archetype acted as a content template, filling in the YAML front matter for you. You can create more specific archetypes for other types of content and include whatever you’d like, including placeholder content.
Create the file archetypes/projects.md and open it in your editor. Add the following to the file, which defines not only front matter, but some placeholder content:
| | --- |
| | title: "{{ replace .Name "-" " " | title }}" |
| | draft: false |
| | --- |
| | |
| |  |
| | |
| | Description... |
| | |
| | ### Tech used |
| | |
| | * item |
| | * item |
| | * item |
The front matter is nearly identical to the content in the default archetype, which uses some Go template functions to generate the page name from the filename. But unlike the default archetype, you’re adding some content to the body. You specified a placeholder image, a placeholder for the description, and a “Tech Used” section where you can list the various pieces of technology you used. Whenever you generate a new project, Hugo uses this file as the basis, and you can use the placeholder text here to quickly fill out your project’s details.
Save the file and try it out. Create a new project page with the hugo new command:
| | $ hugo new projects/awesomeco.md |
| | /Users/brianhogan/portfolio/content/projects/awesomeco.md created |
This generates content/projects/awesomeco.md. The hugo new command creates files in the content directory, and since you prefixed the filename with projects/, Hugo looked for, and found, a projects archetype, which it used to create this file.
When you open the file, you’ll see that Hugo used your new project archetype instead of the default:
| | --- |
| | title: "Awesomeco" |
| | draft: false |
| | --- |
| | |
| |  |
| | |
| | Description... |
| | |
| | ### Tech used |
| | |
| | * item |
| | * item |
| | * item |
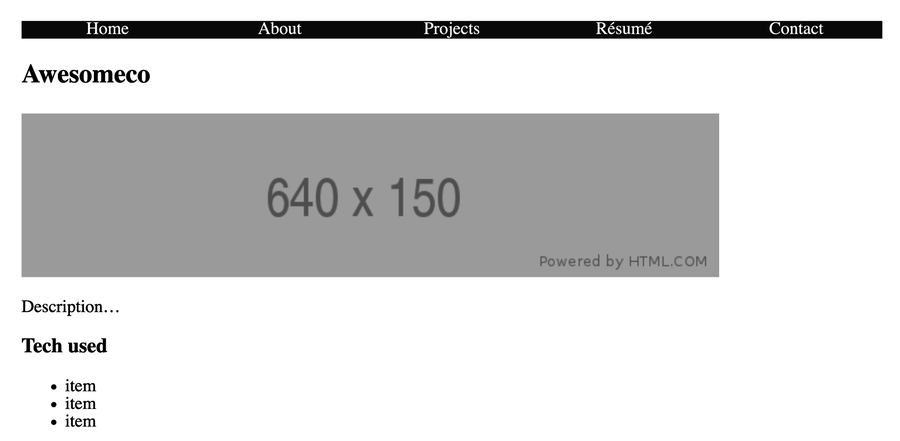
Replace the placeholder text with some details associated with the project. Save the file, start up the development server with hugo server, and visit http://localhost:1313/projects/awesomeco to view the project page as shown in the screenshot.
Stop the server and create another project page with the hugo new command:
| | $ hugo new projects/jabberwocky.md |
This creates the file content/projects/jabberwocky.md. Start up the server again. You’ll find this file at http://localhost:1313/projects/jabberwocky.
No, you don’t. Hugo is usually pretty good at noticing new files. That said, in this book I’m going to prompt you to do so at various times because this ensures you’ll see exactly what you should. It also avoids you having to juggle multiple terminal windows or manage background processes.
You now have a fast way to generate pages that showcase your projects. All you have to do is generate a new page and fill in the details. Archetypes can be fantastic boilerplates that guide you as you create additional content.
Unfortunately, if you visited http://localhost:1313/projects, instead of a list of projects, you won’t see anything at all. That’s because you haven’t defined a layout that displays lists. Let’s do that now.