Creating the Search Interface
Right now, when you visit http://localhost/search in your browser, you see the title. The search.md file you created renders output in both JSON and HTML formats, but you only created a JSON layout. The default single page layout is currently applied, but you didn’t define any content in the search.md file. Let’s get the search form to appear on the page.
Create the file themes/basic/layouts/_default/search.html and add the following code, which defines the main block, displays the title, and defines a text box, button, and area for search results:
| | {{ define "main" }} |
| | |
| | <h2>{{ .Title }}</h2> |
| | |
| | <input type="search" id="searchField"> |
| | <button id="searchButton">Search</button> |
| | |
| | <div id="output"> |
| | <p>Waiting for search input</p> |
| | </div> |
| | {{ end }} |
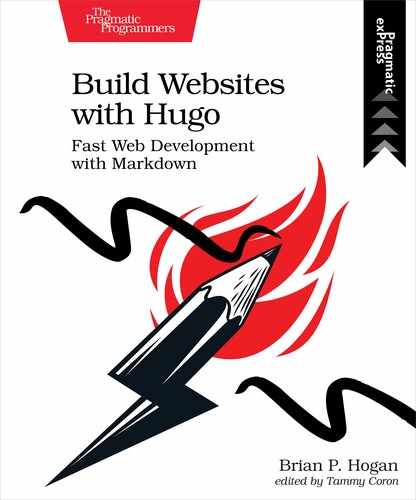
Save the file. Visit http://localhost:1313/search in your browser and you’ll see the form as shown in the screenshot.

At this point, the form doesn’t do anything. To implement the search functionality, you need to write some JavaScript and attach it to this page. You’ll fetch the document collection you just created, use the Lunr library to build a search index from that document collection, and perform a search using the text your visitor submits.
You’ll use the Axios[32] library to fetch remote data. Axios is a promise-based library that makes grabbing remote data a breeze.
To use Lurn and Axios, you need to include them on your page. Open themes/basic/layouts/_default/search.html and, right before the {{ end }} markup, add these two lines to load the Lunr and Axios JavaScript libraries from a Content Delivery Network (CDN):
| | <script src="//unpkg.com/[email protected]/lunr.js"></script> |
| | <script src="//unpkg.com/[email protected]/dist/axios.js"></script> |
Using a CDN saves you the trouble of downloading them locally, and lets you take advantage of the caching mechanisms the CDN provides. In the next chapter, you’ll refactor this to use npm and Webpack to create a bundle that contains these libraries, so you won’t be relying on the CDN. But let’s get the search working first before adding additional complexity.
Create the file themes/basic/static/js/search.js and add an alert statement to the file so you can test that the script loads properly:
| | alert("Search!"); |
Save the file, and then switch back to themes/basic/layouts/_default/search.html and include the search.js file by adding this code after the other script tags:
| | <script src="{{ "js/search.js" | relURL }}"></script> |
Now, visit https://localhost:1313/search and you’ll see an alert box pop up. This demonstrates that your JavaScript is properly linked up.
Switch back to themes/basic/static/js/search.js. Remove the alert line from the file.
Define a global SearchApp object, which will hold some references you’ll need throughout the search script:
| | 'use strict' |
| | window.SearchApp = { |
| | searchField: document.getElementById("searchField"), |
| | searchButton: document.getElementById("searchButton"), |
| | output: document.getElementById("output"), |
| | searchData: {}, |
| | searchIndex: {} |
| | }; |
This stores references to the search field, search button, and the output area. It also defines two other properties: searchData and searchIndex.
You’ll fetch the JSON data from the server and store it in the searchData property. Then you’ll feed that to Lunr, which will build a search index that you’ll store in searchIndex. You’ll need to keep the original JSON data around because when you query the search index, the list of results won’t contain the title and other information in the search index. The results you’ll get contain the hyperlink to the page, along with other data like the relevance and weight. To display the page title, you’ll cross-reference the results you get with the original data.
Use the Axios library to fetch the data from the search page. When you get the results, store them in the searchData property. Then populate the search index with the results from the field:
| | axios |
| | .get('/search/index.json') |
| | .then(response => { |
| | SearchApp.searchData = response.data; |
| | SearchApp.searchIndex = lunr(function () { |
| | this.ref('href'); |
| | this.field('title'); |
| | this.field('body'); |
| | response.data.results.forEach(e => { |
| | this.add(e); |
| | }); |
| | }); |
| | }); |
Lunr uses the data from the title and the body to build the search index. When you perform a search, Lunr will compare the search terms with the words in its index and generate results.
Next, add an event listener to the search button which calls a search function, and then implement the function which uses Lunr to perform the search:
| | SearchApp.searchButton.addEventListener('click', search); |
| | |
| | function search() { |
| | let searchText = SearchApp.searchField.value; |
| | |
| | |
| | let resultList = SearchApp.searchIndex.search(searchText); |
| | |
| | let list = []; |
| | let results = resultList.map(entry => { |
| | SearchApp.searchData.results.filter(d => { |
| | if(entry.ref == d.href) { |
| | list.push(d); |
| | } |
| | }) |
| | }); |
| | |
| | display(list); |
| | |
| | } |
Lunr gives you results, but the results only contain a score and a hyperlink. To get results you can display, search through the JSON data you pulled from the server and match on the URLs. Then call the display function to display the results you found.
Finally, write the display function, which iterates over the results and displays them:
| | function display(list) { |
| | |
| | SearchApp.output.innerText = ''; |
| | if (list.length > 0) { |
| | const ul = document.createElement("ul"); |
| | list.forEach(el => { |
| | const li = document.createElement("li"); |
| | const a = document.createElement("a"); |
| | a.href = el.href; |
| | a.text = el.title; |
| | li.appendChild(a); |
| | ul.appendChild(li); |
| | }); |
| | |
| | SearchApp.output.appendChild(ul); |
| | }else{ |
| | SearchApp.output.innerHTML = "Nothing found"; |
| | } |
| | |
| | }; |
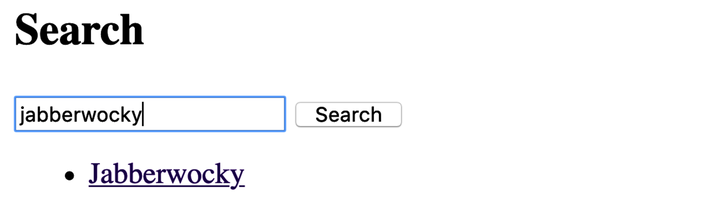
Take the search out for a spin. This current implementation only finds whole words, so search for “Jabberwocky” and you’ll see the link to that project appear in the results.
Let’s tweak the search to make it a little more useful.