
Chapter 11: Building a Color-Sorter Conveyor Belt
With the introduction of the Industrial Revolution 4.0, most industries are now turning toward automation for their production. Huge assembly lines are deployed, and multiple robots are lined up around these assembly lines to do various tasks one after another, automatically. A whole car body is prepared automatically with the help of robots today! Just as we need robots for such processes, we also need robots for sorting various things, ranging from faulty products to different products, into different trays. In this chapter, you will be building one such assembly line that sorts different-colored LEGO bricks into different trays.
You can see an example representation of an assembly line here:
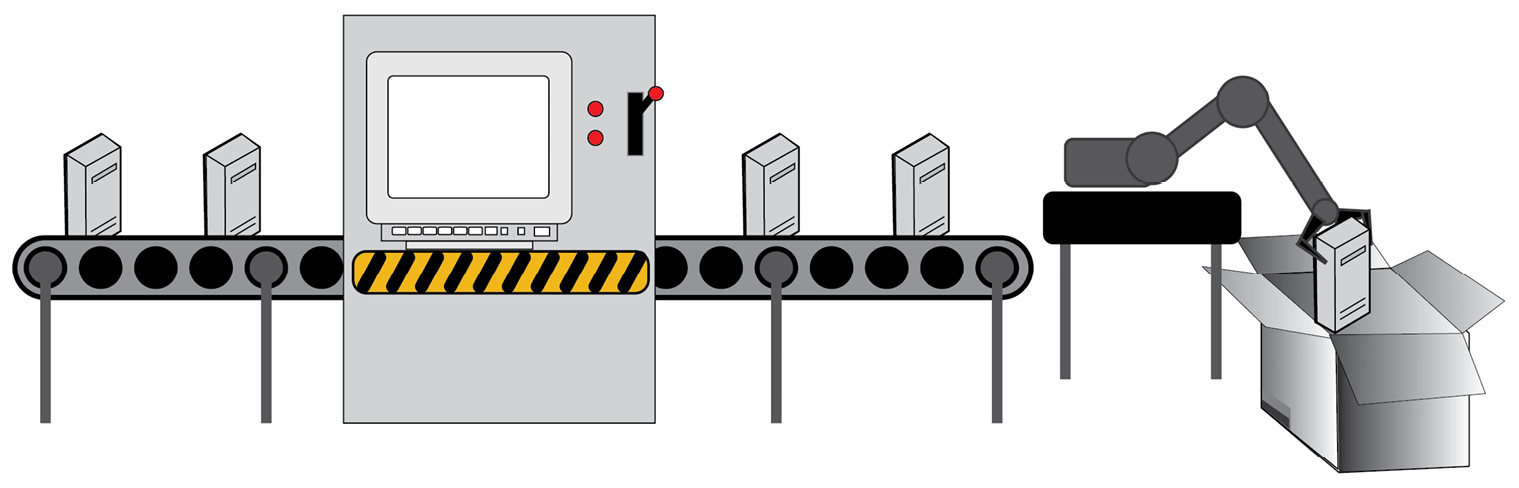
Figure 11.1 – Assembly-line representation
In this chapter, you will do the following:
- Building a color-sorter conveyor belt
- Let's code the robot to sort different colored LEGO bricks
- Time for a challenge
Technical requirements
In this chapter, you will need the following:
- LEGO BOOST kit with six AAA batteries, fully charged
- Laptop/desktop with Scratch 3.0 programming installed and an active internet connection
- A diary/notebook with a pencil and eraser
Building a color-sorter conveyor belt robot
Let's build a robot like the one shown in the following figure:

Figure 11.2
Follow these given instructions to build the robot:
- Take your BOOST Hub and ensure that the batteries are fully charged. The Hub is illustrated in the following figure:
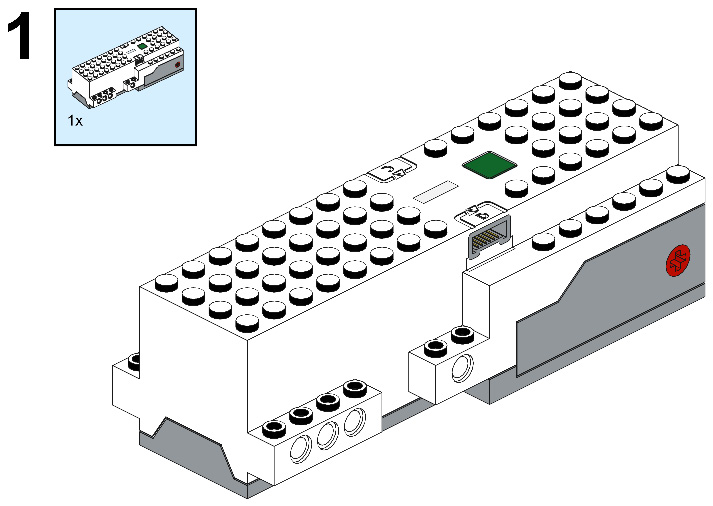
Figure 11.3
- Take four 1x6 bricks and connect them to the back side of the BOOST Hub, as follows:
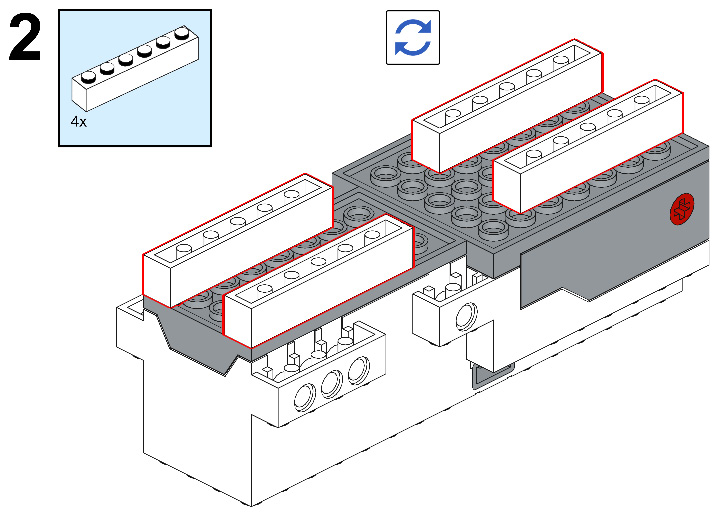
Figure 11.4
- Take four 1x3 bricks and connect them to all four 1x6 bricks, then take one 4x6 brick and place it so that it will connect to all four 1x6 bricks, as shown here:

Figure 11.5
- Now, take two 6x10 plates and connect them to two 1x3 bricks and the 4x6 brick, as shown here:
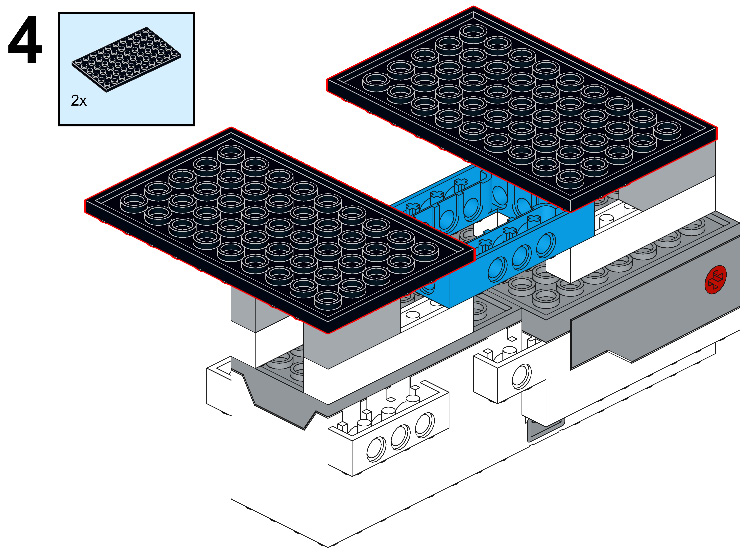
Figure 11.6
- Now, turn the model frontside, take two 2x4 bricks, and place them on the BOOST Hub, as follows:
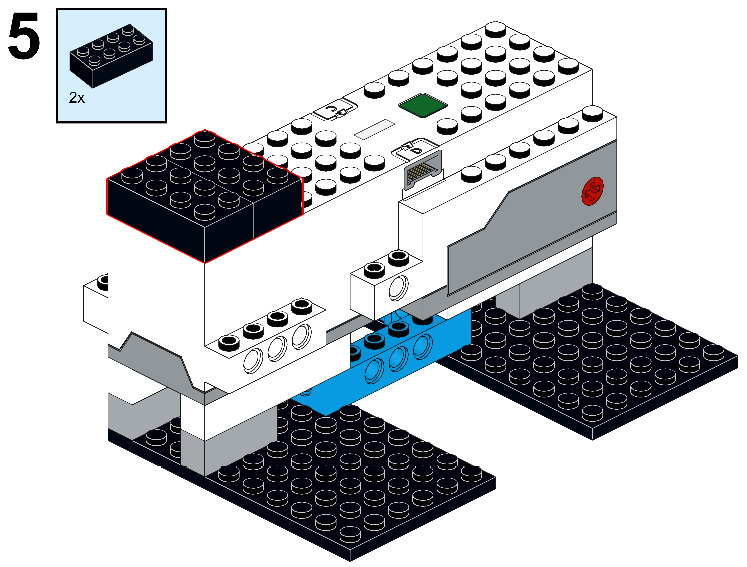
Figure 11.7
- Take three 3M connector pegs with friction and connect them to the BOOST Hub, as shown here:

Figure 11.8
- Then, take two 1x10 bricks and connect one of them to two pegs and another one to a single peg, as shown here:
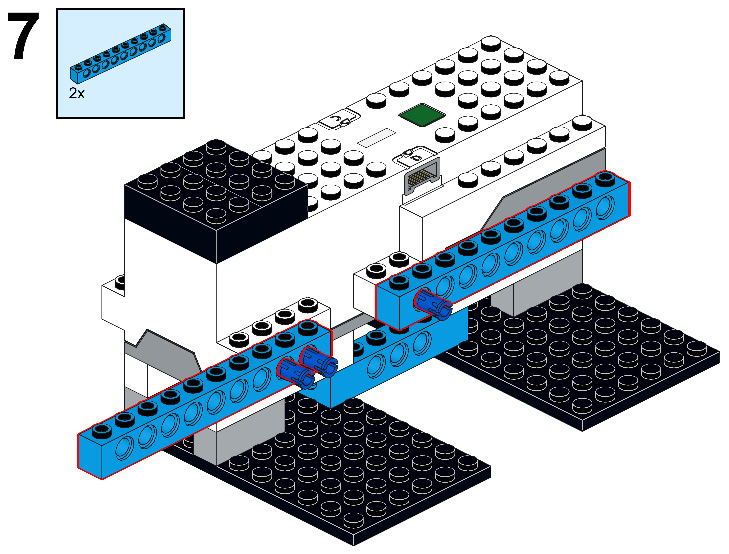
Figure 11.9
- Now, take one 1x6 plate and one 1x8 brick and connect this brick to the plate, so that half of the plate will be covered. This is illustrated here:
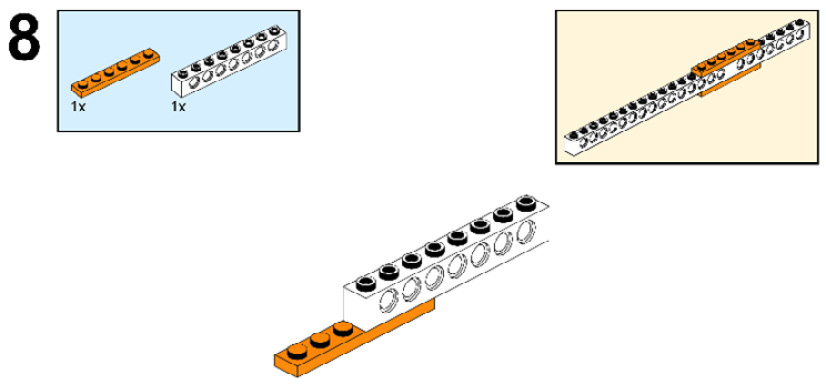
Figure 11.10
- Take one 1x16 brick and connect it to the 1x6 orange plate, where you just connected the 1x8 brick. Now, take one 1x6 plate and connect it to the top of these two bricks, as shown in the following figure. This will hold the bricks firmly. Again, take one 1x6 plate and connect it to both the bricks:

Figure 11.11
- Then, connect this structure to the 3M connector pegs, as shown here:
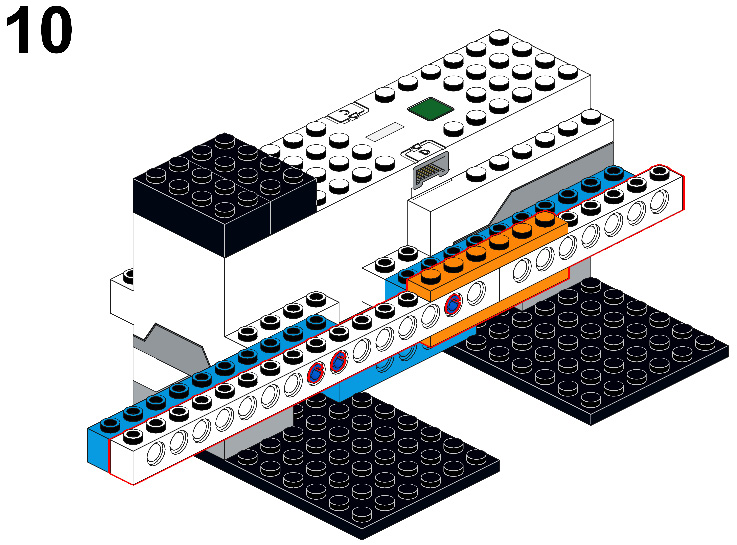
Figure 11.12
- Take two 7M cross axles and connect them to the brick. Then, take one bush and connect it to stop one of those axles. The result should look like this:

Figure 11.13
- Now, take two sprockets and connect them to both the axles. Then, take one 4x4 plate and connect it to the 6x10 plate, as shown here:

Figure 11.14
- Take 10 track elements and connect them all, as shown here:
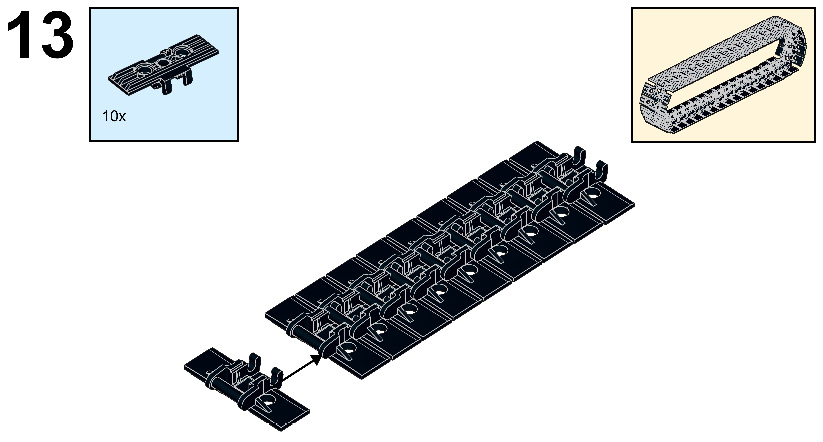
Figure 11.15 –
- Take 30 such track elements and connect them with each other. Once done, connect this track with the track you built in the previous step. We will now get a conveyor belt as per our requirement, as follows:

Figure 11.16
- Now, connect this round-shaped track with those two sprockets. Then, take one 2x4 plate and connect it under the 4x4 plate, as follows:
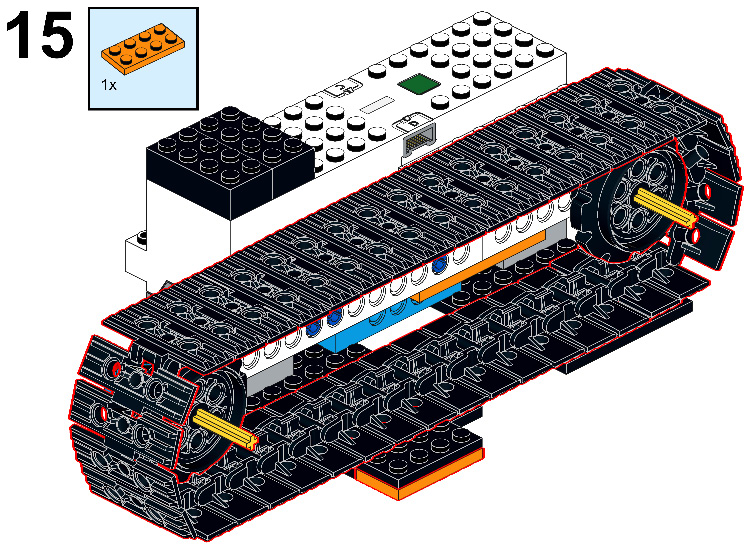
Figure 11.17 –
- Now, take one 1x6 plate and one 1x8 brick and connect this brick to the plate that we have used (so that half of the plate will be covered). This is illustrated here:
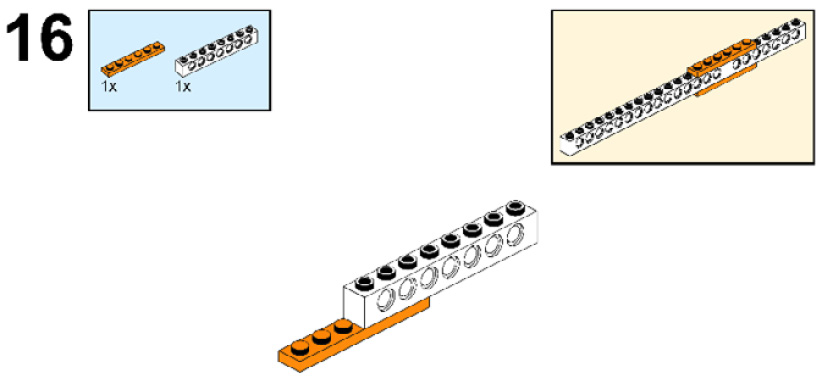
Figure 11.18
- Then, take one 1x16 brick and connect it to the remaining half of the plate. Again, take one 1x6 plate and connect it to both the bricks, as follows:
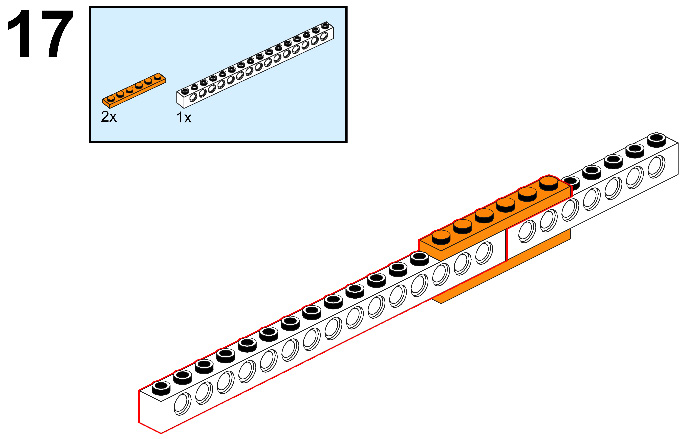
Figure 11.19
- Now, connect this structure to both the axles, as follows:

Figure 11.20
- Take two bushes and connect them to both the axles, then take two 1x2/2x2 angular plates and connect them to the 4x4 plate, as shown here:
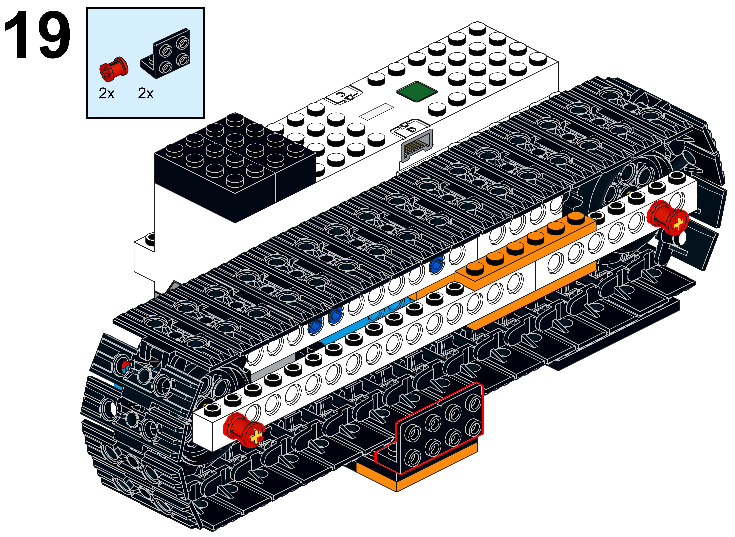
Figure 11.21
- Then, take two 2x8 plates and connect them to the angular plates, as follows:
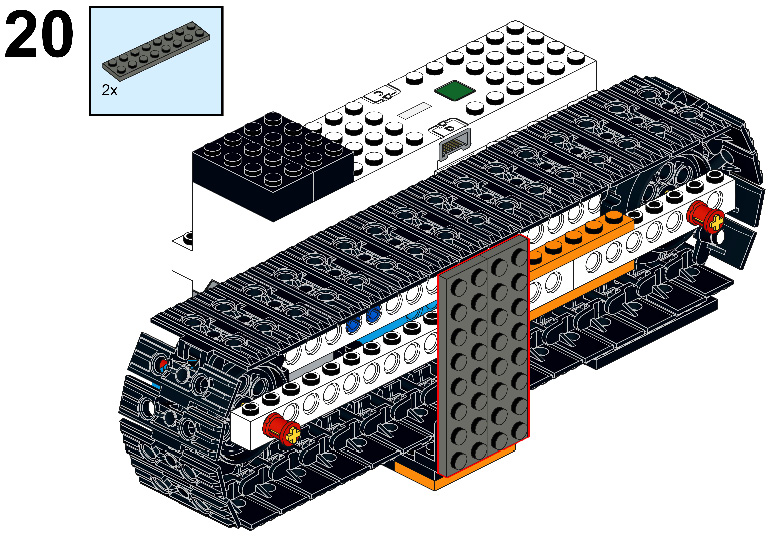
Figure 11.22
- Take two 1x2/2x2 angular plates and connect them to both the 2x8 plates, as shown here:
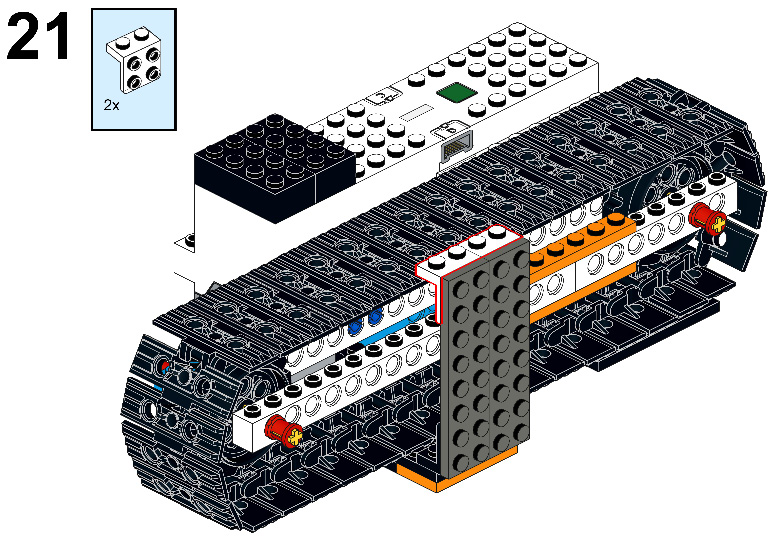
Figure 11.23
- Then, take two 2x12 plates and connect them to the 2x4 bricks and angular plates, as follows:
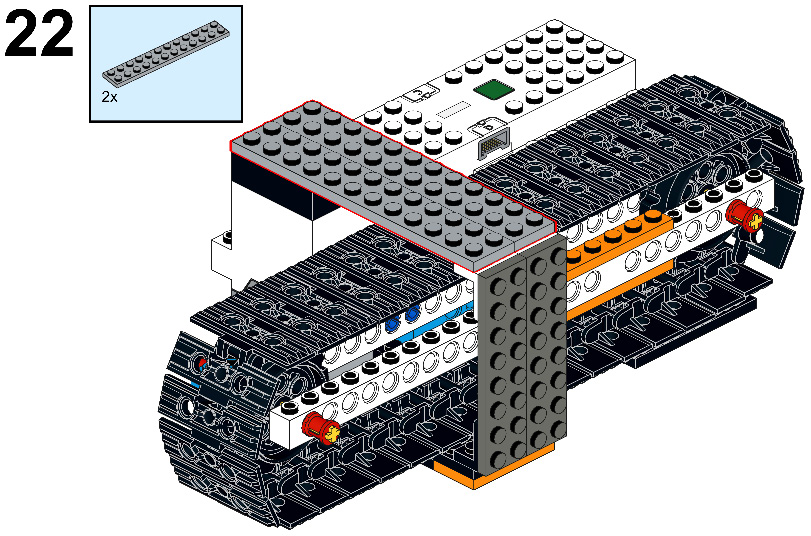
Figure 11.24
- Take two 4x6 bricks and connect them to the 2x12 plates. Then, take two 1x4 plates and connect them, as shown here:
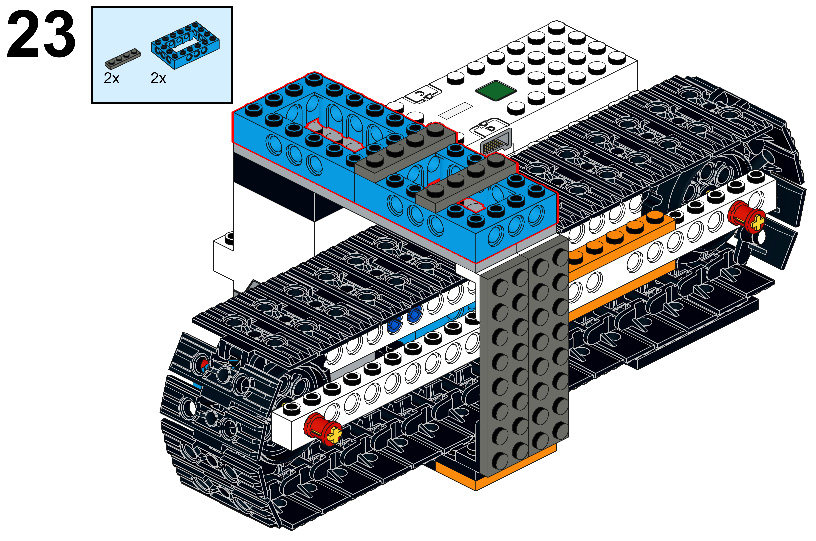
Figure 11.25
- Take one 5M beam and three 3M connector pegs and connect all of them to the 5M beam (two with the first two holes and one with the fourth hole of the beam), as follows:
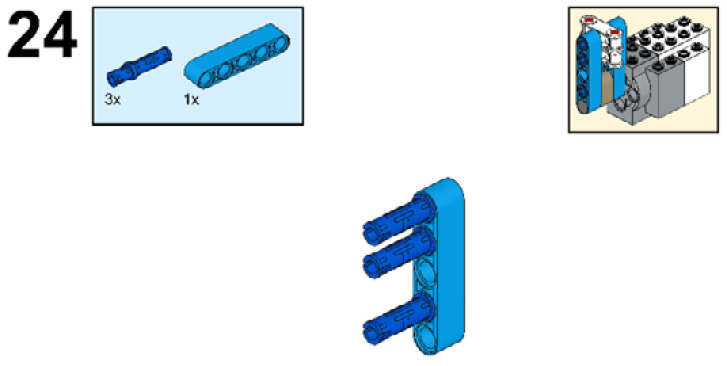
Figure 11.26
- Take two double-cross blocks and connect them to the first two 3M pegs, then take one 4M stop axle followed by one 1x2 beam with a cross and hole, connect the axle to the last hole of the 5M beam, and connect the 1x2 beam to the cross and hole, connecting it with the remaining 3M peg and axle. The process is illustrated here:

Figure 11.27
- Again, take one 5M beam and connect it as shown, then take two 2M axles and connect them to both the cross-hole blocks, as shown here:
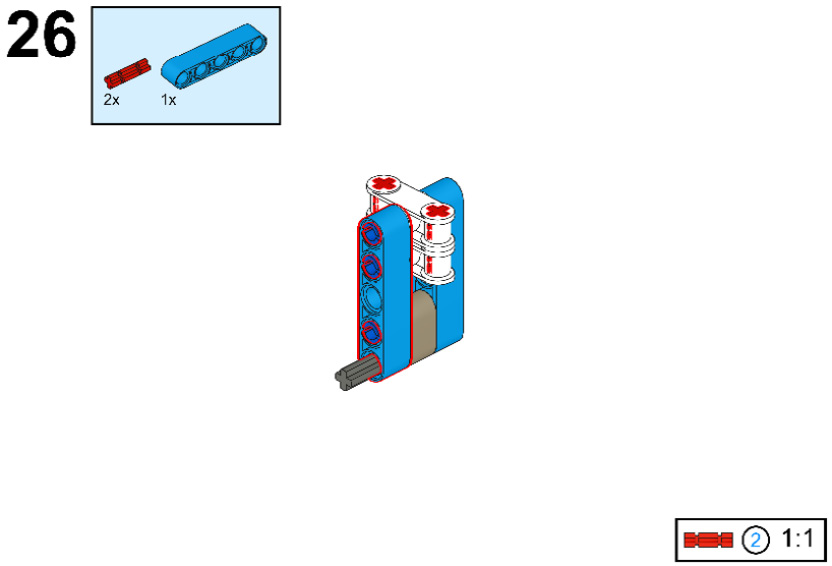
Figure 11.28
- Now, take an external motor from your BOOST kit and connect the axle of the model to it, as follows:
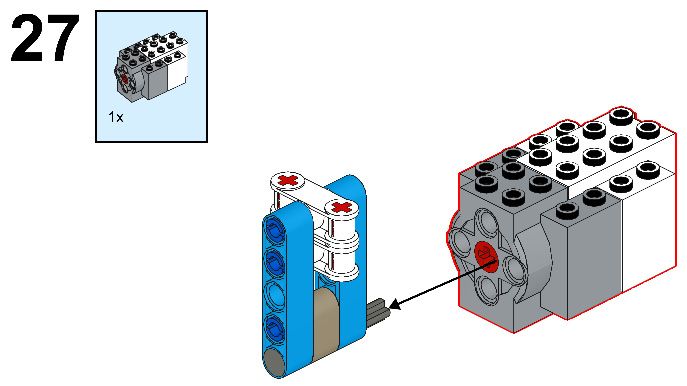
Figure 11.29
- Now, place the motor on the 1x4 plates, as follows:
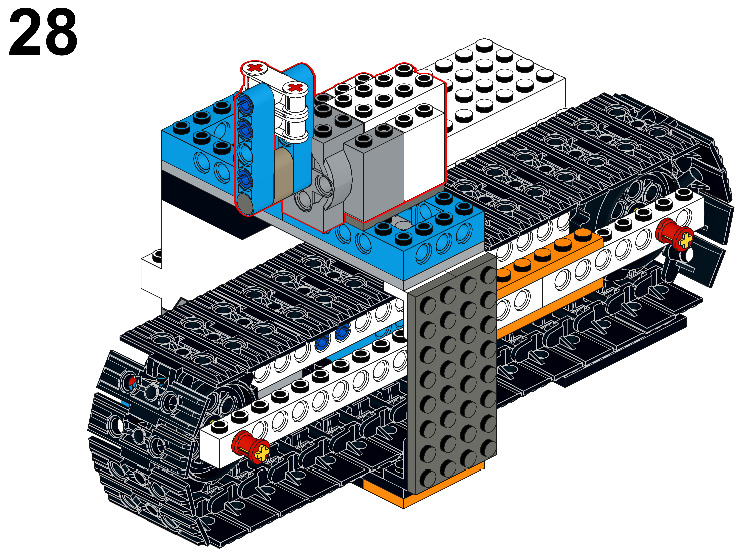
Figure 11.30
- Take one 1x2 plate and one 1x2 1/2 angular plate, then connect them to each other, as shown here:
Figure 11.31
- Take a color sensor from your LEGO BOOST kit and connect this to the orange-colored angular plate, as shown here:
Figure 11.32
- Now, connect this structure to the motor using the angular beam, as shown here:
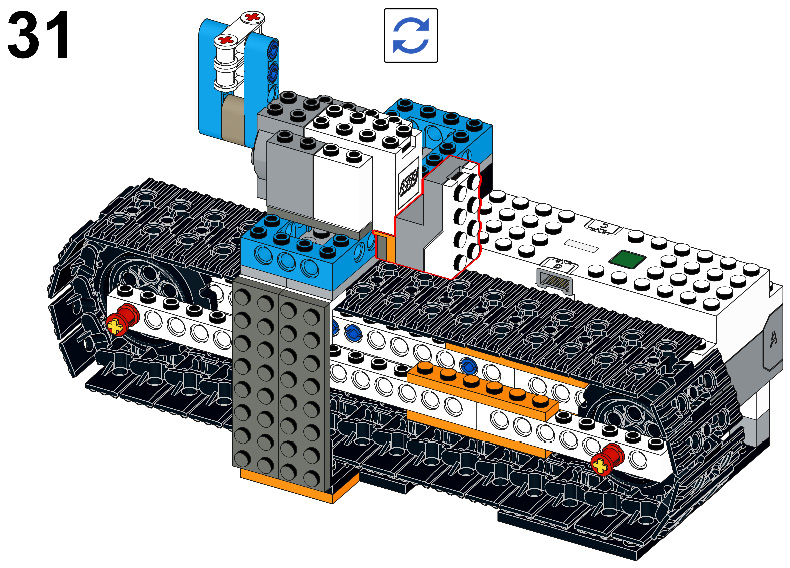
Figure 11.33
- Now, let's make a bowl to collect the separated boxes. For that, first take one wheel and one brick with a cross and connect it to the hole of the wheel, as follows:
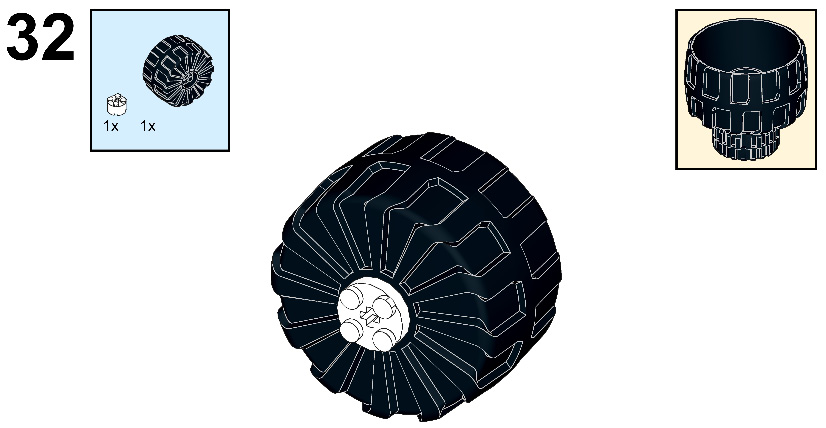
Figure 11.34
- Then, take one 3M cross axle and connect it to the brick with a cross, as follows:
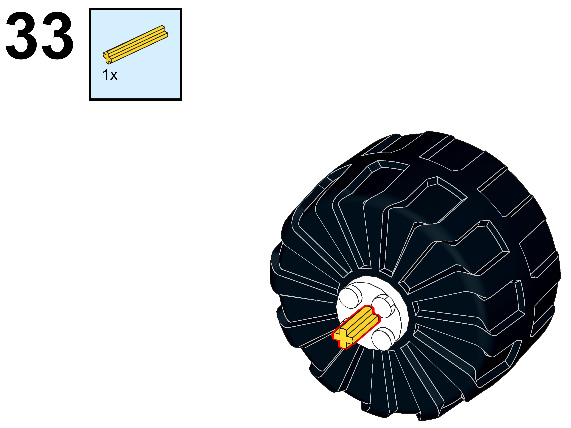
Figure 11.35
- Then, take one normal tire and a rim wide with a cross, connect them to each other, and then connect them to the 3M axle, as follows:

Figure 11.36
- Now, place this bowl beside the circular track to collect the boxes, as follows:
Figure 11.37
- Now, make one more bowl by following the same steps shown previously. Your bowl should look like this:
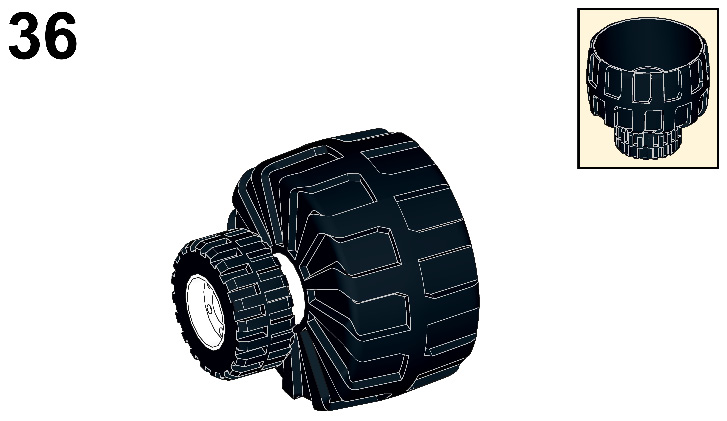
Figure 11.38
- Place this second bowl on the other side of the circular track, as illustrated here:

Figure 11.39
- Now, we are going to make one more bowl to collect the boxes. For that, let's start by taking a 4x4 round-shaped plate and one 2x2 round brick with a hole and connect them, as shown here:

Figure 11.40
- Take one more 4x4 round-shaped plate and connect it to the 2x2 round brick with a hole, as follows:
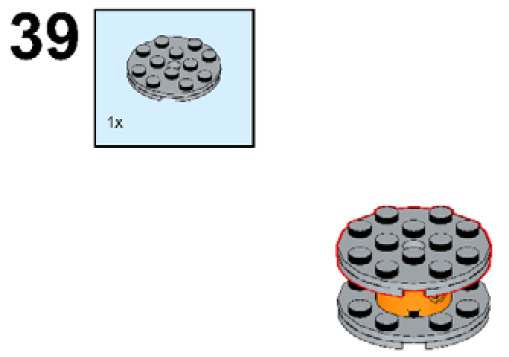
Figure 11.41
- Now, take two 4x6 bricks and connect them to the 4x4 round-shaped plate, as shown here:

Figure 11.42
- Then, take eight 1x2x2/3 roof tiles and connect them to the 4x6 brick, as shown here:
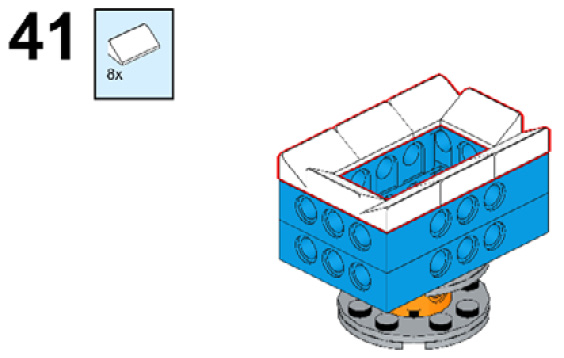
Figure 11.43
- Now, place this front tray (made of blue LEGO bricks) as shown in the following figure:

Figure 11.44
Now, let's make colorful boxes to sort in different buckets.
- Let's start by making a green box. For that, take two 2x2 bricks and place them side by side, as follows:
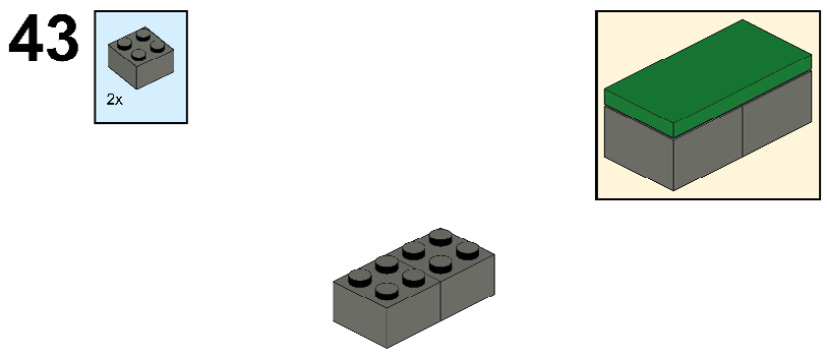
Figure 11.45
- Then, take a green flat tile and place it on both the bricks, as follows:
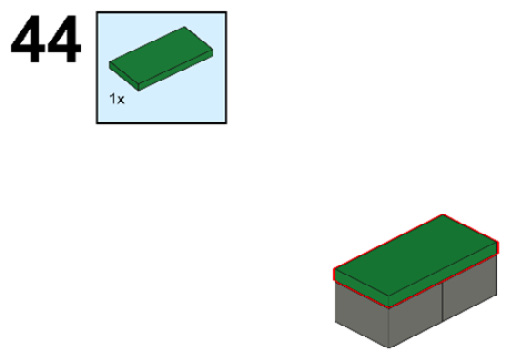
Figure 11.46
- For the blue box, again take two 2x2 bricks and place them back to back, as follows:
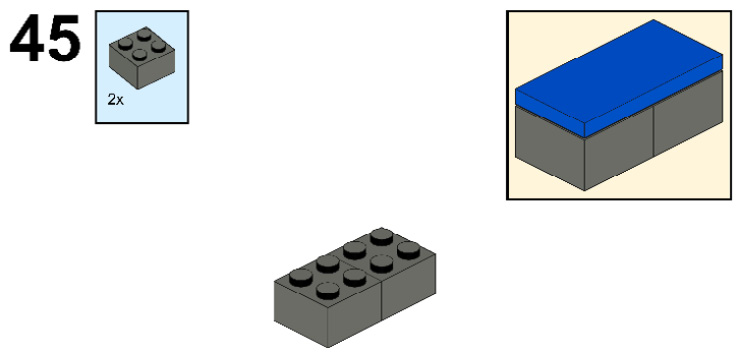
Figure 11.47
- Take a 2x4 blue-colored flat tile and place it on both the bricks, as follows:
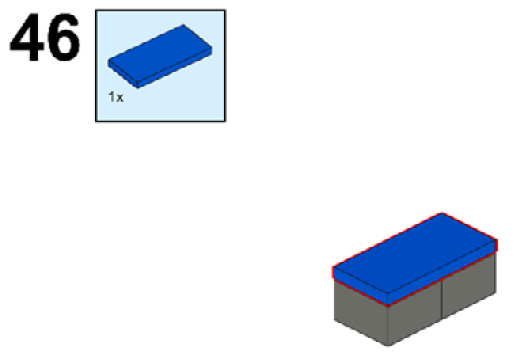
Figure 11.48
- Now, for the red box, take one 2x4 red-colored brick and one 2x4 red flat tile and connect them to each other, as follows:
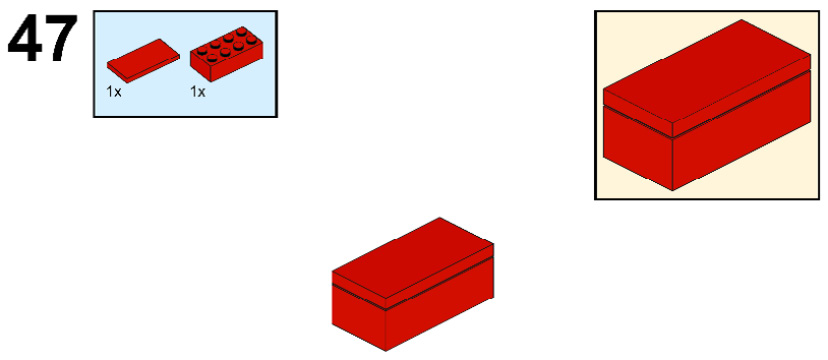
Figure 11.49
And you are now done with your color sorter!
Check if your model is working fine and that the connections are sturdy as depicted in the figure:

Figure 11.50
Well done! Let's now switch to the coding section and solve various tasks.
Let's code the robot to sort different colored LEGO bricks
Let's now sort the LEGO bricks with this color sorting robot. First, find out the number of rotations needed by the external motor to do the following:
- Knock LEGO brick to the left tray:______________ rotations.
- Knock LEGO brick to the right tray:_____________ rotations.
- Allow LEGO brick to pass through at the blue tray:_____________ rotations.
Ensure that the hitter comes back to the original position after knocking the LEGO brick. The hitter is connected to port C and the conveyor belt is connected to port A.
Activity #1
Place a red LEGO brick on the belt. Now, move the belt until the color sensor senses this brick. Display the brick color on the screen. Now, move it further until it reaches a proper knocking position. Knock it to the left tray.
The sample code for this task is given here:

Figure 11.51 – Sample code
Let's repeat the same process for the other colors as well.
Activity #2
Place a blue LEGO brick on the belt. Now, move the belt until the color sensor senses this brick. Display the brick color on the screen. Now, move it further until it reaches a proper knocking position. Knock it to the right tray.
Activity #3
Place a green LEGO brick on the belt. Now, move the belt until the color sensor senses this brick. Display the brick color on the screen. Now, move it further until it reaches a proper knocking position. Let it pass through and drop down in the front tray (made with blue LEGO bricks).
Activity #4
Now, let's just take two bricks—red and blue. Let's now code the sorter to do the following:
- Display Red brick detected when red is detected and Blue brick detected when blue is detected.
- Knock the red brick to the left tray and the blue brick to the right tray.
- If the brick is neither red nor blue, display Wrong brick on the belt! Pls check" as in the following screenshot.
Both these things must work continuously, regardless of the order in which you place the bricks on the belt. Make use of the if else block wisely. Repeat this task five times.
Here is some sample code to show how to do this:
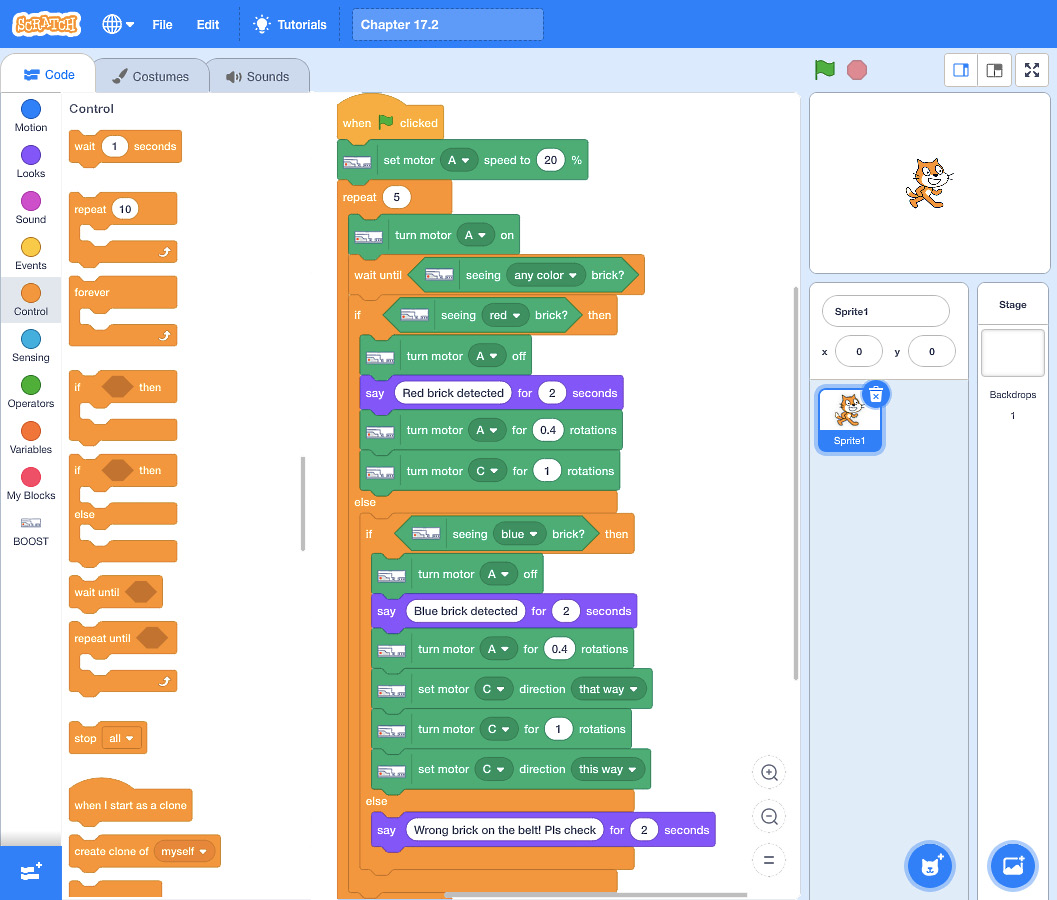
Figure 11.52 – Sample code
You must place the LEGO bricks one after the other on the belt. The second brick must be placed on the belt only when the first brick is sorted and knocked down by the hitter to its respective tray. One important point to note is that the number of rotations for the belt may vary slightly, to transfer the brick from its color sensor stop position to a knocking position. Find this out yourself and input the correct value. Let's now move on to the challenge section.
Time for a challenge
Challenge #1
Just as with Activity #4, can you add a green brick and do the respective programming as follows?
- Red brick to be knocked to the left tray
- Blue brick to be knocked to the right tray
- Green brick to be knocked to the front tray (made with blue LEGO bricks)
You must display on the screen the respective color name that is sensed by the sensor. The program must be such that no matter the order in which you place the bricks on the belt, it should be able to sort them out. Make sure to place one brick after another.
Summary
In this chapter, you learned about the practical application of color sorters in an industrial setting. You learned how to use if-else conditions effectively and repetitively. You were able to program your robot to make decisions from the multiple conditions it was offered. In the next chapter, you will be building a racing car with an internal steering system that will conquer various racetracks at different speeds and of different complexities.
Further reading
Here are some interesting topics that can be explored:
- See how robotic arms, sorting robots, and other robots build up a smart warehouse/factory at https://www.youtube.com/watch?v=IMPbKVb8y8s&ab_channel=TechVision.
- Sorting robots are extensively used in logistics industries, whereby robots scan the barcode on a parcel and sort them based on the cities/pin codes for dispatch. You can see more about this here: https://www.youtube.com/watch?v=ezym16z1NPg&ab_channel=TheRobotReport.