
Next, we can move on to populating the equipment screen. To do this, we first need to create a weapon button similar to the item button that we created previously. This weapon button will house all the logic that will be performed when the user presses the weapon button. Since the weapon button will be similar to the item button in a lot of ways, we can duplicate the item button and modify it to fit the weapon parameters. So, go to the Item Widget Blueprint by navigating to Content Browser | Blueprints | UI, and duplicate the Item Widget Blueprint:
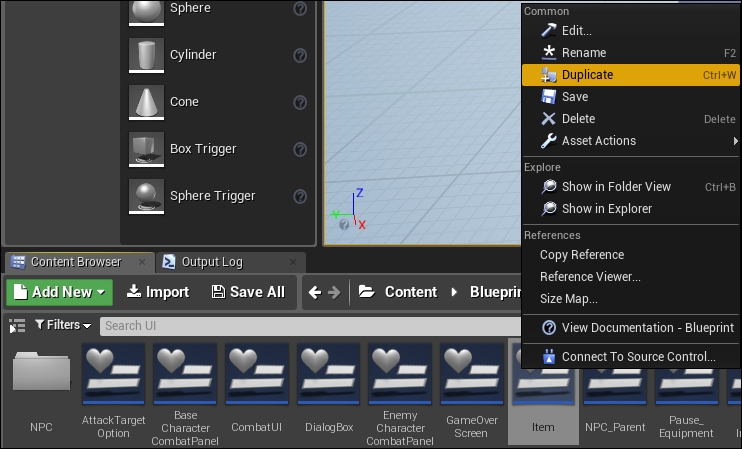
Then, rename it Weapon, as shown in the following screenshot:

We can now open the Weapon Widget Blueprint and navigate to the Event Graph. Here, you will see an exact copy of the Item Widget Blueprint logic, and since the logic for equipping weapons will be similar to using items, we can just modify the Event Graph to fit it with what we want to happen when the user presses the weapon button.
First, we need to edit the section where the OnClicked event is located. We want the OnClicked event to find the equipmentScreen Boolean and check whether it is true, so we can remove the check for the inventoryScreen Boolean and replace it with the equipmentScreen Boolean:

If the equipmentScreen Boolean returns false, the false branch will do nothing, and so we need to delete all of the false branch logic:

If the branch returns true, then we will set the Get Data Table Row Weapons function to get the Weapons Data Table:

Then, from Break ItemsData, set it to break the data ATK stat, and set the ATK stat of the character accordingly:

For now, the OnClicked event in your Weapon Event Graph will look like this:

Also, make sure that you are still setting the Party Members stats to the Character Target variable; otherwise, the base stats of the characters will not carry over correctly:
