
3.3 The Quick Control screen for Scene Intelligent Auto mode.
Chapter 3: Working with Exposure
Photography is all about exposures. Exposures can be creative — both deliberately and, other times, accidentally. In challenging light, it sometimes takes multiple exposures to capture the full range of detail. In short, there are all kinds of exposures. However, one thing is certain: Next to image content, exposure is at the top of the list of the things you want to get right. With the Canon EOS 6D, you have all the technical and creative control you need to get exposures right — in the camera.
This chapter concentrates on exposure, and takes a workflow-oriented approach. First, I discuss the in-camera goals for exposures. Next, I detail exposure modes and other exposure controls using the camera’s onboard metering system, as well as how to evaluate and modify exposures when necessary. Finally, I address multiple exposure and High Dynamic Range (HDR) modes, and look at the 6D’s drive modes.

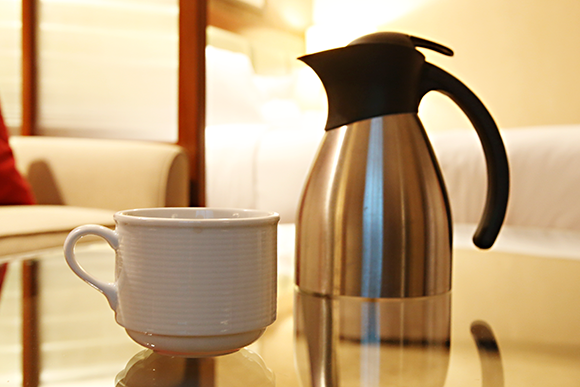
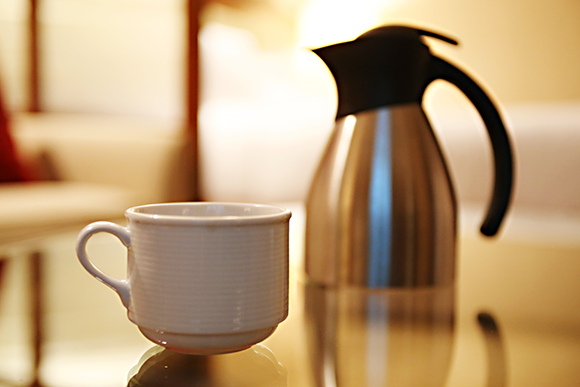
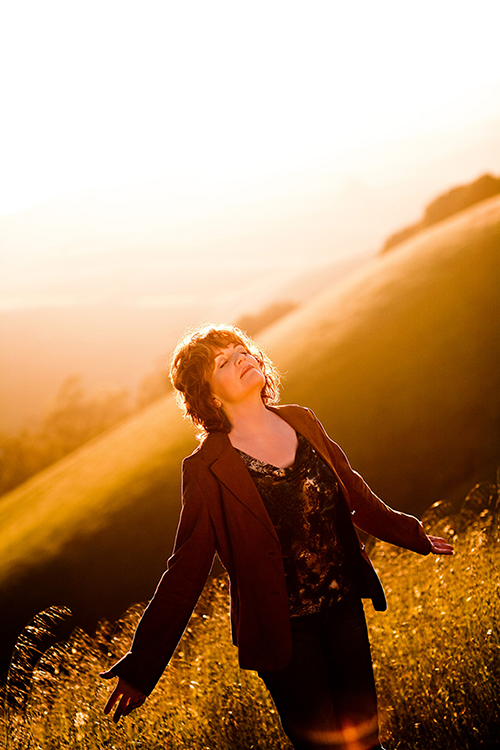
The 6D gives you full control for making excellent exposures. Exposure: ISO 100, f/2.5, 1/60 second in Manual Exposure mode with a Canon 28-70mm, f/2.8L USM.
Setting Exposure Objectives
As a photographer, my goal is to get the exposure right in the camera with every shot. I emphasize this because many photographers look at their images on the LCD monitor, and then say that they’ll fix it in Adobe Photoshop. Sure, many photos can be polished with image editing, but seasoned photographers know that no amount of Photoshop editing can rival the beauty of a spot-on in-camera exposure. In short, getting the best possible in-camera exposure should never take a backseat to image editing.
However, what is a good exposure, and what are the best ways to balance exposure goals with practical challenges?
Defining exposure goals
The definition of a good exposure has two components: the aesthetic component and the technical component. Aesthetically, a good exposure captures and expresses the scene as the photographer saw and envisioned it. Technically, a good exposure maintains image detail through the bright highlights (or the most important subject highlights) and in the shadows. It also displays a full, rich tonal range with smooth transitions and pleasing contrast. In addition, of course, the image must have sharp focus.
Getting good, and even great, exposures is often challenging, but the fundamental and abiding goal is to capture the best exposure possible given the dynamics of the light, the subject, and the gear.
Practical exposure considerations
Should every exposure meet all the technical criteria of an excellent exposure? Not necessarily. Ideally, the exposure serves the purpose of realizing the photographer’s creative vision. Sometimes, the exposure is manipulated to flatter the subject. A classic example of an intentionally imperfect exposure is a photographer who overexposes a portrait of a mature woman to minimize facial lines and wrinkles. Another example of an imperfect-but-acceptable exposure is a photo where the range from highlight to shadow is so great that you can properly expose only the most important part of the scene in a single frame. Silhouettes also come to mind. Of course, HDR imaging can be used in some of those scenes, and the 6D offers HDR shooting in the camera. However, HDR imaging isn’t an option at concerts, plays, and other events where subjects are on the move, so the practical consideration is to get a good exposure on the subject and let the rest of the scene fall where it may.
Other practical exposure considerations include exposing images differently depending on whether you’re shooting RAW or JPEG images and balancing ISO and shutter speed to control digital noise. In short, practical exposure considerations have a significant influence on everyday shooting. The trick is to combine your technical knowledge with the 6D’s capabilities to get exposures that meet your creative vision for the image.

3.1 Purposely metering for a correct exposure of the background causes the foreground to become underexposed, resulting in a creative silhouette effect. Exposure: ISO 320, f/3.2, 1/8000 second with a Canon 50mm, f/1.2L USM.
Exposure Basics
Technically, exposure is a mathematical expression that takes the light in the scene, and based on the ISO, determines the aperture and shutter speed combination that will expose the subject properly. The ISO setting you choose determines the sensitivity of the camera sensor to the light reaching it. In addition, for any one exposure, there are additional exposure settings that produce an equivalent exposure — a different combination of aperture and shutter speed that provide the same amount of light to the sensor. For example, if the camera’s suggested exposure is f/5.6 at 1/60 second at a given ISO setting, other equivalent aperture and shutter speed combinations provide the same exposure. In this example, two equivalent exposures at the same ISO are f/4 at 1/125 second and f/8 at 1/30 second.
While the exposures are equivalent, the images will look different because the depth of field changes, as illustrated in the following figures. Both images were shot at ISO 100 using the EF 100mm, f/2.8 Macro USM lens.
In the first image, the exposure is f/7.1 at 1/10 second. The depth of field is more extensive than what I wanted for this subject. In the second image, the equivalent exposure is f/4.5 at 1/25 second, and the depth of field is shallow, which is more in keeping with my vision for this image.
Of course, when you change one exposure element, such as the aperture or shutter speed, it either doubles or halves the light reaching the image sensor or, in the case of ISO, the sensor’s sensitivity to light. For example, changing the aperture from f/8 to f/5.6 doubles the amount of light reaching the sensor, while a change from f/5.6 to f/8 halves the amount of light. Given the same ISO sensitivity setting, a change in aperture requires a concurrent and proportional change in shutter speed to achieve a proper exposure.
Choosing an Exposure Mode
When you set up your camera for a shoot, one of the first adjustments is choosing the exposure mode. You select an exposure mode based on other camera settings you’ll make, including the drive and autofocus modes. Therefore, I’ll discuss exposure modes first.
The 6D offers the traditional modes that range from giving you full manual to partial control over the exposure, and, of course, there is the fully automatic exposure mode. Exposure modes on the 6D are broken into two sections on the camera’s Mode dial: a Basic Zone and a Creative Zone with two optional Custom shooting modes. Basic Zone exposure modes include Scene Intelligent Auto ( ![]() ), Creative Auto (
), Creative Auto ( ![]() ), and Special scene (
), and Special scene ( ![]() ) modes. Creative Zone exposure modes include Program AE (Auto Exposure) (
) modes. Creative Zone exposure modes include Program AE (Auto Exposure) ( ![]() ), Shutter-priority AE (
), Shutter-priority AE ( ![]() ), Aperture-priority AE (
), Aperture-priority AE ( ![]() ), Manual (
), Manual ( ![]() ), Bulb (
), Bulb ( ![]() ), and two Custom shooting modes (
), and two Custom shooting modes ( ![]() ) and (
) and ( ![]() ).
).

3.2 The Mode dial is broken into two Zones (the Basic and Creative), and two optional Custom shooting modes.
The next sections detail the exposure modes and the control they give you. To set any of the exposure modes, just press the locking button on the Mode dial, and then turn the dial to line up the mode you want with the white mark on the side of the camera.
Basic Zone exposure modes
You want to use the Basic Zone exposure modes on the Mode dial for automatic, set it, and forget it shooting. Some photographers use Basic Zone exposure modes often and some photographers never use them. They provide a good option for quick snapshots in informal situations. However, I rarely use these modes even in those situations, because I want control over all aspects of exposure and focus. However, others rely on these modes frequently. Here’s a look at what the camera sets automatically and what you can adjust manually when using Basic Zone exposure modes.
Scene Intelligent Auto mode
This is the first exposure mode in the Basic Zone and it makes an intelligent guess about the scene, subject, and action or lack thereof to determine the exposure and focus settings. The Scene Intelligent Auto mode ( ![]() ) makes most of the decisions, leaving little for you to do except to point and shoot. However, you can set the image quality, the Drive mode, use manual focusing, and a few other settings.
) makes most of the decisions, leaving little for you to do except to point and shoot. However, you can set the image quality, the Drive mode, use manual focusing, and a few other settings.
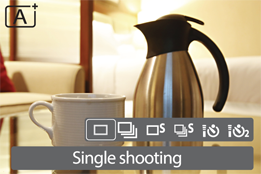
3.3 The Quick Control screen for Scene Intelligent Auto mode.
In the Scene Intelligent Auto ( ![]() ), Creative Auto (
), Creative Auto ( ![]() ), and Special Scene (
), and Special Scene ( ![]() ) modes, there are noticeably fewer camera menus, tabs, and options as compared with other exposure modes.
) modes, there are noticeably fewer camera menus, tabs, and options as compared with other exposure modes.
In Scene Intelligent Auto mode ( ![]() ), the camera sets the following options that you cannot change:
), the camera sets the following options that you cannot change:
• Auto ISO that ranges from 100 to 12800
• High ISO speed noise reduction
• Auto Picture Style
• Auto white balance
• sRGB color space
• Auto Lighting Optimizer — set to Standard
• AI Focus AF, which means that if the subject begins to move, the camera automatically switches to AI Servo AF to maintain focus on the subject as it moves
• Automatic AF-point Selection
• Evaluative metering mode
You are able to change the following options:
• Manual focusing if the lens you’re using offers Manual focusing ( ![]() )
)
• Drive mode
• Image quality and size
• Focus confirmation beep
• Release shutter without card
• Image review duration
• Peripheral illumination correction (to prevent vignetting or darkening at the corners of the image)
• Chromatic aberration correction (to prevent color fringing at the edges of high-contrast objects)
• Live View shooting
• Grid display
A full complement of image playback options is also available. You can use Scene Intelligent Auto ( ![]() ) for shooting in Live View and for movie recording as well.
) for shooting in Live View and for movie recording as well.
To make adjustments in Scene Intelligent Auto mode ( ![]() ), press the Menu button (
), press the Menu button ( ![]() ) and use the Main dial (
) and use the Main dial ( ![]() ) to choose one of the Shooting menu tabs (Shooting menu tabs 1–3 (
) to choose one of the Shooting menu tabs (Shooting menu tabs 1–3 ( ![]() )) containing the setting you want to change. Use the Quick Control dial (
)) containing the setting you want to change. Use the Quick Control dial ( ![]() ) to highlight the setting you want to change, and then press the Set button (
) to highlight the setting you want to change, and then press the Set button ( ![]() ) to enter the settings screen for the camera setting you just chose. Use the Quick Control dial (
) to enter the settings screen for the camera setting you just chose. Use the Quick Control dial ( ![]() ) to highlight the setting option you want to use and press the Set button (
) to highlight the setting option you want to use and press the Set button ( ![]() ) to confirm your selection and return to the top level of that Shooting menu tab.
) to confirm your selection and return to the top level of that Shooting menu tab.
Creative Auto mode
If you’re new to using a dSLR, and you want to get the creative effects that are commonly associated with dSLR shooting, then Creative Auto mode ( ![]() ) is a good shooting mode to choose. This shooting mode offers more control than the other automatic modes, but less control than the Creative Zone shooting modes (detailed later in this chapter).
) is a good shooting mode to choose. This shooting mode offers more control than the other automatic modes, but less control than the Creative Zone shooting modes (detailed later in this chapter).
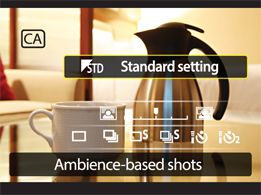
3.4 The Creative Auto screen offers control over how the background is rendered — either sharp or blurred. You can also control the use of the flash and the Drive mode in Creative Auto mode.
In Creative Auto mode ( ![]() ), you can adjust the following settings:
), you can adjust the following settings:
• Ambience selection. Ambience selection changes the look of the image to make color and contrast more expressive. Details on Ambience selection and sample images are provided later in this chapter.
• Background blur. You can adjust this control to blur the background or render it with more sharpness. Just adjust the marker to the left to increase background blur or to the right to increase background sharpness. As discussed earlier, the relative blurring or sharpening of the background is referred to as depth of field, and it’s controlled in large part by the f-stop. Thus, this control enables you to change the aperture.
• Drive mode. The Drive mode determines the speed, or number of images the camera takes with each press of the shutter button. This control enables you to choose Single ( ![]() ) or Continuous shooting (
) or Continuous shooting ( ![]() ) mode at 3.7 frames per second (fps). Alternatively, you can choose Self-timer/Remote control mode (
) mode at 3.7 frames per second (fps). Alternatively, you can choose Self-timer/Remote control mode ( ![]() ) with a 10-second delay before the image is made or Self-timer continuous drive mode (
) with a 10-second delay before the image is made or Self-timer continuous drive mode ( ![]() ), which takes the number of images that you choose, from two to ten at 10-second intervals.
), which takes the number of images that you choose, from two to ten at 10-second intervals.
If you’re taking a portrait in Creative Auto mode ( ![]() ), move the Background blur control to the left to keep the background elements from distracting viewers from the subject. If you’re shooting a landscape, move the control to the right to keep as much of the scene from back to front in sharp focus.
), move the Background blur control to the left to keep the background elements from distracting viewers from the subject. If you’re shooting a landscape, move the control to the right to keep as much of the scene from back to front in sharp focus.
To use Creative Auto mode ( ![]() ), turn the Mode dial to (
), turn the Mode dial to ( ![]() ), and then press the Quick Control button (
), and then press the Quick Control button ( ![]() ). The Quick Control screen appears. Then, use the Multi-controller (
). The Quick Control screen appears. Then, use the Multi-controller ( ![]() ) to move to the setting you want.
) to move to the setting you want.
To change the Ambience selection, use the Multi-controller ( ![]() ) and rotate the Quick Control dial (
) and rotate the Quick Control dial ( ![]() ) to choose an Ambience setting. Alternatively, press the Set button (
) to choose an Ambience setting. Alternatively, press the Set button ( ![]() ) to reveal the Ambience options screen. Use the Multi-controller (
) to reveal the Ambience options screen. Use the Multi-controller ( ![]() ) to choose the desired Ambience setting.
) to choose the desired Ambience setting.
Ambience settings are somewhat like Picture Styles, but provide a much more pronounced effect. You can apply Ambience settings only when you’re shooting in Creative Auto ( ![]() ) or Special Scene (
) or Special Scene ( ![]() ) modes. When you choose an Ambience option, you can adjust the strength of the effect to Low, Standard, or Strong.
) modes. When you choose an Ambience option, you can adjust the strength of the effect to Low, Standard, or Strong.
Here are the Ambience options you can select:
• Standard (![]() ). This default setting has punchy contrast and color.
). This default setting has punchy contrast and color.
• Vivid (![]() ). At the Standard level, this setting provides snappy colors and an increased sharpness.
). At the Standard level, this setting provides snappy colors and an increased sharpness.
• Soft (![]() ). This option decreases color saturation and intensity as well as overall contrast. It is a good choice for portraits of women and children.
). This option decreases color saturation and intensity as well as overall contrast. It is a good choice for portraits of women and children.
• Warm (![]() ). This setting adds a noticeable shift to more prominent yellows and reds.
). This setting adds a noticeable shift to more prominent yellows and reds.
• Intense (![]() ). Just as the name implies, this setting makes saturation and contrast pronounced, and the colors slightly cooler (more bluish) as compared with colors the Standard setting produces. This is not the option to use if you want to show good detail in the shadows.
). Just as the name implies, this setting makes saturation and contrast pronounced, and the colors slightly cooler (more bluish) as compared with colors the Standard setting produces. This is not the option to use if you want to show good detail in the shadows.
• Cool (![]() ). This option delivers extremely blue skies and a cool (bluish) tint in foliage. The contrast and color saturation are both higher than in the Standard setting.
). This option delivers extremely blue skies and a cool (bluish) tint in foliage. The contrast and color saturation are both higher than in the Standard setting.
• Brighter (![]() ). This setting lightens the image overall, including opening up shadow detail. It is a reasonable option for a scene or subject with predominately lighter tones; in other words, a high-key scene or subject. Brighter can cause blown highlights, so use it with care.
). This setting lightens the image overall, including opening up shadow detail. It is a reasonable option for a scene or subject with predominately lighter tones; in other words, a high-key scene or subject. Brighter can cause blown highlights, so use it with care.
• Darker (![]() ). This setting creates a darker image with snappy contrast.
). This setting creates a darker image with snappy contrast.
• Monochrome (![]() ). This option offers a blue, sepia, and black-and-white option. The black-and-white option delivers bright whites and deep blacks with moderate overall contrast.
). This option offers a blue, sepia, and black-and-white option. The black-and-white option delivers bright whites and deep blacks with moderate overall contrast.
• Background blur (![]() ). Use the Multi-controller (
). Use the Multi-controller ( ![]() ) or turn the Main dial (
) or turn the Main dial ( ![]() ) to change the setting. Moving to the left increases background blur and vice versa. You cannot change the Background blur setting if the built-in flash is raised. This control changes the aperture (f-stop) that’s used for the image. If you set this control and then use the flash, the setting you applied is not used.
) to change the setting. Moving to the left increases background blur and vice versa. You cannot change the Background blur setting if the built-in flash is raised. This control changes the aperture (f-stop) that’s used for the image. If you set this control and then use the flash, the setting you applied is not used.
• Drive mode. Use the Multi-controller ( ![]() ) to select the Drive mode, and then press the Set button (
) to select the Drive mode, and then press the Set button ( ![]() ). The options are Single shooting (
). The options are Single shooting ( ![]() ), Continuous shooting (
), Continuous shooting ( ![]() ), Self-timer mode 10 seconds remote (
), Self-timer mode 10 seconds remote ( ![]() ), or Self-timer mode continuous (
), or Self-timer mode continuous ( ![]() ). Press a cross key to make a selection, and then press the Set button (
). Press a cross key to make a selection, and then press the Set button ( ![]() ).
).
Special Scene mode
Special Scene mode ( ![]() ) allows you to choose from a list of shooting scenario presets. These presets automatically set up the camera to produce the best results for the given situation. To use Special Scene mode, set the Mode dial to Special Scene mode (
) allows you to choose from a list of shooting scenario presets. These presets automatically set up the camera to produce the best results for the given situation. To use Special Scene mode, set the Mode dial to Special Scene mode ( ![]() ). Press the Quick Control button (
). Press the Quick Control button ( ![]() ) and use the Quick Control dial (
) and use the Quick Control dial ( ![]() ) to scroll through the options. Press the Release button (
) to scroll through the options. Press the Release button ( ![]() ) to begin shooting in the selected mode. Alternatively, press the Set button (
) to begin shooting in the selected mode. Alternatively, press the Set button ( ![]() ) to reveal the Special Scene mode options screen. Use the Quick Control dial (
) to reveal the Special Scene mode options screen. Use the Quick Control dial ( ![]() ) to scroll through the Special Scene mode options and the Multi-controller (
) to scroll through the Special Scene mode options and the Multi-controller ( ![]() ) to navigate to other options on that screen.
) to navigate to other options on that screen.
Portrait mode
Portrait mode ( ![]() ) sets a wide aperture (small f-stop number) to provide a shallow depth of field that blurs background details and prevents them from distracting viewers from the subject. Obviously, Portrait mode (
) sets a wide aperture (small f-stop number) to provide a shallow depth of field that blurs background details and prevents them from distracting viewers from the subject. Obviously, Portrait mode ( ![]() ) is great for people portraits, but it can also be used for taking pet portraits, indoor and outdoor still-life shots, and nature shots.
) is great for people portraits, but it can also be used for taking pet portraits, indoor and outdoor still-life shots, and nature shots.
In Portrait mode ( ![]() ), the camera automatically sets the following two options:
), the camera automatically sets the following two options:
• One-shot AF mode (![]() ) and Automatic AF-point selection (
) and Automatic AF-point selection (![]() ).
).
• Continuous drive mode (![]() ). This mode enables you to shoot approximately 4.5 frames per second (fps); up to 73 Large JPEG images in a burst. You have the option of changing this to Single shooting mode (
). This mode enables you to shoot approximately 4.5 frames per second (fps); up to 73 Large JPEG images in a burst. You have the option of changing this to Single shooting mode ( ![]() ), Silent single shooting mode (
), Silent single shooting mode ( ![]() ), Silent continuous (
), Silent continuous ( ![]() ), Self-timer mode 10 seconds remote (
), Self-timer mode 10 seconds remote ( ![]() ), or Self-timer mode 2 seconds remote (
), or Self-timer mode 2 seconds remote ( ![]() ).
).
To enhance the effect that Portrait mode ( ![]() ) provides by blurring the background, use a telephoto lens and move the subject several feet away from the background.
) provides by blurring the background, use a telephoto lens and move the subject several feet away from the background.
In Portrait mode ( ![]() ), the camera automatically selects the autofocus (AF) point or points. When the camera chooses the AF point, it looks for points in the scene where lines are well defined, for the object that is closest to the lens, and/or for points of strong contrast. In a portrait, the point of sharpest focus should be on the subject’s eye. However, the subject’s eye may not fit the camera’s criteria for setting focus. As a result, the camera often focuses on the subject’s nose, mouth, or clothing.
), the camera automatically selects the autofocus (AF) point or points. When the camera chooses the AF point, it looks for points in the scene where lines are well defined, for the object that is closest to the lens, and/or for points of strong contrast. In a portrait, the point of sharpest focus should be on the subject’s eye. However, the subject’s eye may not fit the camera’s criteria for setting focus. As a result, the camera often focuses on the subject’s nose, mouth, or clothing.
As you shoot, watch in the viewfinder to see which AF points the camera chooses when you half-press the shutter button. If the AF point or points aren’t on the eyes, then shift your shooting position slightly to try to force the camera to reset the AF point to the eyes. If you can’t force the camera to refocus on the eyes, then switch to Aperture-priority AE mode ( ![]() ), set a wide aperture such as f/5.6, and then manually select the AF point that is over the subject’s eyes. (Manually selecting an AF point is detailed later in this chapter.)
), set a wide aperture such as f/5.6, and then manually select the AF point that is over the subject’s eyes. (Manually selecting an AF point is detailed later in this chapter.)
Landscape mode
Landscape mode ( ![]() ) sets the exposure so that both background and foreground details are acceptably sharp for an extensive depth of field. To do this, the camera sets a narrow aperture (large f-stop number). Also in Landscape mode (
) sets the exposure so that both background and foreground details are acceptably sharp for an extensive depth of field. To do this, the camera sets a narrow aperture (large f-stop number). Also in Landscape mode ( ![]() ), the camera gives you the fastest shutter speed possible given the amount of light in the scene. The fast shutter speed helps ensure sharp handheld images.
), the camera gives you the fastest shutter speed possible given the amount of light in the scene. The fast shutter speed helps ensure sharp handheld images.
In lower light, however, the 6D tries to maintain as narrow an aperture as possible, and this can result in slower shutter speeds, or the camera increases the ISO, or both. So as the light fades, be sure to monitor the shutter speed in the viewfinder. If the shutter speed is 1/30 second or slower, or if you’re using a telephoto lens, then steady the camera on a solid surface or use a tripod for shooting. As it does in all Basic Zone modes, the camera uses Evaluative metering (described later in this chapter) to meter the light in the scene to determine the exposure settings.
In Landscape mode ( ![]() ), the camera automatically sets:
), the camera automatically sets:
• One-shot autofocus mode (![]() ) and Automatic AF-point selection (
) and Automatic AF-point selection (![]() ).
).
• Single-shot drive mode (![]() ). You have the option of changing this to Continuous drive mode (
). You have the option of changing this to Continuous drive mode ( ![]() ), Silent single shooting mode (
), Silent single shooting mode ( ![]() ), Silent continuous (
), Silent continuous ( ![]() ), Self-timer mode 10 seconds remote (
), Self-timer mode 10 seconds remote ( ![]() ), or Self-timer mode 2 seconds remote (
), or Self-timer mode 2 seconds remote ( ![]() ).
).
Close-up mode
Close-up mode ( ![]() ) allows a close focusing distance, and it sets a wide aperture (small f-stop number) to create a shallow depth of field that blurs background details. It also sets as fast a shutter speed as possible given the light. This mode produces much the same type of rendering as Portrait mode (
) allows a close focusing distance, and it sets a wide aperture (small f-stop number) to create a shallow depth of field that blurs background details. It also sets as fast a shutter speed as possible given the light. This mode produces much the same type of rendering as Portrait mode ( ![]() ). You can further enhance the close-up effect by using a macro lens. If you’re using a zoom lens, zoom to the telephoto end of the lens.
). You can further enhance the close-up effect by using a macro lens. If you’re using a zoom lens, zoom to the telephoto end of the lens.
All lenses have a minimum focusing distance that varies by lens. This means that you can’t focus at distances closer than the minimum focusing distance of the lens. You know that you’re not closer than the minimum focusing distance when you hear the autofocus confirmation beep from the camera and/or when the focus indicator light in the viewfinder burns steadily.
In Close-up mode ( ![]() ), the camera automatically sets:
), the camera automatically sets:
• One-shot autofocus mode (![]() ) with Automatic AF-point selection (
) with Automatic AF-point selection (![]() ).
).
• Single-shot drive mode (![]() ). You have the option of changing this to Continuous drive mode (
). You have the option of changing this to Continuous drive mode ( ![]() ), Silent single shooting mode (
), Silent single shooting mode ( ![]() ), Silent continuous (
), Silent continuous ( ![]() ), Self-timer mode 10 seconds remote (
), Self-timer mode 10 seconds remote ( ![]() ), or Self-timer mode 2 seconds remote (
), or Self-timer mode 2 seconds remote ( ![]() ).
).
Sports mode
Sports mode ( ![]() ) sets a fast shutter speed to freeze subject motion. This mode is good for capturing athletes and the antics of pets and children.
) sets a fast shutter speed to freeze subject motion. This mode is good for capturing athletes and the antics of pets and children.
In this mode, when you half-press the shutter button, the camera focuses and automatically tracks focus on the subject as long as the subject is among the AF points. The focus locks the moment you fully press the shutter button.
In Sports mode ( ![]() ), the camera automatically sets:
), the camera automatically sets:
• AI Servo focusing mode (![]() ) with Automatic AF-point selection (
) with Automatic AF-point selection (![]() ).
).
• Continuous drive mode (![]() ). Continuous drive mode enables you to shoot at 4.5 fps for a maximum burst rate up to 73 Large/Fine JPEG images or 14 RAW images. You also have the option to change this to Single shooting mode (
). Continuous drive mode enables you to shoot at 4.5 fps for a maximum burst rate up to 73 Large/Fine JPEG images or 14 RAW images. You also have the option to change this to Single shooting mode ( ![]() ), Silent single shooting mode (
), Silent single shooting mode ( ![]() ), Silent continuous (
), Silent continuous ( ![]() ), Self-timer mode 10 seconds remote (
), Self-timer mode 10 seconds remote ( ![]() ), or Self-timer mode 2 seconds remote (
), or Self-timer mode 2 seconds remote ( ![]() ).
).
Night Portrait mode
Night Portrait mode ( ![]() ) combines flash with a slow shutter speed so that both the subject and the background are correctly exposed. This combination prevents the subject from being very bright against a very dark background. However, this mode uses a longer exposure time to expose a dark background properly, so it’s important that the subject remain still during the entire exposure to avoid blur. Be sure to use a tripod or set the camera on a solid surface to take night portraits.
) combines flash with a slow shutter speed so that both the subject and the background are correctly exposed. This combination prevents the subject from being very bright against a very dark background. However, this mode uses a longer exposure time to expose a dark background properly, so it’s important that the subject remain still during the entire exposure to avoid blur. Be sure to use a tripod or set the camera on a solid surface to take night portraits.
You should use this mode when people are in the picture, rather than for general night shots, because the camera provides a shallow depth of field that blurs background details similar to the way it does in Portrait mode ( ![]() ). For night scenes without people, use Landscape mode (
). For night scenes without people, use Landscape mode ( ![]() ) or a Creative Zone mode and a tripod.
) or a Creative Zone mode and a tripod.
In Night Portrait mode ( ![]() ), the camera automatically sets:
), the camera automatically sets:
• One-shot autofocus mode (![]() ) with Automatic AF-point selection (
) with Automatic AF-point selection (![]() ).
).
• Single shooting mode (![]() ) mode. You also have the option to change this to Continuous drive mode (
) mode. You also have the option to change this to Continuous drive mode ( ![]() ), Single shooting mode (
), Single shooting mode ( ![]() ), Silent single shooting mode (
), Silent single shooting mode ( ![]() ), Silent continuous (
), Silent continuous ( ![]() ), Self-timer mode 10 seconds remote (
), Self-timer mode 10 seconds remote ( ![]() ), or Self-timer mode 2 seconds remote (
), or Self-timer mode 2 seconds remote ( ![]() ).
).
• External flash. An external flash is required and is set automatically.
Handheld Night Scene
Handheld Night Scene ( ![]() ) allows you to obtain good results when photographing night scenes without the aid of a tripod. It does this by capturing four simultaneous exposures for each shot taken. This results in a bright image with less noticeable camera shake. For best results, hold the camera as firmly as possible. I find that bracing the camera against my body is a good technique for producing crisp results. If you’re photographing a person and using a flash, make sure the subject stands still until all four automatic exposures are complete. Keep in mind direct printing will not work in this mode.
) allows you to obtain good results when photographing night scenes without the aid of a tripod. It does this by capturing four simultaneous exposures for each shot taken. This results in a bright image with less noticeable camera shake. For best results, hold the camera as firmly as possible. I find that bracing the camera against my body is a good technique for producing crisp results. If you’re photographing a person and using a flash, make sure the subject stands still until all four automatic exposures are complete. Keep in mind direct printing will not work in this mode.
In Handheld Night Scene ( ![]() ), the camera automatically sets:
), the camera automatically sets:
• One-shot autofocus mode (![]() ) with Automatic AF-point selection (
) with Automatic AF-point selection (![]() ).
).
• Single shooting mode (![]() ). You also have the option to change this to Continuous drive mode (
). You also have the option to change this to Continuous drive mode ( ![]() ), Single shooting mode (
), Single shooting mode ( ![]() ), Silent single shooting mode (
), Silent single shooting mode ( ![]() ), Silent continuous (
), Silent continuous ( ![]() ), Self-timer mode 10 seconds remote (
), Self-timer mode 10 seconds remote ( ![]() ), or Self-timer mode 2 seconds remote (
), or Self-timer mode 2 seconds remote ( ![]() ).
).
HDR Backlight Control
HDR Backlight Control ( ![]() ) is used to correct backlit situations. It’s similar to Handheld Night Scene (
) is used to correct backlit situations. It’s similar to Handheld Night Scene ( ![]() ) in that multiple exposures are used to produce one HDR image automatically. In this case, three simultaneous exposures for each shot are taken. The 6D then merges the three images automatically into one HDR image. The final HDR image corrects lost shadow detail and narrow tonal range typical in backlit scenes. Due to the multiple exposures being captured, holding the camera firmly or using a tripod ensures the best results. Keep in mind that an optional flash or direct printing does not work in this mode.
) in that multiple exposures are used to produce one HDR image automatically. In this case, three simultaneous exposures for each shot are taken. The 6D then merges the three images automatically into one HDR image. The final HDR image corrects lost shadow detail and narrow tonal range typical in backlit scenes. Due to the multiple exposures being captured, holding the camera firmly or using a tripod ensures the best results. Keep in mind that an optional flash or direct printing does not work in this mode.
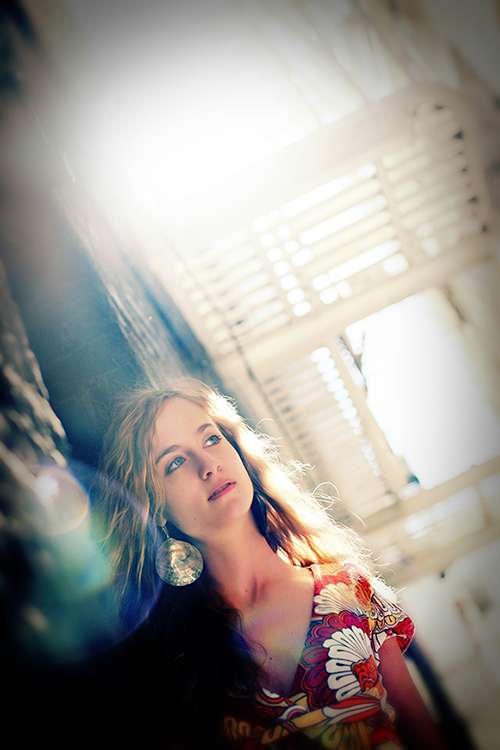
3.5 Backlit portraits can produce beautiful results, provided that you and your subject can remain still. Exposure: ISO 500, f/2.5, 1/3200 second with a Canon 50mm, f/1.2L USM.
In HDR Backlight Control mode ( ![]() ), the camera automatically sets:
), the camera automatically sets:
• One-shot autofocus mode (![]() ) with Automatic AF-point selection (
) with Automatic AF-point selection (![]() ).
).
• Single shooting mode (![]() ). You also have the option to change this to Continuous drive mode (
). You also have the option to change this to Continuous drive mode ( ![]() ), Single shooting mode (
), Single shooting mode ( ![]() ), Silent single shooting mode (
), Silent single shooting mode ( ![]() ), Silent continuous (
), Silent continuous ( ![]() ), Self-timer mode 10 seconds remote (
), Self-timer mode 10 seconds remote ( ![]() ), or Self-timer mode 2 seconds remote (
), or Self-timer mode 2 seconds remote ( ![]() ).
).
Creative Zone exposure modes
The semiautomatic and Manual ( ![]() ) exposure modes in the Creative Zone section of the Mode dial give you the most control over your exposures. Bulb (
) exposure modes in the Creative Zone section of the Mode dial give you the most control over your exposures. Bulb ( ![]() ), also in the Creative Zone section of the Mode dial, isn’t technically an exposure mode, but having Bulb (
), also in the Creative Zone section of the Mode dial, isn’t technically an exposure mode, but having Bulb ( ![]() ) on the Mode dial gives you quick access when you are using long exposures, such as those to create star trails during night photography.
) on the Mode dial gives you quick access when you are using long exposures, such as those to create star trails during night photography.
Unlike the exposure modes in the Basic Zone section of the Mode dial, the modes in the Creative Zone section of the Mode dial give you full control of all camera functions and settings. I cover each of these semiautomatic and manual exposure modes in the following sections.
Program AE mode
Program AE mode ( ![]() ) is a useful exposure mode that enables you to quickly change or shift from the camera’s recommended exposure to a different, but equivalent, exposure. When you press the shutter button halfway, the 6D gives you its suggested exposure settings. If you want a different aperture and shutter speed, just turn the Main dial (
) is a useful exposure mode that enables you to quickly change or shift from the camera’s recommended exposure to a different, but equivalent, exposure. When you press the shutter button halfway, the 6D gives you its suggested exposure settings. If you want a different aperture and shutter speed, just turn the Main dial ( ![]() ) to temporarily change, or shift, the camera’s suggested exposure. For example, if the camera initially sets the exposure at f/2.8 at 1/125 second and you turn the Main dial (
) to temporarily change, or shift, the camera’s suggested exposure. For example, if the camera initially sets the exposure at f/2.8 at 1/125 second and you turn the Main dial ( ![]() ) to the left one stop to f/4.0, the exposure shifts to f/4.0 at 1/60 second. This is equivalent to the initial exposure (given the same ISO setting), only now with a smaller aperture in use. Turning the Main dial (
) to the left one stop to f/4.0, the exposure shifts to f/4.0 at 1/60 second. This is equivalent to the initial exposure (given the same ISO setting), only now with a smaller aperture in use. Turning the Main dial ( ![]() ) to the right one stop to f/1.4 shifts to the exposure to f/1.4 at 1/250 second, and so on.
) to the right one stop to f/1.4 shifts to the exposure to f/1.4 at 1/250 second, and so on.
An advantage of using Program AE mode ( ![]() ) is that with a single adjustment, you can quickly control the depth of field and/or the shutter speed. Exposure shifts are made in 1/3-stop increments by default. When you shift the exposure, the change is temporary. After you take a picture at the shifted exposure settings, the camera returns to its suggested exposure for the next image. Also, if you shift the exposure, and then release the shutter button without taking the picture within a few seconds, the camera returns to its standard exposure.
) is that with a single adjustment, you can quickly control the depth of field and/or the shutter speed. Exposure shifts are made in 1/3-stop increments by default. When you shift the exposure, the change is temporary. After you take a picture at the shifted exposure settings, the camera returns to its suggested exposure for the next image. Also, if you shift the exposure, and then release the shutter button without taking the picture within a few seconds, the camera returns to its standard exposure.
To use Program AE mode, set the Mode dial to ![]() , and then half-press the shutter button. If you want to shift the camera’s standard exposure, turn the Main dial (
, and then half-press the shutter button. If you want to shift the camera’s standard exposure, turn the Main dial ( ![]() ) to the left to make the aperture narrower and the shutter speed longer, or to the right to make the aperture wider and the shutter speed shorter.
) to the left to make the aperture narrower and the shutter speed longer, or to the right to make the aperture wider and the shutter speed shorter.
If the shutter speed shows 30 and the maximum aperture of the lens is blinking in the viewfinder, it means that the image will be underexposed. You can change the ISO to a higher sensitivity setting or use an accessory flash. However, if you use a Speedlite, you cannot shift the exposure. Conversely, if the shutter speed shows 8000 and the lens’s minimum aperture blinks in the viewfinder, the image will be overexposed. Lower the ISO sensitivity setting or use a neutral-density filter on the lens to decrease the amount of light reaching the camera’s sensor.
At first glance, Scene Intelligent Auto mode ( ![]() ) and Program AE mode (
) and Program AE mode ( ![]() ) seem very similar. However, Program AE mode (
) seem very similar. However, Program AE mode ( ![]() ) gives you full control over the focus, white balance, metering mode, and so on. In Scene Intelligent Auto mode (
) gives you full control over the focus, white balance, metering mode, and so on. In Scene Intelligent Auto mode ( ![]() ), you cannot change many camera settings.
), you cannot change many camera settings.
Shutter-priority AE mode
When the primary concern is controlling the shutter speed, Shutter-priority AE mode ( ![]() ) is the exposure mode of choice. In this semiautomatic shooting mode, you set the shutter speed and the camera automatically calculates the appropriate aperture based on the current ISO setting and the light meter reading.
) is the exposure mode of choice. In this semiautomatic shooting mode, you set the shutter speed and the camera automatically calculates the appropriate aperture based on the current ISO setting and the light meter reading.
Controlling the shutter speed determines how subject motion is rendered, and that makes Shutter-priority AE mode ( ![]() ) a good choice for freezing the action in sports or capturing motion, such as waterfalls, during landscape shooting. However, it’s also the mode to use when you need to set a shutter speed that’s fast enough to prevent blur from camera shake when you don’t have a tripod. For example, if you are shooting in moderate to low light with a non-Image Stabilized (IS) lens at a focal length of 100mm, then you can set the shutter speed to 1/100 second — a shutter speed that is fast enough to handhold the camera and get sharp images at this focal length. Additionally, in Shutter-priority AE mode (
) a good choice for freezing the action in sports or capturing motion, such as waterfalls, during landscape shooting. However, it’s also the mode to use when you need to set a shutter speed that’s fast enough to prevent blur from camera shake when you don’t have a tripod. For example, if you are shooting in moderate to low light with a non-Image Stabilized (IS) lens at a focal length of 100mm, then you can set the shutter speed to 1/100 second — a shutter speed that is fast enough to handhold the camera and get sharp images at this focal length. Additionally, in Shutter-priority AE mode ( ![]() ) the shutter speed remains constant as you continue shooting.
) the shutter speed remains constant as you continue shooting.
The general rule of thumb to avoid blurry images caused by camera shake when shooting handheld and with slow shutter speeds, is to shoot at shutter speed that is closest to the inverse of the focal length of the lens being used. Shooting with a 50mm lens you would choose 1/50th, if it’s available, or the closest to it, 1/60th.
On the 6D, you can select shutter speeds from 1/4000 second to 30 seconds or switch to Bulb ( ![]() ) shooting mode (detailed later in this chapter). To show fractional shutter speeds, the 6D shows only the denominator of the fraction in the viewfinder. Thus, 1/4000 second is displayed as 4000 and 1/4 second is displayed as 4. Shutter speeds longer than 1/4 second are indicated with a double quotation mark that represents a decimal point between two numbers or following a single number. For example, 1"5 is 1.5 seconds while 4" is 4 seconds (4.0).
) shooting mode (detailed later in this chapter). To show fractional shutter speeds, the 6D shows only the denominator of the fraction in the viewfinder. Thus, 1/4000 second is displayed as 4000 and 1/4 second is displayed as 4. Shutter speeds longer than 1/4 second are indicated with a double quotation mark that represents a decimal point between two numbers or following a single number. For example, 1"5 is 1.5 seconds while 4" is 4 seconds (4.0).
To use Shutter-priority AE mode, set the Mode dial to Shutter-priority AE ( ![]() ), half-press the shutter button, and then turn the Main dial (
), half-press the shutter button, and then turn the Main dial ( ![]() ) to change the shutter speed. The camera automatically sets the appropriate aperture based on the current ISO and the light meter reading. If the lens’s maximum aperture blinks, the image will be underexposed. Increase the ISO setting or decrease the shutter speed until the aperture stops blinking.
) to change the shutter speed. The camera automatically sets the appropriate aperture based on the current ISO and the light meter reading. If the lens’s maximum aperture blinks, the image will be underexposed. Increase the ISO setting or decrease the shutter speed until the aperture stops blinking.
Using the Quick Control Screen
The Quick Control screen is the quickest way to change the most frequently used camera settings. In the Creative Zone exposure modes — Program AE ( ![]() ), Shutter-priority AE (
), Shutter-priority AE ( ![]() ), Aperture-priority AE (
), Aperture-priority AE ( ![]() ), Manual (
), Manual ( ![]() ), Bulb (
), Bulb ( ![]() ) — and both Custom shooting modes (
) — and both Custom shooting modes ( ![]() ) and (
) and ( ![]() ), you can control the most commonly adjusted functions on the 6D, including the ISO, AF area selection mode, metering and Drive modes, AF-point selection, white balance, Picture Style, and exposure and flash compensation using exposure compensation and Custom Controls. Basic Zone exposure modes have fewer options displayed.
), you can control the most commonly adjusted functions on the 6D, including the ISO, AF area selection mode, metering and Drive modes, AF-point selection, white balance, Picture Style, and exposure and flash compensation using exposure compensation and Custom Controls. Basic Zone exposure modes have fewer options displayed.
In Scene Intelligent Auto mode ( ![]() ), you can change only the Drive mode. While in Creative Auto mode (
), you can change only the Drive mode. While in Creative Auto mode ( ![]() ), you can adjust the Ambience selection (
), you can adjust the Ambience selection ( ![]() ) and level, Background blur or sharpness (
) and level, Background blur or sharpness ( ![]() ), and the Drive mode. In addition, in Special Scene mode (
), and the Drive mode. In addition, in Special Scene mode ( ![]() ), you can adjust the Ambience selection (
), you can adjust the Ambience selection ( ![]() ), Lighting situation selection (
), Lighting situation selection ( ![]() ), and Drive modes. However, it is also helpful to use the LCD monitor to see the settings that the 6D automatically sets in this automatic shooting mode.
), and Drive modes. However, it is also helpful to use the LCD monitor to see the settings that the 6D automatically sets in this automatic shooting mode.
To display the Quick Control screen on the LCD monitor, press the Quick Control button ( ![]() ). Then use the Multi-controller (
). Then use the Multi-controller ( ![]() ) to select the setting you want to change. Turn the Quick Control dial (
) to select the setting you want to change. Turn the Quick Control dial ( ![]() ) or the Main dial (
) or the Main dial ( ![]() ) to change the setting.
) to change the setting.
The 6D alerts you if the exposure is outside the range of acceptable exposure in Shutter-priority AE mode ( ![]() ). If you see the maximum aperture blinking in the viewfinder, it is a warning that the image will be underexposed. You need to set a slower shutter speed or set a higher ISO sensitivity setting. On the other hand, if the lens’s minimum aperture blinks, it is an overexposure warning. You need to set a faster shutter speed or a lower ISO sensitivity setting.
). If you see the maximum aperture blinking in the viewfinder, it is a warning that the image will be underexposed. You need to set a slower shutter speed or set a higher ISO sensitivity setting. On the other hand, if the lens’s minimum aperture blinks, it is an overexposure warning. You need to set a faster shutter speed or a lower ISO sensitivity setting.
To ensure that the exposure is correct in scenes in which light changes quickly, enable Custom Function C.Fn I:6 Exposure, Safety shift. This function is useful in both Shutter-priority AE ( ![]() ) and Aperture-priority AE (
) and Aperture-priority AE ( ![]() ) exposure modes. When a correct exposure fails to be obtained, using Shutter-priority AE (
) exposure modes. When a correct exposure fails to be obtained, using Shutter-priority AE ( ![]() ) or Aperture-priority AE (
) or Aperture-priority AE ( ![]() ) exposure modes, Safety Shift corrects the exposure by automatically shifting the manually selected setting in the given exposure mode.
) exposure modes, Safety Shift corrects the exposure by automatically shifting the manually selected setting in the given exposure mode.
Custom Functions are discussed in Chapter 6.
In the default 1/3-stop increments, the following shutter speeds are available (in seconds): 1/4000, 1/3200, 1/2500, 1/2000, 1/1600, 1/1250, 1/1000, 1/800, 1/640, 1/500, 1/400, 1/320, 1/250, 1/200, 1/160, 1/125, 1/100, 1/80, 1/60, 1/50, 1/40, 1/30, 1/25, 1/20, 1/15, 1/13, 1/10, 1/8, 1/6, 1/5, 1/4, 0.3, 0.4, 0.5, 0.6, 0.8, 1, 1.3, 1.6, 2, 2.5, 3.2, 4, 5, 6, 8, 10, 13, 15, 20, 25, 30.
You can change shutter speed increments from the default 1/3-stop to 1/2-stop increments using C.Fn1: Exposure, Exposure level increments.
Shutter Speed Tips
Shutter-priority AE mode ( ![]() ) is handy when you want to set a shutter speed that is fast enough that you can handhold the camera and still get a sharp image, especially if you are using a long lens. If you are not using an Image Stabilized (IS) lens, a good guideline for determining the fastest shutter speed at which you can handhold the camera and lens, and get a sharp image, is 1/[focal length]. Thus, if you are shooting at a 200mm focal length, the slowest shutter speed at which you can handhold the camera and get a sharp image is 1/200 second.
) is handy when you want to set a shutter speed that is fast enough that you can handhold the camera and still get a sharp image, especially if you are using a long lens. If you are not using an Image Stabilized (IS) lens, a good guideline for determining the fastest shutter speed at which you can handhold the camera and lens, and get a sharp image, is 1/[focal length]. Thus, if you are shooting at a 200mm focal length, the slowest shutter speed at which you can handhold the camera and get a sharp image is 1/200 second.
If you are shooting action scenes and want a shutter speed fast enough to stop subject motion with no motion blur, the following guidelines provide a good starting point:
• Use 1/250 second when action is coming toward the camera.
• Use 1/500 to 1/2000 second when action is moving side to side or up and down.
• Use 1/30 to 1/8 second when panning with the subject motion. Panning with the camera on a tripod is best.
• Use 1 second and slower shutter speeds at dusk and at night. This also works when you want to show a waterfall as a silky blur, or capture the light trails of moving vehicles, a city skyline, and so on.
You can use a polarizing or neutral-density filter to capture moving water as a blur early in the day, both of which reduce the amount of light to give you a slower shutter speed. Besides reducing the light by 2 stops, a polarizer has the additional benefit of reducing reflections on the water.
Further, with regard to shutter speeds, the 6D flash sync speed is 1/180 second or slower for Canon Speedlites. If you use the 6D with a studio lighting system, Canon recommends using a 1/30 to 1/60 second flash sync speed. However, I have used 1/125 second with my Profoto strobe system with no problems and good results. Just be sure to test the sync speed to see which works best with your studio strobes.
Aperture-priority AE mode
When you want to control the depth of field, Aperture-priority AE mode ( ![]() ) is a good choice. In Aperture-priority AE mode (
) is a good choice. In Aperture-priority AE mode ( ![]() ), you select the aperture (f-stop) that you want, and the 6D automatically sets the shutter speed based on the current ISO and the light meter reading.
), you select the aperture (f-stop) that you want, and the 6D automatically sets the shutter speed based on the current ISO and the light meter reading.
The range of apertures available to you depends, of course, on the lens that you are using. On zoom lenses, the minimum aperture may vary by focal length. For example, the EF 24-105mm f/4L IS USM lens has a minimum aperture of f/22 at 24mm, and f/27 at 105mm. The maximum aperture is f/4 at all focal lengths. On other lenses, the maximum aperture may be variable, based on the focal length.
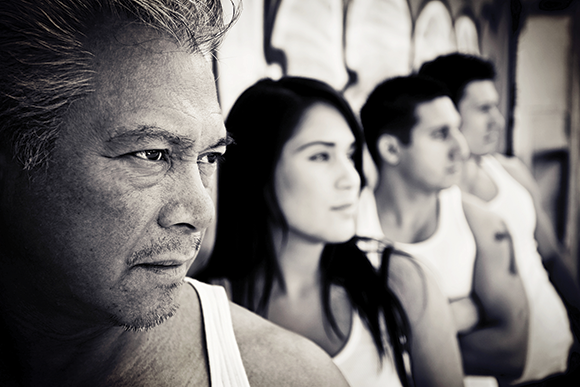
3.6 An f/4.0 aperture enabled me to focus attention on the foreground subject and maintain subtle detail on the background subjects. Exposure: ISO 100, f/4.0, 1/320 second with a Canon 17-40mm f/4L USM.
To use Aperture-priority AE mode, set the Mode dial to ( ![]() ) and then half-press the shutter button. Turn the Main dial (
) and then half-press the shutter button. Turn the Main dial ( ![]() ) to the right to set a narrower aperture or to the left to set a wider aperture. The camera automatically calculates the appropriate shutter speed based on the light meter reading and the ISO.
) to the right to set a narrower aperture or to the left to set a wider aperture. The camera automatically calculates the appropriate shutter speed based on the light meter reading and the ISO.
Practically speaking, you can also control the shutter speed using Aperture-priority AE mode ( ![]() ), just as you can control aperture in Shutter-priority AE mode (
), just as you can control aperture in Shutter-priority AE mode ( ![]() ). For example, if I am shooting outdoors in Aperture-priority AE mode (
). For example, if I am shooting outdoors in Aperture-priority AE mode ( ![]() ) and see a flock of birds coming into the scene, I can quickly open up to a wider aperture and watch in the viewfinder until the shutter speed is fast enough to stop the motion of the birds in flight. The principle is simple: When I choose a wide aperture, the camera sets a faster shutter speed. The same is true for Shutter-priority AE mode (
) and see a flock of birds coming into the scene, I can quickly open up to a wider aperture and watch in the viewfinder until the shutter speed is fast enough to stop the motion of the birds in flight. The principle is simple: When I choose a wide aperture, the camera sets a faster shutter speed. The same is true for Shutter-priority AE mode ( ![]() ), albeit you adjust the shutter speed to get to the aperture you want.
), albeit you adjust the shutter speed to get to the aperture you want.
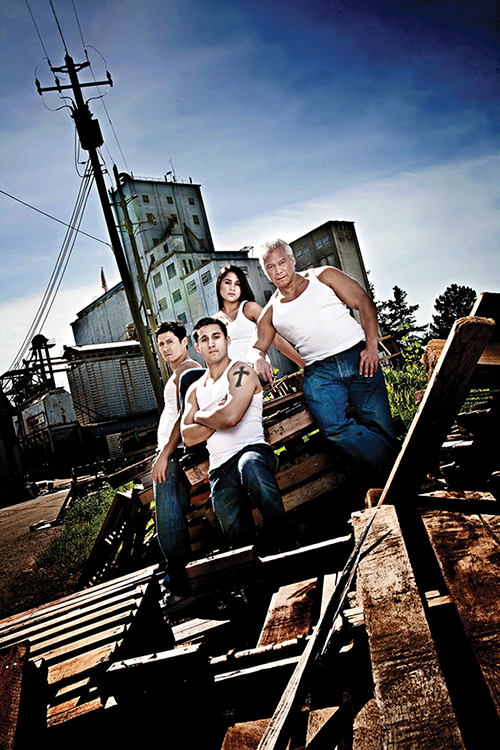
3.7 A narrow, deep depth of field allowed me to include the background details in this group portrait. Exposure: ISO 100, f/20, 1/60 second with a Canon 17-40mm, f/4L USM.
In 1/3-stop increments (and depending on the lens you use), the apertures are as follows: f/1.2, f/1.4, f/1.6, f/1.8, f/2.0, f/2.2, f/2.5, f/2.8, f/3.2, f/3.5, f/4.0, f/4.5, f/5.0, f/5.6, f/6.3, f/7.1, f/8.0, f/9.0, f/10, f/11, f/13, f/14, f/16, f/18, f/20, f/22, f/25, f/29, f/32, f/36, f/40, f/45.
If you select an aperture and the exposure is outside the exposure range, the shutter speed value blinks in the viewfinder and on the LCD panel. If 4000 blinks, the image will be overexposed. If 30 blinks, the image will be underexposed. If this happens, adjust to a smaller or larger aperture, respectively, or choose a lower or higher ISO setting.
You can preview the depth of field by pressing the depth-of-field preview button on the front of the camera. When you press the depth-of-field preview button, the lens diaphragm stops down to the current aperture so that you can preview the range of acceptable focus. The more extensive the depth of field, the more of the foreground and background will be in acceptably sharp focus, and the darker the image will appear in the viewfinder.
Manual mode
As the name implies, Manual mode ( ![]() ) eliminates the automatic aspects of setting the exposure so that you set the aperture, shutter speed, and ISO manually. This is the exposure mode I generally work in because it allows me the most creative control. This mode is great for learning how to control the interdependent relationship of ISO, shutter speed, and aperture and how they affect exposure. The immediate feedback of digital capture makes working in Manual mode (
) eliminates the automatic aspects of setting the exposure so that you set the aperture, shutter speed, and ISO manually. This is the exposure mode I generally work in because it allows me the most creative control. This mode is great for learning how to control the interdependent relationship of ISO, shutter speed, and aperture and how they affect exposure. The immediate feedback of digital capture makes working in Manual mode ( ![]() ) the perfect mode for learning because you can see the effect of each of these settings. Once you become more comfortable with Manual mode (
) the perfect mode for learning because you can see the effect of each of these settings. Once you become more comfortable with Manual mode ( ![]() ) you’ll be in better position to have full creative control over exposures. Manual mode (
) you’ll be in better position to have full creative control over exposures. Manual mode ( ![]() ) also allows you to set the exposure by metering on a middle-gray area in the scene or by metering off a photographic gray card (such as the one included with this book).
) also allows you to set the exposure by metering on a middle-gray area in the scene or by metering off a photographic gray card (such as the one included with this book).

3.8 Manual mode works best for images shot in a studio because shutter speed doesn’t play a role (other than sync speed). Exposure: ISO 100, f/11, 1/125 second with a Canon 70-200mm, f/2.8L IS USM.
In addition, Manual mode ( ![]() ) is best to use when you are using a predetermined exposure, such as when you are shooting fireworks, stars, or subjects in the studio. It is also useful when you want to intentionally underexpose or overexpose a part of the scene or when you want a consistent exposure across a series of photos, such as a panoramic series.
) is best to use when you are using a predetermined exposure, such as when you are shooting fireworks, stars, or subjects in the studio. It is also useful when you want to intentionally underexpose or overexpose a part of the scene or when you want a consistent exposure across a series of photos, such as a panoramic series.
To use Manual mode ( ![]() ), follow these steps:
), follow these steps:
1. Set the Mode dial to Manual (![]() ), set the ISO, and then verify that the Multi-function lock switch on the back of the camera is unlocked. You can either set a specific ISO, or use Auto ISO.
), set the ISO, and then verify that the Multi-function lock switch on the back of the camera is unlocked. You can either set a specific ISO, or use Auto ISO.
2. Press the shutter button halfway, and then turn the Main dial (![]() ) to set the shutter speed.
) to set the shutter speed.
3. Turn the Quick Control dial (![]() ) to set the aperture you want.
) to set the aperture you want.
4. To use the camera’s recommended exposure, adjust the shutter speed and/or aperture until the check mark is at the center of the Exposure Level Indicator. Alternatively, you can adjust the aperture or shutter speed to the exposure indicated by metering on a middle-gray reading. Or you can set the camera to whatever predetermined exposure you prefer for fireworks, celestial subjects, or working with Studio strobes.
3.9 In bright conditions, Manual mode combined with a fast shutter speed makes it possible to shoot with a wide aperture. Exposure: ISO 100, f/2.8, 1/1600 with a Canon 85mm, f/1.2L USM.
You can overexpose or underexpose up to +/– 3 Exposure Values (EV), and the amount of exposure variance from the metered exposure is displayed on the Exposure Level Indicator. If the amount of exposure is greater than +/– 3 EV, then the Exposure Level Indicator shows an arrow on one or the other side. Then you can adjust the aperture, shutter speed, or ISO sensitivity setting until the exposure is within range. When you are in Manual exposure mode ( ![]() ), you cannot use Auto Exposure Lock or exposure compensation.
), you cannot use Auto Exposure Lock or exposure compensation.
The aperture and shutter speed values detailed in the preceding sections are also available in Manual mode ( ![]() ).
).
Exposure value (EV) is the amount of exposure required by the subject luminance and the ISO. EVs are represented by whole numbers, with each sequential step doubling or halving the exposure. If you halve the amount of light that reaches the image sensor, by either reducing the aperture or increasing the shutter speed, the EV increases by 1.
Bulb mode
Bulb ( ![]() ) on the Mode dial enables you to keep the shutter open as long as the shutter button is fully depressed. Bulb (
) on the Mode dial enables you to keep the shutter open as long as the shutter button is fully depressed. Bulb ( ![]() ) is handy for some night shooting, fireworks, celestial shots, and other long-exposure renderings.
) is handy for some night shooting, fireworks, celestial shots, and other long-exposure renderings.
Be sure that you have a fully charged battery before you begin an extended exposure. In most Bulb ( ![]() ) shooting scenarios, a tripod, and a wired or wireless remote is recommended.
) shooting scenarios, a tripod, and a wired or wireless remote is recommended.
To ensure rock-solid stability during Bulb ( ![]() ) exposures, use the RS-80N3 Remote Switch or the TC-80N3 Timer Remote Control to hold the shutter open. You can also enable Mirror lockup to reduce the chance of blur caused by the reflex mirror action. Mirror lockup is on the Shooting menu 2 tab (
) exposures, use the RS-80N3 Remote Switch or the TC-80N3 Timer Remote Control to hold the shutter open. You can also enable Mirror lockup to reduce the chance of blur caused by the reflex mirror action. Mirror lockup is on the Shooting menu 2 tab ( ![]() ).
).
To make a Bulb exposure, turn the Mode dial to ( ![]() ). With the camera on a tripod, set up the remote switch to the amount of time you want for the exposure. You can, of course, press and hold the shutter button for the exposure duration, but that can cause blur from camera shake, not to mention finger fatigue. Select the aperture you want by turning the Main dial (
). With the camera on a tripod, set up the remote switch to the amount of time you want for the exposure. You can, of course, press and hold the shutter button for the exposure duration, but that can cause blur from camera shake, not to mention finger fatigue. Select the aperture you want by turning the Main dial ( ![]() ) or Quick Control dial (
) or Quick Control dial ( ![]() ), and then trip the remote switch. The camera keeps track of the exposure time and displays it in seconds on the LCD panel.
), and then trip the remote switch. The camera keeps track of the exposure time and displays it in seconds on the LCD panel.
Because long exposures introduce digital noise and increase the appearance of grain, consider setting Long exposure noise reduction on the Shooting menu 4 tab ( ![]() ) to either Auto or On.
) to either Auto or On.
Custom modes
One of the handiest options that the 6D offers is the ability to program two custom exposure modes with your favorite shooting settings and preferences. The ( ![]() ) and (
) and ( ![]() ) modes on the Mode dial enable you to set up the camera with your most commonly used settings — including a exposure mode, white balance setting, color space, Picture Style, Custom Functions, and more — and then register those settings as (
) modes on the Mode dial enable you to set up the camera with your most commonly used settings — including a exposure mode, white balance setting, color space, Picture Style, Custom Functions, and more — and then register those settings as ( ![]() ) or (
) or ( ![]() ). Then when you want to use those specific settings again, you simply turn the Mode dial to (
). Then when you want to use those specific settings again, you simply turn the Mode dial to ( ![]() ) or (
) or ( ![]() ).
).
The Custom modes are covered in detail in Chapter 6.
Setting the ISO Sensitivity
One of the calling cards of the 6D is its improved high-ISO performance. As a result, photographers have greater latitude in low-light scenes for using high ISO settings while getting lower levels of digital noise.
If you’re new to photography, the ISO setting determines the image sensor’s sensitivity to light. In more technical terms, the ISO setting amplifies the output of the image sensor. The effect of higher amplification is positive on the one hand, because you can use faster shutter speeds, and negative on the other hand, because higher levels of digital noise appear in the image. Because the amplification increases digital noise and the appearance of grain in the image, it’s still a good policy to shoot at the lowest ISO setting you can, given the existing light and your shooting needs.
Certainly, the 6D offers improved high-ISO performance over its predecessors, but it pays to always be aware of the effects of digital noise in your images and judge how much it is affecting overall image quality.
If the digital noise is visible and aesthetically objectionable in an 8×10- or 11×14-inch print when viewed at a distance of approximately 1 foot or more, then the digital noise has degraded the image quality to an unacceptable level. This standard emphasizes the need to test the 6D at each of the higher ISO sensitivity settings, and then process and print images at the size you typically use. Evaluate the prints to see how far you want to take the 6D’s ISO settings. There are many good noise-reduction software options available for fine-tuning images later on the computer. However, getting it right in camera, when possible, is always the best policy.
In Program AE ( ![]() ), Shutter-priority AE (
), Shutter-priority AE ( ![]() ), Aperture-priority AE (
), Aperture-priority AE ( ![]() ), Manual (
), Manual ( ![]() ), or Bulb (
), or Bulb ( ![]() ) shooting modes, you can set the ISO sensitivity in 1/3-stop increments, or in 1-stop increments by setting C.Fn1: Exposure, ISO speed setting increments to 1 stop. The 6D’s standard range is ISO 100 to 25600, but you can expand the range to include ISO 102400 on the Shooting menu 3 tab (
) shooting modes, you can set the ISO sensitivity in 1/3-stop increments, or in 1-stop increments by setting C.Fn1: Exposure, ISO speed setting increments to 1 stop. The 6D’s standard range is ISO 100 to 25600, but you can expand the range to include ISO 102400 on the Shooting menu 3 tab ( ![]() ). Here you can set both the minimum and maximum limits for ISO to 50 (L), 25600 (H), 51200 (H1), or 102400 (H2).
). Here you can set both the minimum and maximum limits for ISO to 50 (L), 25600 (H), 51200 (H1), or 102400 (H2).
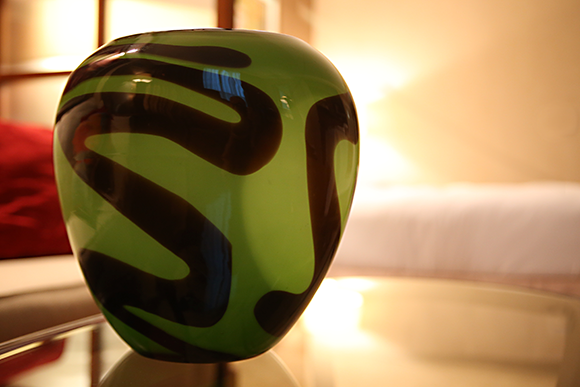
3.10 Captured at ISO 3200, this image has good edge and shadow detail, strong resolving power, and required no noise reduction in post-processing. Exposure: ISO 3200, f/2.8, 1/50 second with a Canon 28-70mm, f/2.8L USM.
If you use the L and H2 settings, an exclamation mark is displayed in the viewfinder as a reminder to you that the ISO expanded settings are being used.
If you are concerned about controlling digital noise in images, and if you use Auto ISO, be sure to check the ISO setting in the viewfinder before shooting. If the camera sets the ISO very high, you can either reduce the maximum ISO setting that can be used for Auto ISO and/or adjust the High ISO speed NR (Noise Reduction) setting on the Shooting menu 4 tab ( ![]() ) to a higher setting. Alternatively, you can set the ISO manually.
) to a higher setting. Alternatively, you can set the ISO manually.
You have a lot of flexibility when setting up the ISO ranges for both the Auto ISO and manual ISO use. In addition, because you control the maximum ISO, you have good control over the level of noise and overall quality of your images while having the advantage of automatic ISO adjustment.
The maximum ISO for movie recording is 12800. Recording movies is detailed in Chapter 8.
The default ISO ranges are as follows, although you can change them by setting the minimum and maximum ranges:
• Scene Intelligent Auto (![]() ). The ISO range is 100 to 12800.
). The ISO range is 100 to 12800.
• Program AE (![]() ), Shutter-priority AE (
), Shutter-priority AE (![]() ), Aperture-priority AE (
), Aperture-priority AE (![]() ), and Manual (
), and Manual (![]() ) modes. The ISO range is 100 to 25600, depending on the minimum and maximum ISO that you choose for the Auto ISO range.
) modes. The ISO range is 100 to 25600, depending on the minimum and maximum ISO that you choose for the Auto ISO range.
• Bulb (![]() ) and when using a Speedlite. Fixed at ISO 400. With Bulb mode (
) and when using a Speedlite. Fixed at ISO 400. With Bulb mode ( ![]() ), this depends on the minimum and maximum ISO that you choose for the Auto ISO range. With flash, a lower ISO may be used to prevent overexposure for fill flash. If you bounce the flash in Creative Auto (
), this depends on the minimum and maximum ISO that you choose for the Auto ISO range. With flash, a lower ISO may be used to prevent overexposure for fill flash. If you bounce the flash in Creative Auto ( ![]() ) or Program AE (
) or Program AE ( ![]() ) modes, the ISO range is 400 to 1600.
) modes, the ISO range is 400 to 1600.
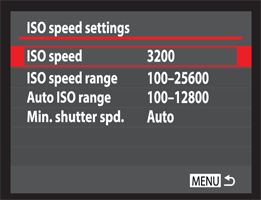
3.11 The ISO speed settings screen.
When I shoot in low light, I am always aware that both high ISO settings and long exposure times increase digital noise and grain in images. I try to balance the two by choosing a moderately high ISO that gives an exposure time of 1 second or less, if the light allows. I find that I get better image quality with that approach than with a blanket approach of just keeping the ISO low and letting the exposure go long. I recommend increasing the ISO judiciously while moderating the exposure time as much as possible.
Without question, the best approach is to test the camera in different venues at different ISO settings and at different shutter speeds. Then evaluate the results. With those tests, you’ll know how far and fast to push the ISO and the exposure time, and what it will mean to overall image quality. Also, remember that the expanded ISO settings of 51200 and 102400 purely and plainly will not deliver high image quality. I look at those settings as nice-to-have-if-all-else-fails options, and I use them rarely, if at all.
Here’s how to set the minimum and maximum ISO sensitivity for Auto ISO and manually selected ISO ranges:
1. On the Shooting menu 3 tab (![]() ), highlight ISO speed settings, and then press the Set button (
), highlight ISO speed settings, and then press the Set button (![]() ). The ISO speed settings screen appears.
). The ISO speed settings screen appears.
2. Highlight either Auto ISO range or ISO speed range, and then press the Set button (![]() ). The Auto ISO range screen or the ISO speed range screen appears, depending on the option you chose.
). The Auto ISO range screen or the ISO speed range screen appears, depending on the option you chose.
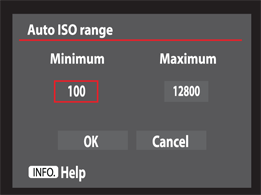
3.12 The Auto ISO range screen.
3. With Minimum selected, press the Set button (![]() ), and then turn the Quick Control dial (
), and then turn the Quick Control dial (![]() ) to set the value. The lowest ISO range is 100 to 12800.
) to set the value. The lowest ISO range is 100 to 12800.
4. Press the Set button (![]() ) to confirm your selection.
) to confirm your selection.
5. Turn the Quick Control dial (![]() ) to select the Maximum value, press the Set button (
) to select the Maximum value, press the Set button (![]() ), and then turn the Quick Control dial (
), and then turn the Quick Control dial (![]() ) to set the value. The maximum ISO speed range is 100 to 102400. The Auto ISO range is 100 to 25600.
) to set the value. The maximum ISO speed range is 100 to 102400. The Auto ISO range is 100 to 25600.
6. Select OK, and then press the Set button (![]() ) to confirm your settings. The ISO speed settings screen appears.
) to confirm your settings. The ISO speed settings screen appears.
The Auto ISO minimum and maximum settings are used for Safety shift as well. If you have Safety shift C.Fn set to ISO, then in Program AE ( ![]() ), Shutter Priority AE (
), Shutter Priority AE ( ![]() ), and Aperture Priority AE (
), and Aperture Priority AE ( ![]() ) modes, the ISO you manually set is automatically adjusted if the subject brightness changes enough that the exposure needs to be changed.
) modes, the ISO you manually set is automatically adjusted if the subject brightness changes enough that the exposure needs to be changed.
When you are using a telephoto lens for action shooting, to avoid camera shake from the a shutter speed that’s too slow, set the minimum shutter speed that can be used when you’re using Auto ISO.
To set a minimum shutter speed for Auto ISO, follow these steps:
1. On the Shooting menu 3 tab (![]() ), highlight ISO speed settings, and then press the Set button (
), highlight ISO speed settings, and then press the Set button (![]() ). The ISO speed settings screen appears.
). The ISO speed settings screen appears.
2. Highlight Min. shutter spd., and then press the Set button (![]() ). The Min. shutter spd. screen appears.
). The Min. shutter spd. screen appears.
3. Turn the Quick Control dial (![]() ) to select Auto or the shutter speed you want, and then press the Set button (
) to select Auto or the shutter speed you want, and then press the Set button (![]() ). The ISO speed settings screen appears.
). The ISO speed settings screen appears.
To set the ISO speed manually, press the Quick Control button ( ![]() ) and then use the Multi-controller (
) and then use the Multi-controller ( ![]() ) to highlight the ISO setting. Next, turn the Quick Control dial (
) to highlight the ISO setting. Next, turn the Quick Control dial ( ![]() ) to change the ISO sensitivity. Alternatively, you can press the Set button (
) to change the ISO sensitivity. Alternatively, you can press the Set button ( ![]() ) to display the ISO screen from which you can select a setting.
) to display the ISO screen from which you can select a setting.
Ideally, I set my camera between ISO 100 and 400; if I’m using Highlight Tone Priority ( ![]() ), the ISO is set to 200 automatically. I typically work within this range except when shooting event photography like weddings where it’s not uncommon for me to exceed ISO 1600 and beyond. Higher ISO performance has vastly improved over what it once was. However, as a rule I increase the ISO only when the light in the scene forces me to do so. I increase it just enough to get the shutter speed that I need to either handhold the camera with the lens I am using or to freeze subject motion if I’m shooting action.
), the ISO is set to 200 automatically. I typically work within this range except when shooting event photography like weddings where it’s not uncommon for me to exceed ISO 1600 and beyond. Higher ISO performance has vastly improved over what it once was. However, as a rule I increase the ISO only when the light in the scene forces me to do so. I increase it just enough to get the shutter speed that I need to either handhold the camera with the lens I am using or to freeze subject motion if I’m shooting action.
Metering Light and Adjusting Exposures
Another step in setting up the camera for a shoot is setting the metering mode. The 6D has a very reliable built-in reflective light meter. For years, I’ve been explaining to people that camera light meters are color blind — they see only in black-and-white brightness levels or luminosity. However, the 6D’s meter is not entirely colorblind. The dual-layer meter has 63 measurement zones to measure the full spectrum of Red, Green, and Blue (RGB). As a result, the meter makes more informed decisions about metering. Canon calls its auto exposure (AE) system Intelligent Focus Color Luminosity metering, or, IFCL.
A side benefit of the IFCL metering system is that it helps the focusing sensor identify objects and their distances and improve focusing accuracy in unusual light such as sodium light.
In the default Evaluative metering mode ( ![]() ), the 6D evaluates the light and color throughout 63 zones within the viewfinder, and because the Autofocus zones are aligned with the Auto Exposure zones, the camera receives exposure information from all the AF points. The 6D uses the subject distance information provided by the lens and the autofocus sensor when making exposure decisions. For example, the metering system looks at objects that are close to the subject — using both the AF point that achieved focus and those that nearly achieved focus. Then, it combines those meter readings with readings from the other zones to provide more consistent exposures, even in difficult lighting situations. The bottom line is that you can expect precise and consistent exposures regardless of the metering mode that you select.
), the 6D evaluates the light and color throughout 63 zones within the viewfinder, and because the Autofocus zones are aligned with the Auto Exposure zones, the camera receives exposure information from all the AF points. The 6D uses the subject distance information provided by the lens and the autofocus sensor when making exposure decisions. For example, the metering system looks at objects that are close to the subject — using both the AF point that achieved focus and those that nearly achieved focus. Then, it combines those meter readings with readings from the other zones to provide more consistent exposures, even in difficult lighting situations. The bottom line is that you can expect precise and consistent exposures regardless of the metering mode that you select.
While the advanced metering system helps to overcome metering challenges such as this one, the meter can still be fooled by very light and very dark subjects. In those scenes, you can choose among the four metering modes to get more precise results, or you can opt to use any of several exposure modification techniques, all of which are detailed in the following sections.
Using metering modes
The 6D offers four metering modes: Evaluative metering mode ( ![]() ), Partial metering mode (
), Partial metering mode ( ![]() ), Spot metering mode (
), Spot metering mode ( ![]() ), and Center-weighted Average metering mode (
), and Center-weighted Average metering mode ( ![]() ). Each of these metering modes can be used when you are shooting in Program AE (
). Each of these metering modes can be used when you are shooting in Program AE ( ![]() ), Shutter-priority AE (
), Shutter-priority AE ( ![]() ), Aperture-priority AE (
), Aperture-priority AE ( ![]() ), Manual (
), Manual ( ![]() ), and Bulb (
), and Bulb ( ![]() ) exposure modes.
) exposure modes.
Here is a look at each of the four metering modes:
• Evaluative metering mode (![]() ). This mode evaluates 63 zones in the viewfinder, as detailed earlier. It considers distance, light intensity, and color. It also biases metering toward the subject position that is indicated by the active AF point or points. It also compares the light values of adjacent AF points at distances that nearly achieved focus, and it takes into account back- or frontlighting. Evaluative metering mode (
). This mode evaluates 63 zones in the viewfinder, as detailed earlier. It considers distance, light intensity, and color. It also biases metering toward the subject position that is indicated by the active AF point or points. It also compares the light values of adjacent AF points at distances that nearly achieved focus, and it takes into account back- or frontlighting. Evaluative metering mode ( ![]() ) works well for pictures of people; for scenes with an average distribution of light, medium, and dark tones; for backlit scenes; and for scenes with reflective surfaces, such as glass or water.
) works well for pictures of people; for scenes with an average distribution of light, medium, and dark tones; for backlit scenes; and for scenes with reflective surfaces, such as glass or water.
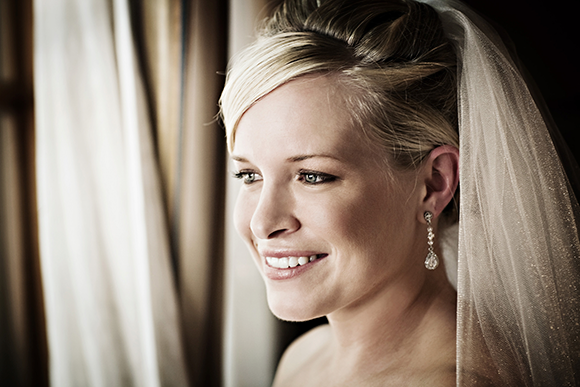
3.13 I used Evaluative metering for this image, in which the brighter background highlights maintain detail, and (most importantly) the bride’s face is properly exposed. Exposure: ISO 400, f/3.5, 1/60 second with a Canon 85mm, f/1.2L USM.
• Partial metering mode (![]() ). Using this mode, you can hone in on a much smaller area of a scene, (approximately 8 percent of the scene at the center of the viewfinder). By concentrating the meter reading more specifically, this mode gives good exposures for backlit and high-contrast subjects, and when the background is much darker than the subject is.
). Using this mode, you can hone in on a much smaller area of a scene, (approximately 8 percent of the scene at the center of the viewfinder). By concentrating the meter reading more specifically, this mode gives good exposures for backlit and high-contrast subjects, and when the background is much darker than the subject is.
• Spot metering mode (![]() ). In this mode, the metering concentrates only on a 3.5 percent area of the viewfinder at the center — the circle that is in the center of the viewfinder when the camera is set to Spot metering mode (
). In this mode, the metering concentrates only on a 3.5 percent area of the viewfinder at the center — the circle that is in the center of the viewfinder when the camera is set to Spot metering mode ( ![]() ). This mode is good for metering a middle-gray area in the scene or a metering from a photographic gray card to calculate exposure. Spot metering mode (
). This mode is good for metering a middle-gray area in the scene or a metering from a photographic gray card to calculate exposure. Spot metering mode ( ![]() ) is useful when shooting subjects with more extreme contrast, backlit subjects, and subjects against a dark background. And you can use Spot metering mode (
) is useful when shooting subjects with more extreme contrast, backlit subjects, and subjects against a dark background. And you can use Spot metering mode ( ![]() ) to keep the metering from being influenced by surrounding areas in the scene or subject. The portrait shown in Figure 3.14 was lit with a Speedlite on the right to light the subject’s face. Window light coming from the left side of the camera provided rim light on her hair. I wanted a perfect exposure on her face, so using Spot metering, I metered on a shadow area just below her eye socket. Basing my exposure on this reading assured I’d maintain shadow detail on the subject’s face.
) to keep the metering from being influenced by surrounding areas in the scene or subject. The portrait shown in Figure 3.14 was lit with a Speedlite on the right to light the subject’s face. Window light coming from the left side of the camera provided rim light on her hair. I wanted a perfect exposure on her face, so using Spot metering, I metered on a shadow area just below her eye socket. Basing my exposure on this reading assured I’d maintain shadow detail on the subject’s face.
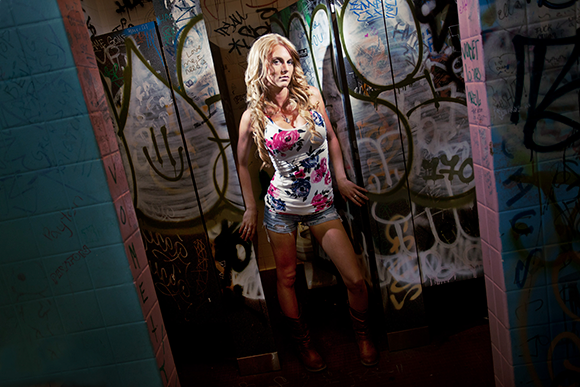
3.14 This portrait was metered using Spot metering. Exposure: ISO 640, f/4.0, 1/100 second with a Canon 17-40mm, f/4L USM.
• Center-weighted Average metering mode (![]() ). This mode weights exposure calculation for the light read at the center of the frame, and then evaluates light from the rest of the viewfinder to get an average for the entire scene. The center area encompasses an area larger than the Partial metering area. As the name implies, the camera expects that the subject will be in the center of the frame. This mode gives good results in scenes with even lighting and brightness.
). This mode weights exposure calculation for the light read at the center of the frame, and then evaluates light from the rest of the viewfinder to get an average for the entire scene. The center area encompasses an area larger than the Partial metering area. As the name implies, the camera expects that the subject will be in the center of the frame. This mode gives good results in scenes with even lighting and brightness.
In Scene Intelligent Auto shooting mode ( ![]() ), the camera automatically uses Evaluative metering mode (
), the camera automatically uses Evaluative metering mode ( ![]() ), and you cannot change it.
), and you cannot change it.
Partial, Spot, and Center-weighted Average metering all assume that the subject is at the center of the viewfinder. If you’re using Partial metering mode ( ![]() ) or Spot metering mode (
) or Spot metering mode ( ![]() ) and the subject isn’t in the center of the scene, move the camera so that the center AF point is over the area you want to meter, half-press the shutter button, and then press the AE Lock button (
) and the subject isn’t in the center of the scene, move the camera so that the center AF point is over the area you want to meter, half-press the shutter button, and then press the AE Lock button ( ![]() ) to lock the exposure. Then you can move the camera, focus again, and press the shutter button.
) to lock the exposure. Then you can move the camera, focus again, and press the shutter button.
To change the metering mode, press the Metering mode selection button ( ![]() ) above the LCD panel, and then turn the Main dial (
) above the LCD panel, and then turn the Main dial ( ![]() ) to choose the mode you want.
) to choose the mode you want.
Evaluating exposures
Once you’ve made an image, the next step is to evaluate the exposure to see if adjustments are needed. The 6D’s Brightness and RGB histograms are great tools for this task, especially with JPEG capture. The histogram shows you immediately if the highlights retained detail or were blown out, and if the shadows retained detail or were blocked (went completely black too quickly). There are two types of histograms, and each provides important information for evaluating images.
A histogram is a bar graph that shows the distribution and number of pixels captured at each brightness level. The horizontal axis shows the range of values from black to white, and the vertical axis displays the number of pixels at each location.
Brightness histogram
The Brightness histogram is a snapshot of the exposure bias and the distribution of tones in the image. The brightness values are shown along the horizontal axis of the histogram. Values range from black (level 0 on the left side of the histogram) to white (level 255 on the right side of the histogram). Note that although the 6D captures 14-bit RAW images, the image preview and histogram are based on an 8-bit JPEG rendering of the RAW file.
The Brightness histogram shows whether the image has blocked-up shadows (on the left side) or blown highlights (on the right side). Blown highlights are indicated by a spike of pixels against the right side of the histogram. Once the highlight detail is blown, it is gone for good. Blocked-up shadows are indicated by a spike of pixels against the left side of the histogram. If the shadows are blocked, you can, of course, lighten them in an editing program. However, digital noise is present in the shadows, and lightening the shadows reveals the digital noise.
Overall underexposure is shown when there is a gap between the end of the highlight pixels and the right edge of the graph. Overexposure is indicated by a spike of pixels on the right side of the graph. If any of these exposure problems is indicated, you can reshoot using an exposure modification technique described later in this section.
The 6D’s Highlight alert causes blown highlights to appear as blinking areas on the image preview during playback. You can turn on Highlight alert in the Playback menu 3 tab ( ![]() ).
).
The Brightness histogram simply reflects the tones in the image. In an average scene, the pixels are distributed fairly evenly across the histogram. In a scene with predominately light tones, such as a high-key image of a child in a white dress against a white background, more pixels are concentrated on the right side of the histogram. Likewise, in an image with predominately dark tones, or a low-key image, more pixels are concentrated toward the left side of the graph.
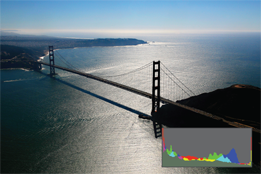
Image courtesy of Dennis Urbiztondo.
3.15 While this is a beautiful image, the histogram shows the loss of detail (clipping) occurring in the shadow areas. Exposure: ISO 200, f/16, 1/200 second with a Canon 17-40mm, f/4L USM.
RGB histogram
RGB histograms show the distribution of brightness levels for the Red, Green, and Blue (RGB) color channels. Each color channel has its own histogram so that you can evaluate the color channel’s saturation, gradation, and bias. As with the Brightness histogram, the horizontal axis shows how many pixels exist for each color brightness level and the vertical axis shows how many pixels exist at that level.
More pixels to the left indicate that the color is darker and less prominent, while more pixels to the right indicate that the color is brighter and denser. If pixels spike on the left or right side, then color information is either lacking or oversaturated with no detail, respectively.
Both types of histograms are great tools for evaluating JPEG images because the histograms are based on the JPEG format. However, if you shoot RAW images, the histogram is based on a less-robust JPEG version of the RAW image. The nature of the RAW image data does not make it feasible to display a histogram of the linear image data, so the camera makes a temporary JPEG version of the image and uses it for the preview image and the histogram. If you shoot RAW, just know that the RAW image is richer than the data you see on the histogram. Despite the JPEG rendering, the histogram is still an invaluable tool for evaluating exposure in the field. In fact, you can set the Picture Style to a lower contrast to get a better overall sense of what a RAW histogram would be.
To display a histogram, press the Playback button ( ![]() ), and then press the Info button (
), and then press the Info button ( ![]() ) two to three times until the Brightness and RGB histograms (or just the Brightness histogram) are displayed with the image preview.
) two to three times until the Brightness and RGB histograms (or just the Brightness histogram) are displayed with the image preview.
You can set the type of histogram that is displayed by default when you review images during playback, and if you like to see all the histograms, this can save you a couple of presses of the Info button ( ![]() ) to change displays.
) to change displays.
To change the default histogram display, follow these steps: On the Playback menu 3 tab ( ![]() ), use the Quick Control dial (
), use the Quick Control dial ( ![]() ) to highlight the Histogram disp., and then press the Set button (
) to highlight the Histogram disp., and then press the Set button ( ![]() ). The Brightness and RGB options appear. Next, use the Quick Control dial (
). The Brightness and RGB options appear. Next, use the Quick Control dial ( ![]() ) to highlight the option you want, and then press the Set button (
) to highlight the option you want, and then press the Set button ( ![]() ) to confirm your selection.
) to confirm your selection.
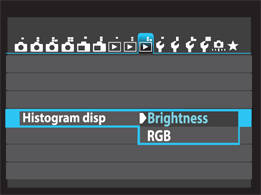
3.16 The Histogram display options.
Modifying and bracketing exposures
The ability to review the image histogram immediately allows you to know right away whether you need to modify the exposure. If you need to make exposure modifications, the 6D offers an abundance of automatic and manual ways to modify exposure, including Auto Lighting Optimizer, Highlight Tone Priority, Safety shift, Auto Exposure Lock, exposure compensation, and Auto Exposure Bracketing.
One of the 6D’s automatic exposure adjustments is Auto Lighting Optimizer, which brightens images that are too dark and/or that have low contrast. While this automatic correction is not applied to RAW images, you can apply it in Canon’s Digital Photo Professional program. You can turn off Auto Lighting Optimizer for images you shoot in Program AE ( ![]() ), Shutter-priority AE mode (
), Shutter-priority AE mode ( ![]() ), Aperture-priority AE (
), Aperture-priority AE ( ![]() ), and Manual (
), and Manual ( ![]() ) shooting modes. In addition, you can change the level of optimization.
) shooting modes. In addition, you can change the level of optimization.
Auto Lighting Optimizer is automatically turned off if you use Highlight Tone Priority, a feature detailed later in this chapter.
The question is, should you use Auto Lighting Optimizer, and when? If you most often print images directly from the media card, then Auto Lighting Optimizer can help you get better prints. It can also produce better exposure when you’re recording movies. However, if you want to control exposure yourself, then Auto Lighting Optimizer can mask the effects of exposure modifications, including exposure compensation, Auto Exposure Bracketing (AEB), and Auto Exposure Lock. Also, a downside of Auto Lighting Optimizer is that as it brightens the shadow areas in the image, digital noise becomes visible, just as it does when shadows are lightened in an image-editing program. So use it with a dose of caution, if you decide to use it at all. I use Auto Lighting Optimizer only when recording movies. However, if you don’t want or like to edit images on the computer, then Auto Lighting Optimizer may be a good option for your images.
You can adjust the level of Auto Lighting Optimizer from the default standard setting to Low or High, or you can turn off optimization entirely for images shot in Program AE ( ![]() ), Shutter-priority AE mode (
), Shutter-priority AE mode ( ![]() ), and Aperture-priority AE (
), and Aperture-priority AE ( ![]() ) shooting modes. Just go to the Shooting menu 3 tab (
) shooting modes. Just go to the Shooting menu 3 tab ( ![]() ), choose Auto Lighting Optimizer, and then press the Set button (
), choose Auto Lighting Optimizer, and then press the Set button ( ![]() ). Then choose the level you want or turn it off by choosing Disable. In the Basic Zone modes Scene Intelligent Auto (
). Then choose the level you want or turn it off by choosing Disable. In the Basic Zone modes Scene Intelligent Auto ( ![]() ), Creative Auto (
), Creative Auto ( ![]() ), and Special Scene (
), and Special Scene ( ![]() ), Auto Lighting Optimizer is automatically applied at the Standard level to JPEG images.
), Auto Lighting Optimizer is automatically applied at the Standard level to JPEG images.
To turn off Auto Lighting Optimizer for Manual exposure mode ( ![]() ), go to the Shooting menu 3 tab (
), go to the Shooting menu 3 tab ( ![]() ), choose Auto Lighting Optimizer, and then press the Set button (
), choose Auto Lighting Optimizer, and then press the Set button ( ![]() ). If a check mark is displayed, it means that the optimization is turned off. If there is no check mark, press the Info. Button (
). If a check mark is displayed, it means that the optimization is turned off. If there is no check mark, press the Info. Button ( ![]() ) to disable Auto Lighting Optimizer for Manual exposure mode (
) to disable Auto Lighting Optimizer for Manual exposure mode ( ![]() ).
).
Highlight Tone Priority
Highlight Tone Priority is designed to improve and maintain highlight detail in bright elements in the scene. With Highlight Tone Priority, highlight detail is improved by extending the range between 18 percent middle gray and the maximum highlight tones in the image, effectively increasing the dynamic range. It provides up to one additional stop of image detail in the highlight areas. Using Highlight Tone Priority also makes the gradations between gray tones and highlights smoother.
This option is especially useful when shooting very light objects such as a wedding dress or white tuxedo, bright white sand on a beach, or light-colored products. If you enable Highlight Tone Priority, the lowest ISO is adjusted to 200, and you cannot use ISO 50 or 100.
Highlight Tone Priority takes advantage of the higher ISO baseline so that the image sensor pixel wells do not fill or saturate causing tonal transitions that lack smoothness. Also, with the 6D’s 14-bit analog/digital conversion, the camera sets a tonal curve that is relatively flat at the top in the highlight area to compress highlight data. The result is almost a full f-stop increase in dynamic range (the range from highlight to shadow tones in a scene as measured in f-stops). The trade-off, however, is a more abrupt move from deep shadows to black — a reduced range of shadow tones that also increases the potential for digital noise in the shadows.
To enable Highlight Tone Priority, set the Mode dial to any of the Creative Zone exposure modes and follow these steps: On the Shooting menu 4 tab ( ![]() ), use the Quick Control dial (
), use the Quick Control dial ( ![]() ) to select Highlight tone priority, and then press the Set button (
) to select Highlight tone priority, and then press the Set button ( ![]() ). Two options appear: OFF and Enable (
). Two options appear: OFF and Enable ( ![]() ). Then use the Quick Control dial (
). Then use the Quick Control dial ( ![]() ) to select Enable (
) to select Enable ( ![]() ), and then press the Set button (
), and then press the Set button ( ![]() ). The Shooting menu 4 tab (
). The Shooting menu 4 tab ( ![]() ) reappears.
) reappears.
If you enable Highlight Tone Priority, it is denoted in the viewfinder and on the LCD panel as Highlight tone priority ( ![]() ), with the D+ indicating Dynamic range.
), with the D+ indicating Dynamic range.
Safety shift
Another automatic exposure control option that can be very useful is Safety shift. With Safety shift, the camera automatically changes the manually selected aperture or shutter speed if the light changes dramatically enough to make the current exposure inaccurate when you’re shooting in Aperture-priority AE mode ( ![]() ) or Shutter-priority AE mode (
) or Shutter-priority AE mode ( ![]() ). Alternatively, you can set Safety shift to adjust the ISO setting to get a standard exposure in sudden light shifts.
). Alternatively, you can set Safety shift to adjust the ISO setting to get a standard exposure in sudden light shifts.
Having Safety shift change the exposure may seem intrusive, but in some scenarios such as action shooting, Safety shift can be welcome insurance in getting the best exposure. It also enables you to concentrate on capturing the moments of peak action.
To enable Safety shift, make sure you have used the Mode dial to select one of the Creative Zone exposure modes, and then follow these steps:
1. On the C.Fn1: Exposure menu tab (![]() ), use the Quick Control dial (
), use the Quick Control dial (![]() ) to highlight menu 6, Safety shift, and then press the Set button (
) to highlight menu 6, Safety shift, and then press the Set button (![]() ). The Safety shift screen is activated.
). The Safety shift screen is activated.
2. Select the option you want:
• Shutter speed/Aperture. Choose this option to have the camera automatically change either the shutter speed you set in Shutter-priority AE mode ( ![]() ) or the aperture you set in Aperture-priority AE mode (
) or the aperture you set in Aperture-priority AE mode ( ![]() ) to get a good exposure if the light changes enough to require an exposure adjustment.
) to get a good exposure if the light changes enough to require an exposure adjustment.
• ISO speed. Choose this option to have the ISO you set change automatically in Program AE ( ![]() ), Shutter-priority AE mode (
), Shutter-priority AE mode ( ![]() ), and Aperture-priority AE mode (
), and Aperture-priority AE mode ( ![]() ) to get a good exposure if the light changes enough to require an exposure change.
) to get a good exposure if the light changes enough to require an exposure change.
3. Press the Set button (![]() ). The C.Fn1: Exposure menu tab (
). The C.Fn1: Exposure menu tab ( ![]() ) reappears.
) reappears.
Auto Exposure Lock
Auto Exposure Lock (AE Lock) is the only way that you can meter and lock the exposure on one area of the scene and then focus on a different area. This is a great tool to use with Spot metering mode ( ![]() ) when you meter on a middle tone.
) when you meter on a middle tone.
In Evaluative metering mode ( ![]() ) with manual AF-point selection, AE Lock is set at the AF point that achieves focus. In Partial metering mode (
) with manual AF-point selection, AE Lock is set at the AF point that achieves focus. In Partial metering mode ( ![]() ), Spot metering mode (
), Spot metering mode ( ![]() ), and Center-weighted metering mode (
), and Center-weighted metering mode ( ![]() ), the exposure is locked at the center AF point. So be sure to point the center AF point over the part of the scene or subject you want to base the meter reading on, and then press the AE Lock button (
), the exposure is locked at the center AF point. So be sure to point the center AF point over the part of the scene or subject you want to base the meter reading on, and then press the AE Lock button ( ![]() ). The camera stores the meter reading for a few seconds while you move the camera to recompose the image, focus, and make the picture. While AE Lock has many uses, there are some limitations, as outlined in Table 3.1.
). The camera stores the meter reading for a few seconds while you move the camera to recompose the image, focus, and make the picture. While AE Lock has many uses, there are some limitations, as outlined in Table 3.1.

AE Lock ( ![]() ) is only available in the Creative Zone exposure modes.
) is only available in the Creative Zone exposure modes.
Exposure compensation
Another way to modify the camera’s metered exposure is by increasing or decreasing the exposure by a specific amount. Using exposure compensation, you can set the compensation up to +/– 5 stops in 1/3-stop increments. While the 6D offers 5 stops of compensation, the LCD panel and viewfinder can only display 3 stops of compensation. To set the full 5 stops, use the Quick Control screen (press the ![]() button), or use the Auto Exposure Bracketing (AEB) screen detailed in the next section.
button), or use the Auto Exposure Bracketing (AEB) screen detailed in the next section.
The classic use of exposure compensation is to override the camera’s suggested exposure settings. In scenes with large expanses of white or dark tones, the camera’s onboard meter expects both subjects to reflect 18 percent of the light, and left to its own devices, it will then render white sand and black train engines as gray. Wedding photographers are all too familiar with this. So, to get true whites and blacks, you set exposure compensation to give the image more or less exposure than what the camera recommends. For example, for a snow scene, a +1 or +2 stop of compensation renders snow as white instead of gray. For a jet-black train engine, a – 1 or – 2 stop of compensation renders it as true black.
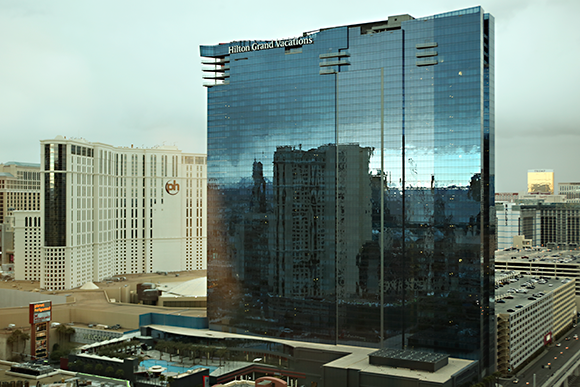
3.17 In this panoramic image of the Las Vegas strip, I used Aperture-priority AE mode and a – 1-1/3 stop exposure compensation to darken the sky, but maintain detail in the reflection. Exposure: ISO 800, f/2.8, 1/80 second with a Canon 28-70mm, f/2.8L USM.
Exposure compensation is also useful when you want to modify the camera’s metered exposure for a series of shots. Here are some points to know about exposure compensation:
• Exposure compensation can be used in the Program AE (![]() ), Shutter-priority AE (
), Shutter-priority AE (![]() ), and Aperture-priority AE (
), and Aperture-priority AE (![]() ) shooting modes, but it cannot be used in the Manual (
) shooting modes, but it cannot be used in the Manual (![]() ) or Bulb (
) or Bulb (![]() ) modes.
) modes.
• In Shutter-priority AE mode (![]() ), setting exposure compensation changes the aperture by the specified amount of compensation. In Aperture-priority AE mode (
), setting exposure compensation changes the aperture by the specified amount of compensation. In Aperture-priority AE mode ( ![]() ), it changes the shutter speed. In Program AE mode (
), it changes the shutter speed. In Program AE mode ( ![]() ), compensation changes both the shutter speed and aperture by the exposure amount you set.
), compensation changes both the shutter speed and aperture by the exposure amount you set.
• The amount of exposure compensation you set remains in effect until you change it, regardless of whether you turn the camera off, change the lens, or replace the battery.
• Automatic exposure correction features, such as Auto Lighting Optimizer, can mask the effect of compensation. I recommend turning off Auto Lighting Optimizer on the Shooting menu 4 tab ( ![]() ) if you are using exposure compensation.
) if you are using exposure compensation.
• Exposure compensation is set by turning the Quick Control dial (![]() ). As a result, it is easy to inadvertently set or change compensation. To avoid this, set C.Fn3: Operations/Others, Multi-function lock so that the Quick Control dial has a check mark next to it. Then set the Multi-function Lock switch on the back of the camera to the Lock position. You are now unable to use the Quick Control dial (
). As a result, it is easy to inadvertently set or change compensation. To avoid this, set C.Fn3: Operations/Others, Multi-function lock so that the Quick Control dial has a check mark next to it. Then set the Multi-function Lock switch on the back of the camera to the Lock position. You are now unable to use the Quick Control dial ( ![]() ) to make exposure compensation changes, but the dial continues to function when you are working with the camera menus and making changes on the LCD panel.
) to make exposure compensation changes, but the dial continues to function when you are working with the camera menus and making changes on the LCD panel.
To set exposure compensation, turn the Quick Control dial ( ![]() ) to the left to set negative compensation or to the right to set positive compensation. As you turn the Quick Control dial (
) to the left to set negative compensation or to the right to set positive compensation. As you turn the Quick Control dial ( ![]() ), the check mark on the Exposure Level Indicator moves in 1/3-stop increments up to +/– 3 stops. If you want to set 4 or 5 stops of exposure compensation, go to the next section on Auto Exposure Bracketing. Also, if you set more than 3 stops of exposure compensation, the Exposure Level Indicator in the viewfinder displays left and right arrows.
), the check mark on the Exposure Level Indicator moves in 1/3-stop increments up to +/– 3 stops. If you want to set 4 or 5 stops of exposure compensation, go to the next section on Auto Exposure Bracketing. Also, if you set more than 3 stops of exposure compensation, the Exposure Level Indicator in the viewfinder displays left and right arrows.
To cancel exposure compensation, repeat the steps above, and then move the check mark back to the center position of the Exposure Level Indicator.
Auto Exposure Bracketing
Auto Exposure Bracketing (AEB), which is available in the Creative Zone exposure modes only, enables you to capture a series of three images, each at different exposures. Traditionally, the bracketing sequence is one image at the camera’s standard metered exposure, one image 1/3-stop above the standard exposure, and one image 1/3-stop below the standard exposure up to +/– 3 stops. Thus, if the scene has high contrast, highlight detail is better preserved in the darker exposure than in either the standard or lighter exposure. Conversely, the shadows may be more open in the brighter exposure than in either of the other two.
With the 6D, you can shift the entire bracketing range to below or above zero on the Exposure Level Indicator. As a result, you can set all three bracketed exposures to be brighter or darker than the camera’s standard exposure.
Exposure bracketing provides a way to cover the bases — to get at least one printable exposure in scenes with challenging lighting, scenes that are difficult to set up again, or scenes where there is only one opportunity to capture an elusive subject.
Today, however, exposure bracketing is most often used for HDR imaging. With the 6D, you can combine both exposure compensation and AEB to set Exposure Values of up to 8 stops from the metered exposure. In practical application, combining exposure compensation and AEB provides a bracketing range that is more than adequate for most HDR work if you choose to do it manually rather than using the HDR mode on the camera.
HDR shooting and the new in-camera HDR feature on the 6D are detailed later in this chapter.
Regardless of how you use the bracketed exposures, here are some points to keep in mind when using AEB:
• AEB is available in the Creative zone exposure modes. These are Program AE ( ![]() ), Shutter-priority AE (
), Shutter-priority AE ( ![]() ), Aperture-priority AE (
), Aperture-priority AE ( ![]() ), and Manual (
), and Manual ( ![]() ).
).
• AEB cannot be used with an accessory flash unit.
• Settings for AEB are good only for the current shooting session. If you turn off the camera, or attach a flash, then AEB is cancelled. If you want to retain the AEB settings even after turning off the camera, you can set C.Fn1: Exposure, Bracketing auto cancel to Disable to retain the settings.
• In the High-speed continuous (![]() ), Low-speed continuous (
), Low-speed continuous (![]() ), and Silent continuous (
), and Silent continuous (![]() ) shooting modes, pressing the shutter button once takes all three bracketed exposures. Likewise, in Self-timer mode 10 seconds (
) shooting modes, pressing the shutter button once takes all three bracketed exposures. Likewise, in Self-timer mode 10 seconds ( ![]() ) or Self-timer mode 2 seconds (
) or Self-timer mode 2 seconds ( ![]() ), the bracketed shots are taken in succession after the timer interval elapses.
), the bracketed shots are taken in succession after the timer interval elapses.
• In the Single shooting (![]() ) and Silent single shooting (
) and Silent single shooting (![]() ) drive modes, you have to press the shutter button three times to get the bracketed sequence.
) drive modes, you have to press the shutter button three times to get the bracketed sequence.
• The order of bracketed exposures begins with the standard exposure, followed by the decreased and increased exposures. You can change the order of bracketing using C.Fn1: Exposure, Bracketing sequence.
• You can change the default 1/3-stop exposure increment to 1/2 stop using C.Fn1: Exposure, Exposure level increments.
If you combine AEB with exposure compensation, the bracketed exposures are based on the amount of exposure compensation that you set. To set AEB, set the Mode dial to Program AE ( ![]() ), Shutter-priority AE (
), Shutter-priority AE ( ![]() ), Aperture-priority AE (
), Aperture-priority AE ( ![]() ), or Manual (
), or Manual ( ![]() ) mode.
) mode.
Next, on the Shooting menu 3 tab ( ![]() ), highlight Expo. comp./AEB, and then press the Set button (
), highlight Expo. comp./AEB, and then press the Set button ( ![]() ). The Exposure compensation/AEB setting screen appears. Next, turn the Main dial (
). The Exposure compensation/AEB setting screen appears. Next, turn the Main dial ( ![]() ) clockwise to set the bracketing amount, and then press the Set button (
) clockwise to set the bracketing amount, and then press the Set button ( ![]() ). As you turn the Main dial (
). As you turn the Main dial ( ![]() ), two additional tick marks appear and move outward from the center in 1/3-stop increments. If you want to shift the bracketing sequence above or below zero, turn the Quick Control dial (
), two additional tick marks appear and move outward from the center in 1/3-stop increments. If you want to shift the bracketing sequence above or below zero, turn the Quick Control dial ( ![]() ).
).
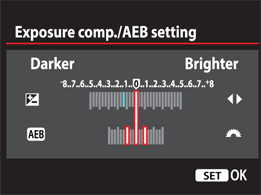
3.18 The Exposure comp./AEB setting screen set for +/–1 stop of bracketing from the standard exposure set.
Creative Exposure Techniques
The 6D offers two new techniques: multiple exposure and HDR shooting. With both techniques, there are ample options for setting up shots and for the choosing a final look of the image.
Making multiple-exposure images
With film shooting, double exposures have long been a popular technique for combining multiple subjects in a single frame. In Multiple exposure mode, it’s possible to capture two to nine exposures and have the camera create a single composited image. You can shoot all new images, or you can choose an image on the media card as the base image. (The existing image cannot have been captured with Highlight Tone Priority enabled.)
I recommend shooting in Live View so you can watch each new image merge with the previous images.
Here are some pointers for multiple-exposure shooting:
• You can use any of the JPEG image quality settings and full-resolution RAW, but not S-RAW or M-RAW for individual images or the merged final image. If M-RAW or S-RAW is selected when shooting begins, the camera automatically switches to RAW. You can shoot RAW+JPEG as well. The current settings for image quality, Picture Style, ISO, High ISO speed noise reduction, and so on, are used for the first and subsequent exposures in the series. Multiple exposure mode does not use the Auto Picture Style ( ![]() ). If it’s selected, the camera automatically changes it to the Standard Picture Style (
). If it’s selected, the camera automatically changes it to the Standard Picture Style ( ![]() ).
).
• Keep the ISO low and exposure time brief, use fewer exposures, and use a tripod in low light (unless you want a creative blur effect). Also, test the mode in advance to see how image blending works. For example, I’ve found that the first image in the series has a higher blend opacity in the final image, at least using the Average exposure option. Your experience may differ, but test different composites methods so you know what to expect in the final image.
• Some camera settings are disabled in Multiple exposure mode (![]() ). When shooting in Multiple exposure mode, Auto Lighting Optimizer, Highlight Tone Priority, Peripheral Illumination Correction, and Chromatic Aberration Correction are disabled. Anything else that is grayed out on the menus is, of course, unusable.
). When shooting in Multiple exposure mode, Auto Lighting Optimizer, Highlight Tone Priority, Peripheral Illumination Correction, and Chromatic Aberration Correction are disabled. Anything else that is grayed out on the menus is, of course, unusable.
• Multiple exposure shooting is disabled if you are using the Wi-Fi function, White Balance Auto Bracketing (![]() ), or HDR mode (
), or HDR mode (![]() ). Also, you can’t shoot multiple exposures if you’re shooting movies, shooting tethered to a computer, or if shooting in one of the Basic Zone exposure modes.
). Also, you can’t shoot multiple exposures if you’re shooting movies, shooting tethered to a computer, or if shooting in one of the Basic Zone exposure modes.
• If you set up for multiple exposures, and then turn off the camera or replace the battery, multiple-exposure shooting is cancelled. Also, if you start shooting in one exposure mode and then switch to another to finish shooting, Multiple exposure mode is cancelled, although the single images you’ve shot are saved to the media card. It works the other way, too — the series is cancelled if you move from Shutter-priority AE ( ![]() ) to Aperture-priority AE (
) to Aperture-priority AE ( ![]() ) or another exposure mode. In short, don’t switch among exposure modes during series shooting.
) or another exposure mode. In short, don’t switch among exposure modes during series shooting.
Setting up for Multiple exposure mode shooting
The Multiple exposure mode menu has all the options you need to set up the camera for shooting. The Multiple exposure option is available in Creative Zone exposure modes only and is set to Disable by default. To enable multiple-exposure shooting, choose one of the following:
• Multi-expos ctrl (Multiple-exposure control). This is where you determine the exposure calculation for the series. You can choose one of the following:
• Additive. Every image exposure is cumulative, with each exposure adding to the next. To get a final image with a good exposure, set negative exposure compensation before shooting each image. The more exposures you make, the higher the negative compensation needed per exposure. As a starting point, Canon recommends the following compensation: two exposures: – 1 stop, Three exposures: – 1.5 stops, and four exposures: – 2 stops.When you use Additive with On: Func/Ctrl, the image on the LCD monitor may look noisy. However, noise reduction is applied to the final image for an improved appearance.
• Average. Choose this is the option when you want the camera to figure out the exposure compensation automatically. It works well when you’re photographing the same scene multiple times. In that scenario, the camera moderates the exposures to keep the background and overlapping highlight areas from overexposing. I used this option for the multiple-exposure image shown in this section, and the exposures were not strictly captures of the same scene. I found that it works well even with moderate changes in light between exposures.
• No. of exposures (Number of exposures). You can choose from two to nine images regardless of the Multiple exposure setting you choose (On:ContShtng, or On:Func/Ctrl). Alternatively, you can use an image on the media card as the starting image. If you do that, then it counts as the first image. Thus, in a three-image composite that uses an existing image on the card, you shoot two images to complete the series.
• Continue Mult-exp (Continue Multiple-exposure). Your choices are 1-shot only, Continuously, or Disable. Like it sounds, the Continuously option takes the exposures for the Multiple-exposure sequence automatically, one after the other. The 1-shot option lets users manually trigger each exposure, using the number of exposures chosen in the previous step, by repeatedly pressing the shutter release. If you choose Continuously, then come back to this option and choose Disable to return to normal shooting.
• Select image for multi. expo. You can choose this option and press the Set button ( ![]() ) to navigate to a RAW image on the media card that will be used as the first image in the series. As mentioned earlier, there are restrictions, including that the image has not been captured with Highlight Tone Priority. Also, it cannot be a JPEG, M-RAW, or S-RAW image. You can also copy a RAW image from your computer onto the media card and use it as long as it was made with a 6D. Camera settings, including the Picture Style, ISO, and color space used for the base image, will be used for the rest of the images in the series.
) to navigate to a RAW image on the media card that will be used as the first image in the series. As mentioned earlier, there are restrictions, including that the image has not been captured with Highlight Tone Priority. Also, it cannot be a JPEG, M-RAW, or S-RAW image. You can also copy a RAW image from your computer onto the media card and use it as long as it was made with a 6D. Camera settings, including the Picture Style, ISO, and color space used for the base image, will be used for the rest of the images in the series.
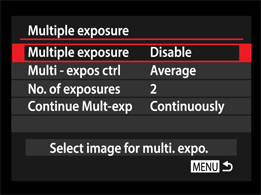
3.19 The Multiple exposure screen.
Shooting in Multiple exposure mode
A crucial step in getting a successful multiple-exposure image is planning the content of the composited image and having a clear vision of the story. Additionally, before you begin, make sure that the Mode dial is set to one of the Creative Zone exposure modes, and that the camera isn’t in Movie mode ( ![]() ). Follow these steps to shoot a multiple-exposure series:
). Follow these steps to shoot a multiple-exposure series:
1. Press the Menu button (![]() ), and use the Main dial (
), and use the Main dial (![]() ) to navigate to the Shooting menu 4 tab (
) to navigate to the Shooting menu 4 tab (![]() ).
).
2. Use the Quick Control dial (![]() ) to highlight Multiple exposure, and then press the Set button (
) to highlight Multiple exposure, and then press the Set button (![]() ). The Multiple exposure options screen appears. Use the Quick Control dial (
). The Multiple exposure options screen appears. Use the Quick Control dial ( ![]() ) to highlight Enable and press the Set button (
) to highlight Enable and press the Set button ( ![]() ) to confirm your selection.
) to confirm your selection.

3.20 The Multiple exposure options for exposure control.
3. Choose No. of exposures, and then press the Set button (![]() ). An arrow control is added to the number.
). An arrow control is added to the number.
4. Turn the Quick Control dial (![]() ) to set the number of exposures you want, and then press the Set button (
) to set the number of exposures you want, and then press the Set button (![]() ).
).
5. Set any other options you want on the Multiple exposure screen. The options are described earlier in this section.
6. Begin shooting. If you chose Additive as the exposure control option, be sure to apply negative exposure compensation for each image as suggested earlier. After the selected number of shots, stop shooting. The merged image will be displayed on the LCD monitor.
You can press the Playback button ( ![]() ) anytime during shooting (but before the composite image is made), and then press the Erase button (
) anytime during shooting (but before the composite image is made), and then press the Erase button ( ![]() ) to display these additional options across the bottom of the screen.
) to display these additional options across the bottom of the screen.
• Return to previous screen. This enables you to review the most recently captured image and remove the ribbon of controls.

3.21 For this double exposure, the first image was a red and white floral pattern. The second exposure was a vase of red roses. I tried a variety of exposure options, but the image looked best with the Average option. Exposure: ISO 800, f/2.8, 1/8 second with a Canon 17-40mm, f/4L USM.
• Undo last image. Select this option, and then press the Set button ( ![]() ) to confirm and delete the last image. After the deletion, the number of images remaining in the series is increased by one.
) to confirm and delete the last image. After the deletion, the number of images remaining in the series is increased by one.
• Save and exit. Select this option, and then press the Set button ( ![]() ) to confirm that you want to save the images captured. Choose OK on the Save and exit confirmation screen. If you have set All images on the Multiple exposure screen, then all images are saved. If you have opted to save only the composite image, then it is saved.
) to confirm that you want to save the images captured. Choose OK on the Save and exit confirmation screen. If you have set All images on the Multiple exposure screen, then all images are saved. If you have opted to save only the composite image, then it is saved.
• Exit without saving. All images including the composite image are deleted.
Shooting High Dynamic Range images
High Dynamic Range (HDR) shooting is a technique that has gained wide acceptance among photographers. The process is to capture a series of bracketed images, with one or more exposures set for the highlights, other exposures optimized for the midtones, and yet other exposures optimized for shadow detail. In some cases, five to seven or more bracketed frames are merged into the final composite image.
The final images are composited in Photoshop or another HDR program to create a single image that has a dynamic range beyond what the camera can capture in a single frame. Dedicated HDR software is available to help you create images that range from traditional photographic renderings to those with a high degree of contrast, detail and artistic renderings.
HDR images are always bracketed by shutter speed rather than by aperture to avoid shifts in depth of field rendering.
The 6D offers in-camera HDR image capture and processing in Creative Zone exposure modes. The in-camera processing doesn’t offer the capabilities that full-blown HDR programs offer, but the HDR feature is both capable and handy for capturing images that go beyond the dynamic range that a single image can capture.
With any HDR shooting, use a tripod so that the combined images align perfectly. In addition, because the images are bracketed by shutter speed, it’s even more important to stabilize the camera in low light.
Here are some things to consider before shooting HDR images:
• Image quality. Images are captured in JPEG, and will match the quality setting selected from the Image quality options found on the Shooting menu 1 tab ( ![]() ).
).
• High-speed image capture. When you press the shutter button to capture the three images, the camera fires them off in rapid succession. There isn’t an option for a slower single-shot speed. The fast capture rate gives you an edge for handholding the camera and still getting good alignment for the images in some cases; however, it’s best to use a tripod.
• When HDR can’t be used. HDR shooting is available in Creative Zone exposure modes only and doesn’t work if you have set AEB, White Balance Bracketing, Multiple exposure mode, or an expanded ISO, and if you’re using a Speedlite it won’t fire.
The HDR Mode screen provides all the options you need to set up the camera for HDR shooting. Here’s an overview of the options you can set:
• Adjust dyn (dynamic) range. With this menu option, you can set the bracketing range to plus/minus 1, 2, or 3 EV. You can also choose Auto to let the camera determine the bracketing amount. Only the shutter speed changes, and that’s done to avoid changes in depth of field shifts. While each scene differs, generally, the higher the contrast and the brighter the light in the scene, the wider the bracketing difference you should use.
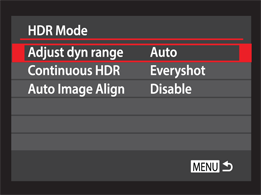
3.22 The HDR dynamic range options.
• Continuous HDR. This menu option enables you to capture one HDR shot or shoot HDR for all images until you change this option.
• Auto Image Align. This is another menu option where you can choose to have the camera automatically align the images, or not. With automatic alignment, the camera can correct minor misalignments among the images for handheld images. In the alignment process, you can expect the composite image to be slightly cropped. Also, if there are stripes, bars, or other repetitive lines in the scene, the alignment may not work well. If you disable this option, the camera does not produce a composite image. The bracketed images are captured and saved to the media card so that you can download them and use an HDR program to create the final composited image on the computer.
To set up for HDR shooting, set the Mode dial to any Creative Zone exposure mode except Bulb mode ( ![]() ), and then follow these steps:
), and then follow these steps:
1. Press the Menu button (![]() ) and use the Main dial (
) and use the Main dial (![]() ) to navigate to the Shooting menu 4 tab (
) to navigate to the Shooting menu 4 tab (![]() ).
).
2. Use the Quick Control dial (![]() ) to highlight HDR Mode, and then press the Set button (
) to highlight HDR Mode, and then press the Set button (![]() ). The HDR Mode options screen appears.
). The HDR Mode options screen appears.
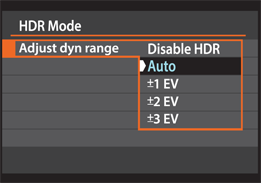
3.23 The HDR Mode options.
3. Turn the Quick Control dial (![]() ) to select each menu option, choose the setting, and then press the Set button (
) to select each menu option, choose the setting, and then press the Set button (![]() ). The options are described earlier in this section.
). The options are described earlier in this section.
4. Preferably with the camera on a tripod, press the shutter button to take the three bracketed images in rapid succession. After a short wait, the composited JPEG image appears on the LCD monitor.
Selecting a Drive Mode
The 6D offers Drive modes for shooting everything from still life to action. You can choose among five Drive modes when you are shooting in any of the Creative Zone exposure modes.
In Basic Zone exposure modes, the camera automatically chooses the Drive mode, but you can optionally choose Self-timer mode 10 seconds ( ![]() ).
).
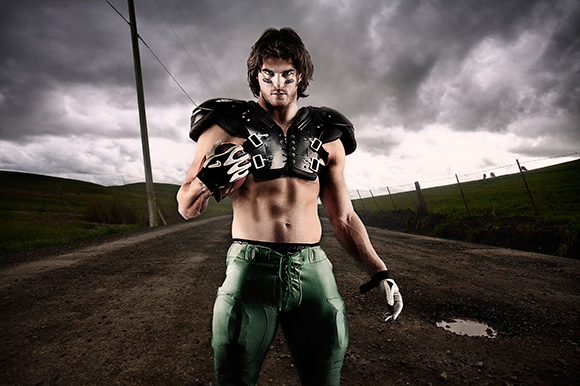
3.24 A composite of a football player (taken in the studio) and a three-exposure composite of the background combined in Nik Software’s HDR Efex Pro plug-in for Photoshop. Exposure 1: ISO 400, f/8.0, 1/60 second. Exposure 2: f/8.0, 1/125 second. Exposure 3: f/8.0, 1/30 second with a Canon 17-40mm, f/4L USM.
Here is a summary of each mode:
• Single shooting (![]() ). In this mode, one image is captured with each press of the shutter button. This is a good choice for still subjects and any other unhurried shooting scenarios.
). In this mode, one image is captured with each press of the shutter button. This is a good choice for still subjects and any other unhurried shooting scenarios.
• Continuous shooting (![]() ). This mode also delivers a maximum of 4.5 fps when you keep the shutter button completely depressed.
). This mode also delivers a maximum of 4.5 fps when you keep the shutter button completely depressed.
• Silent single shooting (![]() ). This is the same as Single shooting (
). This is the same as Single shooting ( ![]() ) but with quieter camera operation. There is a slight delay from when you press the shutter button to when the image is taken.
) but with quieter camera operation. There is a slight delay from when you press the shutter button to when the image is taken.
• Silent continuous shooting (![]() ). This is the same as Continuous shooting (
). This is the same as Continuous shooting ( ![]() ) but with quieter camera operation. There is a slight delay from when you press the shutter button to when the image is taken.
) but with quieter camera operation. There is a slight delay from when you press the shutter button to when the image is taken.
• Self-timer/Remote control modes: 10-second (![]() ) and 2-second (
) and 2-second (![]() ). In Self-timer modes, the camera delays taking the picture for 2 or 10 seconds after the shutter button is fully depressed. The 10-second mode (
). In Self-timer modes, the camera delays taking the picture for 2 or 10 seconds after the shutter button is fully depressed. The 10-second mode ( ![]() ) is handy when you want to include yourself in a picture. In addition, you can choose the 2-second mode (
) is handy when you want to include yourself in a picture. In addition, you can choose the 2-second mode ( ![]() ), which is useful in nature, landscape, and close-up shooting, and can be combined with Mirror lockup to prevent vibration from the reflex mirror action. You have to press the shutter button once to lock the mirror and again to make the exposure.
), which is useful in nature, landscape, and close-up shooting, and can be combined with Mirror lockup to prevent vibration from the reflex mirror action. You have to press the shutter button once to lock the mirror and again to make the exposure.
Smart buffering delivers large bursts of images to the camera’s internal buffer. Then the camera immediately begins writing and offloading images to the media card. The time required to empty the buffer depends on the speed of the card, the complexity of the image, and the ISO setting. With smart buffering, you can continue shooting in one-, two-, or three-image bursts almost immediately after the buffer is filled, and offloading begins and frees up buffer space.
To switch to a different Drive mode, press the Drive button ( ![]() ) above the LCD panel, and then turn the Quick Control dial (
) above the LCD panel, and then turn the Quick Control dial ( ![]() ) to select the Drive mode you want.
) to select the Drive mode you want.