8. share your work
In many instances, when you’re finished creating and formatting a worksheet or chart, you’ll need to print it or e-mail it to another Excel user.
Although you can just use the Print command to send a sheet to your printer for hard copy, Excel offers a wide variety of page setup options you can use to customize your printout. For example, you can change page orientation and scaling, set margins, and add headers and footers. All of these settings affect the way your sheet will appear when printed.

Fortunately, Excel’s Print Preview feature (shown here) enables you to see what your sheets will look like before you print them, so you can fine-tune their appearance without wasting a lot of paper.
This chapter explores many of Excel’s page setup options to prepare our worksheets for printing and then to print them. It also explains how you can use Excel and Outlook together to send Excel worksheets to others via e-mail.
switch to page layout
Throughout this project, we’ve been working in Normal view, which displays each worksheet as a single scrolling page. Page Layout view, however, displays the worksheet in individual pages, as they will print. It also enables you to set options such as headers and footers.
1. If necessary, click one of the worksheet tabs to display a worksheet.
![]()
2. Click the Ribbon’s View tab.

3. Click the Page Layout View button in the Workbook Views group.

The current worksheet (and all other worksheets in the workbook file) switches to Page Layout view.

select the sheets
To print a sheet or set print options for it, you must activate it. Because our workbook includes several worksheets which will all have the same settings, we can select them all and set options for all of them at once.
1. Click the sheet tab for the January sheet.
![]()
2. Hold down the Control key and click the sheet tabs for the February, March, and Quarter 1 sheets.
![]()
All of the sheet tabs you clicked become selected.
![]()
open page setup
The Page Setup dialog is a gold mine of options for setting up worksheets and charts for printing. Its options are organized into five categories:
• Page options control page orientation and scaling.
• Margins options control margin measurements and the centering of the sheet on the page.
• Header/Footer options enable you to choose from predefined headers or footers or create your own.
• Sheet options (which appear for worksheets only) enable you to specify what prints and how it prints or Chart options (which appear for chart sheets only) enable you to specify how a chart will print.
This chapter explores some of these options. But first, let’s open that dialog.
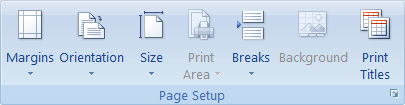
1. Click the Page Layout tab on the Ribbon.

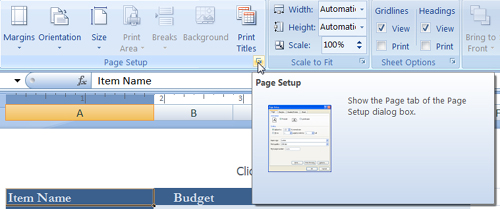
2. Click the Dialog Box Launcher button in the bottom-right corner of the Page Setup group in the Ribbon’s Page Layout tab.
set page options
Page options affect page orientation and scaling, as well as a few other settings. We’ll set Page options for Portrait orientation, 100% scaling, and Letter size paper. These options should be set by default, but we’ll check them, just in case they aren’t.

adjust margins
A margin is the amount of space between the printable area on a page and the edge of the paper. In Excel, Margins options enable you to control the space between the edge of the paper and the sheet contents, as well as the header or footer. Margins settings also enable you to center a sheet horizontally or vertically on a page.

5. Check to make sure other settings appear as illustrated here and make changes as necessary.
add a standard footer
A footer is text that appears at the bottom of every page. In Excel, you add a footer with the Header/Footer options of the Page Setup dialog, which gives you a choice of predefined or custom headers and footers. For our example, we’ll add a standard, predefined footer.

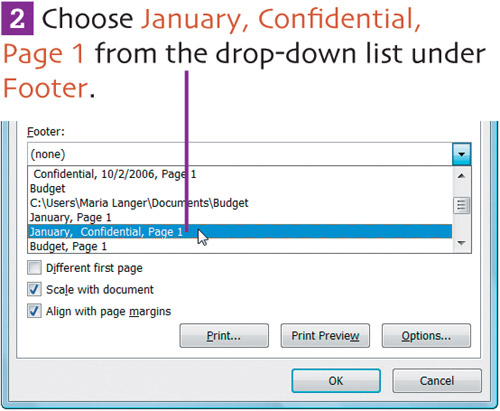
The footer appears in the Footer preview area.

add a custom header
A header is text that appears at the top of every page. In Excel, you add a header with the Header/Footer options of the Page Setup dialog, which gives you a choice of predefined or custom headers and footers. For our example, we’ll add a custom header.
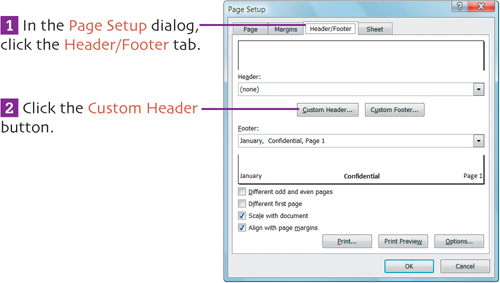

The Header dialog appears.


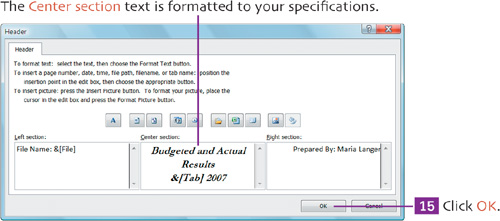
At this point, the Header dialog should look like this.

9. Select the contents of the Center section box.

10. Click the Format Text button.
![]()
The Font dialog appears.

Your custom header appears in the Header preview area.

save settings
We’ve made a bunch of changes in the Page Setup dialog. It’s time to save them.

The settings you made in the dialog are applied to the selected sheets.

Save your work.
Click the Save button on the Quick Access toolbar to save your work up to this point.

preview the sheets
Excel’s Print Preview feature saves time and paper by enabling you to see what a document will look like on paper without actually printing it. If it looks good, you can click a Print button to send it to your printer. If it doesn’t look good, you can click a Setup button to go back to the Page Setup dialog and fix it.

Choose Print Preview from the Print submenu on the Microsoft Office menu.
A Print Preview window opens.

print your work
Once you’re satisfied that the worksheets will look good on paper, you can print them.
1. Click Print on the Microsoft Office menu ...

... or, in the Print Preview window (see page 112), click the Print button in the Print group.

The Print dialog appears.

The worksheets are sent to the printer where they print.
send via e-mail
If you’re using Excel in a workplace environment, you might find it useful to share your workbook with other Excel users. Excel’s E-mail command makes it easy to attach your workbook file to an e-mail message so you can send it to anyone.
1. Click the Save button on the Quick Access toolbar to save your work.

2. Choose E-mail from the Send submenu on the Microsoft Office menu.
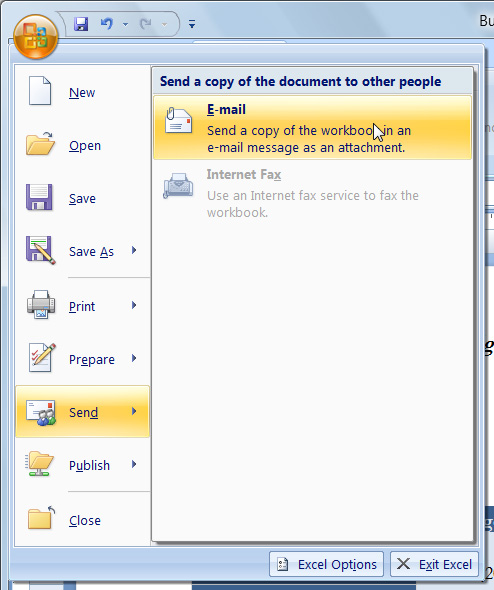
Excel starts your default e-mail program (in my case, Microsoft Outlook 2007) and displays a new message form with your worksheet attached.

The message with its attachment is sent via e-mail to its recipient.
extra bits
set page options p. 105
• You can also set page margins, print orientation, and paper size using menus in the Page Setup group of the Ribbon’s Page Layout tab. Just choose from the available options on the menus there. Keep in mind that the Page Setup dialog offers complete control over all of these options and more.
• If you discover, when previewing your worksheet, that it doesn’t quite fit on a single page, you can force it to fit on that page. Select Fit to in the Page options of the Page Setup dialog and make sure 1 is entered in both boxes beside it.
add a standard footer p. 107
• Excel gets your name and company name from information you entered when you installed Excel or the Microsoft Office package.
add a custom header pp. 108–110
• Excel left-aligns the Left section text, centers the Center section text, and right-aligns the Right section text.
• It isn’t necessary to enter text in all three sections of a custom header or footer. Just use the sections you need.
• You can also create a custom header in Page Layout view. Just click in the header area to select it and enter the text you want to appear.

save settings p. 111
• Page Setup options are automatically saved with a workbook file when you save the workbook. So once you’ve set options for a file, you don’t have to reset them unless you want to change them.
print your work p. 113
• Clicking the Properties button in the Print dialog displays additional options that are specific to your printer. Consult the manual that came with your printer for additional information about these options.
send via e-mail pp. 114–115
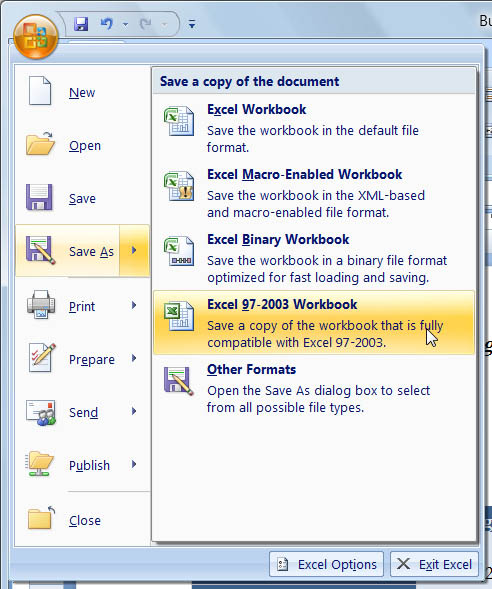
• To send an Excel workbook file to someone who uses an older version of Excel, first save it as an Excel 97-2003 workbook file. Choose Excel 97-2003 Workbook from the Save As submenu on the Microsoft Office menu. Then use the Save As dialog to save a copy of the workbook with a different name and send that file via e-mail.
• Microsoft Excel 2007 can open and work with files created with previous versions of Excel, so you should have no trouble working with files you get from other Excel users.
• If Outlook is not your default e-mail program, consult that program’s onscreen help or other documentation to learn more about using it to send messages with attachments.