ENLARGED PHOTOGRAMS
Dick Bartlett
My efforts in photography have always been to create the infinitesimal detail and subtle tonalities possible only through photographic processes. At first I imitated the technique of Ansel Adams and worked with large negatives producing contact prints. Aaron Siskind’s work introduced me to the possibilities of photographic abstraction. After seeing a show of noncamera photographs by Frederick Sommer, I began work in a technique similar to his, using ink-coated glass sheets as negatives from which to make prints. This freed me from the traditional photographic dependence on the camera and the outside world.
After I became aware of relationships between the forces at work in the processes producing my pictures and similar forces in nature, I found I wanted to combine noncamera and camera-made images. I was aware of the work of Jerry Uelsmann and learned some of his blending techniques. My production of combination pictures has been sporadic because the various elements do not always cooperate.
Since I have found it necessary to earn a living in another field, a common evil, my photographic time is limited. My working habits have evolved from the resulting desire to work with materials found near at hand, in the home. My methods are haphazard, to say the least. I do not standardize but let accidents happen, hoping I am alert enough to capitalize on them.
There are innumerable combinations of materials and methods worthy of investigation. To keep myself from bouncing too rapidly from one to another, I work in stages, completing a prescribed number of prints before moving on. At the present I am fascinated by images produced by the innate properties of the coating substances, so for now I have chosen to keep any painterly hand out of the work. Having begun with an amalgamation of methods of other artists, I feel I have developed something uniquely my own.
The Process
Here is the challenge given us by the early photo-artists: create aesthetically pleasing images on photosensitive paper without the use of a camera. The ways of accomplishing this goal are limited only by your imagination and inventiveness. Most initial attempts meet with failure in each of the areas taught us by conventional photographs: the creation of apparent subject, modulation of tonal values, and the simulation of three dimensions. These three are interrelated, each sliding into the others; and all should be present in a successful image.
The subject in an abstract picture is suggested by a figure-ground relationship. The gradations of tones from black to white help to define the subject and are in themselves aesthetically pleasing. The gradation of tone is also necessary for the creation of a feeling of depth.
As discussed in the chapter on Photograms, the most straightforward approach to noncamera images is to place objects on photographic paper that is exposed to light and then processed. The best objects for this process are translucent, as they modulate the light as well and can be controlled more easily. The next logical step for further control is to make your own translucent objects, which can be printed as negatives. The basic procedure is to coat a transparent base material with a pigmented mixture in a way that allows it to be printed in your enlarger.
The Base Material
Glass is the easiest base material to work with. It is chemical-resistant and remains flat, and most enlargers will accommodate sheets of plain glass in place of the negative carrier. Determine the proper size glass for your enlarger and obtain a dozen or more clean, scratch-free sheets in that size. Most of the materials discussed in this chapter can be easily removed from the glass in the event of an unsatisfactory image; thus, the glass can be reused indefinitely.
Sheets of transparent acrylic plastic (Plexiglas) will make an acceptable base material as well. Although it is less fragile, hence safer, it is much more easily scratched and may interact chemically with some of the materials.
The Pigmented Mixture
The pigmented mixture may be one of a number of solutions. My own negative-producing palette begins with oil-based paints. Alongside are the water-based colors, which will not mix with the oils, and emulsifiers, which can be mixed with either. The others are mostly plastic- or acetone-based. I seldom work with more than two types at any one time.
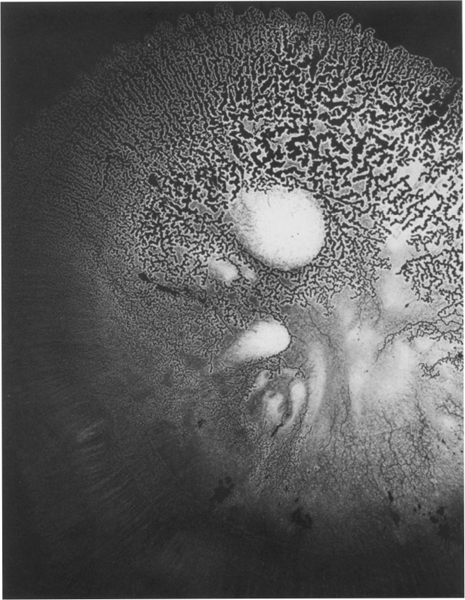
Ink pressed between two glass plates made the negative for this image. The print was made with the ink only partially dry and so cannot be repeated.
The Materials
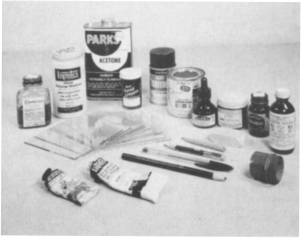
For negative making, you can use the traditional commercial inks and paints, such as india ink or house paint, or you can use discovered or homemade inks or paints. Discovered paints are such things as toothpaste or shoe polish. Homemade inks are base substances to which you have added a pigment. Fountain pen ink mixed with soap is an example of a homemade mixture, as is pure glycerine combined with watercolor. Henry Holmes Smith made a significant body of work using Karo syrup (see cover illustration). Here is a partial list of some of the more readily available materials:
Commercial Pigments
Lampblack
Liquid Opaque
Acrylic paints
Felt pen
Polymer medium
Poster paint
Liquid tusche
Enamel paint
Carbon paper
Crayon
Spray paint

Discovered Pigments
Mucilage
Plastic model cement
Leather dye
Hand soap
Clear nail polish
Tea
Vaseline
Hand lotion
Plastic food wrap
Cornstarch
Paper paste
One interesting material is the solution used to coat the backs of fish tanks to give a crystal-like coating. I use a product called Cryst-L-Craze, which, I believe, is acetone-based.
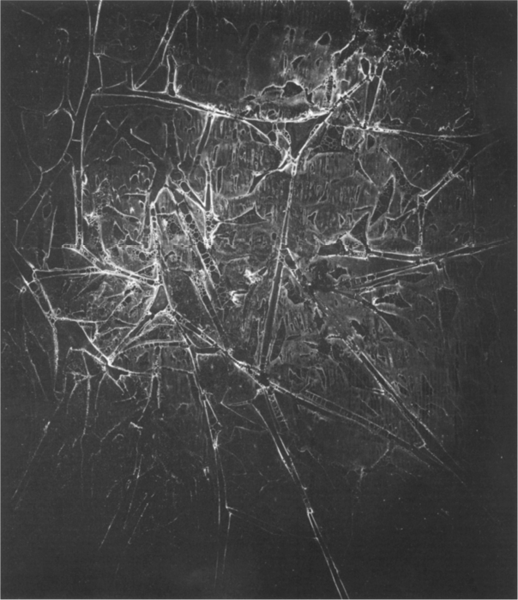
The crystal-like image reproduced here was created with the unlikely combination of soap and plastic wrap. A mixture of water-based poster paint and hand soap was worked together, combining a tone light enough to print with a pleasing amount of froth. This mixture was placed on a glass sheet and covered with plastic wrap. The surface was then pushed around to form a design of wrinkles. When the mixture had dried slightly, not enough to become stuck, the wrap was pulled off and the glass allowed to dry completely. Many more than one such attempt was made before achieving this result.
Negative Making
Coating the base material must be done with care, so that the coating is not too dense to pass light. If a paint is brushed onto a transparent base, the areas painted will be light in the final print, while the unpainted background will be black. The reverse of this procedure is to coat the entire transparent base with the paint and then remove areas you want to be thinner and to print darker. It is better to work with well-thinned paints, as contrast can more easily be added in the printing than removed. An over-contrasty negative is a darkroom disaster, and your first beautiful but unprintable negative will be an important lesson. Compare your photogram negatives to an ordinary camera negative to give yourself an idea of correct contrast. Work for modulated tonal quality and a feeling of depth. It is easy to make an image without a well-defined subject, one that is simply an interesting pattern or texture. To avoid doing so, keep in mind the traditional approach to figure and ground, making one design or specific image the figure and allowing broad textures to become the background.
Primers and Matrices
Primers and matrices will often help when a pigmented mixture seems to be unusable because it won’t adhere to the base material. For example, watercolor will not readily coat sheet plastic. To solve this problem, you can either change the surface or change the material. The surface can be changed by applying a primer coat to give it tooth enough for the material to hold. This can be done with the application of a spray substance made for the purpose, such as Fixatif, available in art supply stores.
To change the material, mix it with a substance that will adhere to the base. A suitable substance, called a matrix, can be any of a number of household items that are both transparent and sticky, such as diluted glue or cornstarch paste. These matrices can be used as primer coats as well, by applying them to the support base.
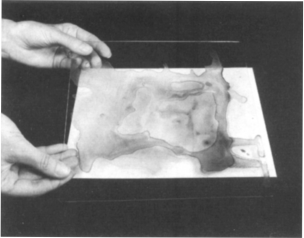
Compare your photogram negatives to your camera-made negatives to get an idea of proper printing contrast.
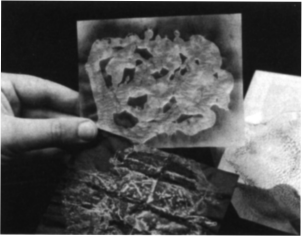
These negatives were made by applying glue to plastic sheets. After the glue dries to a transparent or translucent state, it is rubbed lightly with pencil lead dust on a rag: the more dust transferred, the higher the printing contrast of the negative. Different glues will produce different crackled or rippled surfaces.
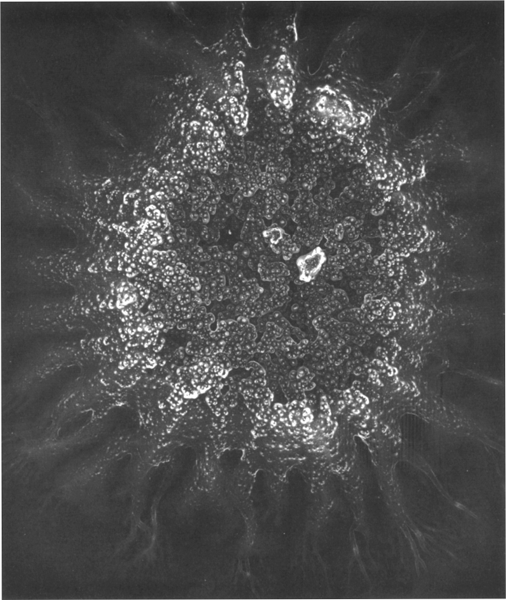
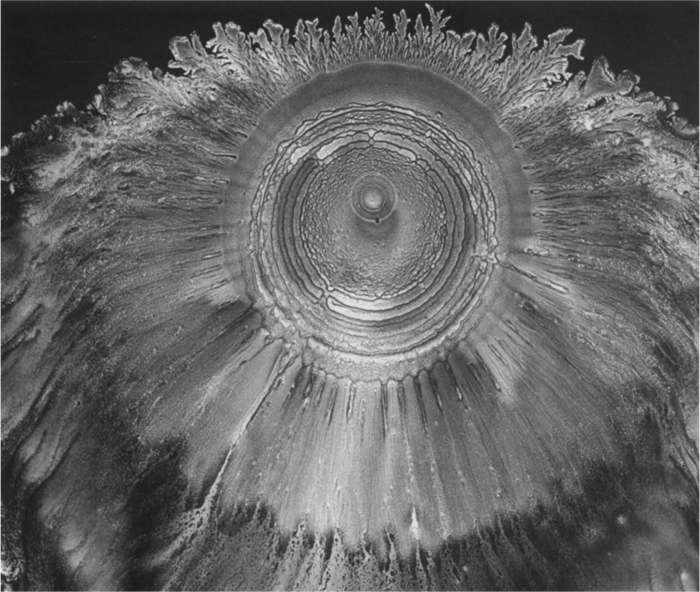
A single drop of india ink allowed to fall on a sheet of glass produced this pattern. The reproduction on page 70 was made the same way. The ink drop making the photogram was quite dirty, which explains the pronounced texture.
Making Negatives Permanent
Many of the negatives made by these techniques, although fragile, are permanent and may be carefully stored for later printing. They should be stored in such a way as to be well separated and supported only by their edges.
Some materials and techniques will yield only a fleeting image. Fugitive images, such as those that are wet and disintegrate on drying, must be printed immediately. If you are interested only in monoprints or small editions, print these while they last and then move along. Otherwise, you will need to use one of several available means of transferring the image to something from which you can later print.
The most straightforward method is to print directly onto a direct-reversal sheet film, such as Kodak SO-015 Professional Direct Duplicating Film. This film, which can be handled like enlarging paper, will yield a negative you can use to print an image identical to the
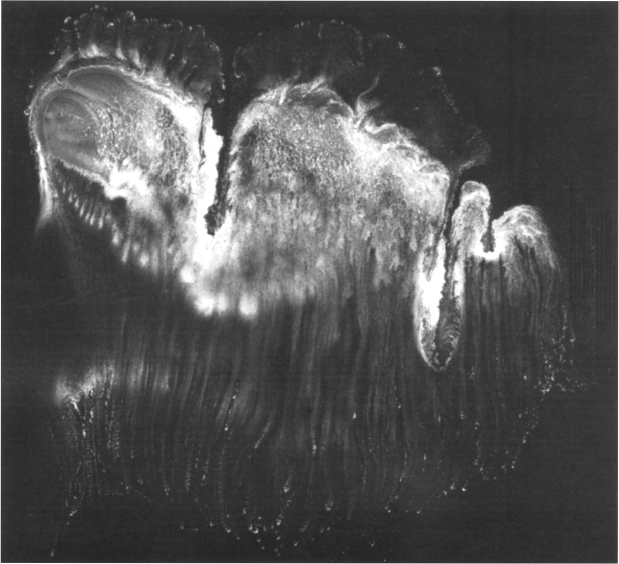
Poster paint thickened with starch and thinned with water was allowed to flow across a tilted glass plate to form this image. Stored properly, the negative is permanent.
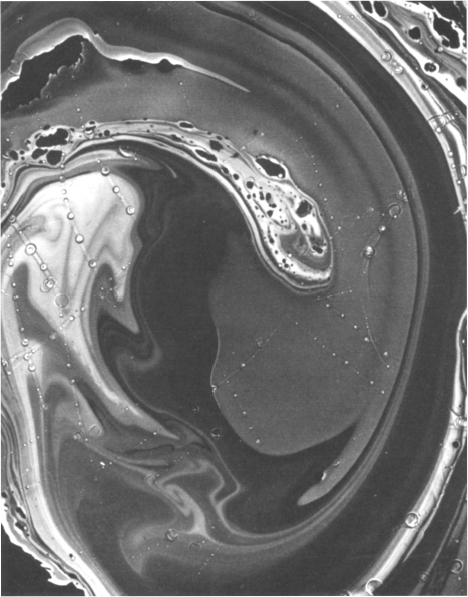
This print is the result of a classic marbling technique used for centuries by bookbinders. An oil-based paint is floated on a water surface, swirled, and lifted off by gently touching a glass sheet to the surface. The capture of this moving spiral of enamel paint is similar to the capture of a photographic “decisive moment.” one your photogram negative would have made. Remember to make your enlargements onto film that is either small enough to fit in the negative carrier of your enlarger or large enough to contact print.
Alternately, you can print on either continuous-tone sheet film or single-weight enlarging paper. Either of these, when printed, will make a final print in tones reversed from one made from your original photogram negative. The sheet film can be enlarged, and a print on single-weight paper can be contact printed by squeegeeing it, well washed and wet, face-to-face with a wet sheet of unexposed enlarging paper. Your exposure time will be much longer than a normal contact print.
Further Exploration
Other areas that deserve investigation include translucent bases, such as frosted acetate or papers. Various thin art papers allow for a larger number of direct artistic methods. Drawings can sometimes be transferred to photo-negative materials by contact printing. You can also work directly on photo-negative materials, applying the techniques mentioned here to camera-made negatives. Try discarded or duplicate negatives instead of glass sheets as a support base. Your negatives can be modified and perhaps improved by burning, baking, folding, or tearing.

