BLACK-AND-WHITE INFRARED FILM
Peter Laytin
The spring-tight line between reality and the photograph has been stretched relentlessly, but it has not been broken. These abstractions of nature have not left the world of appearances; for to do so is to break the camera’s strongest point —its authenticity.
Minor White
Like most photographers I began with a 35mm camera. Later, as I became more serious about my work, I began using a 4x5 view camera. After a few years of developing technical proficiency, I felt its constraints and returned to the 35mm camera, beginning at the same time to use infrared film. As different camera formats and films impose their own ways of seeing and working, these choices imposed radical changes on my photographic vision.
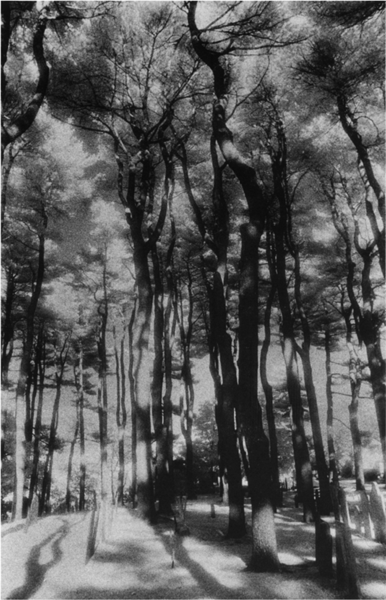
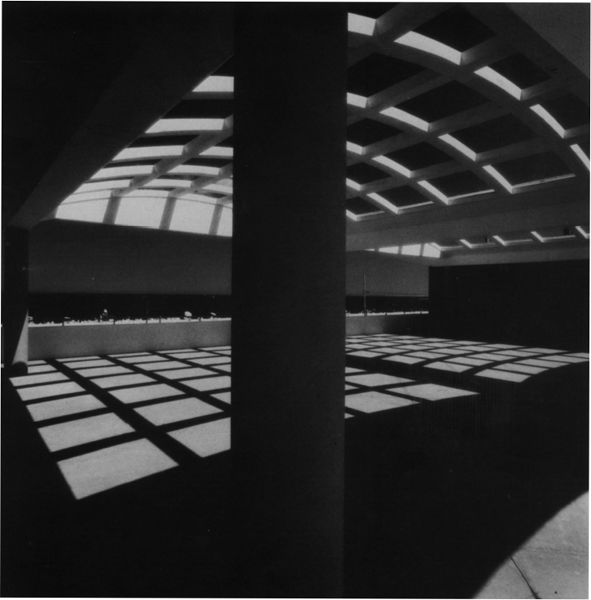
Infrared film is sensitive to some visible light, as well as to imperceptible infrared radiation. It is an exciting film with which to work, as it extends vision beyond the normal bounds, rendering objects differently than would panchromatic film and enabling you to see beyond the visible light range. Becoming adept at using infrared film requires a sense for the special tonal relationships produced by the film. Only testing and trial and error will thoroughly acquaint you with the film. While panchromatic film records a scene in tonalities approximating your usual perception, infrared film will record it with a shift in tones. This tonal shift can vary from extremely subtle in one photograph to obvious in the next, depending upon the specific conditions of each. An obvious shift in tones can suggest an unreal, fantasylike state.
Photographs made with panchromatic film suggest realistic tonal and spatial relationships. Having only two dimensions and a frozen, suspended relationship with time, photographs, even if they seem real, are only images and, as such, can only allude to reality. Photographs have their own rules and cannot be dealt with in the same way as the objects they are about. Photographs made with panchromatic film often disguise the difference between the image and the world. Photographs made with infrared film can clarify it.
Using the Film
Black-and-white infrared film is manufactured only by Eastman Kodak. High Speed Infrared Film is available in 16mm for motion picture work, in 35mm cassettes and bulk rolls, and in 4x5 sheets. Infrared Aerographic Film 2424, essentially the same emulsion, is available in 70mm, 5″, and 9½″ rolls. All infrared film is susceptible to fogging from heat and should be kept refrigerated whenever possible.
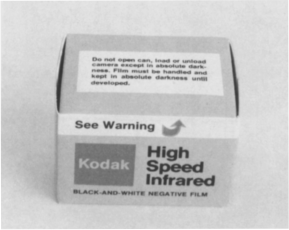
Kodak HIE 135-20 Pilm; note warning.
Focusing
Because infrared radiation comprises longer wavelengths than conventional cameras were designed for, there is a slight difference between the infrared focus and the visual focus. The glass of the lens refracts the longer wavelengths to a lesser extent than visible light, causing them to come to a focus further from the lens. Most lenses have a red line or red dot marker on the focusing scale to help correct for this shift. After finding sharp visual focus, shift the indicated distance to the red infrared correction mark. It is usually unnecessary to make this shift when using small apertures or when using a wide-angle lens, because of the increased depth of field. When using view cameras, correct by adding 0.25% of the focal length to the lens-film distance.
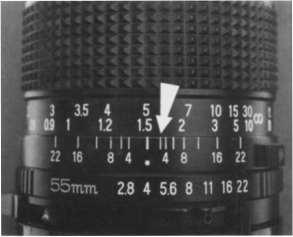
The anow points to the infrared focusing correction marker, red on most lenses. After focusing visually, in this case to 1.5 meters, the focusing mount should be rotated until the visually focused distance is in line with the correction markL.
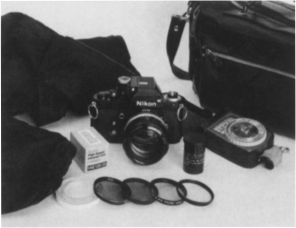
To photograph with infrared film, you will need filters, a hand-held meter, and a changing bag, in addition to your camera and film.
Loading the Camera
Infrared film must be loaded into and unloaded from the camera in complete darkness. The felt strips through which the film leaves the cassette are not opaque to infrared radiation. After loading in the dark, check to see that you have loaded the film correctly by making sure the rewind lever on your camera moves with each film advance. Again, unload the camera in total darkness, too.
Load and unload your camera in complete daikness.
The Changing Bag
When using infrared film, you will find a changing bag an important piece of equipment. Since you need to load and unload the camera in total darkness, and 35mm infrared film is available only in twenty-exposure lengths, you will need a portable darkroom if you want to shoot more than one roll of film. A changing bag is necessary whenever a darkroom is not available.
The cloth from which changing bags are made can leak infrared radiation. Test your changing bag before use to be certain it is safe. In the field, shield yourself from direct sun and use the changing bag in as shaded an area as possible. Change film in a darkroom if at all possible.
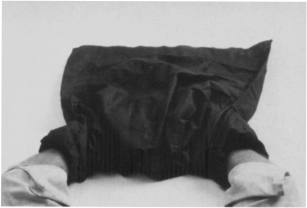
You will need a spacious changing bag to load and unload youi camera in the field.
Using Filters
Since infrared film is sensitive to visible light in addition to infrared radiation, filters for the taking lens will allow you to control the relative amounts of each. A No. 87 filter allows only infrared radiation to pass through. Objects will photograph in tones according only to the proportion of infrared radiation they reflect. Objects reflecting the most radiation will appear the lightest, as they do with conventional film. Objects that appear brightest to your eye, however, are not always those that reflect the most infrared radiation, so photographs made on infrared film often have an unnatural or surreal arrangement of tones.
A No. 87 filter passes only infrared radiation. Your eyes are sensitive to nothing passing through the filter, and it appears opaque. If you use a single-lens-reflex camera, the filter must be removed to focus.
A No. 25 filter (red) prevents blue and green light from passing, but transmits red and infrared radiation. Photographs on infrared film made through a No. 25 filter will show more evidence of conventional reflectivity. You can, however, see to focus through it.
Other filters, including No. 58 (green) and No. 12 (yellow), will allow different segments of the visible light spectrum to accompany the infrared radiation in exposing the film.
Without a filter you will be exposing the film with the greatest amount of visible light in proportion to the infrared. Film exposed this way will by no means behave as does panchromatic film, because the film’s spectral sensitivity has been extended into the infrared.
Infrared film is also useful for haze penetration, as haze is nearer the opposite, or ultraviolet, end of the spectrum. Best for removing haze is a No. 25 or 87 filter in combination with a polarizer.
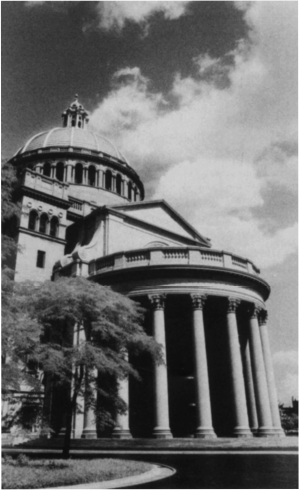
Without a filter over the lens, infrared film will iecoid tones similar to panchromatic film. Foliage will appear lighter than normal and skies darker.
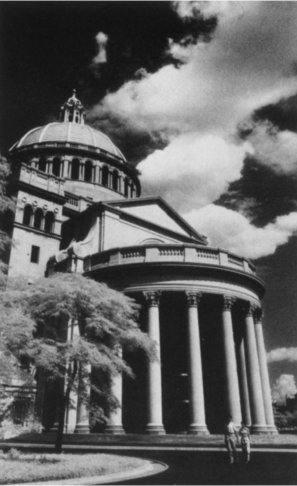
A polarizer, as would a yellow, orange, or green filter, removes the blue part of the visible light spectrum and enhances the infrared effect.
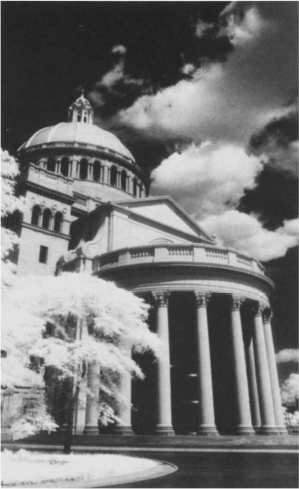
By using a No. 87 filter, which allows no visible light whatsoever to reach the film, you will record only the reflection of infrared radiation. A No. 25 (red) filter will produce similar results.
Controlling the Film
Exposure
Correct exposure for infrared film is difficult to determine. The manufacturer suggests exposing the film through a No. 25 (red) filter and using a hand-held meter at an ASA setting of 50. This has proven to be the best starting point for setting exposures. Use a hand meter rather than one in your camera, because the spectral sensitivity of the meter is affected by the filters over it. There are many different metering systems in cameras today: selenium, CdS, silicon, and so on. Each has a different spectral sensitivity and responds differently to filtration. With the No. 87 filter in place over the lens, through-the-lens metering would be impossible. Use a hand meter at ASA 50 with or without a filter over the lens. I have found, at most, a one-stop difference in proper exposure between the correct exposure with no filter and the correct exposure with any of the mentioned filters, including the opaque No. 87. With panchromatic film there is a three-stop difference between the correct exposures with and without a No. 25 filter. If you have no hand-held meter, you will find it equivalent, but somewhat awkward, to remove the filter each time to meter with one built into the camera.
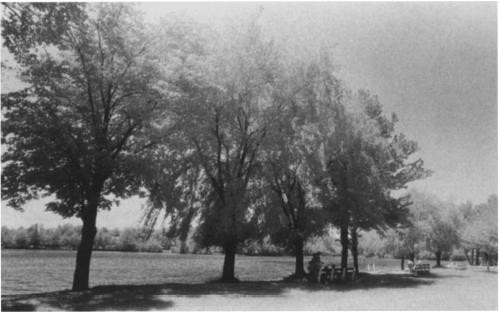
A normal exposure taken on infrared film with no filter.
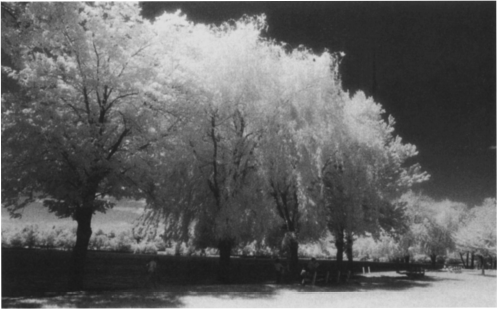
A correct exposure using a No. 25 (red) filter.
Static Electricity
Static electricity discharge is more of a problem with infrared film than with most roll films, and the resulting pinholes can be most annoying. To cut down on the friction that causes the static buildup, coat the pressure plate in your camera with a concentrated wetting agent, such as Photo-Flo. Use a high-quality brush or the tip of your finger to coat the pressure plate, and allow it to dry. One coating should reduce your static problems for several months.
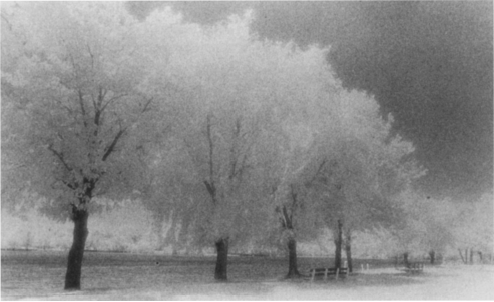
Three stops overexposed using a No. 25 filter.
Exposure Variations
Exposure variations on infrared film will produce the most significant visual changes in the image, yet exposure is the least predictable variable available to you.
A soft, ethereal, dreamlike image can be obtained by overexposure. A proper exposure will render an average scene with an excellent contrast range. An underexposure of as much as two or three stops will still afford the photographer a relatively good negative, but with blocking in shadows and an overall flatness.
Infrared radiation can vary widely in different locations and conditions, including a variation of as much as three stops between noontime daylight in summer and winter.
ASA 50 is a good starting point and will usually produce excellent results, but it is only a recommendation. Because these variations are so unpredictable, and because of the impact of exposure on your final image, you should bracket each image by several stops until you have gained sufficient experience with the materials.

Three stops underexposed using a No. 25 filter.
Processing the Film
Infrared film is more susceptible than most film to damage from abrasion or fingerprints. Handle it carefully during processing.
Piesoak the film in water at least 2 min before processing the film in the same manner as normal panchromatic film. The most useful developer is Kodak D-76 stock. Smoother grain will result from using D-76 1:1, contrast will be increased by using Kodak D-19. The process and all other chemicals are standard. All chemicals should be 20° C, including the water presoak and wash.
Process the film in closed stainless steel tanks. The plastic and open tops of some types of processing tanks might leak infrared radiation and cause fogging. Some plastic tops on stainless tanks are safe. Test first: you might be safe with what you have.
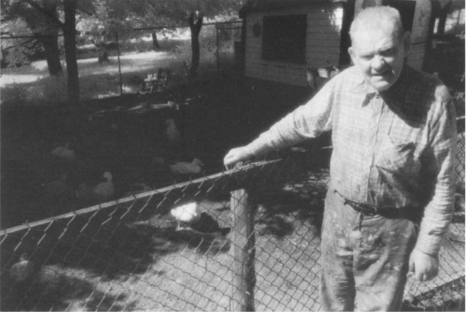
Black-and-white infrared film developed in a normal developer, here D-76, will result in a tonal range similar to that of a panchromatic film.

Developed in a graphic-aits developer, Kodak D-19, the film’s contrast and graininess are increased considerably, enhancing its unique response.
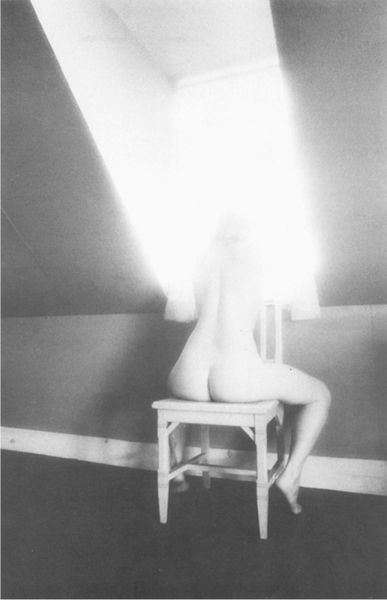
Jane Tuckerman made this photograph showing delicate use of the highlight halation characteristic of infiaied film.
Infrared Flash
There are several ways of combining infrared film with electronic flash. Simplest is to cover your lens with a No. 25 filter and use the flash in a normal manner. Similar results are achieved by covering the flash tube with a No. 87 gel. This filter will allow only infrared radiation to pass through it; so the emitted flash will be virtually undetectable. You can thus photograph unobtrusively in movie theaters and dimly lit bars. In low-light situations no filter over the lens is necessary. A No. 25 filter should be used otherwise. You can also buy a special infrared flash unit such as the Nocto 400 by Sunpak. This flash unit is designed to emit light at the principal wavelength and peak infrared sensitivity zone of Kodak HIE Film.
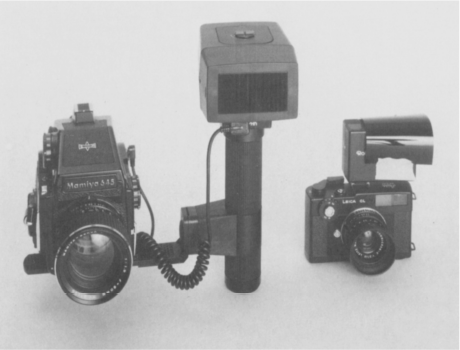
The flash on the left is a powerful unit designed specifically for use with infrared film. On the right is a small standard strobe with a No. 87 filter taped in place over the flash tube. Neither flash emits visible light, and so both can be used unobtrusively.

Brenda 1976. Luther Smith made these photographs with flash in very dim light by taping a No. 87 gel filter over his small strobe. The filter blocks all visible light emitted by the strobe.
Using 70mm Infrared Film
Kodak Infrared Aerographic Film 2424, although manufactured primarily for use in specialized aerial cameras, is not noticeably different from the emulsion available in 35mm. This larger size film can be adapted for use in conventional equipment, although it requires the acquisition of some apparatus of limited usefulness:
1. 70mm film, twice 35mm width, has the same available image area as 120 film, plus perforations.
2. Watson 100 ft 70mm bulk loader will accommodate the supplied 150 ft bulk rolls of film.
3. Kindermann 70mm developing tank and reel holds 2.5 liters of developer and up to 4.6 meters (15 ft) of film.
4. 70mm cassette, unavailable for purchase empty, may be ordered containing panchromatic film and reloaded.
5. 70mm film back, this one for Hasselblad, holds seventy 6x6 cm exposures on 4.6 meters of film. Very few manufacturers make auxiliary 70mm film backs.
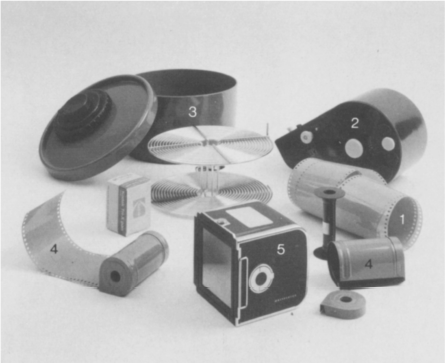
Additional equipment needed to use 70mm infrared film. The 35mm film box on the left has been included to show relative sizes.

