In this chapter, we’ll look at how to administer and manage your classroom network of Raspberry Pi computers.
If you have just a few Raspberry Pi computers, you may want to manage them individually. We’ll look at managing Raspberry Pi computers individually in the first part of the chapter, examining how to create user accounts and how to set up remote access to the computers so that you can administer them remotely.
If you have a full classroom or lab’s worth of Raspberry Pi computers, you’ll likely want to manage them centrally. The easiest way to do this is by using the free server software called PiNet. PiNet can be a great solution for classroom deployments of Raspberry Pi computers, so we’ll dig into it in detail in the second main part of the chapter.
Managing Your Raspberry Pi Computers Individually
If you have only a few Raspberry Pi computers, you may choose to manage them individually. To do so, you should create a separate user account for each user who will log in to a Raspberry Pi computer. You will also likely want to set up remote access to the Raspberry Pi computers so that you can manage them remotely.
Note
If you need to manage many Raspberry Pi computers, you’ll probably be better off using PiNet than managing the computers individually. See the section “Setting Up and Managing a Network with PiNet,” later in this chapter, for coverage of PiNet.
Creating and Managing User Accounts
By default, the Raspberry Pi automatically logs in using an account called pi, with the password raspberry. The pi account has administrative permissions, so anyone using the account can execute system-modifying commands by prefacing them with the sudo (do as superuser) command.
Normally, you’ll want your students to log in using user-level accounts, which don’t have the power of sudo. You can create and manage these accounts by opening a Terminal window and giving the appropriate commands. So to get started, click the Terminal button on the Panel to open a Terminal window.
Tip
You can also create user accounts by connecting via SSH from another computer. See the section “Connecting via SSH,” later in this chapter, for instructions on connecting via SSH.
Creating a User Account
To create a user account, you use the adduser command, which takes a single argument, the name to assign the new user. You preface the command with sudo because it’s a system change.
For example, the following command creates a user called bill:
sudo adduser billWhen you give this command and press the Enter key, Raspbian creates the account and prompts you to enter a password, the user’s full name, and other identifying information. Raspbian doesn’t display the password as you type it. For any information you don’t have or don’t want to enter, press the Enter key to leave the field blank. Here’s an example:
Adding user `bill' ...Adding new group `bill' (1001) ...Adding new user `bill' (1001) with group `bill' ...Creating home directory `/home/bill' ...Copying files from `/etc/skel' ...Enter new UNIX password:Retype new UNIX password:passwd: password updated successfullyChanging the user information for billEnter the new value, or press ENTER for the defaultFull Name []: Bill WilliamsRoom Number []:Work Phone []:Home Phone []:Other []:Is the information correct? [Y/n] y
Changing a User’s Password
To change a user’s password , give the passwd command followed by the username, again prefacing the command with sudo. Here’s an example:
sudo passwd billRaspbian prompts you to enter the password twice, and then confirms that the password has been updated successfully:
Enter new UNIX password:Retype new UNIX password:passwd: password updated successfully
Giving a User Access to the sudo Command
Normally, you won’t want your students to have access to the sudo command so as to limit the actions they can take on the Raspberry Pi computers. However, in some cases you may want to allow a student to use the sudo command—for example, so that she can help you configure a Raspberry Pi computer or use the GPIO pins (which require sudo access).
To give a user access to the sudo command, give the following command in a Terminal window:
sudo visudoRaspbian opens the file /etc/sudoers.tmp in the nano editor. Here is an example of this file:
# This file MUST be edited with the 'visudo' command as root.## Please consider adding local content in /etc/sudoers.d/ instead of# directly modifying this file.## See the man page for details on how to write a sudoers file.#Defaults env_resetDefaults mail_badpassDefaults secure_path="/usr/local/sbin:/usr/local/bin:/usr/sbin:/usr/bin:/s$# Host alias specification# User alias specification# Cmnd alias specification# User privilege specificationroot ALL=(ALL:ALL) ALL# Allow members of group sudo to execute any command%sudo ALL=(ALL:ALL) ALL# See sudoers(5) for more information on "#include" directives:#includedir /etc/sudoers.dpi ALL=(ALL) NOPASSWD: ALL
Go to the section with the heading # User privilege specification (shown in boldface in the previous example). Under the root ALL=(ALL:ALL) ALL line, type a similar line but with the appropriate username in place of root. Here is an example for the user alice:
# User privilege specificationroot ALL=(ALL:ALL) ALLalice ALL=(ALL:ALL) ALL
Now press Ctrl+O to write out the file, and press the Enter key to accept the existing name. Press Ctrl+X to edit nano.
Note
Raspbian enables you to give a user passwordless root access. This is the kind of access the pi account has in a default installation of Raspbian; the last line in the preceding sudoers.tmp file gives the pi account this access. Giving other users passwordless root access is not usually a good idea—but if you need to do it, enter NOPASSWD: ALL on the user’s line in the User privilege specification section of the file. For example, enter alice ALL = NOPASSWD: ALL.
Deleting a User Account
To delete a user account but leave the user’s home folder in place, give the userdel command. For example, the following command removes the user bill:
sudo userdel billTo delete the user account and the user’s home folder, add the –r parameter:
sudo userdel –r bill Setting Up Remote Access
Going to each Raspberry Pi computer you want to update or configure gets old fast, so you’ll likely want to give yourself remote access to the computers.
You can access the computers remotely in several ways. These are the three most widely useful ways:
SSH: Secure Shell (SSH) enables you to connect securely to a remote computer across a network and issue commands via a command-line interface. You can also forward an X session over SSH, which allows you to display a window on your computer showing the graphical output of an app that’s running on the remote computer.
VNC: Virtual Network Computing (VNC) lets you connect to a remote computer and view its screen in a window on your computer. Depending on how you configure VNC, you can also control the remote computer via VNC.
xrdp: xrdp (x Remote Desktop Protocol) enables you to connect to a remote computer, view its screen in a window on your computer, and optionally control the remote computer. xrdp’s capabilities are similar to those of VNC, but the underlying technology is different.
The following sections explain the pros and cons of these three approaches and show you how to set them up.
Connecting with Remote Access via SSH
SSH is a handy way to connect remotely to a Raspberry Pi computer. Connecting via SSH gives you a command-line connection that you can use to issue commands on the Raspberry Pi computer. Using the command line, SSH sends only text between the computers, so it works well even over a slow connection.
You can also forward an X session over SSH, directing the graphical output of an app that’s running on the remote computer (e.g., a Raspberry Pi computer) to a window on the computer you’re using. Because graphical output is involved, this works better over a fast connection than a slow connection.
To connect via SSH, you need to enable SSH on the Raspberry Pi computer by using the Raspberry Pi Configuration tool. You then need an SSH client app on your computer. OS X and macOS includes an SSH client, as do almost all distributions of Linux. Windows doesn’t include an SSH client, but there are plenty of choices, some that are free and others that you must pay for. Neither iOS nor Android includes an SSH client, but you can add one easily and inexpensively.
Enabling SSH in Raspberry Pi Configuration
You can quickly enable SSH by using the Raspberry Pi Configuration tool. Follow these steps:
Choose Menu ➤ Preferences ➤ Raspberry Pi Configuration to open the Raspberry Pi Configuration dialog box.
Click the Interfaces tab to display its contents.
Click the Enable option button on the SSH line.
Click the OK button to close the Raspberry Pi Configuration dialog box.
Note
You can also enable SSH in the raspi-config file: Open raspi-config by using the sudo raspi-config command in a Terminal window, select the Advanced Options item, select the SSH item, and then select the Yes button or the No button at the Would you like the SSH server to be enabled? prompt. Normally, you’d want to do this only if the Raspberry Pi computer is running an older version of the operating system that doesn’t have the Raspberry Pi Configuration tool.
Getting an SSH Client for Windows, iOS, or Android
If you’re using Windows, iOS, or Android, you’ll need to add an SSH client to your computer or device unless you’ve already done so.
Many SSH clients are available, but here are three recommendations:
Windows: Download PuTTY from the PuTTY web site ( http://www.chiark.greenend.org.uk/~sgtatham/putty/ ). If you’re wondering about the name, the TTY is a play on the abbreviation for teletypewriter, TTY.
iOS: Cathode ($4.99 from the App Store) is an effective SSH client for iOS.
Android: JuiceSSH (free from the Play Store) is a full-featured SSH client for Android.
Connecting via SSH
To connect via SSH, you’ll need to know the IP address or hostname of the Raspberry Pi computer. Usually, it’s easier to use the IP address, which you can determine in either of these ways:
On the Raspberry Pi computer: Hold the pointer over the Network icon on the right side of the panel, and then look at the IP address for eth0 (the Ethernet interface) or wlan0 (the Wi-Fi interface) in the pop-up balloon.
Using a network scanner: Use a network-scanning app on another computer or on a device to display the list of computers and devices on the network and their IP addresses.
To connect via SSH, give the ssh command followed by a space, the account name, the @ sign, and the IP address. For example, the following command connects to the computer using the IP address 10.0.0.25 using the pi account:
ssh [email protected] When prompted, enter the account password. You’ll then be connected via SSH and able to give commands via the command line.
When you are ready to close the connection, give the logout command to close the connection:
logoutForwarding an X Session over SSH
Running commands at the command line via SSH is handy, but you may also want to open graphical windows that display on your computer but are running on the remote Raspberry Pi computer. You can do this by forwarding your X session over SSH.
To forward your X session , use the –Y parameter when establishing your SSH connection:
ssh –Y [email protected]Note
After connecting via SSH, you can use tools such as SFTP (Secure File Transfer Protocol), SCP (Secure Copy Protocol), and SSHFS (Secure Shell Filesystem) to copy files between the computer you’re using and the remote computer.
Controlling a Raspberry Pi Computer Remotely via VNC
Virtual Network Computing (VNC) is a technology for remotely viewing and controlling computers. You can use VNC on pretty much any computer or device to view the contents of a Raspberry Pi computer’s screen remotely or to take control of it.
Note
You can use VNC when installing operating systems on your Raspberry Pi computers. See the section “Performing a Headless Install via VNC” in Chapter 5 for details.
Understanding Your Choices for VNC
Versions of Raspbian that have the Pixel interface include a built-in VNC server, so if the Raspberry Pi computer is running such a version of Raspbian, you need only enable the server and configure it. For earlier versions of Raspbian, you need to install a VNC server and set it running.
Enabling the Built-In VNC Server on Pixel Versions of Raspbian
Follow these steps to enable the built-in VNC server on Pixel versions of Raspbian:
Choose Menu ➤ Preferences ➤ Raspberry Pi Configuration to display the Raspberry Pi Configuration dialog box.
Click the Interfaces tab to display its controls.
On the VNC row, select the Enable option button.
Click the OK button to close the Raspberry Pi Configuration dialog box. This is a change that Raspbian can make without restarting the Raspberry Pi computer. The VNC icon appears in the system tray on the right side of the panel .
Viewing Information About the Built-In VNC Server
To view information about the VNC server, click the VNC icon in the system tray. Normally, when you do this the first time on a Raspberry Pi computer using the default pi account, the “Granted permissions without asking for password” dialog box opens (see Figure 7-1), explaining that the VNC server was started with root privileges without a password. This is as it should be. Check the “Do not display this message again” check box, and then click the Close button to close the dialog box.

Figure 7-1. The “Granted permissions without asking for password” dialog box may open the first time you go to view information about the VNC server.
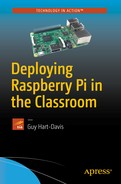
The VNC Server dialog box then opens (see Figure 7-2), displaying the server’s status and providing information. Make sure the Ready for connections bar appears, then look at the IP address shown in the Get Started section. To see the name under which the VNC connection appears on the network, look at the Connectivity section.
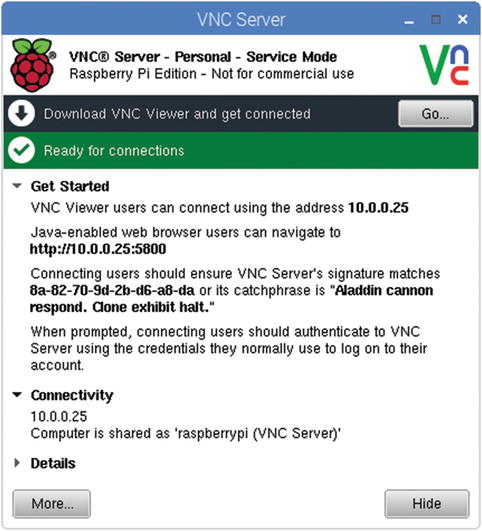
Figure 7-2. The VNC Server dialog box shows whether the server is ready for connections and displays the IP address. Look at the Connectivity section to see the name under which the server appears on the network.
Configuring the Built-In VNC Server
At this point, you can try connecting to the server at the IP address shown in the VNC Server dialog box. The server is using its default configuration, which should work fine. But if you want to configure the server, follow these steps:
Right-click the VNC icon in the system tray, and then click Options on the shortcut menu that appears. The VNC Server – Options dialog box opens, showing the Security pane at first (see Figure 7-3).
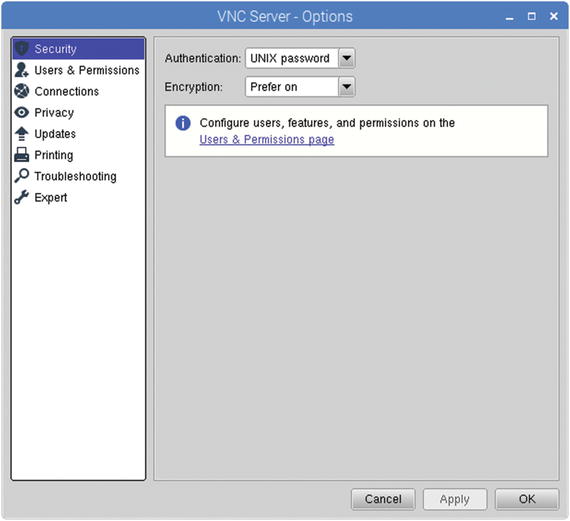
Figure 7-3. In the Security pane of the VNC Server – Options dialog box, choose the Authentication method and Encryption setting for the VNC server.
In the Authentication drop-down menu, choose UNIX password if you want to use the passwords for user accounts for incoming VNC connections. Choose VNC password if you want to set a different password for VNC connections.
In the Encryption drop-down menu, choose Always On to require encryption always, Prefer on to prefer encryption but not require it, or Prefer off.
Click the Users & Permissions item in the left box. The Users & Permissions pane appears (see Figure 7-4).

Figure 7-4. In the Users & Permissions pane of the VNC Server – Options dialog box, select the user or group you want to affect, and then check or uncheck the appropriate check boxes in the Permissions box.
In the box at the top, click the user or group you want to affect.
Note If you selected VNC password in the Authentication drop-down menu, click the Password button to open the Specify VNC Password dialog box, type the password in the Password box and the Confirm Password box, and then click the OK button.
Use the controls in the Permissions box to set permissions for the user or group. This works differently depending on whether you selected UNIX Password or VNC Password in the Authentication drop-down menu:
UNIX Password: Check or uncheck the check boxes for the permissions: Control desktop using keyboard, Control desktop using mouse, Copy and paste text in either direction, Chat with other users, Transfer files in either direction, and Print to a local printer.
VNC Password: Check or uncheck the check boxes in the Allow column and the Deny column for each permission: View the desktop, Control desktop using keyboard, Control desktop using mouse, Copy and paste text in either direction, Chat with other users, Transfer files in either direction, Print to a local printer, and Bypass accept/reject prompts .
Click the Connections item in the left box to display the Connections pane (see Figure 7-5).

Figure 7-5. In the Connections pane of the VNC Server – Options dialog box, choose which types of connections to allow. You can also create rules to filter computers by IP address.
In the Connectivity box, check or uncheck the Allow VNC connections over TCP check box as needed. If you check this check box, as you normally would, make sure the Port box on that row shows the correct port. The default port is 5900.
Also in the Connectivity box, check or uncheck the Serve VNC Viewer for Java check box, as needed. Normally, you’d check this check box only if you’re using VNC Viewer for Java; if so, make sure the Port box on that row shows the correct port. The default port is 5800.
Use the controls in the Filter computers dialog box to create any rules needed to control VNC connections to this computer. For example, to allow a particular computer to connect, follow these substeps:
Click the Add rule button to open the Add IP filter rule dialog box (see Figure 7-6).

Figure 7-6. In the Add IP filter rule dialog box, set up a rule to accept or reject VNC connection requests from either a specific IP address or a range of IP addresses.
In the “When a connection is received from” box, type the IP address of an individual computer (such as 10.0.0.199) or the address range (such as 10.0.0.0/24) that you want the rule to affect.
In the VNC Server should area, select the Accept the connection option button, the Reject the connection option button, or the Ask the VNC Server user what to do option button, as appropriate.
Click the OK button. The Add IP filter rule dialog box closes, and the rule appears in the Filter Computers box.
When you finish working in the Connections pane, click the Privacy item in the left box to display the Privacy pane (see Figure 7-7).

Figure 7-7. In the Privacy pane of the VNC Server – Options dialog box, choose whether to receive notifications when users connect to and disconnect from the VNC server and whether to disconnect users who remain idle for an extended period.
In the Protect computer box, check the “Notify when users connect and disconnect” check box if you want the VNC server to display alerts when users connect and disconnect.
Also in the Protect computer dialog box, check the “Disconnect users who have been idle for an extended period” check box if you want the server to automatically disconnect users who have left the connection idle for a while. This is normally a good idea.
When you finish choosing options in the VNC Server – Options dialog box, click the OK button to close it.
Installing a VNC Server on Earlier Versions of Raspbian
On versions of Raspbian that don’t include a built-in VNC server, you need to install a VNC server on the Raspberry Pi computer and set it running. You can install and configure the VNC server either working directly on the Raspberry Pi computer or via SSH.
To install the VNC server, open a Terminal window and give the following command:
sudo apt-get install tightvncserverYou may get a warning that extra disk space is required. If so, type y and press the Enter key.
After the install completes, type the command to launch TightVNC Server and press the Enter key:
tightvncserver Connecting to the VNC Server
You can now connect to the Raspberry Pi computer by opening a VNC client and specifying the IP address. Figure 7-8 shows a VNC connect to a Raspberry Pi computer using the Chicken of the VNC client on a Mac.

Figure 7-8. A VNC connection on a Mac to a Raspberry Pi computer
Controlling a Raspberry Pi Computer Remotely via RDP
If you want to work from a Windows PC, you can choose from a wide variety of VNC clients to take control of Raspberry Pi computers on your network. But Windows offers an alternative that frequently works better: Remote Desktop Protocol, or RDP for short.
What Is RDP?
RDP is Microsoft’s protocol for Windows’ Remote Desktop feature. As you’ll probably know if you’ve used Windows extensively, Remote Desktop is the feature that enables you to connect one Windows computer (which we’ll call the “client computer” here) remotely to another one (which we’ll call the “remote computer”). After connecting with the Remote Desktop Connection app on the client computer, you run apps on the remote computer, with the output appearing on the client computer’s monitor.
RDP, Remote Desktop, and Remote Desktop Connection enable you to configure the screen size, color depth, and other features on the client computer so you can control the amount of data that needs to be transferred between the remote computer and the client computer. For example, if you have only a slow connection between the computers, you can choose settings that require as little data transfer as possible so that performance remains tolerable.
The disadvantage to RDP is that only the “business” versions of Windows include the Remote Desktop feature that runs on the remote computer, whereas all versions of Windows include the Remote Desktop Connection app. So you can connect using Remote Desktop Connection on a “home” version of Windows to Remote Desktop on a “business” version of Windows, but not vice versa.
Things are better on Linux machines, including the Raspberry Pi: you can run the free xrdp app to enable remote access via RDP. The xrdp app is an RDP server that displays an X Window desktop on the client computer.
Downloading and Installing xrdp
The xrdp app may be included in your installation of Raspbian. To find out, open a Terminal window and give the following command:
xrdpIf the Terminal gives the message xrdp: command not found, give the following command to download and install xrdp:
sudo apt-get install xrdpWhen the installation finishes, type xrdp and press the Enter key to run the server.
Connecting to xrdp with Remote Desktop Connection
To connect to xrdp with Remote Desktop Connection, follow these steps:
Launch Remote Desktop Connection on Windows. Usually the easiest way is to click the Search box, type remote, and then click the Remote Desktop Connection search result. The Remote Desktop Connection window opens.
If the Remote Desktop Connection window is at its small size, click the Show Options button to expand it to its full size (see Figure 7-9).
Figure 7-9. Enter the details for the connection on the General tab of the Remote Desktop Connection dialog box, select the “Allow me to save credentials” check box, and then click the Connect button.
Click the Computer box and type the Raspberry Pi computer’s IP address.
Click the User name box and type the user name for the account on the Raspberry Pi computer.
Select the “Allow me to save credentials” check box if you want Remote Desktop Connection to save these credentials for future use.
Click the Connect button. Usually, when you’re connecting to a Raspberry Pi computer, the Remote Desktop Connection dialog box shown in Figure 7-10 opens, warning you that the identity of the remote computer can’t be verified.
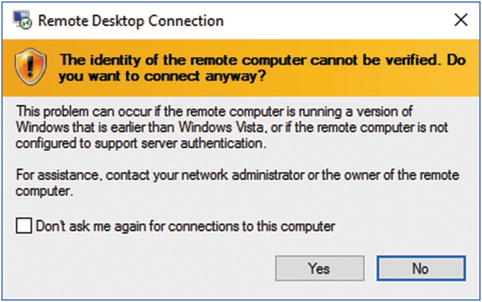
Figure 7-10. In this Remote Desktop Connection dialog box, select the “Don’t ask me again for connections to this computer” check box, and then click the Yes button.
Select the “Don’t ask me again for connections to this computer” check box.
Click the Yes button. The Windows Security dialog box opens (see Figure 7-11).

Figure 7-11. In the Windows Security dialog box, type your password, select the Remember me check box if appropriate, and then click the OK button.
Type your password for the Raspberry Pi computer account.
Select the “Remember me” check box if you want Remote Desktop Connection to store the credentials. This saves you time in the future.
Click the OK button. Remote Desktop Connection establishes the connection and displays the Raspberry Pi computer’s desktop, with the Remote Desktop Connection control bar superimposed on the middle of the top edge (see Figure 7-12).

Figure 7-12. The Remote Desktop Connection control bar appears superimposed on the middle of the top edge of the Raspberry Pi computer’s desktop.
You can now work on the Raspberry Pi computer much as if you were sitting in front of it. When you are ready to end the connection, click the Close (x) button at the right end of the Remote Desktop Connection control bar, and then click the OK button in the Remote Desktop Connection dialog box that opens (see Figure 7-13).
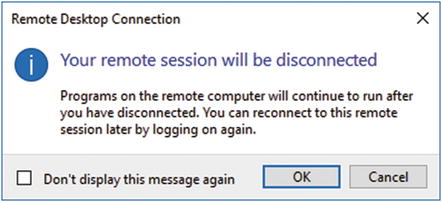
Figure 7-13. Click the OK button in this Remote Desktop Connection dialog box to end the Remote Desktop Connection session.
Setting Up and Managing a Network with PiNet
In this section, we’ll look at how to set up and manage a network of Raspberry Pi computers using the PiNet server. We’ll start by installing PiNet on a suitable PC. We’ll then move along to creating and managing user accounts, setting up the Raspberry Pi computers to work with PiNet, and booting the Raspberry Pi computers. After that we’ll go through how to set up shared folders for users, how to install programs and keep the Raspberry Pi computers and PiNet itself up to date, and how to use features such as collecting work from students and updating SD card images. Finally, I’ll show you how to use the Epoptes classroom-management software to work remotely with your classroom’s computers.
What Is PiNet?
PiNet is a free server operating system for managing networks of Raspberry Pi computers. PiNet is designed for classroom use and runs on the free Ubuntu operating system.
What Are the Advantages of PiNet?
PiNet has several advantages for classroom deployments of Raspberry Pi computers:
You can create user accounts for students: Using the accounts, a student can log in on any Raspberry Pi computer in the classroom and can access his or her files and settings on the server.
You can share folders easily from a central location: PiNet enables you to keep files on the server easily instead of putting them on the individual Raspberry Pi computers. You can back up the files easily from the server.
There’s a work-collection system: This system gives you an easy way for students to submit work to you.
Raspberry Pi computers boot from the server: Instead of having to install Raspbian on the Raspberry Pi computers individually, you configure the copy of Raspbian on the server the way you want it. The Raspberry Pi computers then boot from the server and install that copy of Raspbian across the network.
You can use Epoptes to manage your classroom’s computers: PiNet makes it easy to install and use the Epoptes classroom-management software, which includes features such as monitoring what students are doing on the Raspberry Pi computers; taking control of their screens remotely to help them; sharing your screen to demonstrate techniques; and locking, restarting, or shutting down the Raspberry Pi computers.
What Are the Disadvantages of PiNet?
PiNet has two main disadvantages that you need to balance against its advantages:
PiNet may use an older version of Raspbian: For the Raspberry Pi computers, PiNet uses a customized version of the Raspbian operating system, including extensive modifications. As a result, the version of Raspbian is usually one or two versions behind the latest Raspbian release, so it doesn’t have all the latest features.
PiNet requires Ethernet rather than Wi-Fi: You need to use Ethernet connections for the Raspberry Pi computers rather than Wi-Fi to get adequate performance.
Getting a Suitable PC for Running PiNet
To run PiNet, you need a PC with the Ubuntu Server operating system installed. You can download Ubuntu for free from the Ubuntu web site ( www.ubuntu.com/download ). Normally, you’ll want to get the latest long-term support (LTS) release; as of this writing, that’s Ubuntu Server 16.04.1 LTS, which has support guaranteed until April 2021.
The PC doesn’t have to be new or particularly powerful, but it’s a good idea to have at least 4 GB of RAM (as usual, more is better) and plenty of disk space for storing files.
The PC also needs a Gigabit Ethernet port to make the PiNet network run at a good speed. Don’t try to run a PiNet network on Fast Ethernet—performance will be disappointing because PiNet needs to transfer large amounts of data when the Raspberry Pi computers boot from the server.
Before installing PiNet, configure Ubuntu to use the IP address that the server will have on the network. To do so, follow these steps:
Click the System Settings button on the launcher to display the System Settings window.
In the Hardware row, click the Network icon to display the Network pane (see Figure 7-14).
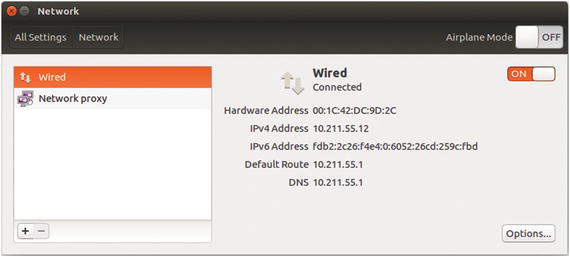
Figure 7-14. In the Network pane of System Settings, click the network connection you want to use for PiNet, and then click the Options button.
In the left pane, click the network you want to use for PiNet. Normally, this will be the Wired connection.
Click the Options button to open the Editing dialog box for the connection. This dialog box’s title shows the connection’s name, such as Editing Wired connection 1 as in Figure 7-15.
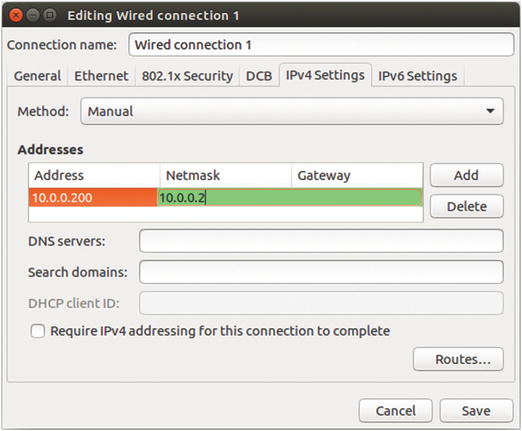
Figure 7-15. In the Editing dialog box for the network connection, click the IPv4 Settings tab and select Manual in the Method pop-up menu. Click the Add button to activate a line in the Addresses box, and then type the IP address, netmask, and gateway address.
Click the IPv4 Settings tab to display its controls.
Click the Method pop-up menu, and then click the Manual item.
Click the Add button to activate a line in the Addresses box.
Click the Address column on the new line and type the IP address, such as 10.0.0.200 or 192.168.1.200 (depending on the private address block your network uses).
Click the Netmask column and type the netmask, such as 24.
Note As you enter data in the Addresses box, the active box (the green box) on the address line may overlap the adjacent box and may hide its contents. This is why Figure 7-15 appears to show the gateway address being entered in the Netmask column.
Click the Gateway column and type the IP address of the gateway, such as 10.0.0.1 or 192.168.1.1 (again, depending on the network’s address block).
Click the DNS servers box and type the IP addresses of the primary and secondary DNS servers, separating them with a comma.
Click the Search domains box and type any search domain you want to have automatically appended for DNS lookups, such as your school’s domain.
Click the Save button to save the changes. The Editing dialog box closes.
Close the Network window by clicking the Close button (the red x button at the left end of the title bar).
Now restart your computer to make the network changes take effect.
Downloading and Installing PiNet
To get started with PiNet, log into your Ubuntu box and take the following steps:
Press Ctrl+Alt+T to open a Terminal window. You can also click the Terminal icon if it’s handy.
Give the following command to download the PiNet script:
wget --content-disposition http://bit.ly/pinetbetaWait while Ubuntu downloads the script called pinetbeta. The script is a small file, so this shouldn’t take more than a few seconds. After the download completes, you’ll see brief details of the file transfer, and the prompt appears again.
Give the following command to launch PiNet:
sudo bash pinetTip The script for installing PiNet is complex and sometimes throws errors, especially if it temporarily can’t access Internet repositories from which it needs to download files. If PiNet stops with an error, try giving the sudo bash pinet command—several times if necessary.
In the Welcome dialog box (see Figure 7-16), select the Yes button and press the Enter key.

Figure 7-16. Select the Yes button and press the Enter key in the Welcome dialog box to start installing PiNet.
In the Importing users dialog box (see Figure 7-17), select the No button and press the Enter key.

Figure 7-17. Select the No button and press the Enter key in the Importing Users dialog box.
In the Release channels dialog box (see Figure 7-18), select the Stable button and press the Enter key.
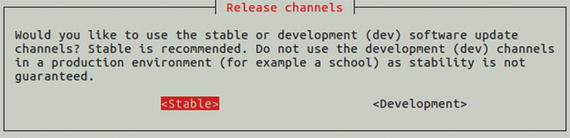
Figure 7-18. Select the Stable button and press the Enter key in the Release channels dialog box.
In the Additional Software dialog box (see Figure 7-19), press the Enter key to accept the OK button.

Figure 7-19. In the Additional Software dialog, press the Enter key.
In the Extra Software Submenu dialog box (see Figure 7-20), select the extra software packages you want to install. To select a package, press Down arrow or Up arrow to move the highlight to its line, and then press Spacebar to place an asterisk (*) between the brackets.

Figure 7-20. In the Extra Software Submenu dialog box, choose the extra software packages you want to install.
Select the OK button and then press the Enter key to proceed.
Note In the Extra Software Submenu dialog box, you’ll likely want to install LibreOffice, the office software suite. You may also want to install Epoptes, classroom-management software that we’ll show you how to use later in this chapter to control the network’s computers.
In the Are you sure? dialog box (see Figure 7-21), verify your choices before selecting the Yes button and pressing the Enter key.

Figure 7-21. In the Are you sure? dialog box, select the Yes button and press the Enter key to proceed.
In the Full Install dialog box (see Figure 7-22), read the information shown—briefly, downloading the files will take a while, during which you must leave the Terminal window open—and then press the Enter key to accept the OK button.

Figure 7-22. In the Full Install dialog box, read the information and then press the Enter key to accept the OK button.
The script then downloads the files required for the installation. This may take an hour or two. After that, the Warning dialog box opens (see Figure 7-23), asking whether you want to give the students access to the sudo command.
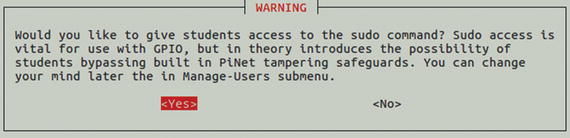
Figure 7-23. In the Warning dialog box, choose the Yes button or the No button to control whether PiNet gives students access to the sudo command.
Tip Give your students access to the sudo command only if they will be doing projects that use the GPIO pins on the Raspberry Pi computers. Otherwise, for security, don’t give students access to the sudo command.
Select the Yes button or the No button, as needed, and then press the Enter key. The script then compresses the operating system, which takes several minutes. When that process finishes, the IP address dialog box opens (see Figure 7-24).

Figure 7-24. In the IP address dialog box, verify that the IP address the script has detected is the one you want to use for PiNet. Then select the Yes button and press the Enter key.
Make sure that the IP address shown is the one you want to use for PiNet. If you set the Ubuntu box’s IP address, as explained in the previous section, the IP address should be right; but if the computer has two or more network interfaces, you may need to pick the right one.
Note If the IP address dialog box shows the wrong address, select the No button and press the Enter key. In the second IP address dialog box that opens, type the correct IP address, select the OK button, and then press the Enter key.
Select the Yes button and press the Enter key. The Stats dialog box then opens, letting you know that PiNet will automatically collect usage statistics (see Figure 7-25).
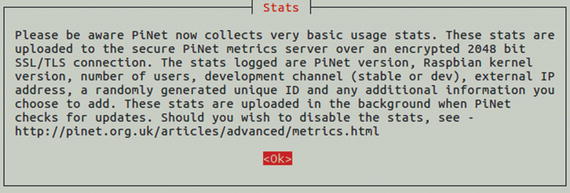
Figure 7-25. The Stats dialog box explains PiNet’s collection of usage statistics. Press the Enter key to proceed.
Press the Enter key to accept the OK button. The Additional information dialog box then appears (see Figure 7-26), inviting you to add extra information to your server in the dialog boxes that follow. This information is to help the PiNet team understand PiNet usage; if you don’t want to provide it, leave the fields blank in the dialog boxes.

Figure 7-26. In the Additional information dialog box, read the instructions and press the Enter key.
Press the Enter key to accept the OK button. The “Nearest major city” dialog box then appears, prompting you to enter your nearest major city (see Figure 7-27).

Figure 7-27. You can enter your nearest city in the Nearest major city dialog box.
Enter the city (or leave the field blank), select the OK button, and then press the Enter key. The Organisation type dialog box then opens (see Figure 7-28).

Figure 7-28. In the Organisation type dialog box, select your organization type, such as School; choose the Blank item if you don’t want to answer.
In the list, select the organization type, such as School or Non Commercial Organisation. Then select the OK button and press the Enter key. The School/organisation name dialog box then opens (see Figure 7-29).

Figure 7-29. You can enter the name of your school or organization in the School/organisation name dialog box.
Type the name of your school or organization (or leave the field blank), then select the OK button and press the Enter key. The Additional information dialog box then opens, telling you how to edit the information later if needed (see Figure 7-30).

Figure 7–30. The Additional information dialog tells you how to edit the additional information later if you need to.
Press the Enter key to accept the OK button. The Compression dialog box then opens (see Figure 7-31).

Figure 7-31. In the Compression dialog box, press the Enter key to accept the OK button.
Press the Enter key to proceed. After the compression completes, the Main installation complete dialog opens (see Figure 7-32), telling you to copy the files found in the /home/YourUser/PiBoot folder to the root of an SD card and use the SD card to boot a Raspberry Pi computer on the network.

Figure 7-32. In the Main installation complete dialog box, read the instructions for copying the boot files to an SD card and using it to boot a Raspberry Pi computer. Then press the Enter key.
Press the Enter key. The script looks for updates and applies any it finds. The PiNet Main Menu dialog box then opens (see Figure 7-33), and you can start administering the PiNet server. See the next sections for details.

Figure 7-33. From the PiNet Main Menu dialog box, you can configure the PiNet server, manage users, back up user files, and more.
Creating and Managing User Accounts
Normally, you’ll want to create a user account for each student who will use the Raspberry Pi computers. The user accounts enable students to log in to the network on any of the Raspberry Pi computers and see their own files and settings.
You’ll also usually want to create a user account for each teacher who will use the system. PiNet automatically creates an account for you during setup, giving it your Ubuntu username and password.
Note
PiNet assigns students to a group called pupil and teachers to a group called teacher. The pupil group has limited permissions, whereas the teacher group has administrative permission for PiNet.
Creating User Accounts
To create a user account, follow these steps:
In the PiNet Main Menu dialog box, select the Manage-Users item and press the Enter key. The Manage-users Submenu screen appears (see Figure 7-34).

Figure 7-34. The Manage-users Submenu dialog box includes commands for adding and removing users, adding teachers, changing passwords, and enabling and disabling the sudo command.
Select the Add-user item and press the Enter key. The Username dialog box opens.
Type the name for the user, select the OK button, and press the Enter key. The Password dialog box opens.
Type the password for the user, select the OK button, and then press the Enter key. The Permission Level dialog box opens, asking whether the user is a pupil or a teacher.
Select the Pupil button or the Teacher button, as appropriate, and then press the Enter key. The Success dialog box opens, confirming that the new student user (or teacher user) has been added to the system.
Press the Enter key to accept the OK button. The Another User dialog box opens, prompting you to add another user.
Select the Yes button or the No button, as appropriate, and then press the Enter key. If you select the Yes button, the Username dialog box opens, and you can repeat steps 3–6 to create the user account. If you select the No button, the PiNet Main Menu dialog box opens again.
Removing User Accounts
You can quickly remove a user account from the PiNet system. Follow these steps:
In the PiNet Main Menu dialog box, select the Manage-Users item and press the Enter key. The Manage-users Submenu dialog box appears.
Select the Remove-user item and press the Enter key. The Users dialog box appears (see Figure 7-35), showing all the user accounts. This dialog box doesn’t indicate which of the accounts are teacher accounts.
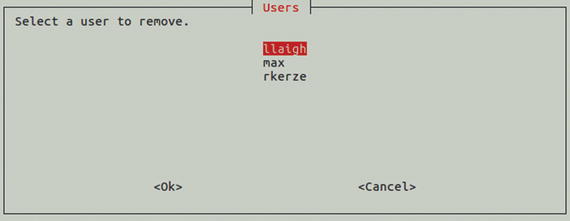
Figure 7-35. In the Users dialog box, select the user account you want to remove, select the OK button, and then press the Enter key.
Select the user account you want to remove.
Select the OK button, and then press the Enter key.
Displaying the List of Users
To see the list of users , and to see which of them are teachers, go to the Manage-users Submenu screen, select the Display-users item, and press the Enter key. You’ll see a readout something like this:
-------------------Current Linux users-------------------jmatrixhhughesllaighrkerze-------------------Current Linux users in the teacher groupjmatrixrkerze-------------------Press enter to continue
Press the Enter key when you want to return to the PiNet Main Menu dialog box.
Promoting a Pupil Account to a Teacher Account
You can promote a pupil account to a teacher account if you want the pupil to be able to help administer the PiNet system. To promote the account, follow these steps:
In the PiNet Main Menu dialog box, select the Manage-Users item and press the Enter key. The Manage-users Submenu screen appears.
Note You can also give the Add-teacher command from the Shared Folders submenu.
Select the Add-teacher command and press the Enter key. The Teacher dialog box opens (see Figure 7-36), explaining which access teachers have.

Figure 7-36. The Teacher dialog box explains the access that teachers have in PiNet.
Press the Enter key. The Users dialog box opens, showing a list of all accounts but not indicating which are students and which are teachers. (To find out which accounts are teachers, see the previous section.)
Select the user you want to add to the teacher group.
Select the OK button and press the Enter key. The Success dialog box opens, confirming that the user has been added to the teacher group.
Press the Enter key to accept the OK button. The PiNet Main Menu dialog box opens again.
Enabling and Disabling the sudo Command
From the Manage-users Submenu dialog box, you can also give the Enable-Sudo and Disable-Sudo commands. These commands enable or disable the sudo command on the Raspberry Pi computers that connect to the PiNet system.
Note
Normally, you’ll want to prevent students from giving the sudo command to prevent them from taking administrative actions. The exception is if the students will be working with the GPIO pins on the Raspberry Pi computers, because controlling the GPIO pins requires the sudo command.
After you give one of these commands, PiNet creates a new system image that includes the change. Compressing the new system image takes several minutes. After that, you need to restart each Raspberry Pi computer to make the change take effect .
Importing and Exporting Users
If you are moving from one PiNet server to another, you can use the Export-users command on the old server to export the list of users to a CSV (comma-separated values) file. You can then use the Import-users command on the new server to import the list of users.
Both these commands are in the Manage-users Submenu dialog box.
Setting Up a Raspberry Pi Computer with the PiBoot Files
To set up a Raspberry Pi computer to connect to the PiNet server, you copy the files from the PiBoot folder in your Home folder on the Ubuntu box to an SD card that you then insert in a Raspberry Pi computer. Follow these steps:
Open a Files window and navigate to the PiBoot folder in your Home folder.
Connect an SD card or micro SD card to your Ubuntu box. For example, insert a micro SD card in a card reader attached to the computer.
Use the Files app to copy the files from the PiBoot folder to the root folder on the SD card.
Eject the SD card from the Ubuntu box’s filesystem.
Insert the SD card in a Raspberry Pi computer that’s connected to the network via Ethernet.
You can then boot the Raspberry Pi computer as discussed in the following section.
Booting a Raspberry Pi Computer with PiNet
After you insert the SD card containing the PiBoot files in a Raspberry Pi computer, you can boot the computer much as normal. Startup takes somewhat longer than usual because the Raspberry Pi computer copies the operating system across the network from the PiNet server rather than getting it from the SD card, but it’s pretty quick on a Gigabit Ethernet connection.
To boot a Raspberry Pi computer, follow these steps:
Power on the Raspberry Pi computer. You’ll see several screens full of information, and then the login screen appears.
Type your username and press the Enter key. The Password field appears.
Type your password and press the Enter key. The PiNet server verifies your credentials, and the Raspberry Pi computer then logs you in.
Once you’ve logged in, the desktop appears, and you can start using Raspbian as normal.
Setting Up Shared Folders for Users
PiNet makes it easy to provide shared folders for the system’s users. Shared folders are accessible on each Raspberry Pi computer that connects to the PiNet system. They appear in the left pane of File Manager.
Opening the Shared-Folders Dialog Box
To work with shared folders, select the Shared-Folders command in the PiNet Main Menu dialog box and press the Enter key. The Shared folders dialog box appears (see Figure 7-37).
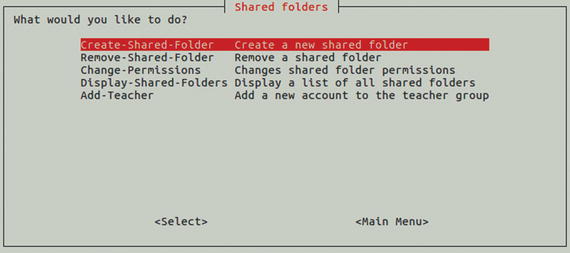
Figure 7-37. The Shared folders dialog box gives you access to the commands for creating and removing shared folders, changing permissions on shared folders, displaying shared folders, and adding accounts to the teacher group.
Creating a Shared Folder
Follow these steps to create a shared folder:
In the Shared folders dialog box, select the Create-Shared-Folder command and press the Enter key. The Create shared folder dialog box opens (see Figure 7-38).

Figure 7-38. In the Create Shared Folder dialog box, select the Yes button and press the Enter key.
Select the Yes button and press the Enter key. The Current Shared Folders list appears, showing a text list of shared folders. Here’s an example, showing only a folder called Resources:
----------------------Current shared folders----------------------ResourcesHit enter to continuePress the Enter key. The Shared folder dialog box opens (see Figure 7-39).

Figure 7-39. In the Shared folder dialog box, type the name for the new shared folder, select the OK button, and then press the Enter key.
Type the name for the new shared folder.
Select the OK button, and then press the Enter key. The Pupil write access dialog box opens, with the Read button selected by default (see Figure 7-40).

Figure 7-40. In the Pupil write access dialog box, specify whether pupils should have read/write access or only read access to the folder.
Select the Read/Write button if you want students to be able to have read/write access to the folder. Otherwise, leave the Read button selected.
Press the Enter key. The Complete dialog box opens (see Figure 7-41), confirming that the folder has been created and telling you that you will need to reboot the Raspberry Pi computers to access the folder.

Figure 7-41. The Complete dialog box confirms that you have created the folder and reminds you to reboot the Raspberry Pi computers to access it.
Press the Enter key to accept the OK button. The PiNet Main Menu dialog box then opens again.
When you’ve finished creating shared folders, restart each Raspberry Pi computer to force it to update the list of shared folders.
Removing a Shared Folder
PiNet enables you to remove a shared folder almost as easily as you can create one.
Caution
Before you remove a shared folder, open a Files window to the folder and make sure you know what it contains. Move any files that you need to keep to another folder, or back up all the files in the folder to a medium from which you can easily recover them.
To remove a shared folder, follow these steps:
In the Shared folders dialog box, select the Remove-Shared-Folder command and press the Enter key. The Warning! dialog box opens (see Figure 7-42), letting you know that you will need to reboot all running Raspberry Pi computers after deleting a shared folder.

Figure 7-42. In the Warning! dialog box, read the warning about having to reboot all running Raspberry Pi computers after deleting a shared folder. Then press the Enter key.
With the Yes button selected (as it is by default), press the Enter key. The Shared-folders dialog box opens, showing the list of shared folders on the system (see Figure 7-43).
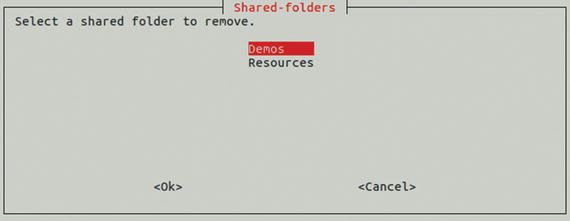
Figure 7-43. In the Shared-folders dialog box, select the shared folder you want to remove, select the OK button, and then press the Enter key.
In the “Select a shared folder to remove” list, select the shared folder you want to remove.
Select the OK button and press the Enter key. The “Are you sure?” dialog box opens (see Figure 7-44).

Figure 7-44. In the Are you sure? dialog box, double-check the name of the shared folder you’re about to delete before pressing the Enter key to accept the Yes button.
Look at the name and double-check the name of the shared folder you’re about to delete.
Press the Enter key to accept the Yes button. The Success dialog box opens (see Figure 7-45), confirming that the folder has been deleted.

Figure 7-45. The Success dialog box confirms that PiNet has deleted the shared folder.
Press the Enter key. The PiNet Main Menu dialog box opens again.
After deleting one or more shared folders, restart all the running Raspberry Pi computers to force them to update the list of shared folders.
Switching a Shared Folder Between Read and Read/Write
After creating your shared folders, you may sometimes need to change a folder’s access permission from read to read/write or vice versa.
Caution
When you change a shared folder from read/write to read, students will be unable to change or delete any files they have already created in that folder.
To change the access permission for a shared folder, follow these steps:
In the Shared folders dialog box, select the Change-Permissions command and press the Enter key. The Shared-folders dialog box opens (see Figure 7-46).
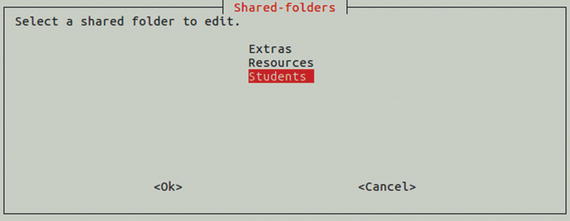
Figure 7-46. In the Shared-folders dialog box, select the shared folder whose permissions you want to change.
In the “Select a shared folder to edit” list, select the shared folder you want to change.
Select the OK button and press the Enter key. The Pupil write access dialog box opens (see Figure 7-47).

Figure 7-47. In the Pupil write access dialog box, select the Read button or the Read/Write button, as needed, and then press the Enter key.
Select the Read button or the Read/Write button, as needed, and then press the Enter key. The Complete dialog box opens, confirming the change (see Figure 7-48).

Figure 7-48. The Complete dialog box confirms the permissions change to the shared folder.
Press the Enter key. The PiNet Main Menu dialog box opens again.
Viewing the List of Shared Folders
When you want to see a list of all the shared folders on the PiNet system, go to the Shared folders dialog box, select the Display-Shared-Folders command, and press the Enter key. You’ll see a list such as this:
----------------------Current shared folders----------------------ExtrasResourcesStudentsHit enter to continue
As you can see, the list doesn’t show which folders have read access and which have read/write access for students.
Press the Enter key to return to the PiNet Main Menu dialog box.
Viewing the PiNet System Status
To see the status of the PiNet system, select the System-Status command in the PiNet Main Menu dialog box and press the Enter key. You’ll see text output giving various statistics about the system. Here is an example:
PiNet System Status-------------------------------------------------------Current version - 1.1.8Server IP address - 10.0.0.200-------------------------------------------------------Been running version 1.1.8 since - 2016-09-01PiBoot folder last updated - 2016-10-05Last system-wide update (update-all) - 2016-10-05----------------Hard Drive Usage----------------Total space - 7.9GUsed space - 2.4GFree space - 5.5G-----Other-----CPU usage - 8%Epoptes installed - TrueTeacher members - max, rkerze, llaigh--------------------Current active users--------------------10.0.0.201:41837 – max10.0.0.202:41837 – hhughes...10.0.0.225:41837 – dweirHit enter to return to the main menu
Here’s what you can see on the PiNet System Status screen:
PiNet version: You can see the PiNet version, which you may need to know when checking for support. This too appears in the title bar of the PiNet Main Menu dialog box.
Server IP address: You can see the server’s IP address, but you can see it more easily anytime in the title bar of the PiNet Main Menu dialog box.
Running and updates statistics: You can see how long the server has been running, when the PiBoot folder was last updated, and when the last system-wide update was run.
Hard drive usage: You can see the total amount of space, how much has been used, and how much remains free.
CPU usage: You can see the CPU usage percentage when you gave the System-Status command.
Epoptes installed: You can see whether the Epoptes classroom-management system is installed (True) or not (False).
Teacher members: You can see which users are members of the teacher group.
Current active users: You can see which users are logged in and which IP addresses their computers are using.
Press the Enter key when you finish viewing the system status information.
Installing Programs on the Raspberry Pi Computers
PiNet enables you to install programs easily on all the Raspberry Pi computers on the network by adding them to the Raspbian image that the computers copy from the server during startup. After you add a program, PiNet needs to compress a new Raspbian image, which takes a few minutes. After that, you must restart any running Raspberry Pi computers to get them to pick up the new image.
To install a program, select the Install-Program command in the PiNet Main Menu dialog box and press the Enter key. The Additional Software dialog box opens, and you can follow through the same procedure as when choosing which additional software to install while installing PiNet itself. See the section “Downloading and Installing PiNet,” earlier in this chapter, for details.
Updating PiNet and the Raspberry Pi Computers
The PiNet Main Menu dialog box includes the Update-All command for updating its own software and that of the Raspberry Pi computers. When you give this command, PiNet checks and displays the system status, then automatically downloads and installs any updated packages that are available. This may take a while, depending on how many packages there are, what their file size is, and the speed of the Internet connection.
When the update is finished, the Update Complete dialog box opens. Press the Enter key to accept the OK button. The PiNet Main Menu dialog box then appears.
Collecting Work from Students
Pinet gives you an easy means to collect work from students. Each student saves the work they want to submit in his or her handin folder. You then give the Collect-Work command and specify the account in which you want PiNet to save the collected work .
To collect work from each student’s handin folder, follow these steps:
In the PiNet Main Menu dialog box, select the Collect-Work command and press the Enter key. The User selection dialog box opens (see Figure 7-49).

Figure 7-49. In the User selection dialog box, type the name of the user account in which you want to save the collected work.
Type the name of the user account in which you want to save the collected work. PiNet suggests the username under which you’re currently logged in.
Select the OK button and press the Enter key. The Warning dialog box opens (see Figure 7-50), telling you that the current submitted folder will be deleted.

Figure 7-50. In the Warning dialog box, select the Yes button and press the Enter key to agree that PiNet may delete the current folder used for work submissions.
Select the Yes button and press the Enter key. The Complete dialog box opens (see Figure 7-51), telling you that the students’ work has been collected and shows the folder in which it is stored.

Figure 7-51. The Complete dialog box tells you that the students’ work has been collected and the folder in which to find it.
Press the Enter key to accept the OK button. The PiNet Main Menu dialog box opens again.
Updating the SD Card Image
If you make changes to your PiNet server’s configuration, such as changing its IP address, you can use the Update-SD command to update the image that you burn to the SD cards you install in the Raspberry Pi computers.
Updating the SD card image takes a few minutes, during which PiNet prompts you to make sure that the IP address that PiNet is using is correct. When the SD card image is ready, the SD image updated dialog box opens to let you know the names of the files and where to find them (see Figure 7-52).

Figure 7-52. The SD image updated dialog box notifies you that the SD card image files are ready and tells you where to find them.
Updating the PiNet System
PiNet checks for updates automatically unless you prevent it from doing so (see the sidebar titled “Turning Off Uploading of PiNet Statistics”). You can also check for updates manually by giving the Update-PiNet command from the PiNet Main Menu dialog box.
Taking Remote Control with Epoptes
To keep an eye on what your students are doing during lessons, and to manage your Raspberry Pi computers remotely, you can use Epoptes , a free computer lab management and monitoring app. Epoptes is a Greek word that means “overseer” or “one who has the vision sublime”—a fair description of you in your classroom—rather than a complex acronym.
Installing Epoptes
Epoptes is one of the apps you can install from the Extra Software Submenu dialog box while setting up PiNet itself. You can also install it afterward by using either the Install-Program command from the PiNet Main Menu dialog box or the Install-Epoptes command from the Epoptes Submenu dialog box. If you prefer to work from the command line, the command apt-cache search epoptes will do the trick.
The Epoptes Submenu dialog box (see Figure 7-53), which you open by giving the Epoptes-Menu command in the PiNet Main Menu dialog box, contains commands for installing Epoptes, launching Epoptes , adding accounts to the teacher group, and uninstalling Epoptes.

Figure 7-53. From the Epoptes Submenu dialog box, you can install or uninstall Epoptes, launch Epoptes, and add accounts to the teacher group.
Launching Epoptes
Once you’ve installed Epoptes, you can launch it by selecting the Epoptes-launch command in the Epoptes Submenu dialog box and pressing the Enter key.
Epoptes opens in a separate window, showing an overview with a thumbnail for each client (see Figure 7-54). You can zoom the thumbnails larger or smaller by using the controls on the right side of the status bar. Click the – button to zoom out by increments; click the + button to zoom by increments; or drag the slider to zoom in or out freely.

Figure 7-54. Epoptes displays a thumbnail for each client connected to the network. Use the controls on the right side of the status bar to increase or decrease the thumbnail size as needed.
Tip
You can choose which information appears under each client thumbnail by opening the Labels menu and then clicking the readout you want: Computer (User), Computer, User (Computer), User, or Show Real Names.
Working with Your Class’s Computers in Epoptes
Once you’ve launched Epoptes, you can use it to take a wide variety of actions with the client computers on your network. In this section, we’ll cover briefly the main actions, most of which you can take from the toolbar, leaving you to explore other capabilities if you need them.
Figure 7-55 shows the toolbar with the buttons labeled.
Figure 7-55. You can give the most widely used commands in Epoptes from the toolbar.
These are the main actions you can take:
Select the client or clients you want to affect: Click the first (or only) client. After that, you can select a range of contiguous clients by Shift+clicking the one at the far end of the range, or add noncontiguous clients by Ctrl+clicking them.
Note
The Boot Selected Clients (Wake On LAN) feature of Epoptes doesn’t work on Raspberry Pi computers as of this writing, but the Raspberry Pi Foundation is working on Wake On LAN booting.
Log out users: Click the Log Out Users Connected on Selected Clients button to log the users out.
Note
Epoptes gives the clients no alert or warning about actions you’re taking on the clients. If students are using the computers, you might want to use the Send a Message to the Selected Clients command before taking actions such as rebooting the computers, logging the users out, or taking control of the screen.
Reboot a Raspberry Pi computer: Click the Reboot the Selected Clients button to reboot each Raspberry Pi computer you have selected.
Shut down a Raspberry Pi computer: Click the Shutdown the Selected Clients button to shut down each of the Raspberry Pi computers.
Take control of a Raspberry Pi computer: Click the Take Control of the Selected User’s Computer button, or simply double-click the computer’s thumbnail, to open a VNC window showing the computer’s screen (see Figure 7-56). You can then take actions as needed to help the user or to manage the computer. Close the VNC window when you want to end your control of the computer.

Figure 7-56. Open a VNC window showing a client’s desktop when you want to view what the user is doing, help the user, or control the computer remotely.
Note
You can take control of multiple computers at the same time. Each computer’s desktop appears in a separate VNC window, and you can take actions separately in each window.
Broadcast your screen to one or more clients: Select the clients, and then click the Broadcast Your Screen to the Selected Clients, Fullscreen button to send your computer’s screen so that it appears full screen on the client’s screen. To send your computer’s screen so that it appears in a window on the client’s screen, click the pop-up arrow to the right of the Broadcast Your Screen to the Selected Clients, Fullscreen button and then click Broadcast Screen (Windowed) on the pop-up menu.
Caution
Before broadcasting your screen, make sure it is displaying only what you want the students to see. Normally, you’ll want to close any VNC windows you’re using to monitor or help students before starting broadcasting. Epoptes will happily broadcast to students the VNC windows in which you’re monitoring clients; but network performance tends to suffer, and students will likely find the display visually confusing.
Stop broadcasting your screen: Click the Stop All Broadcasts on Every Client button.
Open a URL, open a file, or give a command: Click the Execute a Command on the Selected Clients button to open the Execute command dialog box (see Figure 7-57). Type the URL, the filename, or the command, and then click the Execute button.

Figure 7-57. Use the Execute command dialog box to open a web page, open a file, or run a command on the selected clients.
Send a message: Click the Send a Message to the Selected Clients button to display the Send message dialog box (see Figure 7-58). If necessary, change the default text (Message from administrator) in the Message title box. Type your message in the Message text box, and then click the Send button.

Figure 7-58. Use the Send message box to send a message to one or more clients.
Note
Select the Use Pango markup check box in the Send Message dialog box if you want to use the Pango markup language to format your message text.
Lock the client’s screen: Click the Lock the Screen of Selected Clients button to lock the screen. The client displays a lock screen containing a padlock symbol and the message The screen is locked by a system administrator.
Unlock a locked client’s screen: Click the Unlock the Screen of the Selected Clients button to unlock a client you’ve locked.
Note
If the Unlock the Screen of the Selected Clients command fails to unlock a client’s screen, reboot the client to get it working again.
View information about a client: Click the Show Information for the Selected Client button to open the Properties dialog box (see Figure 7-59) in which you can see the client type (fat or thin), the hostname, the MAC address, the IP address, the username, the processor type, and the amount of RAM.
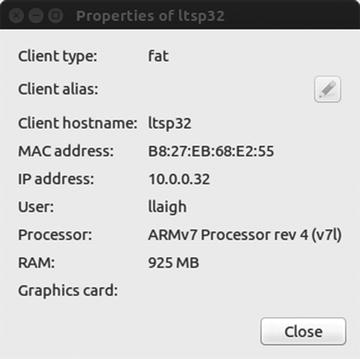
Figure 7-59. The Properties dialog box lets you see a client’s type, MAC address, processor type, and other details.
Note
Epoptes is extremely useful software and usually works very well—but as of this writing, it sometimes crashes. If this happens, there’s no indication to the clients unless you’re broadcasting your screen to them. Restart Epoptes without fanfare, and you’ll be able to resume your instruction without the students noticing the crash.
Summary
In this chapter, you’ve learned how to administer and manage your classroom network of Raspberry Pi computers. You now know how to create user accounts on individual Raspberry Pi computers and how to connect to them using SSH, VNC, and RDP. You also know how to install, configure, and use the PiNet server software to manage your Raspberry Pi computers centrally, and how to use the Epoptes software to control your classroom computers remotely.
In Chapter 8, we’ll look at how to troubleshoot your classroom deployment of Raspberry Pi computers.