
8
Implementing Secure Cloud Solutions
Now that we’ve been through the authentication and authorization side of security, it’s the time for us to talk about deploying apps securely in Azure. One of the benefits of hosting your applications in the cloud is the security capabilities that come with the platform.
In this chapter, we’re going to start by talking about securing your application secrets with Azure Key Vault. This will also cover recommendations for providing access to your vaults and secrets. We’re going to then look at how to authenticate your application with Azure resources using managed identities, exploring the different types of managed identities available within Azure.
We’ll finish the chapter with a look at the Azure App Configuration service for centrally and securely storing your application configuration settings, including how to use the feature management capabilities of the service to centrally manage enabling and disabling features, among other things.
By the end of this chapter, you’ll know how to secure and provide access to your application secrets, how to authenticate your application with other Azure resources, and how to centrally manage settings and feature flags for your applications, all of which will include exercises in code for demonstration purposes.
In this chapter, we’ll cover the following main topics:
- Securing secrets with Azure Key Vault
- Implementing managed identities
- Exploring Azure App Configuration
Technical requirements
To follow along with the exercises in this chapter, you will need the following:
- The latest .NET SDK: https://dotnet.microsoft.com/download
- Visual Studio Code: https://code.visualstudio.com/Download
- The Azure App Service VS Code extension: https://marketplace.visualstudio.com/items?itemName=ms-azuretools.vscode-azureappservice
- The Azure Functions VS Code extension: https://marketplace.visualstudio.com/items?itemName=ms-azuretools.vscode-azurefunctions
- The Azure Account VS Code extension: https://marketplace.visualstudio.com/items?itemName=ms-vscode.azure-account
- The code samples for this chapter can be found here: https://github.com/PacktPublishing/Developing-Solutions-for-Microsoft-Azure-AZ-204-Exam-Guide/tree/main/Chapter08
Code in Action videos for this chapter: https://bit.ly/3UAB3Mj
Securing secrets with Azure Key Vault
I’m sure it won’t come as a surprise to hear that storing credentials, connection strings, and other sensitive secrets in application code isn’t a great idea. We hear about these secrets being leaked all the time, and there are many tools integrated into code repositories nowadays that warn you if potential secrets are detected within your source code.
Azure Key Vault provides a way to store your application secrets, create and control encryption keys, and manage both public and private certificates centrally and securely. With the Standard tier, your keys, secrets, and certificates are software-protected and safeguarded by Azure. With the Premium tier, you have the option to import or generate keys in hardware security modules (HSMs) that never leave the HSM boundary.
A key vault is a logical group of secrets, and as such, the recommendation is to use one vault per application per environment (dev/prod, for example). This helps prevent the sharing of secrets across different environments and applications and reduces the threat of secrets being exposed.
You can monitor a key vault’s usage by enabling and configuring logging, with the ability to restrict access to and delete the logs as needed. You can send the logs to a Log Analytics workspace, archive them to a storage account, stream them to an event hub, or send them to a partner solution. Previously, you were able to send the logs to Azure Monitor logs, but at the time of writing, a preview feature of Azure Monitor called Key Vault insights can be used instead. A link to further details on this preview feature can be found in the Further reading section of this chapter. As far as the exam is concerned (again, at the time of writing), you can still send the logs to Azure Monitor logs.
Key Vault secrets are encrypted at rest transparently, meaning that the encryption happens without any user interaction required, and the decryption happens automatically when you request to read those secrets (providing you have the permissions to do so). They’re also encrypted in transport using Transport Layer Security (TLS). The combination of Perfect Forward Secrecy (PFS) – which protects connections between client systems and Microsoft cloud services – and connections using RSA-based 2048-bit encryption makes intercepting and accessing this data in transit difficult.
Before a user or application can get access to any secrets or keys stored within a key vault, that caller needs to first be authenticated with AAD. Once they are authenticated, authorization determines what operations they are allowed to perform (if any). Let’s first look at authorization because authentication will lead us nicely into the subsequent section.
Authorization
Key Vault supports two permission models (only one of which can be used for accessing secrets at any one time):
- Role-based access control (RBAC): You are probably already familiar with how RBAC works for Azure resources: you can assign roles that have certain permissions. RBAC controls access to the management plane, which is used for creating and managing key vaults and their attributes and access policies, and accessing the data stored within them.
- Key Vault access policy: Access policies control access to the data plane for managing secrets, keys, and certificates, but not the management of the key vault itself.
Before we move into authentication, let’s create a new vault and explore the permission models. We’ll do the initial setup using the Azure CLI before moving into the portal:
- From a terminal session that’s already authenticated with Azure, create a new resource group if needed:
az group create -n "<name>" -l "<location>"
- Create the key vault:
az keyvault create -n "<unique vault name>" -g "<resource group name>" -l "<location>"
This may take a few minutes. Notice that the vault name needs to be unique because it will create a globally unique URI in the format https://<vault name>.vault.azure.net/.
- Create a new secret in the newly created vault with any name and value you want:
az keyvault secret set --vault-name "<vault name>" --name "<secret name>" --value "<secret value>"
Your secret is now encrypted in your new key vault.
- Read the value of the secret, which will transparently decrypt the secret and make it readable:
az keyvault secret show --vault-name "<vault name>" --name "<secret name>"
From the terminal output, you can see that there are multiple properties, including activation and expiration dates.
- From within the Azure portal, open the newly created key vault and from within the Secrets blade, open your secret.
Notice that we have a version with a status. Every secret is versioned and can be disabled at any time if needed. When we ran the CLI command to view the secret, we could have specified the version. When a version isn’t specified, the latest version is used.
- Open the current version and notice the Secret Identifier, which contains the vault URI, the secret name, and the specific version of the secret. Also, notice the options for dates and to set its Enabled state to either Yes or No.
- Click Show Secret Value and you’ll see the decrypted value once more.
- Come out of the secrets screens and open the Access policies blade.
Notice the options to allow access to different types of Azure resources as well as the Permissions model option previously discussed.
- Leaving Vault access policy selected, explore the various drop-down options for Key Permissions, Secret Permissions, and Certificate Permissions against your user account.
- Remove the List option for your account under Secret Permissions and click Save.
- Open the Secrets blade and you should no longer be able to view any created secrets (you may need to refresh).
- Revert the change to give yourself List permissions again and don’t forget to click Save. Confirm that you are now able to see the list of secrets again in the Secrets blade (you may need to refresh).
- Back in the Access policies blade, change the Permissions model to Azure role-based access control and click Save.
Changing the Permissions Model
When changing the Permissions Model, it’s strongly recommended that you don’t do this during production hours in a production environment. If users or services were previously able to access the secrets as part of the vault access policy, they may no longer have access unless they’ve been granted access via RBAC as well.
- Head back to the Secrets blade, click Refresh, and you should no longer have permission to list secrets despite having access when we were using the access policy.
To give yourself access, you would need to assign yourself to an appropriate role within the Access control (IAM) blade, although we won’t do that right now.
- Switch Permissions model back to Vault access policy from the Access policies blade, and remember to click Save.
Don’t delete the resources just created because we’ll use them in the exercises that follow.
There is a lot more to Key Vault than we can cover in this chapter. For example, soft-delete is a feature that allows deleted secrets to be recovered if they were deleted in error. There is a lot of useful information and multiple resources in the Azure Key Vault developer’s guide, a link to which can be found in the Further reading section of this chapter.
We have just completed a very basic demonstration of the authorization side of accessing a key vault. This was all done using your own user account, but as the exam is focused on development, we should talk about how your apps can get access. Let’s talk about how to authenticate your apps with Key Vault.
Authentication
In addition to authenticating with a user account like we just did, you can authenticate with a service principal (either using a certificate or secret), which we discussed in the previous chapter. You can also authenticate with Key Vault using managed identities, which is the recommended approach.
With service principals, you are responsible for storing and rotating the secrets and certificates. We hear all the time about these credentials being leaked or stolen, sometimes being accidentally committed to source control, or things ceasing to work because someone forgot to rotate a secret and the previous one has now expired.
The answer to this problem is managed identities, which remove the need for you to manage these credentials yourself.
Implementing managed identities
With managed identities (previously called managed service identities), the secret and secret rotation is automatically handled by Azure. You don’t even have access to the credentials. This is the recommended way to authenticate your application with Key Vault and can be used to authenticate with any resource that supports AAD authentication, even your own applications.
If you’re building an application using popular Azure resources such as App Service which access anything that supports AAD authentication, using managed identities is generally the recommended best practice. You can provide all the permissions you need without having to manage any of the credentials yourself. A link to a list of services that can use managed identities can be found in the Further reading section of this chapter.
Internally, managed identities are a special type of service principal (not an app registration) that are only usable with Azure resources. If a managed identity is deleted, the corresponding service principal is also deleted automatically. It’s important to understand the two types of managed identity, so let’s look at each one individually.
User-assigned managed identity
A user-assigned managed identity is a standalone resource tied to an AAD identity that’s trusted by the subscription in which it’s created. Once you’ve created a user-assigned managed identity, you can assign it to one or more applications, which can also have one or more user-assigned managed identities for authentication (we’ll demonstrate this shortly, don’t worry). With this type of managed identity being standalone and assignable to multiple resources, its life cycle is managed separately to any of those resources.
Let’s explore this by using Azure Functions to query our key vault using a user-assigned managed identity to authenticate:
- Create a new user-assigned managed identity with a name of your choice:
az identity create -n "<name>" -g "<resource group name>"
- Within the Azure portal, open the resource group and open the newly created user-assigned managed identity. This may take a few moments, and you may need to refresh the screen.
- Open the Properties blade and notice that you can see the Tenant id, the Principal id (which is the service principal’s object ID), and the Client id (which is the service principal’s application/client ID).
If you wanted to confirm that a service principal is indeed behind this, feel free to check Enterprise applications within AAD, but make sure the Application type filter is changed to Managed identities.
- Open the key vault created earlier and within the Access policies blade, click Add Access Policy.
- From the Secret permissions list, select Get then click on None selected next to Select principal.
- Search for and select your new user-assigned managed identity, then click Add.
- With the managed identity now showing in the list, click Save.
That’s our user-assigned managed identity created and permissions to get secrets from the vault assigned to it. We’ll eventually assign the identity to a function app. Let’s go ahead and create said function app:
- Create a new folder for this exercise locally on your device and open it in VS Code.
- Open the command palette using the menu or shortcut keys.

Figure 8.1 – VS Code view command palette menu
- Start typing and then select the option for Azure Functions: Create New Project....
- Browse to the relevant folder and select it, select C# for the language, choose the appropriate .NET version for the runtime, select HTTP Trigger, accept the default trigger name or create a new one, accept the default Namespace, select Function for the access rights selection, and wait for the project to be created.
- Open a terminal from the current folder and add the Azure.Identity package along with the KeyVault.Secrets package with the following commands:
dotnet add package Azure.Identity
dotnet add package Azure.Security.KeyVault.Secrets
- Once they have both been added, you can add them to your .cs file by adding the following lines near the other using statements:
using Azure.Identity;
using Azure.Security.KeyVault.Secrets;
The Azure.Identity package is what we’ll use to authenticate with Key Vault (it’s not just for Key Vault) and the Azure.Security.KeyVault.Secrets package is what we’ll use to get the secret we created earlier.
- Replace the Run() method with the following code, putting in the client ID of the user-assigned managed identity, the URI of your key vault, and the name of the previously created secret that you want to get:
public static async Task<IActionResult> Run(
[HttpTrigger(AuthorizationLevel.Function, "get", Route = null)] HttpRequest req,
ILogger log)
{
log.LogInformation("C# HTTP trigger function processed a request.");
string userAssignedClientId = "Client ID of the user-assigned managed identity";
var credential = new DefaultAzureCredential(new DefaultAzureCredentialOptions { ManagedIdentityClientId = userAssignedClientId });
var client = new SecretClient(new Uri("Key Vault URI (in the format of https://<vault name>.vault.azure.net/)"), credential);
KeyVaultSecret secret = await client.GetSecretAsync("Name of secret you want to get");
string responseMessage = $"Secret value: { secret.Value }";
return new OkObjectResult(responseMessage);
}
The key information to notice from this code is that we’re using DefaultAzureCredential, which will try to get a token using the following credential types in the following order:
- EnvironmentCredential (credential stored in an environment variable)
- ManagedIdentityCredential
- VisualStudioCodeCredential (if you have the Azure Account extension installed and logged in)
- AzureCliCredential
- AzurePowerShellCredential
The list should be somewhat self-explanatory. DefaultAzureCredential is a popular choice for developers because when we’re developing locally, it can use our VS Code credentials via the Azure Account extension, and when the code is running in Azure, it will use the managed identity provided in DefaultAzureCredentialOptions.
The code finishes off by using the GetSecretAsync() method to get the secret from the key vault using whichever credential was able to acquire a token from DefaultAzureCredential, before returning the secret value in plain text. Outputting the unencrypted value of a secret isn’t something you’d usually want to do, but this is purely for demonstration purposes.
Let’s test this locally to confirm it all works before deploying it to Azure:
- Build and run the function with F5.
- Open the GET URL shown in the terminal output from your web browser:

Figure 8.2 – GET URL shown in the VS Code terminal output
It will take a few moments, but eventually the secret value should be displayed in your browser. This works fine locally using our credentials. Now we’ll try in Azure.
- Stop the function running with Ctrl + C in the terminal window.
- Create a new function app using your preferred method, ensuring that you configure it to be .NET code with the correct version, your relevant region, and using the consumption plan.
- From VS Code, deploy your project to your newly created function app using your preferred method.
- Once that’s complete, head to the new function within the Azure portal, get the function URL, and browse to it (or use Test/Run to create a GET request). You’ll get an HTTP 500 error because none of the credentials DefaultAzureCredential wants to use are available.
- Go back to the function app (not just the function) in the Azure portal and open the Identity blade.
- Click on the User assigned tab and click Add.
- Search for and add the user-assigned managed identity created earlier.
- Try the function URL or Test/Run again, and this time you should see the secret value being displayed.
To recap, we now have an identity with credentials we don’t have to store, manage, or rotate. This identity can be assigned to one or more resources, such as a function app, and permissions can be provided for that identity that the relevant resources can use to authenticate with. We’ve also demonstrated how to access Key Vault secrets in code using DefaultAzureCredential to use whatever credentials are available in the current environment.
One thing that isn’t especially obvious is that certain scenarios will default to attempting to use a system-assigned managed identity for authentication even if the resource doesn’t have one and has a user-assigned managed identity assigned. I’ve been caught out by that in the past!
One example of this is if you try setting an App Service application setting (which we covered in Chapter 3, Creating Azure App Service Web Apps) value to reference a Key Vault secret, it will fail unless you either change the default behavior programmatically or configure a system-assigned managed identity. We’ll come across this scenario shortly.
That brings us nicely onto the topic of system-assigned managed identities.
System-assigned managed identity
While a user-assigned managed identity is a standalone resource that can be assigned to multiple resources, with its own separate life cycle, a system-assigned managed identity is enabled within a resource and shares the life cycle of that resource.
Let’s get straight into an example to demonstrate this. We’re going to create a web app that reads an application setting, like we did in Chapter 3, Creating Azure App Service Web Apps, but the application setting value will be read from Key Vault:
- Create a new App Service plan using the following Azure CLI command:
az appservice plan create -n "< App Service plan name>" -g "<resource group name>" --sku "<SKU code. S1 for example>"
This is assuming you’re using the same resource group as before, or another existing one. By now, you should be able to create a new one if you need to.
- Create an App Service web app that uses the newly created App Service plan:
az webapp create -n "<web app name>" -g "<resource group name>" -p "<App Service plan name>"
- Within the Azure portal, open the newly created App Service and open the Configuration blade.
- Add a new application setting called KV_SECRET and give it the following value, providing your vault name and secret name: @Microsoft.KeyVault(VaultName=<vault name>;SecretName=<secret name>)
We could have also used @Microsoft.KeyVault(SecretUri=https://<vault URI>/<secret name>/). The forward slash (/) at the end allows this to pick up newer versions of the secret, whereas if you don’t add the slash, it doesn’t.
Notice that Source for this new setting displays Key vault Reference:
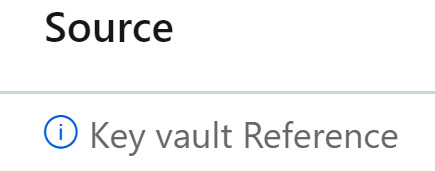
Figure 8.3 – Application setting source showing as a Key Vault reference
- Click Refresh followed by Continue and notice Source now displays an error icon:

Figure 8.4 – Key vault reference error on an application setting
- Go to Edit, and you’ll see the error is because no managed identity has been enabled on the App Service (although it still says MSI – managed service identity – which is the old name for managed identity):
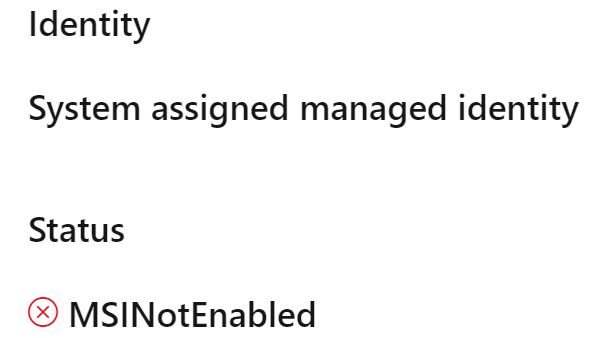
Figure 8.5 – Key vault reference application setting error status
Notice that Identity is specifically saying System assigned managed identity. If we were to now assign our user-assigned managed identity to the App Service, this message would remain because the default behavior is for App Service to attempt authentication with a system-assigned managed identity. This can be changed, but we don’t need to worry about that for this exercise.
- Open the Identity blade and from the System assigned tab, toggle Status to On, and click Save followed by Yes.
We could have also used the following CLI command to enable the system-assigned managed identity if we didn’t want to use the portal:
az webapp identity assign -n "<app name>" -g "<resource group name>"
This has once again created a new service principal, but this time, it didn’t create a standalone resource, unlike with a user-assigned managed identity. The life cycle of this system-assigned managed identity is intrinsically linked to that of the App Service.
- Copy the Object (principal) ID value to the clipboard.
- Add a new access policy to provide this new identity Get permissions to the secret in your key vault (make sure you set the Secret Permissions and not Key or Certificate) like we did before. You can either search for the App Service name or use the copied object ID. Make sure you click Save after adding it.
- Go back to the Configuration blade and check the setting no longer shows an error. If you see an error that the key vault name isn’t resolved, restart the App Service and refresh after a few moments.
- Create a new folder for this exercise on your local machine and open a terminal session from it.
- Create a new app using the .NET web app template:
dotnet new webapp
- Open the folder with the newly created app files in VS Code.
- Add a line of code similar to this in the PagesIndex.cshtml file:
<h3>Secret value: @(Environment.GetEnvironmentVariable("KV_SECRET"))</h3>
If you run this locally, it will just display Secret value: with no value because that variable doesn’t exist in this context.
- Publish the app ready to deploy:
dotnet publish -c Release -o DeployToAppService
If you’re already familiar with .NET, you’ll know there are various ways to do this and create a .zip if you need to. Feel free to use your preferred method instead of the provided steps.
- Assuming you’re using the Azure App Service VS Code extension, right-click on the DeployToAppService folder and select Deploy to Web App….
- When prompted, select your App Service, and select Deploy when prompted.
- Once it’s deployed, browse to the App Service website and you should see the secret value displayed on the screen. If not, restart the App Service and try again.
To recap, we now have an identity linked to the app itself, which can be used to provide access to resources that support AAD authentication. If the application gets deleted, so does the identity.
We’ve been using Key Vault secrets during this chapter to explain concepts, and we have demonstrated how having a centrally managed secret store can be useful. What about configuration settings that aren’t secrets? With cloud applications often being made up of many distributed components, wouldn’t it be useful to have a central store of configuration settings that can be shared across these components? Enter Azure App Configuration.
Exploring Azure App Configuration
Azure App Configuration enables you to centrally manage your configuration settings, so you don’t have to save all your settings in each individual component. In addition to configuration settings, you can also manage feature flags, which allow you to decouple your feature releases from code deployment, all managed centrally.
With App Configuration, you can create key-value pairs, and each setting can also be tagged with a label, so you can have the same key name multiple times but with different labels – perhaps a Development label and a Production label for the same key. This allows your code to reference a single key and have the value selected based on the environment (development or production, for example).
If you need security isolation between these environments, then you should create a new App Configuration store for each environment, rather than just using labels, because access control is at the per-store level.
As well as labels, you can organize your keys by adopting a hierarchical namespace approach to key names. For example, you could have all settings for an app in the MyApp namespace, and maybe add another level for service names, for example, MyApp:MyFirstService:MyAPIEndpoint and MyApp:MySecondService:MyAPIEndpoint. Ultimately, it’s down to you how you want to manage this kind of thing. Keys are case sensitive as well, so bear that in mind.
All settings within App Configuration are encrypted at rest and in transit. This doesn’t make App Configuration a replacement for Key Vault, however. Key Vault is still the best place to store secrets because of the hardware-level encryption, access policy model, and features such as certificate rotation, which is unique to Key Vault. You can create an App Configuration setting that pulls a value from a Key Vault secret, so your application can reference the App Configuration key and the value will come from Key Vault.
You can view and restore from historical revisions of each key, as well as compare two sets of configurations based on the times and labels you define. Unlike the app settings we’ve been changing so far, you don’t always need to restart the service when you make changes to App Configuration keys. In fact, you can make your app handle dynamic configuration, so it will be updated with the latest key changes without needing a restart. The final exercise in this chapter will demonstrate this.
As with Key Vault, there’s native integration with several popular frameworks for connecting to an App Configuration store, and we’ll demonstrate this by using the App Configuration provider for .NET Core in an ASP.NET Core app shortly.
Also like Key Vault, you can use private endpoints to allow clients on a vNet to access data securely over a private link, and on-premises networks to connect to the VNet using VPN or ExpressRoutes with private peering, which allows you to configure the firewall to block all connections on the public endpoint.
Let’s get started with creating a new App Configuration instance and have a look around. This exercise assumes we’re using the same resource group as the previous exercises in this chapter, but feel free to create a new one or use a different one:
- Create a new App Configuration resource using the CLI:
az appconfig create -n "<unique name>" -g "<resource group name>" -l "<location>"
- Create a new key-value pair (you don’t need to use the same key and value as I have, as long as you use the same key for the steps that follow):
az appconfig kv set -n "<App Config name>" --key "Chapter8:DemoApp:Greeting" --value "Hello, World!" --yes
If we didn’t add --yes, we’d have been prompted for confirmation before the key is created.
- Create a new value for the same key, adding the Development label:
az appconfig kv set -n "<App Config name>" --key "Chapter8:DemoApp:Greeting" --value "Hello from Development!" --label "Development" --yes
- Create a new value with the same key, but with the Production label this time:
az appconfig kv set -n "<App Config name>" --key "Chapter8:DemoApp:Greeting" --value "Hello from Production!" --label "Production" --yes
- Within the Azure portal, find and open the App Configuration service (not your resource, just the service where the resources are listed).
Notice there’s a Manage deleted stores option. Soft delete is enabled by default on your App Configuration stores (just like in Key Vault), so if you delete one, you can recover it again if it’s still within the retention period. Alternatively, you can purge the deleted stores unless purge protection is enabled. We didn’t customize the retention period or enable purge protection, but you can.
- Open your newly created App Configuration store and open the Configuration explorer blade, where you should see the key we just created. Click on the arrow next to it to expand and see the Development and Production entries for the same key, as well as the one without a label.

Figure 8.6 – New key-value pairs listed in App Configuration with both labels
If you haven’t already noticed, you can click on the Values button with the eye icon at the top of the screen to display the values.
- Right-click or click on the ellipsis (…) for one of the values and select Edit.
- Change the value to something else and click Apply.
- Right-click or click on the ellipsis (…) for the value you just changed and select History.
- Expand the entries so you can see the changes in value, then click on the Restore button next to the original value. You’ll see that the value has now reverted to the original.
- Click on the Create button and select Key Vault reference. Notice that you can either browse through your Key Vault resources and secrets or input a secret identifier. We won’t be using a Key Vault reference, so there’s no need to create the reference, so you can click Cancel.
Feel free to also check out the Compare blade. There you’ll be able to compare the state of the current store with itself or another store at a specific date and time and filtered by label. Also notice there are many familiar blades, including the Identity blade we explored earlier in this chapter.
Now that we’ve seen how to create, edit, and restore a configuration setting, let’s reference it within code.
App Configuration in code
Follow these steps to make use of App Configuration settings within an application’s code:
- From the Access keys blade, click on the Read-only keys tab and copy the Connection string value under Primary key. Keep this value safe because we’ll need it shortly.
- On your local machine, create a new folder for this exercise and open the new folder within a terminal session.
- Create a new ASP.NET web app using the dotnet CLI:
dotnet new webapp
- Add the relevant AppConfiguration package:
dotnet add package Microsoft.Azure.AppConfiguration.AspNetCore
- Initialize a local secret store for storing the connection string:
dotnet user-secrets init
- Create a new local secret for the connection string, which we’ll call AppConfig (make sure you use quotation marks around the connection string, because some terminal shells will truncate the string without them):
dotnet user-secrets set ConnectionStrings:AppConfig "<connection string>"
- Confirm that the connection string looks like it was saved correctly:
dotnet user-secrets list
- Within VS Code, open Program.cs and, after the line that calls the CreateBuilder() method, enter the following lines to set up the App Configuration connection:
var connectionString = builder.Configuration.GetConnectionString("AppConfig");
builder.Host.ConfigureAppConfiguration(builder =>
{
builder.AddAzureAppConfiguration(connectionString);
});
Because we didn’t add any options to AddAzureAppConfiguration(), we’ll be getting the value that didn’t have a label assigned, because, by default, it will load configuration values with no labels/label values of null.
- Open the PagesIndex.cshtml file and replace the code with the following:
@page
@using Microsoft.Extensions.Configuration
@inject IConfiguration Configuration
@model IndexModel
@{
ViewData["Title"] = "Home page";
}
<h1>Message: @Configuration["Chapter8:DemoApp:Greeting"]</h1>
We’re using the .NET Core Configuration API to access the store, and we’re using Razor syntax to display the message in the final line.
- Confirm the project builds successfully:
dotnet build
- Run the program and then open the URL shown in the output in your chosen web browser:
dotnet run
You should be presented with the message we created in App Configuration.

Figure 8.7 – Website showing message from App Configuration
- Stop the app with Ctrl + C in the terminal.
Great! That proves everything is working as expected. We could now edit that App Configuration value and run the app again, but we can be confident of the outcome. Let’s instead make use of labels now. We’re going to use HostingEnvironment.EnvironmentName to determine within which environment the app is running, which will correlate to our labels:
- Back in the VS Code terminal session, run the following command to add the package required to filter App Configuration keys:
dotnet add package Microsoft.Extensions.Configuration.AzureAppConfiguration
- Open Program.cs and add the following line at the top of the file:
using Microsoft.Extensions.Configuration.AzureAppConfiguration;
- On the line immediately after the var builder = WebApplication.CreateBuilder(args); line, add the following line, which will allow us to access the user secrets (containing the connection string) in environments other than Development:
builder.Configuration.AddUserSecrets<Program>();
As you may already know, user secrets are only intended for development, so AddUserSecrets<>() is included in the default options for the Development environment but not others. We’re changing that behavior for the purposes of this exercise.
- Replace the ConfigureAppConfiguration() code block with the following, which returns any keys with a label that matches the current environment:
builder.Host.ConfigureAppConfiguration((hostingContext, builder) =>
{
builder.AddAzureAppConfiguration(options =>
{
options.Connect(connectionString)
.Select(KeyFilter.Any, hostingContext.HostingEnvironment.EnvironmentName);
});
});
- Run the app again, as before, and browse to it. You should see the greeting you created with the Development label.
- Stop the app running and this time, change the environment to Production and when you browse, you should notice the greeting you created with the Production label being displayed:
dotnet run --environment Production
We’ve just seen how we can change the behavior of our app, without needing to make changes to our code, by using labels. We could have also made changes to the values in App Configuration. Consider the value this service can bring when you have multiple services using the same keys – change the value in one central location and all relevant services will be able to pick up the changes.
Another common requirement in modern development is to decouple feature releases from code deployment, so you can push code continuously into production without the risk of impacting production because the code is hidden behind a feature flag that is yet to be enabled.
Feature flags
The concept of a feature flag is very straightforward – it’s a Boolean variable which has some code that executes based on the value of the flag. For example, you may have a new UI in development and although you’re still deploying the code, the code that changes the UI sits behind a feature flag that defaults to false. You may have the option for users to opt into the new experience, so the flag gets changed to true and the new UI code runs.
You can also use a filter to evaluate the state of a feature flag. For example, user group memberships, device types, locations, and specific time windows can be evaluated and can ultimately determine the state of a feature flag. Feature flags can also act as a safety net – if something undesired happens as a result of enabling a feature, just toggle the feature back off.
App Configuration provides a centralized repository for your feature flags, so you can externalize feature flags and change their state quickly from Azure without having to modify or redeploy the application. Let’s check out feature flags and how to use them in code. We’ll also add the ability to automatically update when changes are made without needing to restart the app:
- Within the Azure portal, open your App Configuration resource and open the Feature manager blade.
- Click on Create. Leave the Enable feature flag box unchecked, enter demofeature for the Feature flag name, and add the Development label.
- Check the Use feature filter box and explore the options available for filtering. When this is done, uncheck the box again as we won’t be using a filter for this example. Then click Apply.
- Repeat the process again, creating a new feature flag with the same demofeature name, but this time, add the Production label.
Your list should now look like this:
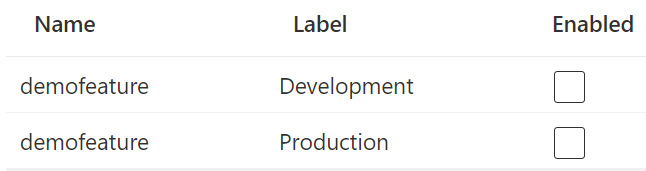
Figure 8.8 – Two feature flags with the same name and different labels
- Open the project we were using for the last exercise in VS Code.
- Add the FeatureManagement package to the project:
dotnet add package Microsoft.FeatureManagement.AspNetCore
- Open Program.cs and add the following line to the top of the file:
using Microsoft.FeatureManagement;
- Replace your builder.AddAzureAppConfiguration() block with the following:
builder.AddAzureAppConfiguration(options =>
{
options.Connect(connectionString)
.UseFeatureFlags(option =>
{
option.Select("demofeature", hostingContext.HostingEnvironment.EnvironmentName);
})
.ConfigureRefresh(refreshOptions =>
{
refreshOptions.Register("demofeature");
})
.Select(KeyFilter.Any, hostingContext.HostingEnvironment.EnvironmentName);
});
Here, we’re allowing the use of feature flags and returning only those features with the name of demofeature and with labels that match our hosting environment, just like we did with the keys in the previous exercise. We’re also using ConfigureRefresh to monitor demofeature for changes. Once changes occur, the app will update after the refresh interval, which is 30 seconds by default.
- Add the following lines just before the var app = builder.Build(); line:
builder.Services.AddAzureAppConfiguration()
.AddFeatureManagement();
- Just after the var app = builder.Build(); line, add the following line so we can use the App Configuration middleware for the dynamic refresh we just configured:
app.UseAzureAppConfiguration();
- Open the Pages\_ViewImports.cshtml file and add the following line to add the feature management tag helper:
@addTagHelper *, Microsoft.FeatureManagement.AspNetCore
- Open PagesIndex.cshtml and add the following to the bottom of the file, which will display the text only if the relevant feature flag is enabled:
<feature name="demofeature">
<h1>Demo feature enabled!</h1>
</feature>
- Confirm the application builds and run it with the following two commands:
dotnet build
dotnet run
- Browse to the local app page and you should see the same as in our previous exercise. Don’t stop the app or close the browser tab.
- Enable the feature flag with the Development label, wait around 30 seconds, then refresh the browser tab with the app page open. You should see that the demo feature text is now showing.
Feel free to experiment further and add the --environment Production switch to the dotnet run command to see the difference if you wish.
Conceptually, we now have a way to deploy new code into production that will only be executed under certain circumstances, including the feature flag being enabled, without having to restart the app or make any additional code changes. Once a feature is rolled out to production, enabled, and fully tested, you probably want to clean up your code and remove the feature flag logic, so it becomes a normal part of the code.
That was a very basic example, but it has hopefully given you enough insight to grasp the concept and be able to answer any exam questions related to feature flags. Feel free to delete any resources created during this chapter if you want.
Summary
In this chapter, we explored some of the key services and features available for implementing secure solutions on Azure. We started off with a look into centralized secret management with Azure Key Vault, including how authorization and authentication work with it.
This led us onto the topic of managed identities, where we discussed user-assigned and system-assigned managed identities and used Azure.Identity to authenticate either with local credentials or – when the app is running in Azure – the managed identity via DefaultAzureCredential.
We finished off this chapter by exploring Azure App Configuration for centralized configuration management, discussing various ways to organize your settings with namespaces and labels, and how to reference them in code.
Finally, we ended the topic by discussing the feature management capabilities of App Configuration and some of the useful features, including making use of the feature in code and automatically refreshing without needing to restart the app.
In the next chapter, we’re going to introduce the caching solutions available within Azure. We’ll go into common caching patterns, Azure Cache for Redis, and how to use content delivery networks for web applications.
Questions
- Which type of managed identity shares its life cycle with an Azure resource?
- If you want to use App Configuration to read a secret value, what’s the recommended approach to achieve this?
- Which method of authenticating your app to Key Vault is recommended for most scenarios and doesn’t require you to manage secret rotation?
- Which Key Vault permission model is used for controlling access to the vault’s management plane?
Further reading
- The Azure Key Vault Developer’s Guide can be found here: https://docs.microsoft.com/azure/key-vault/general/developers-guide
- Key Vault insights (preview) documentation can be found here: https://docs.microsoft.com/azure/azure-monitor/insights/key-vault-insights-overview
- Managed identities documentation can be found here: https://docs.microsoft.com/azure/active-directory/managed-identities-azure-resources/overview
- A list of services that can use managed identities can be found here: https://docs.microsoft.com/azure/active-directory/managed-identities-azure-resources/managed-identities-status
- Azure App Configuration documentation can be found here: https://docs.microsoft.com/azure/azure-app-configuration/overview
- Documentation on using customer-managed keys to encrypt App Configuration data can be found here: https://docs.microsoft.com/azure/azure-app-configuration/concept-customer-managed-keys
- App Configuration feature management documentation can be found here: https://docs.microsoft.com/azure/azure-app-configuration/concept-feature-management
- To learn about using ConfigurationBuilder to configure ASP.NET apps to retrieve secrets from Azure Key Vault, check out the following learning path: https://docs.microsoft.com/learn/modules/aspnet-configurationbuilder
- To learn more about implementing feature flags in cloud-native ASP.NET Core microservices, check out the following learning path: https://docs.microsoft.com/learn/modules/microservices-configuration-aspnet-core