
Chapter 7. Authentication
Authentication is a common problem that just about every developer faces at some point in their career. Since security is such a major concern these days, it is often solved early on in the project. Using third-party libraries can often help solve this problem. In some cases, an OAuth based approach can be used. In other cases, this may not be an option depending on how much control the developer has over the backend.
We would like to make authentication as seamless as possible. We don’t want the user to perform an action, get prompted to login, enter their credentials, and then be taken to a home page; then perform the same set of steps again. It might have taken them several steps to get to the point only to have their request rejected due to authentication. We can do better than that.
Since Ionic uses AngularJS, we can incorporate the angular-http-auth library (created by Witold Szczerba) to help us solve this problem. We can use this library when using an OAuth based approach, or when using a traditional token based authenticaiton scheme.
Desired user experience
We would like to have a more transparent authentication solution where the user can be taken to a login page whenever an HTTP request fails due to not being authenticated. Then after the user logs in, we want to proceed as if the user had been logged in the whole time. This can be extremely useful. For example, especially when the backend service expires a token after a certain amount of time.
You can see this feature first hand in the TrendiCity application by selecting the Search icon at the top-right portion of the app. Just make sure you are not already logged in. You can logout by selecting the side menu Logout option.
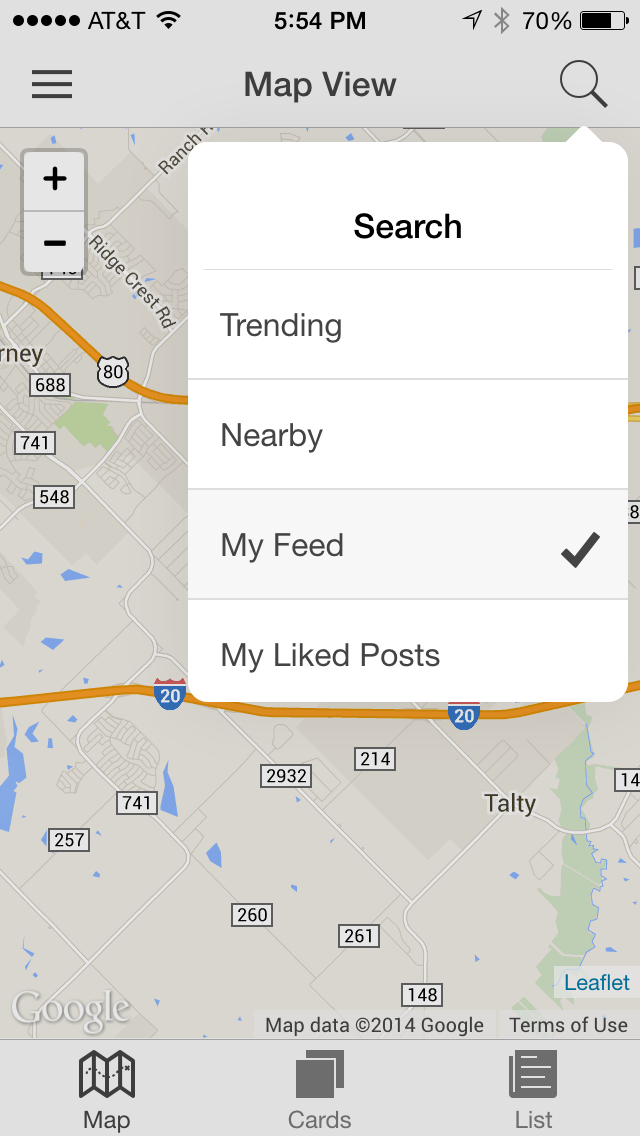
Upon selecting the My Feed option in the ionicPopover, you will be prompted to login.
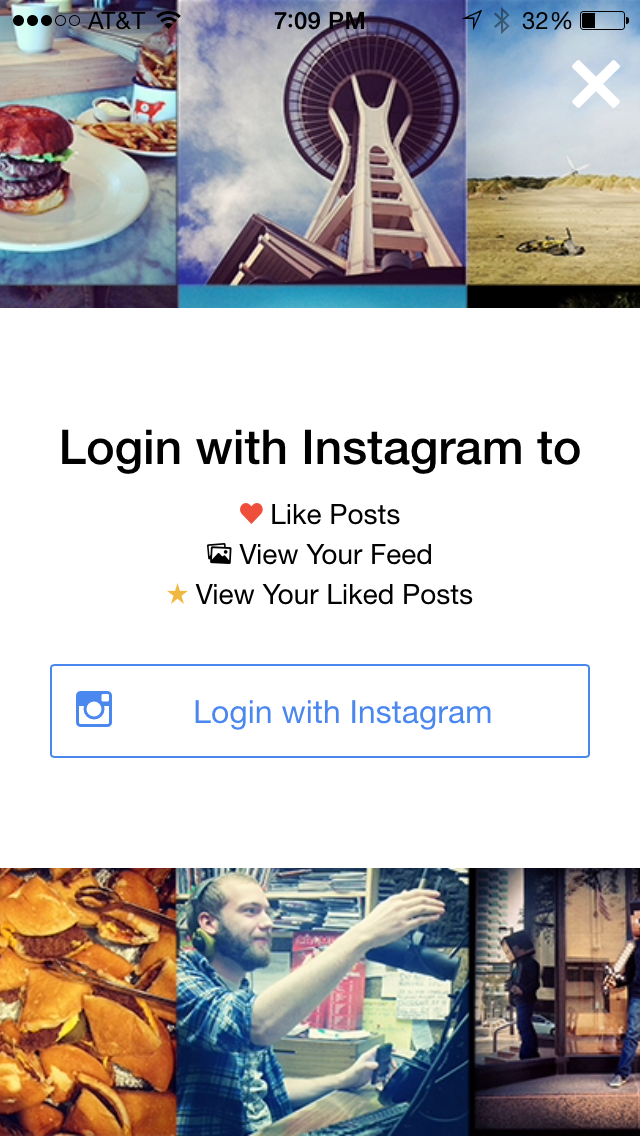
Upon selecting to Login to Instagram, you will be presented with an Instagram login window.
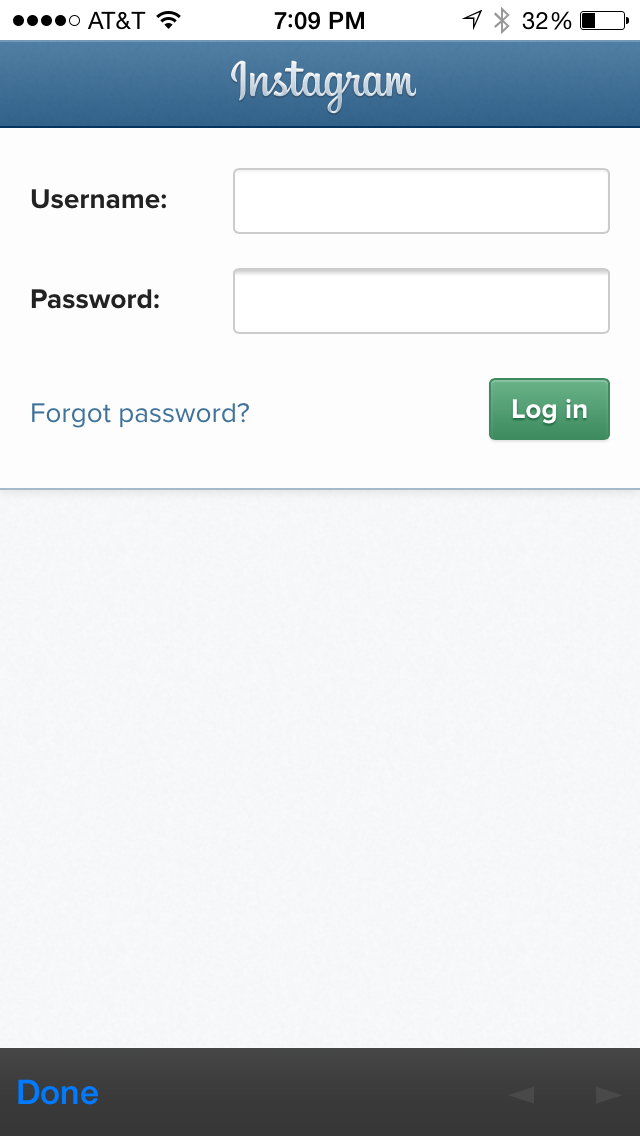
Once you successfully login, the HTTP request to retrieve the My Feed posts will be resent. Only, this time it will have the access_token appended to the URL parameters. You should now see the photos for your user feed.
Incorporating angular-http-auth
A common practice for backend services is to issue an HTTP status code of 401 when a request needs to be authenticated. The angular-http-auth library implements an angular service called authService using an HttpInterceptor. This service will intercept HTTP requests and detect a HTTP status code of 401. The authService will then broadcase the event event:auth-loginRequired. We can then listen for this event and prompt the user to login.
OAuth2 based approach
In the case of Instagram, it doesn’t return an HTTP status code of 401 when a request fails due to authentication. Instead, it returns an HTTP status of 400, which is a generic error code indicating a “Bad Request.” In addition to that, it returns an error type. In the TrendiCity application, we are going to have the TrendicityInterceptor in www/js/services/interceptors.js look for this condition.
responseError:function(rejection){if(rejection.status==400&&rejection.data.meta.error_type=='OAuthParameterException'){console.log("detected an Instagram auth error...");// Set status to 401 and let the authService handle itrejection.status=401;}return$q.reject(rejection);}
If we find this condition, we are going to set the HTTP status code to 401 and let the angular-http-auth authService handle this. Since that service will raise the event event:auth-loginRequired we can listen for this event in www/js/controllers/app.js.
// Handle the login required event raised by the authService$scope.$on('event:auth-loginRequired',function(){console.log('handling event:auth-loginRequired ...');$scope.loginModal.show();});
When the event event:auth-loginRequired is triggered, we show an ionicModal to prompt the user to Login with Instagram. If the user chooses to Login with Instagram, we will display a window with the Instagram login URL.
Below are some code snippets from the www/js/services/instagram.js login function. Once the user logs into Instagram, we inform the angular-http-auth authService that the user has in fact logged in successfully. The authService will then apply the configUpdater function on any pending HTTP requests. In this case, it will resend the previous unauthorized requests with our access_token added as a parameter. The success/error/finally blocks for those original HTTP requests will then be executed appropriately as if the user was already authenticated.
this.login=function(){varconfigUpdater=function(config){config.params=config.params||{};config.params.access_token=self.getAccessToken();returnconfig;}if(self.isLoggedIn()){authService.loginConfirmed(null,configUpdater);}}
Token based approach
Token based authentication (non-OAuth) is a common way of authenticating directly between a trusted client and server. In this case, you would display a traditional login page where the user is prompted for their username and password. The main difference here is that your application is collecting the username and password directly. Whereas with OAuth, you are redirecting to a URL that you do not own.
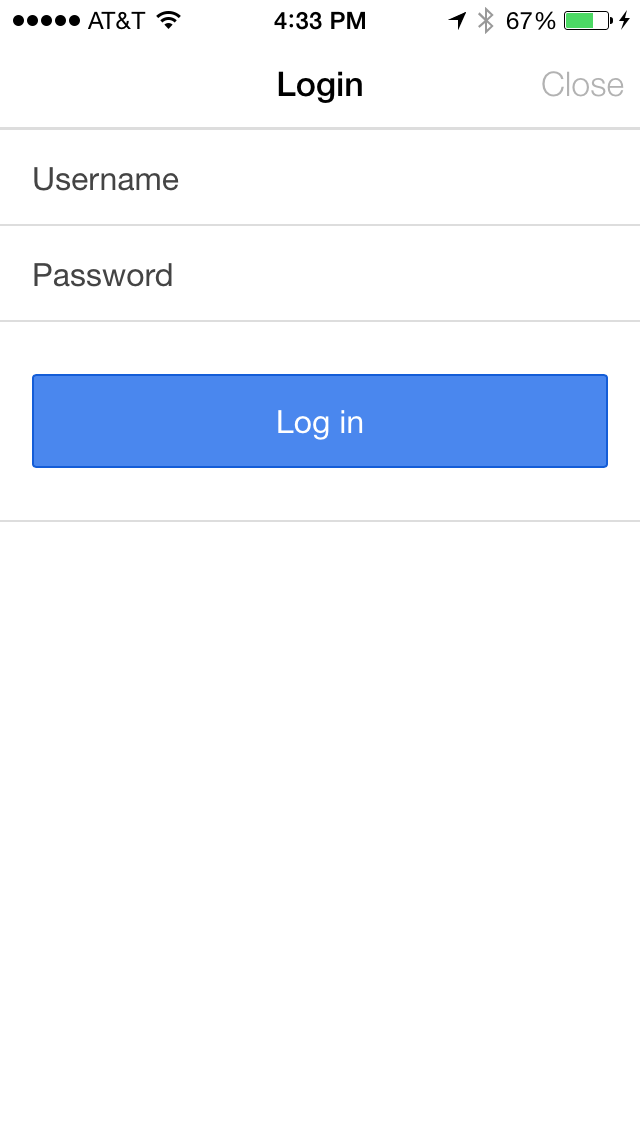
In this scenario, the user would enter their username and password and submit the form. Below is the HTML needed to create the login modal.
<divclass="modal"><ion-header-bar><h1class="title">Login</h1><divclass="buttons"><buttonclass="button button-clear"ng-click="closeLogin()">Close</button></div></ion-header-bar><ion-content><divstyle="color:red">${{message}}</div><formng-submit="doLogin()"><divclass="list"><labelclass="item item-input"><spanclass="input-label">Username</span><inputtype="text"ng-model="loginData.username"></label><labelclass="item item-input"><spanclass="input-label">Password</span><inputtype="password"ng-model="loginData.password"></label><labelclass="item"><buttonclass="button button-block button-positive"type="submit">Log in</button></label></div></form></ion-content></div>
We can now load the HTML for the modal in a controller using the code below.
$ionicModal.fromTemplateUrl('templates/login.html',{scope:$scope,animation:'slide-in-up'}).then(function(modal){$scope.loginModal=modal;});
When the form is submitted, the doLogin function will be called. In this scenario, we would issue a post request to a backend server with the username and password entered by the user. Because this is a login request, we set the header attribute ignoreAuthModule to true. This attribute will tell the angular-http-auth authService to bypass the normal intercepting of HTTP status codes. If the login request fails, we don’t want to misinterpret that as a normal request that needs to be authenticated. Basically, this is a non-authenticated request.
this.doLogin=function(username,password){$http.post('https://hostname/login',{username:username,password:password},{ignoreAuthModule:true}).success(function(data,status,headers,config){$http.defaults.headers.common.Authorization=data.authorizationToken;varconfigUpdater=function(config){config.headers.Authorization=data.authorizationToken;returnconfig;}authService.loginConfirmed(data,configUpdater);}).error(function(data,status,headers,config){$rootScope.$broadcast('event:auth-login-failed',status);});}
If the login request is successful, we add the authorizationToken to the default set of headers. This is done so that future requests will be authenticated. Then we inform the authService that login has been confirmed. We pass in a function that will be responsible for adding the authorizationToken to the headers of any previously pending HTTP requests.
If the login request receives an error, we broadcast the event event:auth-login-failed on the $rootScope. We can then listen for this event and use it to display an error message on the ionicModal used to login.
$scope.$on('event:auth-login-failed',function(e,status){varerror="Login failed.";if(status==401){error="Invalid Username or Password.";}$scope.message=error;});
Also, since the angular-http-auth authService will raise the event event:auth-loginConfirmed, we can do something when that event occurs, if necessary. Like hide the ionicModal for example. In the case of TrendiCity, we don’t need to do anything since we are using OAuth 2.0 to authenticate with Instagram.
// Handle the login confirmed event raised by the authService$scope.$on('event:auth-loginConfirmed',function(){console.log('handling event:auth-loginConfirmed...');$scope.loginModal.hide();});
Cancel login
If the user decides not to login when prompted to, and decides to close the login modal, we need to inform the angular-http-auth authService of this. That way, any pending HTTP requests can be cancelled. For example, in www/js/controllers/app.js, we have the closeLogin function.
// Triggered in the login modal to close it$scope.closeLogin=function(){InstagramService.loginCancelled();$scope.loginModal.hide();};
The authService will also raise the event event:auth-loginCancelled that you can setup a watch on it; in case you wish to do something when that occurs. In the case of the Trendicity application, we don’t need to do anything extra.
Summary
In this chapter, you learned how to make use of the third-party angular-http-auth library to help streamline the login process in an Ionic application. You learned how this library can be used with both an OAuth2 approach, as well as with a traditional token-based approach. In the next chapter, you will learn how to design an application and take advantage of some built-in Ionic styles and components that will make your application more appealing to the end user.