
Chapter 5. Storing favorite locations in TrendiCity
Some thoughts for Diego:
Go with the same structure as side menu and map chapters:
Pull in the whole code block from that particular part (in this case the Favorites controller & Favorites service after each other) And walk through functionality step by step (favoriteService.add, .edit, .delete, easy stuff)
Explain about $ionicModal usage and how to trigger open/close from view? And other possible advanced features not yet covered in TrendiCity (events?) Regarding the modal, same approach: throw in a code block and a ‘that results into this'-screenshot and go through it step by step.
If you need anything else -- I’m on Hangouts
OLD STUFF BELOW
In the previous chapter, you learned how to set up the application routes, define a state, and link your state to your custom template and controller. We will be utilizing all of those constructs in this chapter while setting up the Favorites view.
The Favorites view will allow the user to add and save a location that will be used to find nearby Instagram posts.
We will be using the following modules and Ionic plugins in this chapter:
- HTML5 Local Storage (angular-local-storage)
- Ionic Modal
- Ionic option button
Setting up the routes
The first thing we need to do is to set up the states and routes we’ll need. A state is just another way of naming your application at a certain point in time. A route allows you to specify which URLs map to your view and controllers.
We’ll be using the same tab structure as in /templates/home.html, so we know we’ll need four routes: Favorite, Map, Card, and List.
In your app.js, add the main favorite route.
.state('app.favorites',{url:'/favorites',views:{'menuContent':{templateUrl:'templates/favorites.html',controller:'FavoritesCtrl'}}});
The first thing we do is define our app.favorites state that we will use to trigger our application to load the appropriate template and controllers when the /favorites URL is accessed. The views object allows us to include our favorites item in the menuContent side menu while linking our custom favorites.html template and our favorites controller.
This allows us to hit the route /favorites and it will pull in our template and initiate our controller, as well as letting our side menu know where to go on click.
The other routes we’ll be using are already set up for us.
app.home.map
app.home.card
app.home.list
All we need to do is extend these routes to allow an id to be passed in.
Add the following routes to your app.js:
.state('app.home.map.id',{url:'/:id'})
.state('app.home.card.id',{url:'/:id'})
.state('app.home.list.id',{url:'/:id'})
Now that our states are setup, let’s create our views.
Setting up the views
In this section we’ll create the views for the favorites. We’ll reuse the map, card, and list views from the tabs to be DRY. (Don’t repeat yourself.)
In your /templates folder, create a view named favorites.html. This will include our markup for the favorites list, and the form to add a favorite using the Ionic Modal.
In your favorites.html file, we’ll start by including the general view content. We’ve also added a view title of “Favorites” on the ion-view directive.
<ion-viewtitle="Favorites"><ion-nav-buttonsside="left"><buttonmenu-toggle="left"class="button button-icon icon ion-navicon"></button></ion-nav-buttons><ion-contentclass="has-header"><!-- Content here --></ion-content></ion-view>
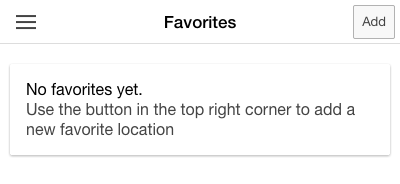
Before we start generating the list of favorites, we want to make sure the user gets a notification message if a favorite hasn’t been added yet. Ionic provides us with a nice and neat card class for our divs to show a pre-styled notification message like this:
Adding this notification is very straight forward in our templates markup.
<divclass="card ng-hide"ng-show="!favorites || favorites.length === 0"><divclass="item item-text-wrap"><h2>No favorites yet.</h2>Use the button in the top right corner to add a new favorite location</div></div>
We’ve added the ng-hide class to make sure this div is hidden before Angular even starts rendering the view. After rendering, Angular has decided to either show this div if there are no favorites in the scope, or keep it hidden when the user already has some favorites stored.
The view will use the ion-list directive, which is similar to a general ng-repeat, but with extra API options. We’re not using any of the extra directive options in this view, but you can see what the directive supports by visiting the ion-list documentation.
<ion-list><ion-item></ion-item></ion-list>
Next we’ll add an ng-repeat on the ion-item tag. This will allow us to iterate and display each favorite location in our favorites array.
<ion-itemclass="item-icon-right"ng-repeat="favorite in favorites"ui-sref="app.home.map.id({ id: {{favorite.id}} })">{{favorite.city}}<iclass="icon ion-chevron-right icon-accessory"></i><ion-option-buttonclass="button-assertive"ng-click="removeFavorite(favorite)">Remove</ion-option-button></ion-item>
Let’s step through these attributes one-by-one.
ng-repeat="favorite in favoriteswill add a list-item for each object in the favorites array.ui-sref="app.home.map.id({id: {{favorite.id}}})"an attribute that is a little more tricky. ui-sref is an attribute for the ui-router project that you provide a state and params (if needed) that the app will transition to on a touch and click event. Here, we’re passing in thefavorite.idto the map state to load that particular location on click.- We’ll add an ion-option-button tag for swipe-to-delete functionality and an
ng-clickevent to pass our favorite item to the controller for the delete.
We also want to have an Add button to trigger the form modal. You can include this using the ion-nav-buttons and adding an ng-click event to trigger our form popup.
We know we’ll need add and delete functionality as well as a form. We’ve already decided to use the ionic-modal as it simplifies the design and has mobile friendly animation.
Our markup for the Favorites list view now looks like the following:
<ion-viewtitle="Favorites"><ion-nav-buttonsside="left"><buttonmenu-toggle="left"class="button button-icon icon ion-navicon"></button></ion-nav-buttons><ion-nav-buttonsside="right"><buttonclass="button"ng-click="openAddFavoriteForm()">Add</button></ion-nav-buttons><ion-contentclass="has-header"><ion-list><ion-itemclass="item-icon-right"ng-repeat="favorite in favorites"ui-sref="app.home.map.id({id: {{favorite.id}}})">{{favorite.city}}<iclass="icon ion-chevron-right icon-accessory"></i><ion-option-buttonclass="button-assertive"ng-click="removeFavorite(favorite)">Remove</ion-option-button></ion-item></ion-list></ion-content></ion-view>
It’s time to build our Add Favorite modal.
Since we’ll be including our modal in the favorites.html file, we can add a script tag declaring that it should be parsed as an AngularJS template to include in our view.
<scriptid="add-favorite-modal.html"type="text/ng-template"><ion-modal-view><ion-content></ion-content></ion-modal-view></script>
We’ve named the template, and we’ll talk about how this gets loaded in the controller section of this chapter. For now, let’s continue building our markup.
The next thing we want to do is add the ionic-header-bar directive. This will include a title and a cancel button in which the click event will close the modal.
<ion-header-bar><h1class="title">Add Favorite Location</h1><buttonclass="button button-clear button-positive"ng-click="closeAddFavoriteForm()">Cancel</button></ion-header-bar>
For our actual form, we’ll be using the Stacked Labels form. This is a simple template provided by Ionic that includes some base styles for stacked and grouped labels and inputs. You could use any of the default forms provided, or create and style your own.
We know we’ll need a city field and, for lack of a better word, a region field to allow international favorites. We’ve added a favorite model to the inputs that will equate to the following object in-memory.
$scope.favorite={city:favorite.city,region:favorite.region};
Here’s what the modal markup looks like after we’ve added our form fields and bindings.
<scriptid="add-favorite-modal.html"type="text/ng-template"><ion-modal-view><ion-header-bar><h1class="title">AddFavoriteLocation</h1><buttonclass="button button-clear button-positive"ng-click="closeAddFavoriteForm()">Cancel</button></ion-header-bar><ion-content><divclass="list"><labelclass="item item-input item-stacked-label"><spanclass="input-label">City</span><inputtype="text"placeholder="Chicago"ng-model="favorite.city"></label><labelclass="item item-input item-stacked-label"><spanclass="input-label">StateorCountry</span><inputtype="text"placeholder="IL"ng-model="favorite.region"></label><buttonclass="button button-block button-positive activated"ng-click="addFavorite(favorite)">Submit</button></div></ion-content></ion-modal-view></script>
In this form, we now have a favorites object that will hold the values from the input fields favorite.city and favorite.region. On submit click, we will pass the favorites object to our controller’s addFavorite function. We’ll go over this functionality on the ‘Setting up the Favorites controller’ section of this chaper.
That’s it for our favorites view, but we do need to add some extra functionality to the other templates to allow what we’ve done here to work.
In our home.html view, we need to add a route param to include our favorite.id to be parsed on load of the tab states (map, card, and list). If the route does not include a favorite.id, the state will fallback to your current location.
<ion-tabsclass="tabs-icon-top"><ion-tabtitle="Map"icon="icon ion-map"href="#/app/home/map/{{ favorite.id }}"><ion-nav-viewname="tab-map"></ion-nav-view></ion-tab><ion-tabtitle="Cards"icon="icon ion-ios7-browsers"href="#/app/home/card/{{ favorite.id }}"><ion-nav-viewname="tab-card"></ion-nav-view></ion-tab><ion-tabtitle="List"icon="icon ion-ios7-paper"href="#/app/home/list/{{ favorite.id }}"><ion-nav-viewname="tab-list"></ion-nav-view></ion-tab></ion-tabs>
We also need to re-initate the controller on load of the map state if coming from the favorites tab. We can do this by using a special attribute provided by the ui-router called ui-sref-opts. This will ensure that when transitioning from the favorites tab to the home tab, you always start back at your current location.
Let’s add this in the side menu template menu.html.
<ion-itemnav-clearmenu-closeclass="item-icon-left"ui-sref="app.home.map"ui-sref-opts="{ reload: true }"><iconios="ion-ios7-home"default="ion-home"></icon>Home</ion-item>
Optionally, you can pass in the ui-sref arguments as a single attribute with a blank state param.
ui-sref="app.home.map({ id: '', { reload: true })"
Now that we have our markup for the Favorites section, let’s continue on with our Favorites controller.
Setting up the Favorites controller
We’ll need to create a controller named FavoritesCtrl. This will allow us to access functions specific to the favorites view when we hit the app.favorites state.
angular.module('Trendicity').controller('FavoritesCtrl',function($scope){// Feed me javascript!});
We’ve already linked this controller in the previous section when we set up the app.favorites state, which means we’re ready to continue building our functionality out. If you have a naming convention for your controllers, it’s good practice to add the controller to your app.js routes on either route creation or controller creation.
For our dependencies, we know we’ll need the $scope dependency that is standard. We’ll also want to include a Favorites service that will handle the functionality of adding and deleting the Favorites, as well as saving them in local-storage. We’ll cover the FavoritesService in the next section, but for now, we can assume we’ll need to add it as a dependency. The next thing to inject is the $ionicModal directive, which will allow us to access it’s functions and pass in parameters.
The order doesn’t neccessarily matter in this case, though some teams may have a prefence. We’ll leave that to your discretion.
controller('FavoritesCtrl',function($scope,FavoritesService,$ionicModal){
We’ll first want to create an empty Object named $scope.favorite. This will allow it to be updated in memory as the user is typing in the form fields we created earlier.
$scope.favorite = {};
We’ve already thought about the functionality we needed when creating the views. We need the Add Favorite and Remove Favorite functionality. In the ng-click attributes, we also provided some named functions to Open and Close the modal.
Let’s go ahead and stub these functions out. In both functions, we’ll be passing in the favorite object as an argument to have access to.
$scope.removeFavorite=function(favorite){};$scope.addFavorite=function(favorite){};$scope.openAddFavoriteForm=function(){};$scope.closeAddFavoriteForm=function(){};
We’ll also add the call to iniatilize the modal and pass in our scope.
$ionicModal.fromTemplateUrl('add-favorite-modal.html',{scope:$scope,animation:'slide-in-up'}).then(function(modal){$scope.modal=modal;});
Here we use the fromTemplateUrl method and pass in our template id as the URL. We’re using the slide-in-up animation, which brings the modal from the bottom to the top on .show(). We also pass a reference to the modal itself to the $scope.
The default methods included in the $ionicModal directive are the following:
- show - shows the modal
- hide - hides the modal
- remove - removes modal from the DOM
- isShown - will return true or false depending on if modal shown
The next thing we want to do is attach the show and hide methods to our modal instance $scope.modal.
$scope.openAddFavoriteForm=function(){$scope.modal.show();};$scope.closeAddFavoriteForm=function(){$scope.modal.hide();};
We need a function to get our current favorites on load of the view. Let’s add a mock call to the FavoritesService and bind it to our favorites model used by the list. It doesn’t matter where this is in the JavaScript, although we prefer to put functions that run on-load at the bottom of the controller file.
$scope.favorites=FavoritesService.getFavorites();
Now that we can actually see our form modal on Add click, let’s mock out our calls to the FavoritesService. Since Angular’s two-way binding has a watch on all models, if we change our favorites array, it will update our ion-list items in real time. This is why we have our FavoritesService return an array and bind it to $scope.favorites because AngularJS will take care of the rest.
$scope.removeFavorite=function(favorite){$scope.favorites=FavoritesService.delete(favorite);};$scope.addFavorite=function(favorite){FavoritesService.add(favorite).then(function(){$scope.favorites=FavoritesService.getFavorites();$scope.closeAddFavoriteForm();});};
All of this will be explained further in the FavoritesService section of this chapter. But let’s go over what we just did here.
We know we’ll want to update our Favorites list on delete of a favorite, so the call FavoritesService.delete(favorite); will need to return an updated favorites array and bind it to our model.
The addFavorite function is a little trickier. Here we’ll pass in the favorite to add to our local storage, and the service will return a promise when that’s complete. We then do another call to the FavoritesService to get an updated favorites array and bind it to our scope. And we’ll want the favorite form to close automatically on add for a smooth experience.
Now that we have our Favorites controller all stubbed out, we need to dive into setting up our Favorites service.
The Favorites service
In Angular, if you’re going to be making several of the same $http calls in multiple controllers, it’s good practice to make a Service that can be injected into your controllers wherever you need it.
To get started, let’s create a service named favorites.js in the /services folder. We’ll give it a name of FavoritesService.
angular.module('Trendicity').service('FavoritesService',function(localStorageService,GeolocationService){});
We’ve included the localStorageService and the GeolocationService as dependencies since we’ll rely on them both to return a latitude and longitude that we can then use to pass into our Instagram service to get location-specific posts.
The localStorageService has proved beneficial in many AngularJS projects. The syntax is very easy to use and the module provides a browser cookie as a fallback if the browser does not support the HTML5 localStorage API.
The GeolocationService is located at /services/geolocation.js and includes a handy function to convert an address to latitude and longitude positions using the Google Maps API.
Now we’ll do the same thing in our service as we did in our controller. Stub out the functions! This helps our brain think about exactly what this service needs to do and what’s left to code.
We know we’re already calling .add, .delete, and getFavorites from our controller so we definitely need to stub those out. We’ll also add another function that will return our selected favorite location. Let’s name that getFavorite.
.service('FavoritesService',function(localStorageService,GeolocationService){this.add=function(favorite){};this.delete=function(favorite){};this.getFavorites=function(){};this.getFavorite=function(id){};returnthis;
Adding a favorite
Before we dive in, let’s start with how we’re structuring our Favorites array. All we need is an id to uniquely identify the location, a city, which is a combination of city and region models from our form, and the latitude and longitude for the map service to grab nearby instagram posts. We know we’ll be using the GeolocationService to convert our models passed in from the add favorite form to latitude and longitude positions. We’ll then add these to our Favorites array in the localStorageService.
this.add=function(favorite){varcurrentFavorites=this.getFavorites()?this.getFavorites():[];varid=currentFavorites.length+1;varaddress=favorite.city+", "+favorite.region;returnGeolocationService.addressToPosition(address).then(function(data){varnewLocation={id:id,city:address,lat:data.latitude,lng:data.longitude};currentFavorites.push(newLocation);localStorageService.set('Favorites',currentFavorites);});};
The first thing we’re doing is using the ternary operator in JavaScript to either get the current favorites using a method we’ve setup getFavorites, or if there are no current favorites, set it to an empty array. We need to do this so that the id will always increment even if there’s no current favorites. This allows us to manage unique ids easily from the front end.
// Either get existing favorite Array or set to empty ArrayvarcurrentFavorites=this.getFavorites()?this.getFavorites():[];// Increment favorite IDvarid=currentFavorites.length+1;
We’ll then concatenate the favorite form model into a single address in string format to pass into our GeolocationService.
varaddress=favorite.city+", "+favorite.region;
Simple enough right? The next step is a little tricky. We’ll call the addressToPosition function and pass in the address. If you look into the /services/geolocation.js script, you’ll see it’s using an $http request in which we have the ability to use the .then promise. If the documentation is a little unclear and you’re familiar with jQuery, you can look at this similar to the $ajax methods .success() and .error().
After the $http request has been completed, we’ll create our object, assign our data from the request, push the object into our currentFavorites array, and then add the update array into the localStorage.
returnGeolocationService.addressToPosition(address).then(function(data){// data contains our Object from the Google Maps response// Set up your ObjectvarnewLocation={id:id,city:address,lat:data.latitude,lng:data.longitude};// Push the Object into our currentFavorites ArraycurrentFavorites.push(newLocation);// Set (and update if Array exists) our localStorage 'Favorites' valuelocalStorageService.set('Favorites',currentFavorites);});
We now have the ability to add a favorite and update our favorites array.
Deleting a favorite
We want the users to have the ability to delete a favorite. Luckily, deleting is much easier than adding in our case.
In our favorites.html file, we’re using the ion-option-button on our list item to expose the Delete button.
<ion-option-buttonclass="button-assertive"ng-click="removeFavorite(favorite)">Remove</ion-option-button>
When you swipe right-to-left on the list-item and click Delete, it will pass the selected favorite object into our controller function, which will call our FavoritesService.
$scope.removeFavorite=function(favorite){$scope.favorites=FavoritesService.delete(favorite);};
We’re setting the favorites model in the controller to the returned array from the service again, this will automatically update our DOM because of AngularJS’s two-way data binding.
Here’s our complete delete function in the FavoritesService. We’ll step through it peice-by-peice.
this.delete=function(favorite){varcurrentFavorites=this.getFavorites();angular.forEach(currentFavorites,function(i){if(i.id===favorite.id){currentFavorites.splice(currentFavorites.indexOf(i),1);returnfalse;}});localStorageService.set('Favorites',currentFavorites);returnthis.getFavorites();};
First, we want to get a reference to our currentFavorites array. By calling this every time, it will ensure we’re working with the latest favorites in localStorage.
We’ll use AngularJS’s handy .forEach function to iterate over our objects. We’ll match the index (or position) of the object to our passed in favorite.id. We do this in a conditional to only run code on a matching index and id. After the forEach finds a match, we’ll use the .splice() method to remove our selected object from the array. We’ll pass in a reference to current object index, the second argument for .splice is how many to remove. We’ll only be removing the one object, so we’ll pass in 1.
// Get currentFavoritesvarcurrentFavorites=this.getFavorites();// Iterate over each Object in currentFavorites array and track by i or index.angular.forEach(currentFavorites,function(i){if(i.id===favorite.id){// Remove object with current indexcurrentFavorites.splice(currentFavorites.indexOf(i),1);returnfalse;}});
After we’ve removed the object from the array, we’ll want to update our currentFavorites array again in localStorage.
localStorageService.set('Favorites',currentFavorites);
And since we’ll want the updated the favorites array in our controller, we’ll return the function with a call to get the updated array.
returnthis.getFavorites();
This updated array will be assigned to our favorites model in the controller.
$scope.favorites=FavoritesService.delete(favorite);
Just like that, we have delete functionality and our DOM is updating.
Getting favorites
This will be a call to our localStorageService to get the currentFavorites array. As you’ve seen from previous functions, we’ll be using this a bit for being DRY.
this.getFavorites=function(){returnlocalStorageService.get('Favorites');};
Getting a single favorite
This function is very important. We’ll be using this in the map and home controllers to give our views a location reference. Since the routes we set up for our favorites are based on an :id param, we’ll be passing the id from the route into our getFavorite function. This will return the favorite in which the id matches the :id of the route.
Unfortunately, at the time of this writing, the ui-router documentation does not include anything about using the $state dependency to grab URL parameters. You can do this though by passing in $state to your controller as a dependency, and getting the current route param with $state.params, and your URL parameter using dot notation. So in our case, $state.params.id will return our id value.
Let’s take a quick look into /controllers/map.js to see how we’re grabbing the route param.
// If route contains idif($state.params.id){// Get favorite based on route parameter and parse id as an Integer. (The parameter is initially returned as a String)$scope.favorite=FavoritesService.getFavorite(parseInt($state.params.id,10));
We’ll then go back to our getFavorite function in the service with the id being passed in.
this.getFavorite=function(id){varcurrentFavorites=this.getFavorites(),favorite;angular.forEach(currentFavorites,function(i){if(i.id===id){favorite=i;returnfalse;}});returnfavorite;};
Here we get a reference to the currentFavorites again. We’ll also set a undefined variable favorite to update if there’s an id match.
We then iterate over our currentFavorites array and return the favorite if the id of the route param matches an id in our objects. Otherwise, we’ll return an undefined favorite, and the views will fall back to your current location.
That’s it for our FavoritesService. The last thing we do is to return the service itself to make the functions available when called. We do this with return this;.
Getting the views to update with the selected favorite
If you’re following along with the application code, you may have noticed that the Instagram service results get set into a scoped model named $scope.data.posts, which is an array. Therefore, we’ll use our favorite location with the InstagramService to return a nearby result set, and then set that to our posts model.
Let’s take a quick look on how we’re doing this in the map view.
if($state.params.id){$scope.favorite=FavoritesService.getFavorite(parseInt($state.params.id,10));InstagramService.findNearbyPosts($scope.favorite.lat,$scope.favorite.lng).success(function(data){$scope.data.posts=data.data;});$scope.map={center:{lat:$scope.favorite.lat,lng:$scope.favorite.lng,zoom:14},markers:{m1:{lat:$scope.favorite.lat,lng:$scope.favorite.lng}},layers:{baselayers:{googleRoadmap:{name:'Google Streets',layerType:'ROADMAP',type:'google'}}}};}else{$scope.init();}
On the loading of our map controller, our conditional checks if there is an id in the route. If there is, we’ll continue on and grab the favorite associated with that id, then we’ll pass that into our InstagramService to get nearby posts. If there is not an id in the route param, the map will fall back to your current location.
For the card and list view, we’ll be adding some logic and functions to update the $scope.data.posts model.
Let’s open up /controllers/home.js.
We’ll need a function just like in the map controller to get the favorite id and pass the returned latitude and longitude into the InstagramService to return a local result set.
$scope.getFavoritePosts=function(){$scope.favorite=FavoritesService.getFavorite(parseInt($state.params.id,10));InstagramService.findNearbyPosts($scope.favorite.lat,$scope.favorite.lng).success(function(data){$scope.data.posts=data.data;});};
We’ll pass the result set into the $scope.data.posts model to update our views with the new results.
Let’s add a conditional to the getPosts function that will check for a route param and trigger our getFavoritePosts function.
$scope.getPosts=function(value){if($state.params.id){$scope.getFavoritePosts();}elseif(value==='TR'){$scope.findPopularPosts();}elseif(value==='NB'){$scope.findNearbyPosts();}elseif(value==='UF'){$scope.findUserFeedPosts();}elseif(value==='LP'){$scope.findLikedPosts();}};
On a tab change to the List or Card views, the getPost function will run, and we’ll either get a result set based on the search pop-over value, or posts local to your favorite location.
Summary
Let’s go over what we accomplished building in this chapter. We created a Favorites view that included several Ionic components. We built an ionic-list that utilizes the ion-option-button directive (swipe right-to-left for button reveal). We also integrated an add favorite form using the ionic-modal directive, and we learned how to open, close, and pass in scope to the modal. We learned a little bit on how to set up a service in Angular, and attach methods that return what we need.
Moving forward, you should have the skills necessary to use those components in a basic format, and get to explore more of the options avaiable to you within.
In the next chapter, we cover setting up Ionic with a map view. This will include going over a couple of plugins that we’ll utilize to make development easier with coordinates and plotting.