Creating edges and borders involves changing the size, shape, and content of your background layer.
When the image file you are working with is too small for your needs, enlarge it using the Image Size dialog. In this process, newly created pixels are squeezed in between existing pixels. Elements uses a clever routine to estimate the color of these new pixels based on an average of the surrounding pixel color, and the results are pretty impressive.
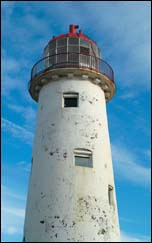
Image Size adjustments increase the pixel dimensions of an image so it can be printed at a greater size, but the changes won’t create any additional space around the edge to introduce artwork or other frame designs.
Enlarging with the Image Size controls is almost imperceptible if you keep it below a 20% increase. However, any more than this and you will start to lose sharpness, as shown above. The file gets bigger, but it isn’t any sharper.
Elements’ Canvas Size functions also allow you to increase the pixel dimensions of the image file, but in a different way. For some editing projects, you will want to introduce additional blank space around your original image for a decorative edge or caption.
The Canvas Size dialog keeps your image at its original pixel dimensions, but adds new pixels around the edge for you to use. By default, Elements fills in this new territory with the current background color in the toolbox. The Canvas Size controls are also used if you want to place two images side by side on the same printout, or if you want to create a montage using different-sized images and graphics.
Never use Canvas Size for enlarging an image, but only for creating empty space around the perimeter.
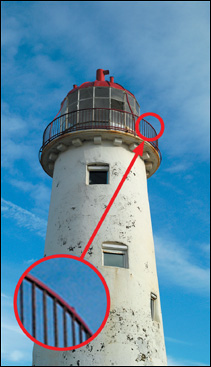
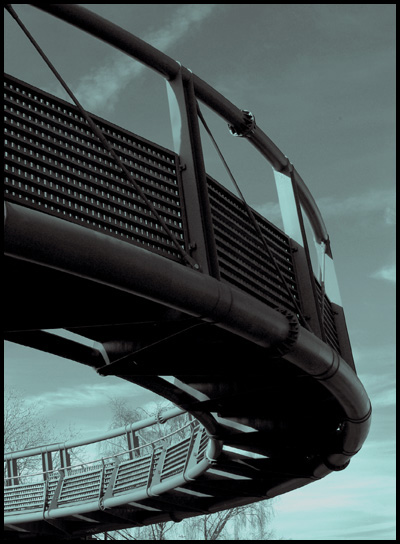
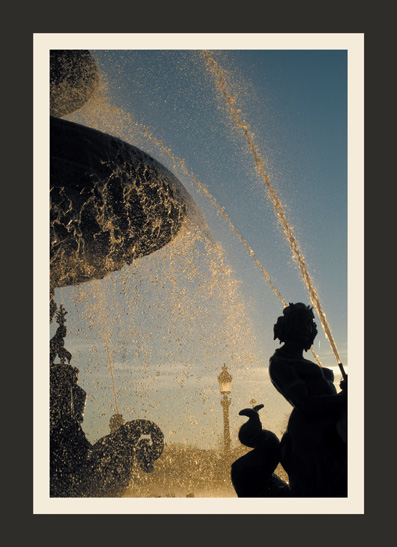
Using thin black borders is an effective way to contain bright skies—and looks great when combined with graphic compositions.
The best way of introducing a black border around your image is to use the Print dialog. Rather than embedding the line into your file forever, this technique temporarily adds the effect and does not apply it to the file itself.
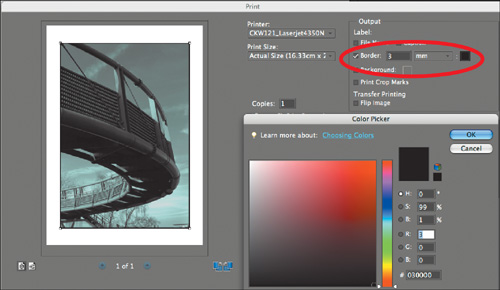
After preparing your file for printing, select File > Print. Under the Output section, click the Border option, as shown above right. Type in 3mm as the width, and then click the color square to choose the border color. For this example, I chose black in the Color Picker. The effect immediately appears around your image in the preview window so that you can check it before sending the file to print.
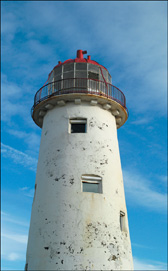
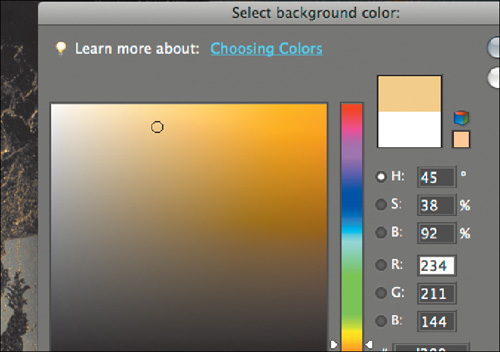
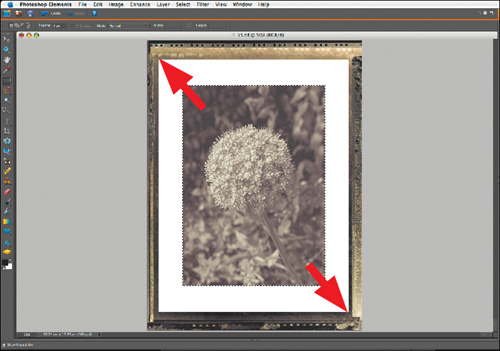
The simplest way to make an edge is by using Elements’ Canvas Size controls and two complementary colors sampled from your image.
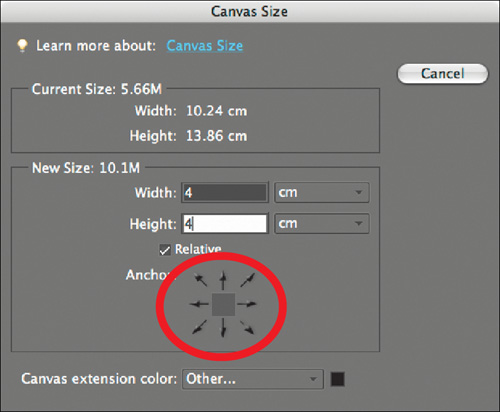
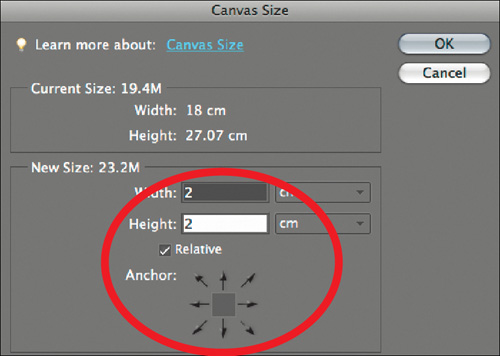
Elements’ Canvas Size tool is used for creating additional space around your image in the current background color. Select a cream color from the Color Picker, as shown, or click to sample a color from your image.
Select Image > Canvas Size, then increase both width and height by 2cm, as shown. Make sure that the Relative option is selected and the Anchor is in the center. Click OK.

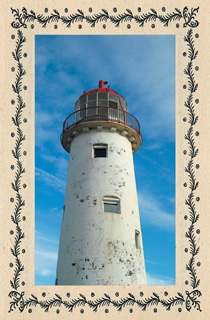
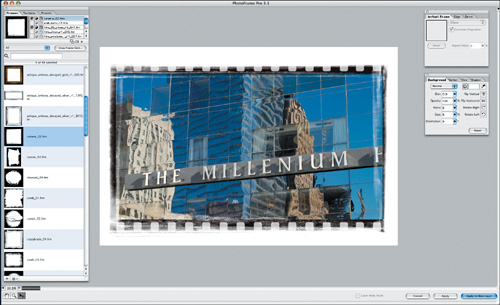
PhotoFrame Pro is an easy-to-use plug-in for Elements, helping you make signature-style edges around your photographs.
PhotoFrame Pro is an exciting plug-in designed to add extra creative functionality to Elements. Once installed, PhotoFrame is accessed directly inside Elements through a brand-new menu, so you don’t have to swap your file between applications. Open an image file, then select PhotoFrame from the onOne menu, as shown above. Your image will now occupy a new window, with the all-important Frames menu on the left-hand edge, as shown above. PhotoFrame is packed with hundreds of edge styles for you to try or adapt to fit your needs.
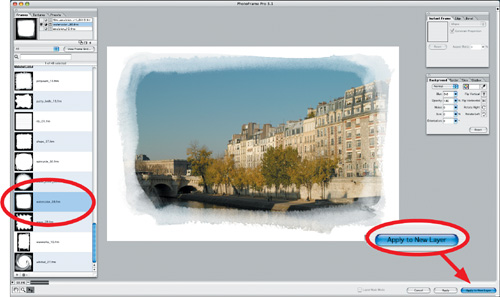
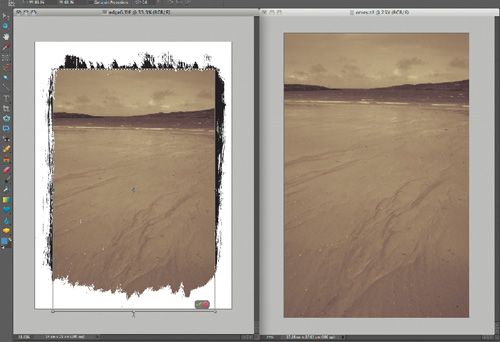
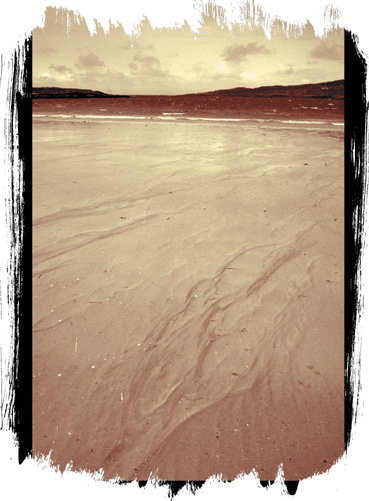
Start by selecting a style from the thumbnail menu, as shown above. For this kind of effect, the watercolor frame file is used to create a distressed-style edge. As with layers, you can fade and blend the different frame styles with your image and even apply a color. Multiple frames can also be applied on top of each other, but the best results are achieved if the frame visually enhances the image, rather than distracting from the effect you are trying to create. When finished, click the Apply to New Layer button, as shown above, to keep your design separate from the Background layer.

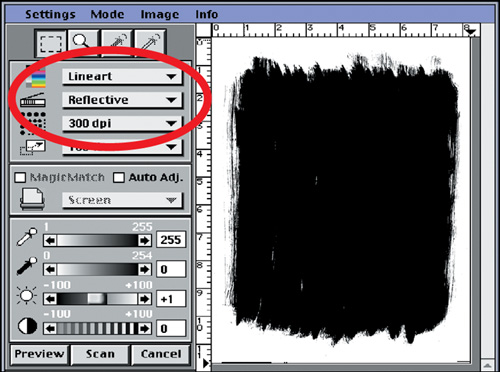
A stiff paintbrush, some black ink, and a sheet of copier paper is all you need to create a unique edge for your image.
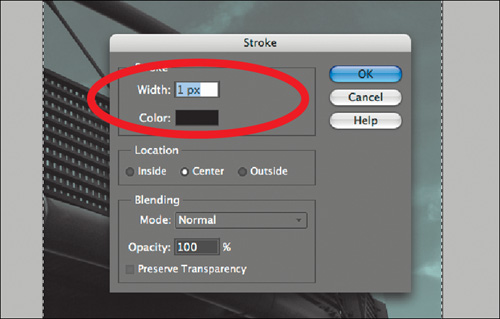
Make a brushy black shape on a sheet of paper and, when dry, lay it face down in your flatbed scanner. Scan in the Lineart mode at 300 ppi, as shown above.
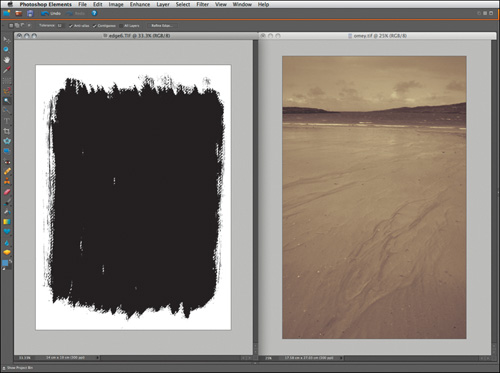
Open your scan in RGB mode, then click the Magic Wand tool in the black area. Next, choose Select > Similar to ensure all black pixels are included in the selection.

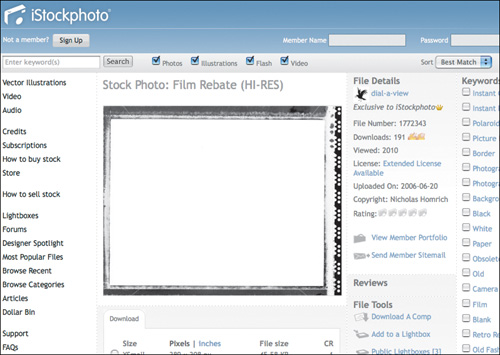
The famous peel-apart film material is no longer manufactured, but you can still find digital examples of this edge effect to use.
iStockphoto.com is a good place to search for a downloadable digital Type 55 edge, as shown above. The service is low-cost and for a few dollars, you’ve got a ready-made file to use in your project.
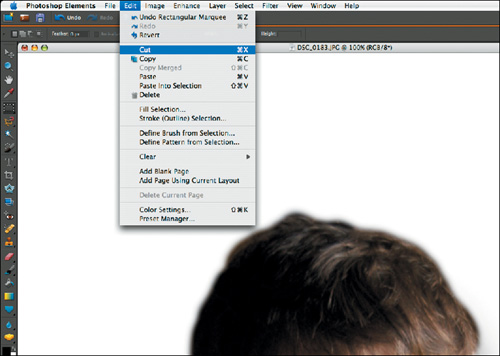
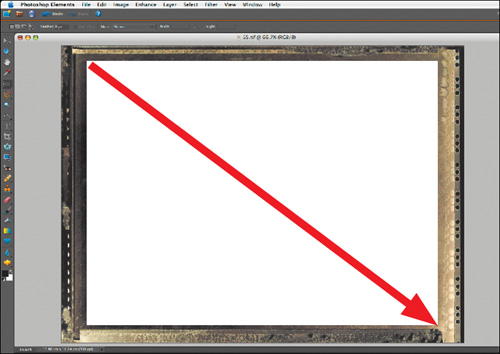
Open the downloaded JPEG file in Elements, then drag the rectangular marquee tool from corner to corner inside the center of the frame. Select Edit > Cut to remove any stray pixels from the center.
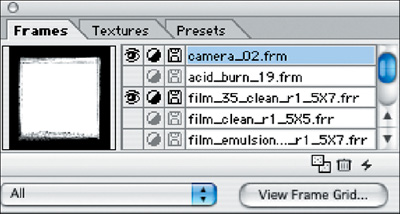
Sprocket holes, scratchy edges, and film code lettering are all part and parcel of the film rebate look.
This effect is created using the PhotoFrame Pro plug-in, but instead of using a single frame file, this project merges two together. From the onOne menu, open PhotoFrame to reveal your image in the standalone window. Next, load the Film 35 edge together with the Camera 02 edge into the Frames palette, as shown above.
When combining two or more frames into one effect, it’s important to choose designs that complement each other rather than competing designs. If you’re not sure which ones to use, load several frames, then switch them on and off to judge their effectiveness.
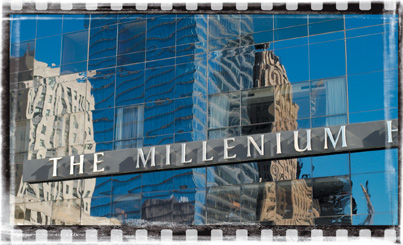
The beauty of using a plug-in like Photo-Frame is that while you will lose some of your image’s peripheral area, you don’t have to adjust your canvas size to make space for the effect.
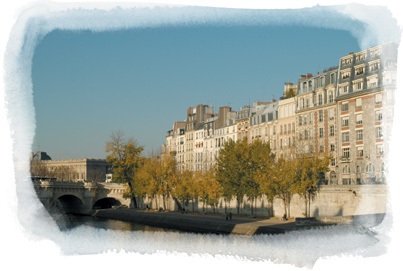
Applying a surrounding frame can help to hide unwanted details and can even provide a fence around distracting elements in the image. The example shown above is a detail captured from a sleek and shiny high-rise building that is enhanced by the addition of a scratchy, jagged edge.

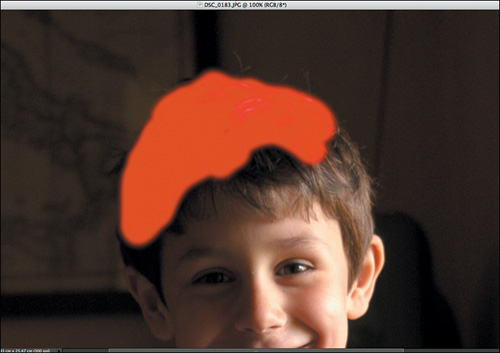
A cluttered or distracting background can detract from the main subject of your image—but can easily be removed.
Cutouts are best made with Elements’ Selection Brush, used in the Mask mode, as shown above. Set the brush between 80 and 100 pixels in size and with a 50% hardness so that the cut edges remain soft.
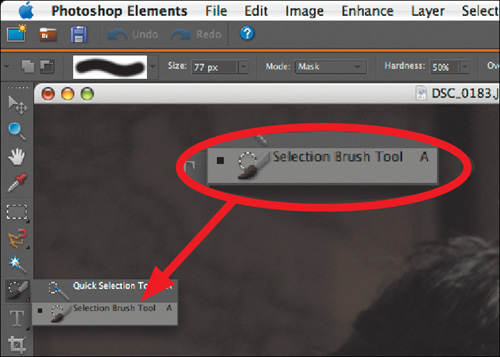
Rather than select the unwanted background, use the brush to paint over the areas you want to keep. The Selection Brush marks the protected area with a nonprinting red color, as shown above.