The techniques in this chapter create custom-sized inkjet prints, all of which need trimming.
Trimming photographic prints can cause a lot of anxiety, especially if you’ve put a great deal of effort into making a one-off print. Never trim prints with scissors or a blade and ruler combination, as it’s far too easy to slip and ruin the symmetry of your print.
The best way to finish off a print is to use a purpose-made rotary trimmer, preferably one with a built-in rule or scale. Never cut more than one print at a time and always clean before use, as tiny grains of sand or grit under the guides will scratch the ink off your print.
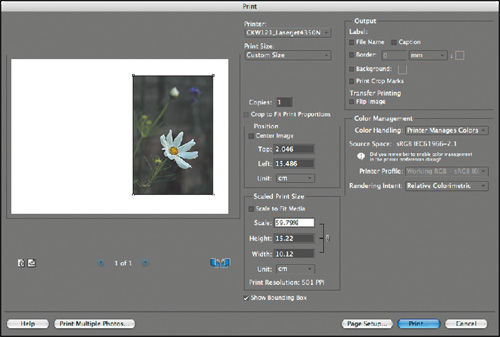
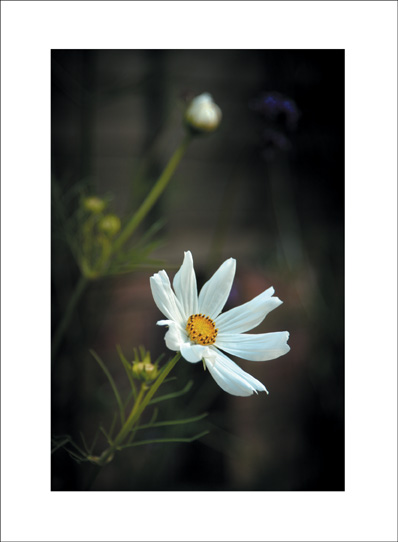
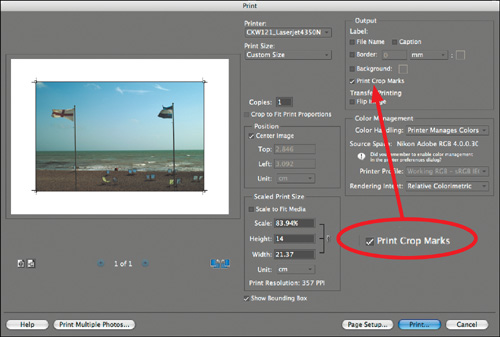
If you want to make trimming even easier, then use the Print Crop Marks function in Elements’ Print dialog, as shown above. When selected, the Print Crop Marks option creates four tiny crosshairs at the corners of your image when printed.
When you line up your print in the trimmer, the crosshairs show you where to start and stop cutting so you don’t have to guess. The marks are not embedded into your image file and print in black.
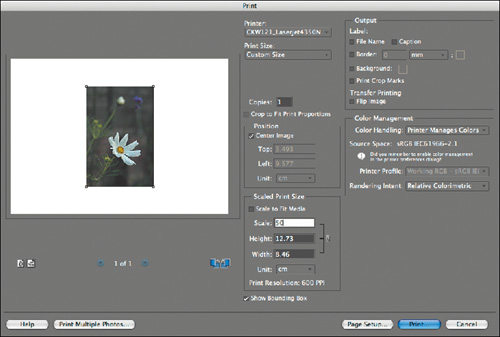
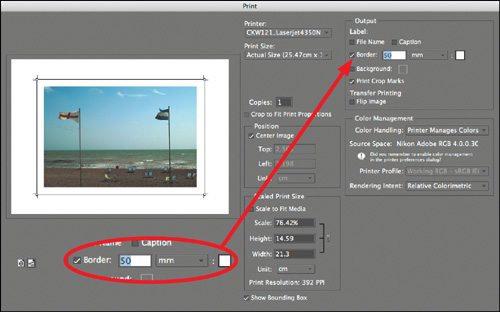
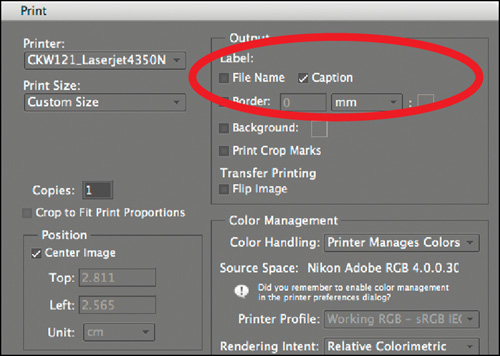
Not all of your print projects will be made for letter-sized paper, so if you want to print out a specially sized image on a larger sheet of paper, as shown above, you need to use a combination of the Border and Print Crop Marks commands. In the Print dialog, arrange the image using the Bounding Box function. Next, select Print Crop Marks, then set the Border value to 50cm (the maximum size possible), and pick white as the color. The crop marks are placed far enough away from the edge of your image to serve as useful trimming guides.
The most convenient way to reflect on all the images from a day’s shoot is to print them out as a contact print.
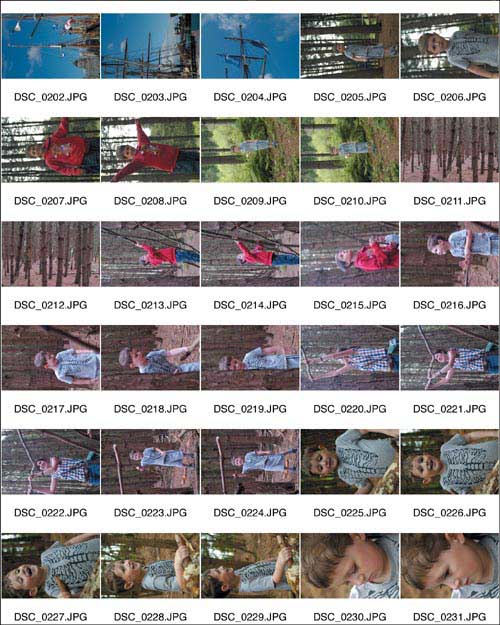
Start by transferring your images from your camera to your hard drive. The example above shows a day’s shoot in the browser application, Bridge. To make a contact print, you must place all your source images in the same folder.

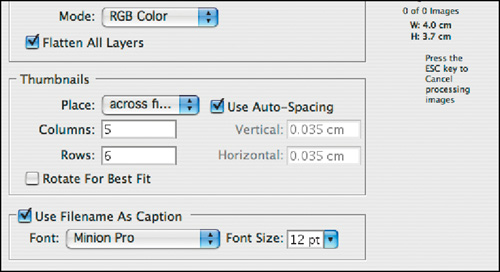
Open Elements and select File > Contact Sheet II. In the Source Images panel, select Folder and click Choose to point Elements to the desired set of images. Next, define the paper size and set Resolution to 200 ppi.
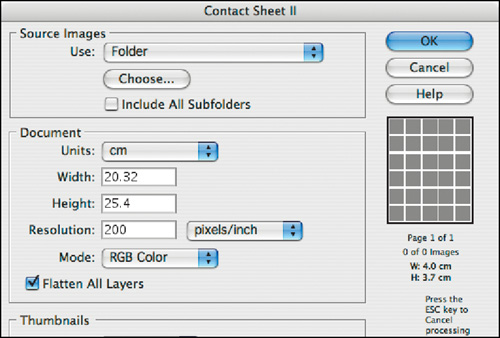
In the Thumbnails panel, choose 5 columns and 6 rows to define how many images print out per page. At this size, the thumbnails are big enough to evaluate properly. Deselect Rotate For Best Fit, as this prints portrait-format shots too small to see. Finally, select Use Filename As Caption and set Font Size to 12 pt.
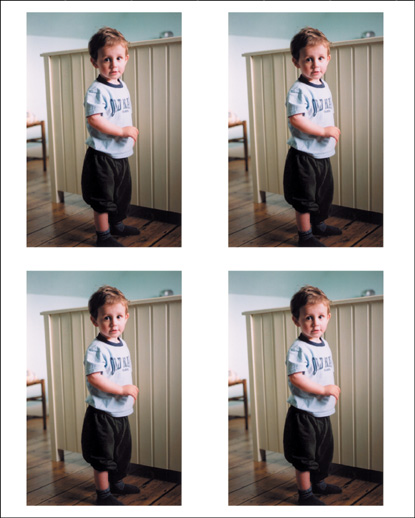
The simplest way to make multiple copies of your favorite image on a single sheet is with the automated Picture Package function.
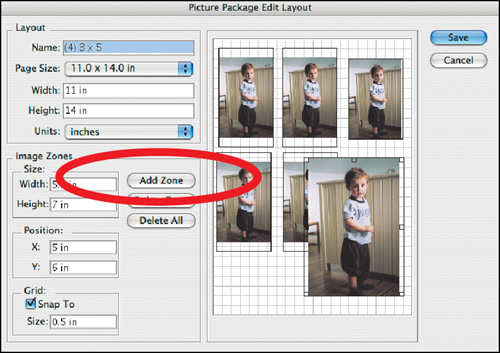
Open your chosen file in Elements, then select File > Picture Package. Set the size of your printing paper in the document panel, as shown above.

In the Layout menu, choose the quantity and size of the package you want to build. The example above tiles the image four times on the chosen paper size at 3″×5″. Set Resolution to 200 ppi for inkjet output.

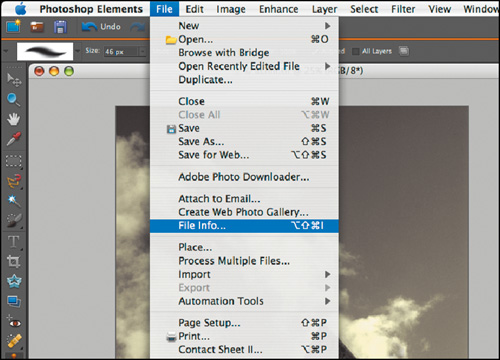
There’s no need to use a desktop publishing application for adding text to your image; you can use the File Info command instead.
Largely unnoticed in both Elements and Photoshop is the File Info dialog. Open the file you want to print, then select File > File Info, as shown above.
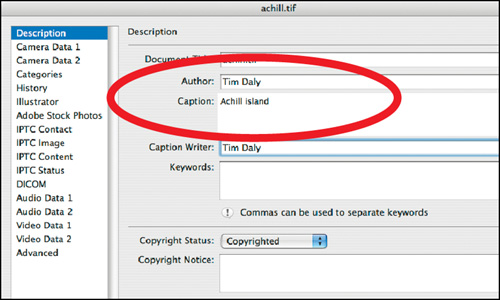
Select the Description tab and enter text in the four fields, as shown above. The Caption field is the all-important one for this project, as the words you enter here will print underneath your image. All File Info text is saved when you resave the image.
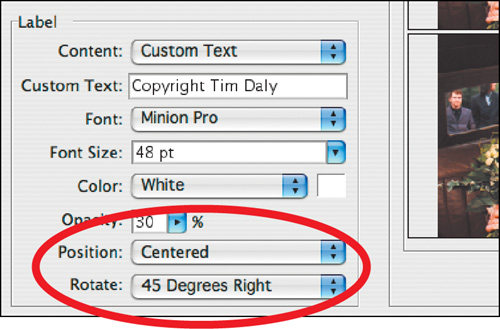
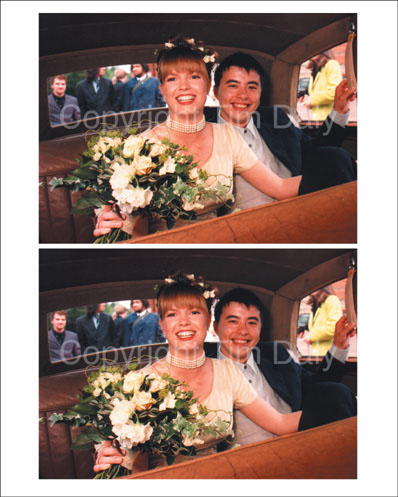
If you are providing proof prints free of charge, protect against unauthorized copying with a watermark.
Open your image and launch the Picture Package dialog. In the Label panel, found at the bottom left of the dialog, choose the Custom Text option. Set the size, color, and opacity as shown above.
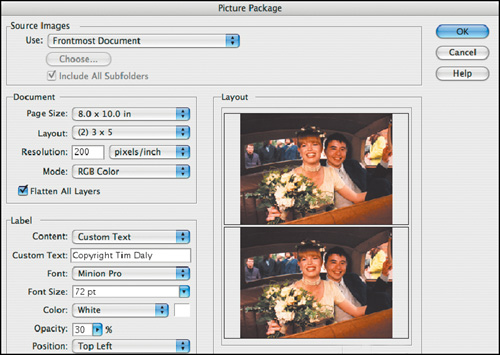
It’s essential to place the watermark in exactly the right position. If it doesn’t drape across the main subject, there’s a chance it will be cut off or cropped by an unscrupulous client. Experiment with the Rotate and Position options, as shown above.
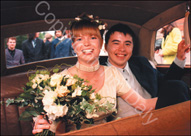
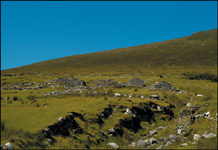
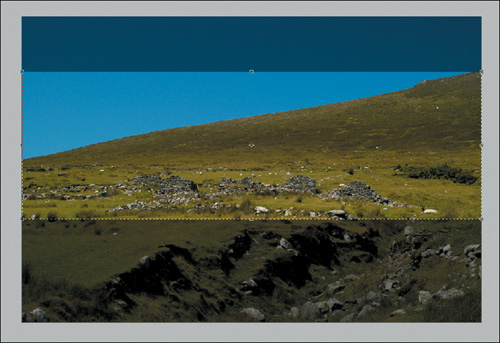
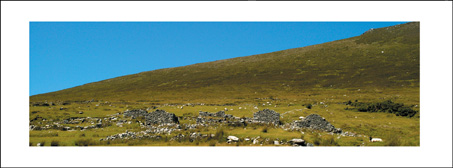
Many landscape images look even better when cropped to a letterbox panoramic shape.
The example image shown above is a clumsy composition with too many distracting elements. The intended subject is a thin row of derelict cottages, but the foreground grabs all of the attention and emphasis.
Select the Crop tool and drag this across your image. All unwanted areas darken and sit outside the dotted selection line. This crop, as shown above, places the emphasis back onto the original subject.


Many paper manufacturers provide top-quality prefolded cards for making your own greeting cards at home.
Make all the creative edits to your file before thinking about the printing stage. Ensure that your image is in proportion to your chosen card, using the Crop tool to shave bits off if necessary.
In the Print dialog, choose the overall size of the unfolded card. To account for the fold in the center of the card, it’s essential to move the image to one side of the sheet.