
Deploying ASP.NET Applications Using Copy Project
The Copy Project method of deploying a project using Visual Studio .NET is a straightforward operation with little room for error. When you use Copy Project, you specify a location to copy files to and how you want the files to be copied.
To use Copy Project, you must have an ASP.NET application open in the Visual Studio .NET IDE. To test out how Copy Project works, from the main menu, select Project, Copy Project. You're prompted with the Copy Project dialog shown in Figure 6.3.
Figure 6.3. The Copy Project dialog.

The first thing the Copy Project dialog wants to know is where you want the project deployed. If the directory you plan to deploy to doesn't exist, Copy Project creates it for you. The default settings are also configured in IIS for a new virtual directory. That means as soon as Copy Project is done, you can browse to the URL in the Destination project folder option and your site is active. For this test, change the destination project folder to http://localhost/WebDeployWithCopyProject.
After you determine the location of the project, you decide how you want the project files deployed. You set it by selecting either FrontPage or File Share with Web Access Method option button.
If you select FrontPage, you're choosing to deploy your project using HTTP, which is allowed if FrontPage server extensions are installed on the target server. Because they're installed by default on Windows 2000 Servers, Windows 2000 Professional, and Windows XP, this normally isn't an issue. But if the server extensions aren't installed, you get an error and Copy Project fails.
The File Share option is a direct file copy to a shared directory on the Web server. When using this method, Front Page server extensions aren't used and the files are simply copied across the network to the Web server.
Note
When deploying to your local machine, which you're doing here, all the deployment methods you've learned about always work. When Visual Studio .NET is installed, the IIS on the machine is configured to correctly handle the creation of Web sites, which is what happens every time you create a new ASP.NET Web application. If you have issues using Copy Project when deploying to an external Web server, it's most likely a permission issue. By default, only administrators are allowed write access to the wwwroot directory, so you must have your administrator create a special account that allows your login name to physically create directories on the Web server. By default, a VS Developers security group is created when Visual Studio .NET is installed on a computer, and that group has read/write permission on the Web server. The group has no users added by default, so each user who needs access must be added. The problem with this is that you normally won't have Visual Studio .NET installed on the Web server.
The final step to setting your deployment options is what files to copy. You have three choices:
Only files needed to run this application
All project files
All files in the source project folder
The interesting thing about this option is that no matter what option you seem to select, all the files in the source folder are copied. To test this, I added a cursor file, an XML file, and another style sheet, none of which is necessary to run the application. Copy Project decided it would be a good idea to copy them anyway, and it deployed unnecessary files to the Web server.
After you've selected the correct options in the Copy Project dialog, you can click the OK button, and the project is copied to the Web server. If the directory to which you're copying does not exist, it's created.
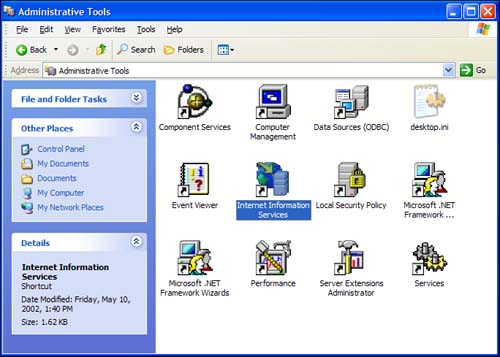
To check out what just happened, open Control Panel and select the Internet Information Services applet as Figure 6.4 demonstrates.
Figure 6.4. Selecting the IIS applet in the Control Panel.
Double-click the IIS applet to open up the IIS Management Console. When IIS is open, drill into the Web Sites node under the name of your local computer in the left pane of the snap-in. Under the Web Sites node is the Default Web Site node. This is the root directory of Inetpubwwwroot on your machine. If you drill further down, all the Web site folders are listed. Find the WebDeployWithCopyProject folder and drill into it, as Figure 6.5 shows.
Figure 6.5. Navigating the IIS snap-in to view virtual directories.
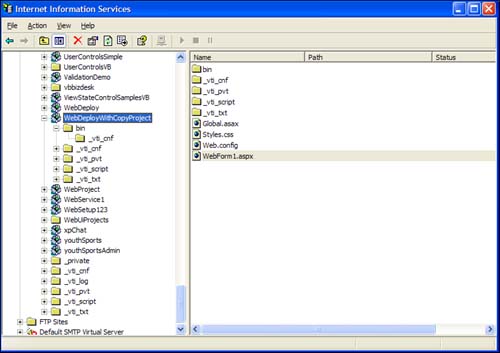
The folder you're looking at is known as a virtual directory. The way the Web server works is that to browse pages, the ASPX, HTML, or any type of document must be running under the isolated memory and protection of the Web server. By creating virtual directories, you're telling IIS that this folder is okay to be browsed from the Web.
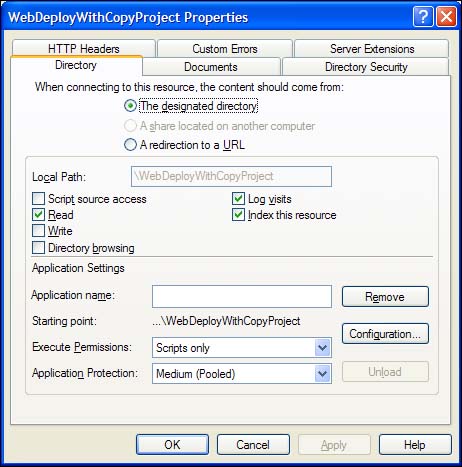
If you right-click the WebDeployWithCopyProject node and select Properties from the context menu, you get the project properties dialog for this virtual directory. The default settings of a virtual directory created using Copy Project are the minimal read permissions for a Web site. As you can see in Figure 6.6, the following permissions are given to the site:
Read Access Only— This means that, from a Web browser, files cannot be uploaded to this site and hackers cannot get in.
Execute Permissions: Scripts Only— This means only scripted pages can be run from this folder through a browser. Executable files can't be run. This is a high security setting, conforming to the script permissions for the IISUSER account on the local machine.
Application Protection— Allows this Web application to run in an isolated application process that other applications might or might not be using. This allows good memory protection and consumes minimal server resources.
Figure 6.6. IIS Properties dialog box for the deployment project.
To test that your application actually runs, close the Properties dialog and right-click WebForm1.aspx in the right pane of the snap-in. From the contextual menu, select Browse. Your default page should now be displayed in the browser, as Figure 6.7 demonstrates.
Figure 6.7. Viewing your successfully deployed project in the browser.

Although Copy Project is a very simple and straightforward mechanism for deploying your site, I see the following drawbacks to using this method of deployment:
It always copies all files, so unless you manually exclude files from a project, they're copied to the server.
It doesn't register COM components or copy satellite assemblies, such as Crystal Reports, to the target folder.
There's no differentiation on changed files. In other words, each time you run Copy Project, it attempts to deploy all files, even if they haven't been changed since the last deployment. However, you are prompted with an overwrite warning dialog.
That being said, I think Copy Project is a great way to create and configure a virtual directory. You can always work with your administrator to get other items, such as COM components, deployed to the server.
Note
Even though it's beyond the scope of this book, the way that COM components can be distributed using .NET is vastly improved. With a new feature called lazy Registration, you no longer have to manually create COM component applications in the COM+ snap-in. If you've deployed a COM component to a Web server, the first time you reference it in your code, the component is registered with COM+ and any and all available COM+ attributes can be defined in your code. On Day 14, “Components and .NET,” you learn about components in .NET, but we don't get into transactional components and other COM+ features.