In this chapter you will learn to:
Create a survey.
Respond to a survey.
View the results of a survey.
Create and use a discussion board.
Chapter 4 introduced you to Microsoft Windows SharePoint Services lists. With two specialized SharePoint lists, surveys and discussion boards, you can gather feedback and information from users of your site.
By creating a survey, you can determine the format of the user's feedback. You can configure also whether respondents' names appear in the survey results. If names are configured to appear, you can see how each user responded; if names are configured not to appear, the survey is anonymous. Windows SharePoint Services tallies the results and can compile a graphical summary of the responses.
By creating a discussion board, you can allow users to determine the type of response they give. A discussion board invites users to discuss issues with one another by starting topics and posting replies.
In this chapter you will learn how to create and respond to a survey, and then view the survey results. You will also learn how to create and use a discussion board.
See Also
Do you need only a quick refresher on the topics in this chapter? See the Quick Reference entries in Quick Reference.
Important
Before you can use the practice files provided for this chapter, you need to install them from the book's companion CD to their default locations. See "Using the Book's CD-ROM" for more information.
Important
Remember to use your SharePoint site location in place of http://gardenco in the exercises.
Surveys are created for a number of reasons. For example, you might need to create a survey to ask for a user's opinions, or you might need to collect factual information for marketing purposes. No matter what their purpose, all surveys involve the creation of a survey "container," and then the creation and administration of questions.
These questions can be one of two basic types:
Open-ended questions have no definitive answer. Open-ended questions give users the opportunity to answer in their own words, rather than just checking one of a limited list of alternatives. An example of an open-ended question is, "Are there any other comments you would like to add about the services or products that The Garden Company supplies?" The advantage of open-ended questions is that responses can be very useful, often yielding quotable material and an insight into the issues that are of most concern to the respondents of the survey. The disadvantage is that the responses are more difficult to catalog and interpret.
Closed-ended questions have a finite set of answers from which the user chooses. One of the choices might be "Other" or "N/A" to allow users to specify that their answer is not one of those supplied or that the question is not applicable to them. The advantage of closed-ended questions is that they are easy to gather data from and that they lend themselves to statistical analysis. The disadvantage is that they are more difficult to write than open-ended questions, because the choices must include all the possible answers a user could give for each question.
Users can respond to a survey in a number of ways, such as by typing in text, by selecting items from a menu, by clicking yes or no, or by entering a numeric or currency value. When you use Windows SharePoint Services to create a question, you can specify the type of answer, as summarized in the following table.
With each of these answer types, you can specify whether an answer is required or optional, and you can provide a default answer for each question.
In this exercise, you will create a survey on a SharePoint Web site.
OPEN the SharePoint site in which you would like to create your survey. The exercise will use the http://gardenco site, but you can use whatever site you want. If prompted, type your user name and password, and then click OK.
BE SURE TO verify that you have sufficient rights to create a list. If in doubt, see the Appendix .
On the Quick Launch bar, click Surveys.
The Documents and Lists page is displayed.
Click Create Survey.
The Create Page page is displayed.
Under Surveys, click Survey.
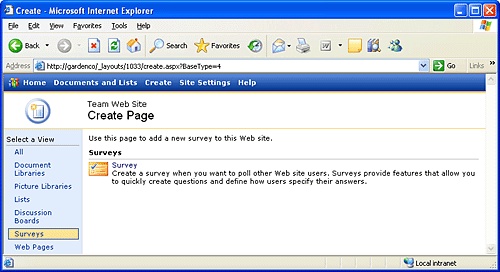
The New Survey form is displayed.
In the Name box, type Garden Survey.
In the Navigation section, leave the Yes option selected.
In the Survey Options section, for the Store user names in survey results? and Allow multiple responses? options, select Yes.
At the bottom of the page, click the Next button.
The Garden Survey: Add Question page is displayed.
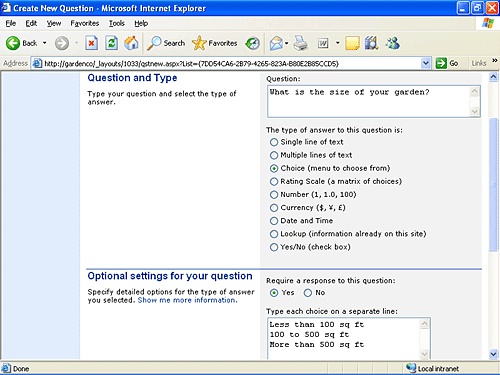
In the Question and Type section, in the Question box, type What is the size of your garden?, and then select the Choice (menu to choose from) option.
In the Optional settings for your question section, for the Require a response to this question option, select Yes.
In the Type each choice on a separate line box, replace the existing text with the following three lines:
Less than 100 sq ft
100 to 500 sq ft
More than 500 sq ft
Under Display choices using, make sure the Radio Buttons option is selected. (This is the default setting.)
At the bottom of the page, click the Next Question button.
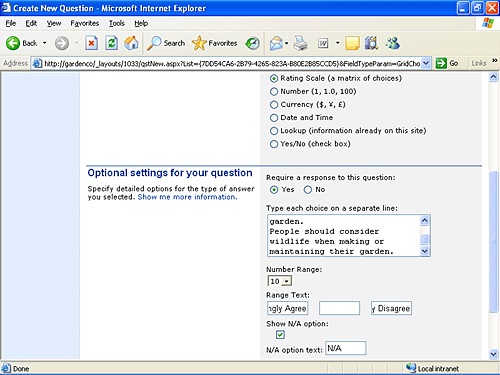
In the Question and Type section, in the Question box, type To what extent do you agree or disagree with the following statements?, and then select the Rating Scale (a matrix of choices) option.
In the Optional settings for your question section, for the Require a response to this question option, select Yes.
In the Type each choice on a separate line section, replace the existing text with the following three lines:
I try to attract wildlife to my garden.
Wildlife can damage my garden.
People should consider wildlife when making or maintaining their garden.
Click the down arrow to the right of Number Range box, and then click 10.
In the first Range Text box, type Strongly Agree, replace the text in the middle box with a space, and then in the last box, type Strongly Disagree.
At the bottom of the page, click the Next Question button.
Tip
If a Microsoft Internet Explorer dialog box is displayed stating that the Rating Scale Range Text contains invalid characters, then it is likely you deleted the text in the middle Range Text box and did not enter a space character. To correct this, click OK in the dialog box, and then enter a space in the middle Range Text box.
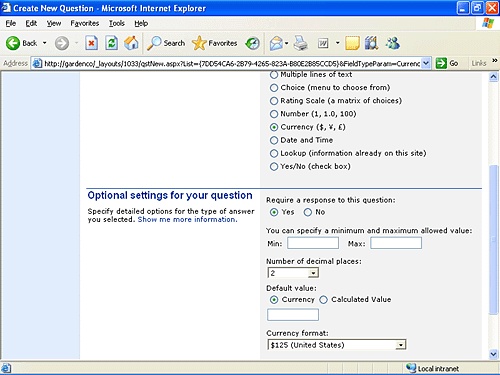
In the Question and Type section, in the Question box, type How much money, in total, did you spend on your garden over the last year?, and then select the Currency ($, ¥, £) option.
In the Optional settings for your question section, for the Require a response to this question: option, select Yes.
To the right of the Number of decimal places box, click the down arrow, and then click 2.
At the bottom of the page, click the Finish button.
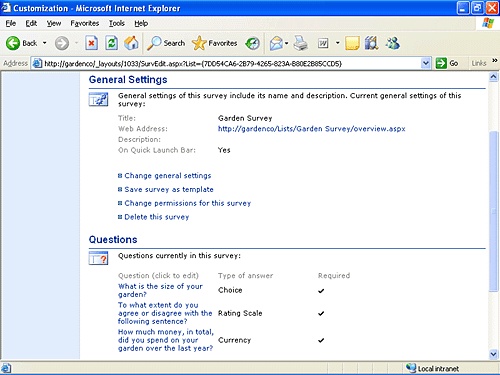
The Customize Garden Survey page is displayed.
Tip
In the Questions section of the Customize Garden Survey page, you can add, modify, delete, or change the order of your survey questions. To modify or delete an existing survey question, click the appropriate question in the "Question (click to edit)" column. When the Edit Question page is displayed, either modify the question and click OK, or click the Delete button to delete the survey question.
CLOSE Internet Explorer.
As surveys are created on a SharePoint Web site, you might find that you need to respond to them. Surveys are created to gather information, and it is important that you know how to respond to surveys. As a survey creator, users must respond to your survey so you can analysis their responses. It is good practice that once you have created a survey that you see the survey from an user's perspective, by completing at least one test response.
In this exercise, you will respond to a survey.
OPEN the SharePoint site in which the survey is located. If prompted, type your user name and password, and then click OK. The exercise will use the Garden Survey created in the previous exercise, but you can use whatever survey you want.
BE SURE TO verify that you have sufficient rights to contribute to the list. If in doubt, see the Appendix .
On the Quick Launch bar, under Surveys, click Garden Survey.
The Garden Survey page is displayed.
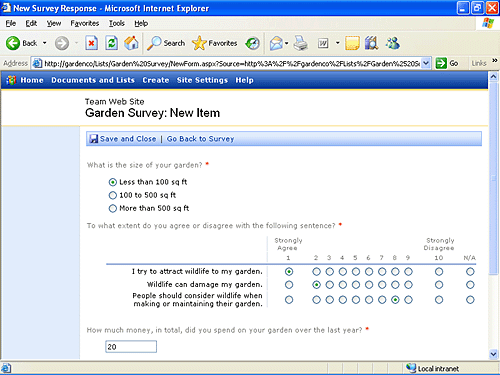
Click Respond to this Survey.
Select the Less than 100 sq ft option, then for the ranking questions options, select 1, 2, and 8, and for the money question enter 20.
Click Save and Close.
The Garden Survey page is displayed.
Repeat steps 2 through 4 several times, entering different responses each time.
CLOSE Internet Explorer.
Note
If you do not allow multiple responses when you create a survey and you try to test it more than once, an Error page is displayed stating that you are not allowed to respond again to the survey. To correct this problem, display the Garden Survey page, and then in the left navigation column, under Actions, click "Modify survey and questions." On the Customize Garden Survey page, in the General Settings section, click "Change general settings." On the Survey Settings: Garden Survey page, in the Survey Options section, select Yes as the "Allow multiple responses" option, and then click OK. Then click Go Back to "Garden Survey" to enter additional responses.
After users respond to your survey, you will need to examine and analyze the results. Windows SharePoint Services provides three ways to display a quick summary of the survey data:
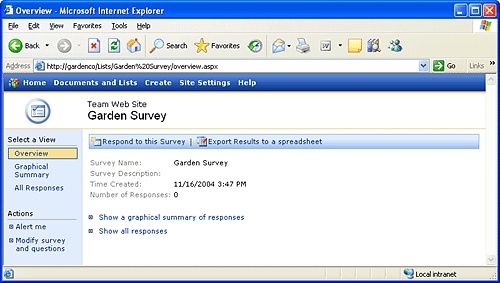
Overview. This view displays the survey's name, description, date and time of creation, and number of responses.
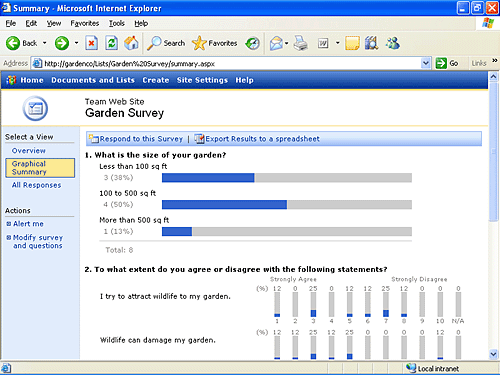
Graphical Summary. This view displays the response data for each survey question in a graphical form. The number of responses is displayed as a value and a percentage of the total number of responses received.
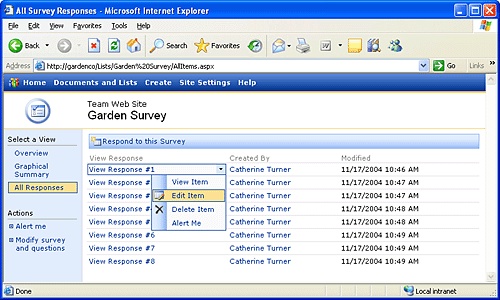
All Responses. This view displays a list of each survey response, the date and time the response was last modified, and, if applicable, the name of the user who created it. In this view, responses can be modified or deleted.
Important
Surveys are created with item-level permissions set so that all responses can be read by all users, but users can only edit their own responses. If you want to prevent users from changing their responses, display the survey and in the left navigation column under Actions, click "Modify survey and questions." On the Customize Survey page, in the General Settings section, click "Change permissions for this survey." On the Change Permissions page, click "Modify item-level security," and in the Item-level Permissions section, in the "Edit Access: Specify which responses users can edit" list, click None. Setting survey permissions is similar to setting document library permissions.
See Also
For more information about setting document library permissions, see Chapter 5.
You can also export survey result data to a spreadsheet, where you can use the data analysis features available in Microsoft Office Excel 2003.
In this exercise, you will view the survey responses. After editing one of your responses to the survey, you will export the results of the survey to Excel, and then find the average amount spent on gardens by users who responded to your survey.
OPEN the SharePoint site in which the survey is located. If prompted, type your user name and password, and then click OK. The exercise will use the Garden Survey used in the previous two exercises, but you can use whatever survey you want.
BE SURE TO verify that you have sufficient rights to access the list. If in doubt, see the Appendix .
On the Quick Launch bar, under Surveys, click Garden Survey.
The Garden Survey page is displayed in Overview view.
In the left navigation column, under Select a View, click Graphical Summary.
The Garden Survey page is displayed in Graphical Summary view.
In the left navigation column, under Select a View, click All Responses.
The Garden Survey page is displayed in the All Responses view.
Point to the View Response #1 survey item, click the down arrow, and then in the drop-down list, click Edit Item.
Select the 100 to 500 sq ft option, and then click Save and Close.
In the left navigation column, under Select a View, click Overview, and then click Export Results to a spreadsheet.
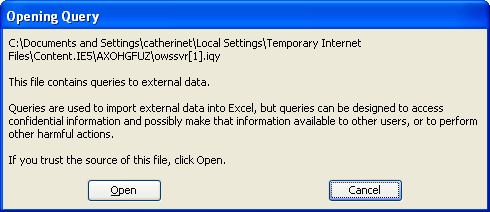
If the File Download dialog box appears with a warning that some files can harm your computer, click the Open button.
Excel opens.
In the Opening Query dialog box, click the Open button.
If a Microsoft Excel dialog box appears with a warning about hidden or read-only columns, click OK.
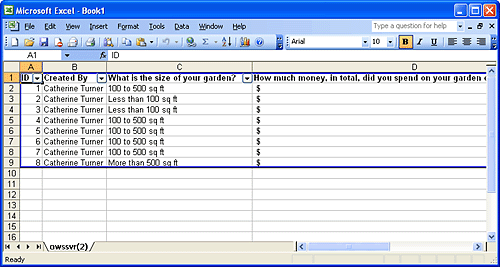
The survey responses are displayed as an Excel list surrounded by a dark blue border and with AutoFilter enabled in the header row of every column. If the List tool bar appears, close it.
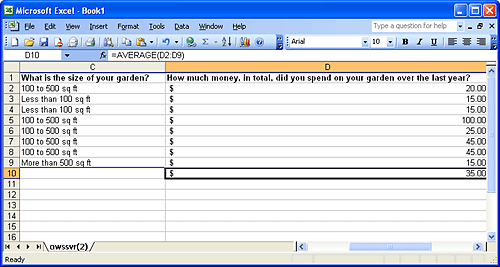
In column D, click the first empty cell below the Excel list, and then on the Insert menu, click Function.
In the Insert Function dialog box, in the Select a function list, click AVERAGE, click OK, and then in the Function Arguments dialog box, click OK.
Excel displays the average amount survey respondents spent on their gardens in the last year.
On the Standard toolbar, click the Save button.
On the left side of the dialog box, click the My Documents icon. If you installed the practice files, open Microsoft PressSharePoint Services SBSChapter 09. Then in the File name box, type MyGardenSurvey, and click the Save button.

CLOSE Excel and Internet Explorer.
See Also
For more information about how to use Excel lists to share data with other users, see "Importing Data from an Excel Spreadsheet to a List in SharePoint" in Chapter 11.
Discussion boards provide a forum on which visitors to your site can converse about topics that interest them. SharePoint sites that were created with the Team, Document Workspace, or Social Meeting site templates, include a discussion board called General Discussion. You can display the discussion board by using either the Quick Launch bar or the Documents and Lists page.
You can use a discussion board to start new discussions and sort and filter existing discussions. You can also change the design of the discussion board and create alerts that notify you of changes to the discussion board.
Windows SharePoint Services can display a discussion board in two views:
Flat view lists replies in chronological order (the order in which they were created).
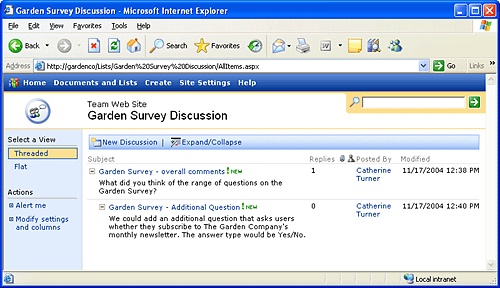
Threaded view lets you view comments grouped by conversation, or thread. All messages that are part of the same thread appear together in the order in which they were created.
You can post new topics and replies to the General Discussion discussion board or you can create new discussion boards. You can configure discussion board security settings so that users can participate in one discussion board but not another.
Important
Discussion boards are created with the same item-level permissions as surveys; that is, all discussions and replies can be read by all users, but users can edit only their own discussions and replies.
In this exercise, you create a new discussion board, add a new topic, delete a topic, and then remove the discussion board.
OPEN the SharePoint site in which you would like to create a discussion board. If prompted, type your user name and password, and then click OK.
BE SURE TO verify that you have sufficient rights to create a list. If in doubt, see the Appendix .
On the Quick Launch bar, click Discussions.
The Documents and Lists page is displayed.
Click Create Discussion Board.
The Create Page is displayed.
In the Discussion Boards section, click Discussion Board.
The New Discussion Board form is displayed.
In the Name box, type Garden Survey Discussion.
In the Navigation section, make sure the Yes option is selected.
At the bottom of the page, click the Create button.
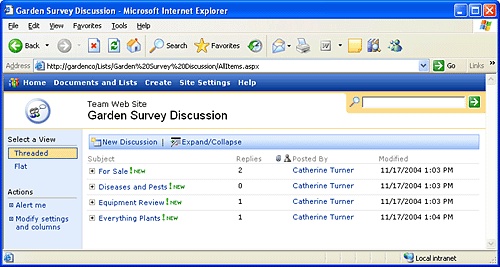
The Garden Survey Discussion page is displayed.
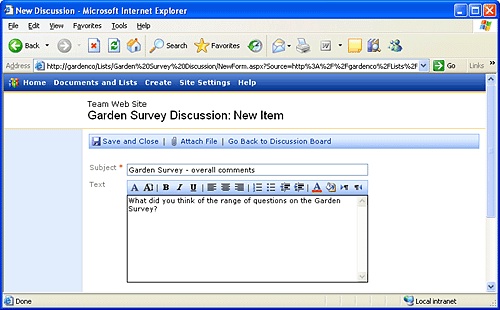
Click New Discussion.
In the Subject box, type Garden Survey – overall comments.
In the Text box, type What did you think of the range of questions on the Garden Survey?
Click Save and Close.
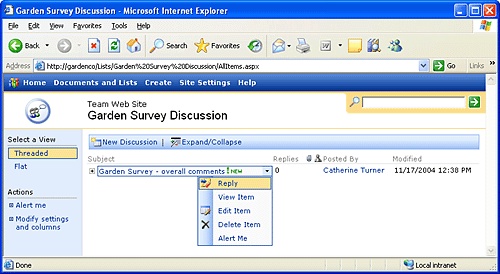
Point to the Garden Survey – overall comments item, click the down arrow, and in the drop-down list, click Reply.
In the Subject box, replace the contents with Garden Survey – Additional Question.
In the Text box, type We could add an additional question that asks users whether they subscribe to The Garden Company's monthly newsletter. The answer type would be Yes/No.
Click Save and Close.
Click Expand/Collapse.
All discussions and replies are displayed.
In the left navigation column, under Select a View, click Flat.
All discussion and reply items are displayed.
Point to the Garden Survey – overall comments item, click the down arrow, and then in the drop-down list, click Delete Item.
In the Microsoft Internet Explorer dialog box asking if you are sure you want to delete the item, click OK.
In the left navigation column, under Actions, click Modify settings and columns.
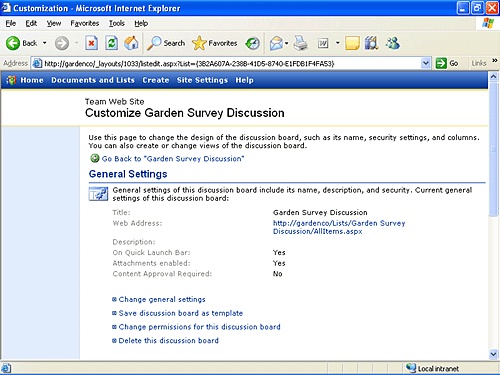
The Customize Garden Survey Discussion page is displayed.
On the Customize Garden Survey Discussion page, click Delete this discussion board.
In the Microsoft Internet Explorer dialog box asking if you are sure you want to delete it, click OK.
The discussion board is deleted and the Documents and Lists page is displayed.

CLOSE Internet Explorer.
In a survey, you can create questions and control the response format.
In a survey, you can create both open-ended and closed-ended questions.
Windows SharePoint Services provides three views to summarize survey responses: Overview, Graphical Summary, and All Responses.
You can export survey responses to a spreadsheet where you can perform more complex data analysis.
With a discussion board, users can create and reply to discussion topics.
You can view discussions in either Flat view or Threaded view.
Surveys and discussion boards are specialized lists. Their permissions can be controlled independently of the site and of other lists. You can apply item-level permissions to prevent users from editing their survey responses or messages.