In this chapter you will learn to:
Create a Document Workspace.
Create a Document Workspace within Microsoft Office 2003.
Access an existing Document Workspace.
Work with the Office 2003 Shared Workspace task pane.
Publish a document back to a document library.
Delete a Document Workspace.
Document Workspaces have many features that enable you to work on a particular document more easily. You can collaborate with others on a single document in a convenient environment where you can create or store a document, and associate links with that document. Additionally, Microsoft Office 2003 has tight integration between the products in the Office System and Document Workspaces.
You can think of a Document Workspace as a temporary SharePoint site. It is a collaborative environment for discussing, editing, and writing a single document, and enhances content creation. The Document Workspace usually has a short life—several months at most—because its main purpose is to help with content creation. Once the document is finished, it should be stored in a regular document library, as discussed in the previous chapters, for other people to find and read. Then the Document Workspace for that document can be deleted. Because the lifecycle for a Document Workspace is short, you can expect to be creating and deleting Document Workspaces fairly often.
In this chapter, you will learn how to efficiently work with Document Workspaces. You will learn how to create them and access existing ones. You will also learn how to work with the Office 2003 Shared Workspace task pane, publish a document back to a document library, and delete a Document Workspace.
See Also
Do you need only a quick refresher on the topics in this chapter? See the Quick Reference entries in Quick Reference.
Important
![]() Before you can use the practice files and sites provided for this chapter, you need to install them from the book's companion CD to their default locations. See "Using the Book's CD-ROM" for more information.
Before you can use the practice files and sites provided for this chapter, you need to install them from the book's companion CD to their default locations. See "Using the Book's CD-ROM" for more information.
Important
Remember to use your SharePoint site location in place of http://gardenco in the exercises.
There are two ways to create a document library. The first way is to create it through the SharePoint Web interface, and the second way is to create it using a Microsoft Office 2003 application. Both methods will be covered in this chapter. With either method, the resulting Document Workspace will be the same, only the procedure you use to create it will be different.
A Document Workspace centers around one particular document. It is important to stress that fact. You only want one document per Document Workspace because Document Workspaces are linked back to their original document—enabling you to easily copy the document from the Document Workspace back to its original source location. This is a unique feature of Document Workspaces, which are not found in any other type of SharePoint site. This way, you and your team members can work on the document without interfering with the main site or having people read the document before it is complete.
In this exercise, you will create a Document Workspace from an existing document using the SharePoint Web interface.
OPEN the SharePoint site where you'd like to create a Document Workspace. If prompted, type your user name and password, and then click OK.
BE SURE TO complete the "Adding Documents" exercise in Chapter 5.
Alternatively, you can create a practice site for this chapter based on site template Chapter 7 Starter.stp in the practice file folder for this chapter. The practice file folder is located in the My Documents Microsoft PressSharePoint Services SBSChapter 07 folder. See "Using the Book's CD-ROM" for instructions on how to create a practice site.
On the top link bar, click Documents and Lists.
In the Document Libraries section, click Plant Descriptions.
You are taken to the Plant Descriptions document library.
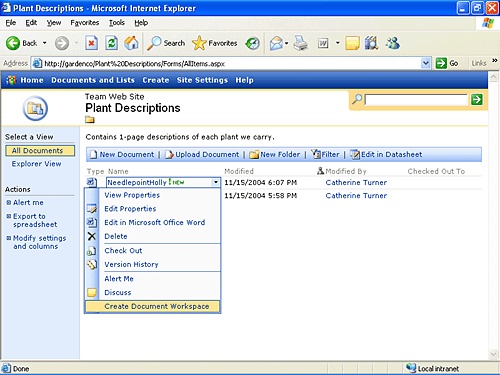
Move your mouse over NeedlepointHolly.doc, and when an arrow appears to the right of the document name, click the arrow.
Click Create Document Workspace.
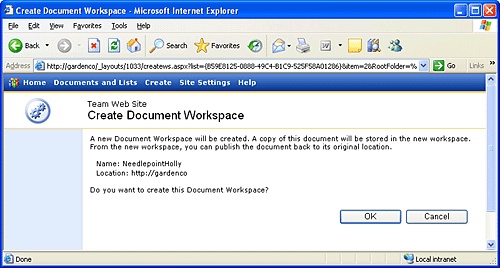
The Create Document Workspace page appears.
Click OK.
A new Document Workspace is created for you and populates with information from the NeedlepointHolly.doc document.

Tip
You can also create a Document Workspace manually by using the Create link on the home page of the site. However, this will not provide the same integration with an existing document as the above process does. To get the full benefits of a Document Workspace, you should create it from an existing document as described above or create it from an Office 2003 application, which is explained in the next section.
Office 2003 provides tools that enable you to work with a Document Workspace through a task pane. In this section you will use the Microsoft Office 2003 task pane to create a Document Workspace. The Document Workspace that is created is very similar to the one you created in the last exercise; the only difference is that the Document Workspace is created from within a Microsoft Office 2003 application.
In this exercise, you will create a new document and use Microsoft Office Word 2003 to generate a new Document Workspace for that document.
OPEN the SharePoint site where you'd like to create a Document Workspace for a document in Office 2003. If prompted, type your user name and password, and then click OK.
BE SURE TO complete the "Working with Library Columns" exercise in Chapter 6.
Alternatively, you can create a practice site for this chapter based on site template Chapter 7 Starter.stp in the practice file folder for this chapter. The practice file folder is located in the My Documents Microsoft PressSharePoint Services SBSChapter 07 folder. See "Using the Book's CD-ROM" for instructions on how to create a practice site.
On the top link bar, click Documents and Lists.
In the Document Libraries section, click Plant Descriptions.
The Plant Descriptions document library appears.
Click New Document, and then when a dialog box appears indicating that some files can harm your computer, click OK.
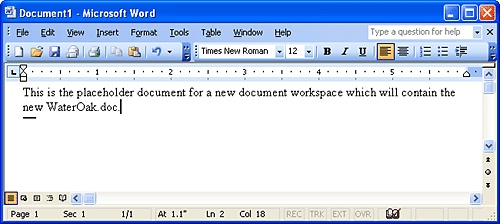
A new document is opened in Microsoft Office Word.
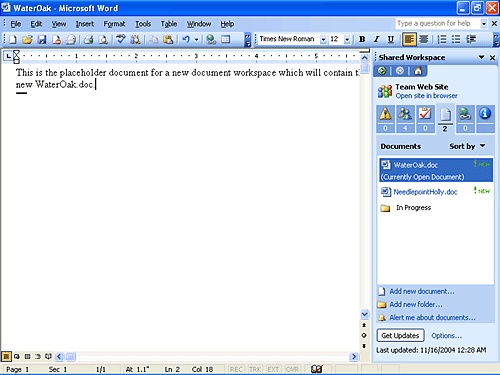
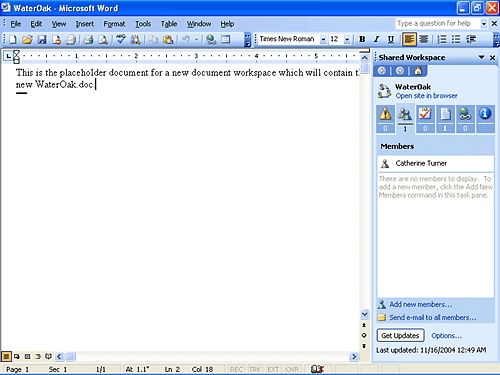
Type some information into the document, for example, This is the placeholder document for a new document workspace which will contain the new WaterOak.doc.
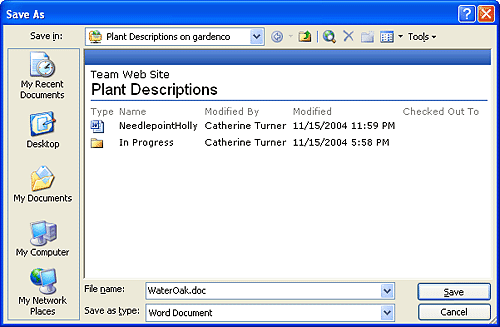
Click File, and then click Save.
In the File name box, type the name of the document, for example WaterOak.doc.
Click the Save button.
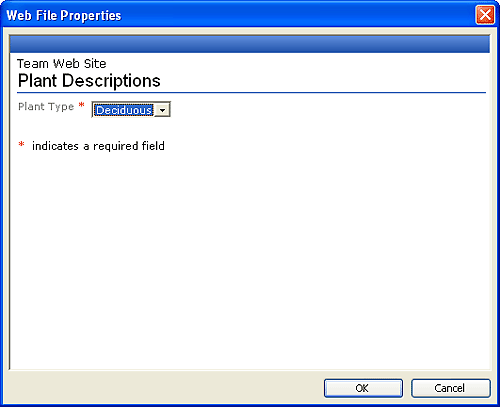
In the Web File Properties Dialog box, select Deciduous.
Click OK.
The file is saved to the Plant Descriptions Document Library.
Click View, and then click Task Pane.
The Microsoft Office task pane appears on the right side of the application.
At the top part of the task pane, click Getting Started.
A drop-down list of selections appears.
Select Shared Workspace.
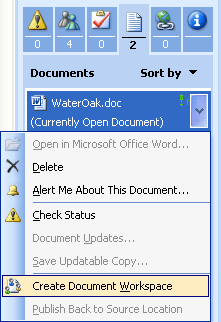
Move your mouse over WaterOak.doc, and when an arrow appears to the right of the document name, click the arrow.
Click Create Document Workspace.
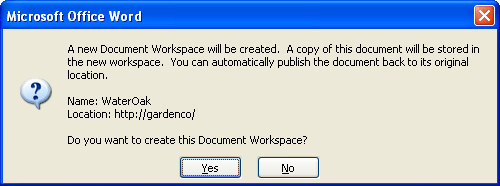
A dialog box appears asking if you are sure you want to create the Document Workspace.
Click Yes.
Microsoft Office Word displays the progress and creates a Document Workspace for this document.
Close Microsoft Office Word.
A dialog box appears asking you if you would like to save a local copy of the document.
Click Skip.
You can choose to save a local copy if you want, but it is not necessary.
CLOSE Internet Explorer.
After you create a Document Workspace, you have to access it in order to work on the document. Unless you know where to look, it can be difficult finding the Document Workspace again after you first create it.
In this exercise, you will browse to the Document Workspace for NeedlepointHolly.doc, which you created in the first exercise.
OPEN the SharePoint site where you'd like to access an existing Document Workspace. If prompted, type your user name and password, and then click OK.
On the top link bar, click Documents and Lists.
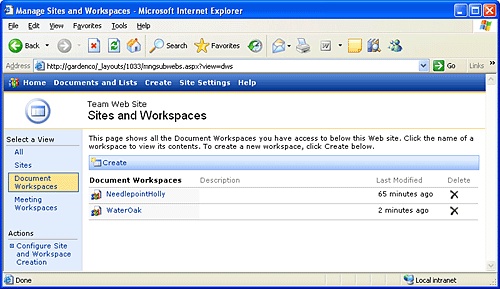
Under See Also on the left-hand side of the screen, click Document Workspaces.
The Sites And Workspaces page appears.
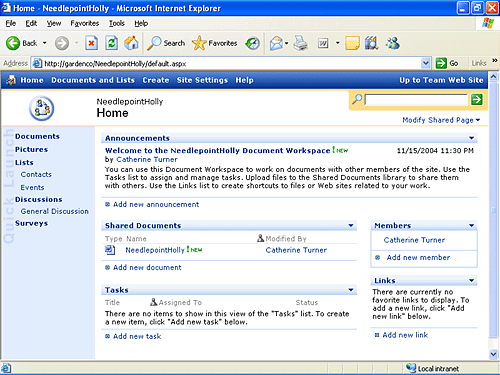
Under Document Workspaces, click the Document Workspace you would like to access, for example NeedlepointHolly.
The NeedlepointHolly Document Workspace appears, which you can work with as you would any SharePoint site.
CLOSE Internet Explorer.
The Office 2003 Shared Workspace task pane has six tabs that present different information. Following is a description of each tab:
 The Status tab. This is the first tab from the left on the task pane and is used to give you information about the status of the document, such as who the document is checked out to.
 The Member tab. This is the second tab from the left on the task pane and is used to show you a list of people who have access to the Document Workspace. It also shows you who is online if you have a presence client installed, such as Windows Messenger.
 The Tasks tab. This is the third tab from the left on the task pane and shows the list of tasks from the Task list of the Document Workspace.
 The Documents tab This is the fourth tab from the left on the task pane and shows a list of documents in the SharePoint site.
 The Links tab This is the fifth tab from the left on the task pane and shows links from the Links list of the Document Workspace.
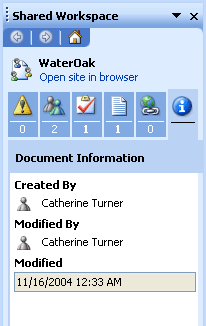
 The Info tab This is the last tab from the left on the task pane and shows general information about the document, such as who created the document, who last modified the document and when the document was last modified.
In this exercise, you will work with some of the features of the Shared Workspace task pane in Microsoft Office Word 2003. You will add a task to the Document Workspace, add a user to the Document Workspace, and check the document information all from within Word.
OPEN the SharePoint site in which you'd like to work with a document in a Document Workspace. If prompted, type your user name and password, and then click OK.
On the top link bar, click Documents and Lists.
In the See Also section on the left-hand side of the page, click Documents Workspaces.
The Sites And Workspaces page appears.
Click WaterOak.
The Water Oak Document Workspace appears.
Move your mouse over WaterOak.doc and when an arrow appears to the right of the document name, click the arrow.
Click Edit in Microsoft Office Word.
A dialog box appears indicating that some files can harm your computer.
Click OK.
The document is opened in Word.
If the Shared Workspace task pane does not show up on the right side of the screen, click View, and then click Task Pane.
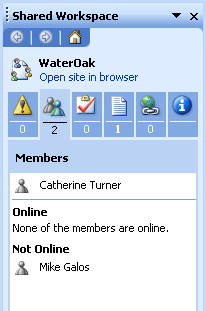
Click the Members tab.
Your name appears (Catherine Turner in this example) listed as the only member of this Document Workspace.
Toward the bottom of the task pane, click the Add New Members link.
The Add New Members dialog box displays.
In the Enter e-mail addresses or user names, separated by semicolons box, type the e-mail address or user name of a user you want to add, for example mikeg.
Click the Next, and then click Finish.
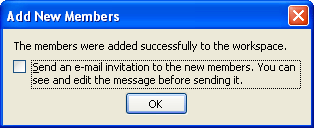
If your server is configured for e-mail, the Add New Members dialog box will appear.
Clear the check box to send an e-mail invitation to the new members, and then click OK.
The user (Mike Galos in this example) is listed as one of the members of the Shared Workspace and he now has permissions to edit the document.
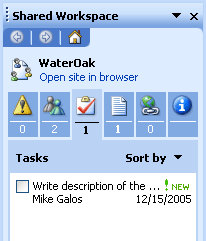
Click on the Tasks tab.
In the bottom section of the pane, click the Add New Task link.
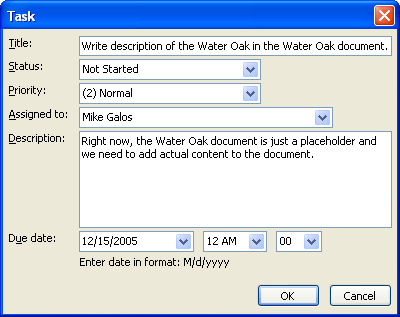
The Task dialog box appears.
In the Title box, type a name for the task, for example Write description of the Water Oak in the Water Oak document.
Leave the Status and Priority boxes set to their defaults.
In the Assigned To box, select a user to assign the task to, for example Mike Galos.
In the Description box, type a description for the task, for example, Right now, the Water Oak document is just a placeholder and we need to add actual content to the document.
In the Due Date box, select the due date for the task, for example 12/15/2005.
Leave the hours and minutes boxes set to their default settings.
Click OK.
The new task you just entered appears in the task pane.
Click on the Info tab.
The date and time the document was modified as well as the user who created the document and the user who most recently modified it is displayed.

CLOSE Microsoft Word and Internet Explorer.
The ability to publish a document back to its original source document library is one of the unique features of Document Workspaces. Essentially, what this feature does is copy the document back into the source library. It keeps you from having to remember where the document originally came from, while still being able to keep it up to date.
In this exercise, you will publish a document from the Document Workspace back to the document library.
OPEN the SharePoint site in which you'd like to publish a document from a document library back to the main site. If prompted, type your user name and password, and then click OK.
On the top link bar, click Documents and Lists.
In the See Also section on the left-hand side of the page, click Document Workspaces.
The Sites And Workspaces page appears.
Click NeedlepointHolly.
The NeedlepointHolly Document Workspace is displayed.
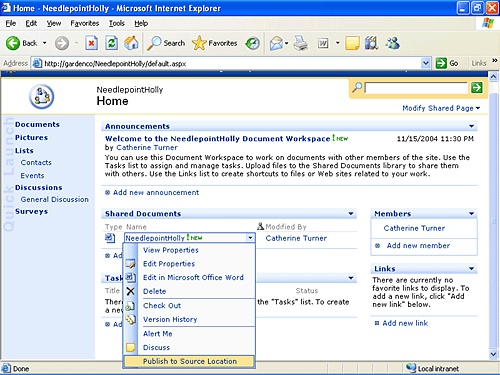
Move your mouse over NeedlepointHolly.doc and when an arrow appears to the right of the document name, click the arrow.
Click Publish to Source Location.
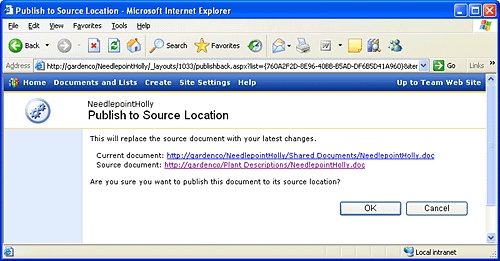
The Publish To Source Location page appears.
Click OK.
This copies the latest version of NeedlepointHolly.doc from the Document Workspace to the original document library NeedlepointHolly.doc came from (in this case, Plant Descriptions) and a confirmation that the operation completed successfully appears.
CLOSE Internet Explorer.
When you are finished with a Document Workspace, you will want to delete it in order to save space on your SharePoint server. Deleting it also reduces the clutter when people are trying to find other Document Workspaces.
In this exercise, you will delete the NeedlepointHolly.doc Document Workspace.
OPEN the SharePoint site from which you'd like to delete a Document Workspace. If prompted, type your user name and password, and then click OK.
On the top link bar, click Documents and Lists.
In the See Also section on the left side of the page, click Document Workspaces.
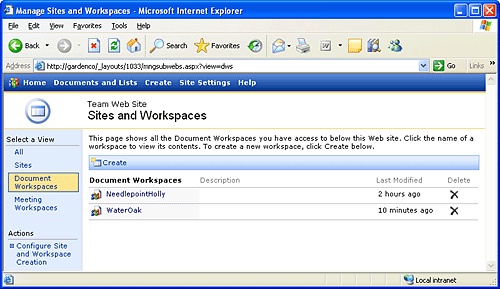
The Sites And Workspaces page appears.
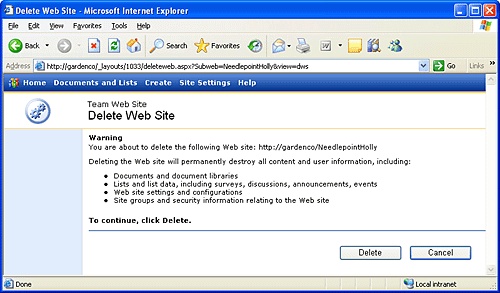
 Under the Delete column, click the X that corresponds to NeedlepointHolly.
The Delete Web Site page appears and warns you that all the information contained in the site will be destroyed.
Click the Delete button.
The Sites And Workspaces page appears. Notice that the NeedlepointHolly Document Workspace is no longer listed.
CLOSE Internet Explorer.
You can create Document Workspaces for documents that are in progress.
Using Document Workspaces, you can more easily communicate and collaborate about a particular document.
With the Microsoft Office 2003 Shared Workspace task pane, you have access to information directly from a SharePoint site and you are able to update that information directly within Office.
You can create a document library from an existing document in a document library so you can use the Publish To Source Location feature to update the original document with the latest version.