Chapter 10
Creating Lists
Key Skills & Concepts
• Use Ordered Lists in a Web Page
• Use Unordered Lists in a Web Page
• Use Definition Lists in a Web Page
• Combine and Nest Two or More Types of Lists in a Web Page
• Style Lists
Lists are everywhere—on your refrigerator, in schoolbooks, next to the telephone, on bills, and in all sorts of other documents. That’s why there’s a special set of tags just for creating lists. This chapter focuses on the three different types of lists possible in HTML:
• Ordered lists
• Unordered lists
• Definition lists
Lists are especially useful in web pages to draw attention to short pieces of information. Keep that in mind when you create your lists, and try to include short phrases, instead of long sentences, in each list item.
Use Ordered Lists in a Web Page
An ordered list is one in which each item is preceded by a number or letter. For example:
My favorite fruits are:
1. raspberries
2. strawberries
3. apples
If you want to create the previous list on a web page, you should use an ordered list. Here’s what the HTML code would look like:

NOTE
While it’s not required, I indent the list items to make seeing the structure of the list easier.
Notice I didn’t include any numbers in my list. This is because I used the
ol element to tell the browser this is an ordered list. When browsers see ordered lists, they know to place a number in front of each list item.
The default type of ordered list uses Arabic numbers, but you can use the
type attribute to change that. Table 10-1 identifies the different types of ordered lists you can create with the type attribute.
Table 10-1 Ordered List Types
To change the type of ordered list, add the
type attribute and its value to the opening ol tag:
Here, I changed the type to “I,” which tells the browser to place uppercase Roman numerals in front of each list item. So the previous code would create a list like the following:
I. Introduction
II. Understanding the Medium
III. Basic Page Structure
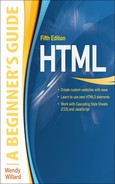
You can also specify the starting number or letter for an ordered list with the
start attribute. The default for the starting number is 1. To change this, add the start attribute to your ol tag:
Even though the value of the
type attribute may be something other than Arabic numerals, the value of the start attribute is always an integer. So, in the previous example, start="3" actually tells the browser to start the list with the third letter because type="a".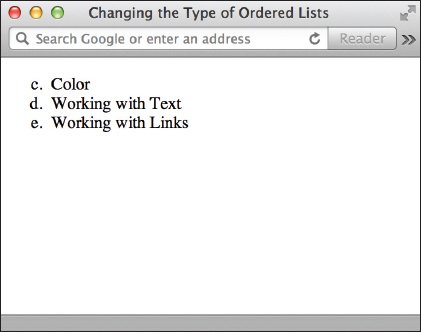
If you want to change an individual value—for example, if you want to make the third item in the list use the letter g—you can add the
value attribute to the specific li tag:
As with the
start attribute, the value attribute is always an integer. The browser looks at the value of the third list item and changes it to g because the type is a.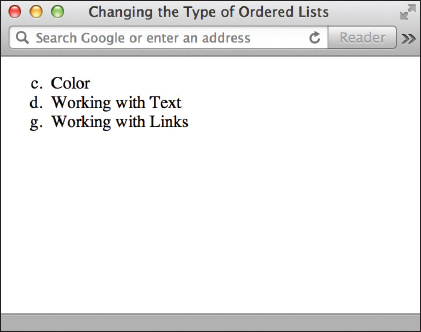
You can also reverse the order completely by adding the reversed attribute to your opening
ol tag. In this case, the list would be ordered 3, 2, 1 instead of the default 1, 2, 3.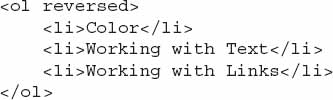
Use Unordered Lists in a Web Page
The second type of list is similar to the first, except unordered lists don’t use numbers or letters. As the name suggests, unordered lists don’t rely on order for importance. These lists use bullets to precede each list item. The following is an example of an unordered list:
• Red
• Green
• Blue
You still use the
li element to identify each item in the list, but instead of beginning with the ol element, unordered lists are contained within the ul element: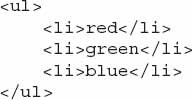
Aside from that, the code used to create the first two types of lists is the same.
Use Definition Lists in a Web Page
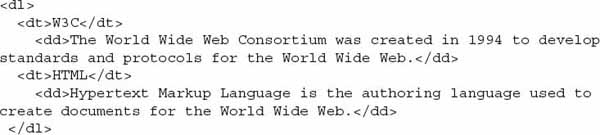
The third type of list you can create in HTML is called a definition list. As its name suggests, you might use a definition list to show terms and their definitions. For example, in the following list, the term is listed on the first line and then the definition is on the line below the term:
W3C
The World Wide Web Consortium was created in 1994 to develop standards and protocols for the World Wide Web.
HTML
Hypertext Markup Language is the authoring language used to create documents for the World Wide Web.
A definition list works just like this one, where you use HTML tags to identify the terms and definitions for each of the list items. The dl element sets up the definition list, while the dt element contains the definition term, and the dd element is used for the actual definition data.

The code to create the page shown in the preceding illustration looks like this:
You can use more than one
dd for each dt if you need to; the browser will just simply indent each line below the dt.Combine and Nest Two or More Types of Lists in a Web Page
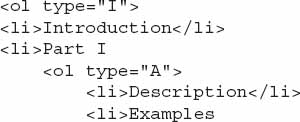
You can also use another list inside itself or even one type of list inside another type of list. Each time you use a list inside another list, you are nesting lists. Perhaps the best example for nested lists is an outline like those created for a term paper.
I. Introduction
II. Part 1
A. Description
B. Examples
1. Reference One
2. Reference Two
III. Part 2
IV. Summary
Can you imagine what the HTML code would look like for the preceding outline? The best solution would be to use a series of nested ordered lists as shown in the following illustration and code:


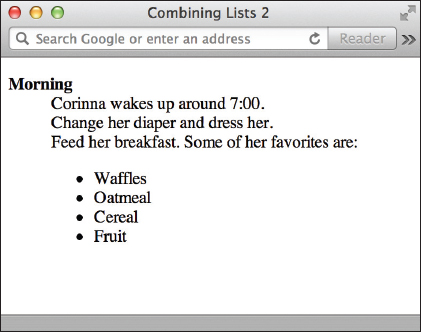
As I mentioned before, you can also nest one type of list inside another type. For example, you could include a bulleted list inside a definition list to give further clarification to a definition description. Look at the following illustration and code to see what I mean:

TIP
The most important thing to remember when nesting lists is always to confirm that you have closed each list. If you notice a section of your nested list is indented more than it should be or continues within the list above it, try drawing semicircles from each of the list’s opening and closing tags. If any of the circles cross or don’t have an ending spot, you may need to recheck your work for errors.
| Try This 10-1 | Use Lists on Your Web Page |
In this project, you create a web page listing your company’s products and/or services. Goals for this project include
• Using an ordered list in a web page
• Using an unordered list in a web page
1. Open your text/HTML editor and create a new file entitled services.html.
2. Type all the HTML tags needed for a basic web page.
3. Specify a white background color and that the entire page should use the Verdana font.
4. Add the necessary content to describe your site’s services, making sure to include at least one ordered and unordered list for practice.
5. Format the top headline as a Level 1 header.
6. Add any other formatting you think is appropriate.
7. Save the file.
8. Open your web browser and choose File | Open Page (or Open File or Open, depending on the browser you’re using). Locate the file sessions.html that you just saved. Make sure the file appears as you intended.
9. If you need to make changes, return to your text editor to do so. After making any changes, save the file and switch back to the browser. Choose Refresh or Reload to preview the changes you just made.
Ordered and unordered lists can be great ways to draw attention to important information on your page. This project gave you practice using each type of list in preparation for using them on your own web pages.
TIP
Is the text after your list indented? If so, check to make sure you closed your lists with the proper ending tag (
</ol> or </ul>). For more tips, see Appendix C.Style Lists
While there is no style sheet property for actually creating lists—that’s done with HTML, as you just learned—there are three properties that can be particularly useful in formatting lists. Table 10-2 provides details. Note that all three properties can only be used to format lists and no other HTML elements.

Table 10-2 Style Sheet Properties for Formatting Lists
Customize the Bullets
For example, suppose you wanted to create a list on a web page in which each item was preceded by an image of a star. You could add an image tag to the beginning of each item in a definition list to achieve this sort of thing, such as with the following code:
But what if you had 20 items in your list? Adding that long
img tag to every list item would be tedious. A more efficient alternative is to switch to an unordered list (one with bullets, by default) and use a style sheet in the header of your page to change the regular bullet to the image of your choice. The following code and illustration show how this might work:

TIP
For the best results, choose images that are about the same height as the text in each list item.
Customize the Spacing
As you know, the HTML list tags indent each list item by default. Unfortunately, the exact amount of that indentation does vary a bit according to the browser. Thankfully, there are CSS properties for adjusting the indent. Two properties—margin and padding—in particular affect the spacing around each item in your list, and around the list in general.
When attached to the
ul or ol tag, the margin property affects the space around the entire list. But when it is used with the li tag instead, the margin property alters the space around each individual list item.The padding property dictates the amount of buffer space around the text in the list item, before the edge of the list item is reached. Take a look at the following illustrations to help visualize how this works (first, I’ll show you a visual representation of a list with some extra spacing, then the code used to create that example).


It is important to note that whenever you alter the spacing around your lists and list items, you must test your pages in a variety of browsers just to make sure everything displays as intended. Some older versions in particular have trouble properly displaying lists with altered spacing.
Customize the Entire Layout
What if you wanted to completely change the layout of your list so that it no longer looked like the typical list with bullets and indentations? In the past, web page authors have used tables (such as those created in word processing programs or spreadsheets) to hold each “item” in an irregular list. But style sheets provide a method of easily changing the layout of a list, whether that means simply removing the bullets and indents or going so far as to switch the whole thing from vertical to horizontal.
Vertical Navigation
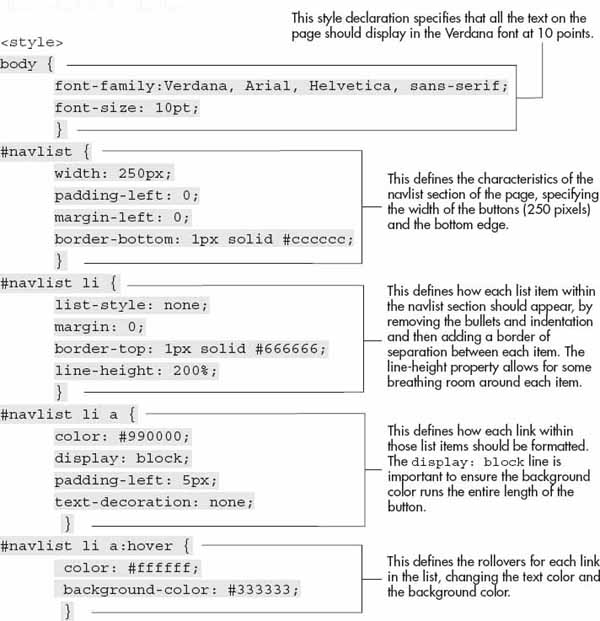
Probably the most common reason for playing with the layout of a list is to use it as a navigation bar. Consider the navigation bar shown in Figure 10-1. It certainly doesn’t look like a list; in fact, it looks more like a bunch of graphical buttons. There are borders separating the links, and the colors even change when you move your mouse over the links.

Figure 10-1 CSS made it easy to turn a boring list into a stylish navigation bar.
The actual HTML code used to create that list is shown next:


Notice how the HTML for the list looks the same as the lists previously created in the beginning of this chapter. In fact, every bit of the formatting is achieved through the style sheet, which looks like this:

Horizontal Navigation
What if you wanted to display the navigation bar horizontally across the page instead of vertically down the page? The reason lists run down the page by default is that they are block-level elements in HTML. As mentioned previously, block-level elements automatically fill the available space.
With that in mind, we can easily make a list display horizontally by specifying it should be displayed as an inline element instead of a block-level element with
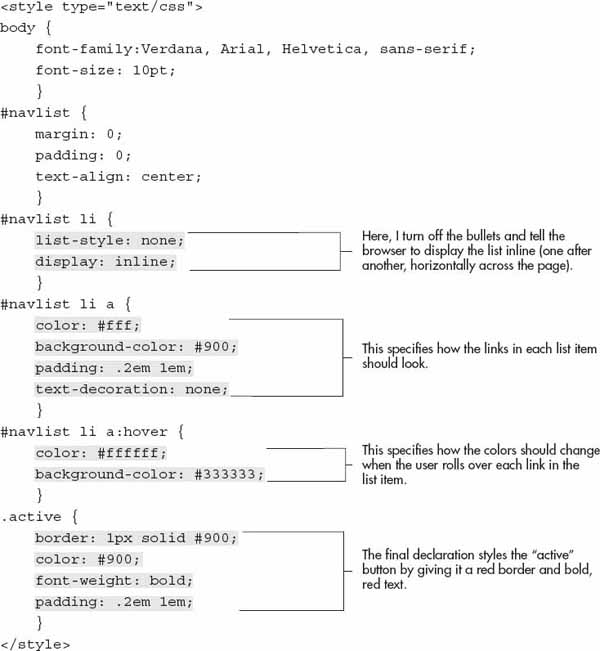
display: inline. Figure 10-2 shows a very basic unordered list, with a style sheet applied to turn it into a horizontal navigation bar. The list code looks like the following:
Figure 10-2 Changing the list from block-level to inline allows the items to run horizontally across the page.

And the style sheet looks like this:
| Try This 10-2 | Style Lists Within Your Web Page |
In this project, we’ll use style sheets to customize the lists created in Try This 10-1. Goals for this project include
• Stylizing the bullet in an unordered list
• Creating an inline list for navigational purposes
1. Open your text or HTML editor and return to the file saved from the previous project.
2. Replace the Roman numerals in the ordered list with a graphical button, such as those included at http://www.prodraw.net/button. (HINT: Try using
ol>li as your selector to tell the browser only to use the star for list items within the ordered list on your page, not all the list items on the page.)3. If you don’t already have one, add a new content division for the navigation.
4. Create an unordered list in that division, with at least three list items that make sense for your site. Here are some suggestions:
• Home
• About Us
• Our Services
5. Link “Home” to the index.html page you’ve created.
6. Link the others to their corresponding pages. (If they haven’t yet been created, simply create a placeholder link.)
7. Specify that “Our Services” should use the “active” class in your style sheet.
8. Add the appropriate style declarations to your style sheet to make the list in the navigation division display as a horizontal navigation bar.
9. Turn off the underlines for the links in the navigation bar.
10. Continue adding style sheet properties to format the list items with a one-pixel, solid, black border.
11. Create a class called “active” and give that class a gray background color.
12. Save the file.
13. Open your web browser and choose File | Open Page (or Open File or Open, depending on the browser you’re using). Locate the file you just saved. Make sure the file appears as you intended.
14. If you need to make changes, return to your text editor to do so. After making any changes, save the file and switch back to the browser. Choose Refresh or Reload to preview the changes you just made.
Style sheets make it very easy to turn simple lists into elegant navigation bars. This project gave you practice working the various style sheet properties used to do just that.
Chapter 10 Self Test
1. What’s the difference between an unordered list and an ordered list?
2. Which element is used to enclose list items in both ordered and unordered lists?
3. You created an unordered list with four list items. All the content following the fourth list item that should be normal text is indented under the list. What is the most likely cause of this problem?
4. Which HTML attribute changes the numbering style of a list?
5. True/False: You can use more than one
dd element for each dt element.6. Which HTML attribute changes the starting letter or number for a list?
7. Fill in the blank: When displayed in a browser, each item in an unordered list is preceded by a(n) _____________ by default.
8. Fix the following code:

9. Add the appropriate code to turn the following text into an ordered list:

10. Fill in the blank: The
dl element stands for ________________________.11. True/False: When you nest unordered lists, the bullet style remains unchanged.
12. What value is used with the
display property to change a list from vertical to horizontal?13. How can you change a list from using Arabic numbers to lowercase letters?
14. Which CSS property is used to replace the standard bullet in a list with an image?
..................Content has been hidden....................
You can't read the all page of ebook, please click here login for view all page.