

CHAPTER
10
Power-Using Cordova
In this chapter, you will learn how to transform an HTML5 mobile web application into a hybrid multidevice native application using the Apache Cordova platform. We will use the NetBeans IDE, Apache Cordova command line interface, and Android SDK to convert the AngularJS personnel directory we started in Chapter 6 (but finished in Chapter 8) into a native, on-device Android application.
Why Apache Cordova? The most common reason to use Apache Cordova is platform independence. Cordova allows a developer to create a single application using standard HTML5 technology and deploy that application to multiple device operating systems (iOS, Android, etc.) without learning device-specific development tools. Another good reason to use Cordova is because it exposes a JavaScript interface to native device capabilities allowing web developers to access protected device features without learning device-specific APIs.
About the Apache Cordova Platform
Apache Cordova is an open source project donated to the Apache Software Foundation by Adobe Systems. Cordova provides a command line interface for assembling native applications from HTML, CSS, JavaScript, and images. Using plugins, Cordova exposes device-specific features, such as the camera and geolocation, to developers through a JavaScript API. The original open source project, named PhoneGap, was purchased by Adobe, and still exists as an extension of Cordova. There are a lot of similarities between the two platforms. In this chapter, we use Apache Cordova instead of PhoneGap, so that we can leverage the Cordova build tools included with NetBeans.
Cordova allows developers to create cross-platform applications using common development languages, such as JavaScript, HTML, and CSS, and deploy those applications to a variety of mobile operating systems. This allows a developer to write one version of an application and then deploy that application to multiple target operating systems (Android, iOS, BlackBerry, Windows Mobile, and so on). Cordova does not directly compile applications. Instead, it uses platform-specific development kits to compile and deploy applications. For example, if you want to create an Android application, then Cordova requires the Android SDK. Likewise, if you want to create an iPhone or iPad application, then Cordova requires Xcode.
Installing the Apache Cordova Platform
Even though NetBeans integrates with Apache Cordova, it doesn’t include the Cordova Platform with the NetBeans installation. Instead, NetBeans will prompt you to install Cordova the first time you attempt to create a Cordova project. Let’s get a head start by installing the required pieces ourselves. NetBeans requires Node.js, Git, and a mobile platform SDK. Chapter 1 described how to install Node.js as part of the Weinre installation. If you didn’t install Node.js in Chapter 1, head over to http://nodejs.org/download/ now and install the Node.js binaries appropriate for your operating system (Windows, Linux, Mac, and so on). You will also need Git installed. There are a multiple Windows Git packages. I use the one available at http://git-scm.com/downloads. As with Node.js, download the Git package appropriate for your operating system. The final prerequisite is a mobile SDK. Since we downloaded and installed the Android SDK in Chapter 1 and then used it to build a mobile application in Chapter 9, we have already satisfied that prerequisite. To summarize, the prerequisites for installing Cordova are
![]() Node.js
Node.js
![]() Git
Git
![]() Mobile SDK
Mobile SDK
After satisfying these prerequisites, install the Apache Cordova platform from a command prompt by entering the command npm install -g cordova as follows:
![]()
![]()
NOTE
Oracle maintains a brief NetBeans/Cordova “Getting Started” guide on the http://netbeans.org website. When I wrote this book, the getting started guide was available at https://netbeans.org/kb/docs/webclient/cordova-gettingstarted.html.
Creating a NetBeans Cordova Project
Creating a Cordova project in NetBeans is very similar to creating an HTML5 project (because a Cordova project IS an HTML5 project). Launch NetBeans and choose File | New Project from the NetBeans menu bar. When step 1 of the New Project appears, select the HTML5 category and then the Cordova Application Project. Click Next to Continue. In step 2, name the project PersonnelDirectoryCordova. In step 3, choose the Cordova Hello World Online Template. Figure 10-1 is a screenshot of step 3.
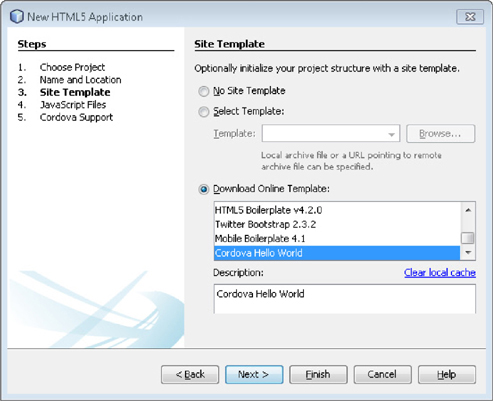
FIGURE 10-1. Step 3 of the New HTML5 Application wizard
![]()
NOTE
If NetBeans raises an exception when trying to create a new Cordova project, then make sure you are running the most current version of NetBeans.
On step 4, click Next to move to step 5. We don’t need to select any libraries because we will be using the project source from Chapter 6. In step 5, you are prompted for an Application ID and Application Name. Keep the default Application ID but change the Application Name to Personnel Directory. Figure 10-2 is a screenshot of step 5. Click the Finish button to complete the wizard and create the project.
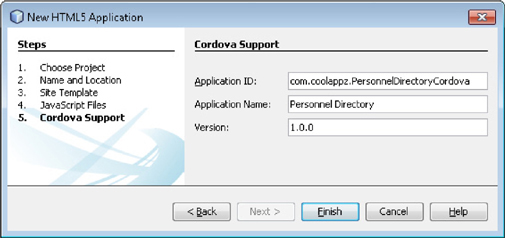
FIGURE 10-2. Step 5 of the New HTML5 Application wizard
In the Project Explorer, identify the Important Files node and then the Cordova Plugins node. Double-click the Cordova plugins node to open the plugin.properties file. This file contains one row for each plugin used by a Cordova application. The Cordova Hello World template is preconfigured with entries for common plugins. We will only use the camera and console plugins so delete every line except the camera and console lines. After deletion, your plugin.properties file should contain the following:
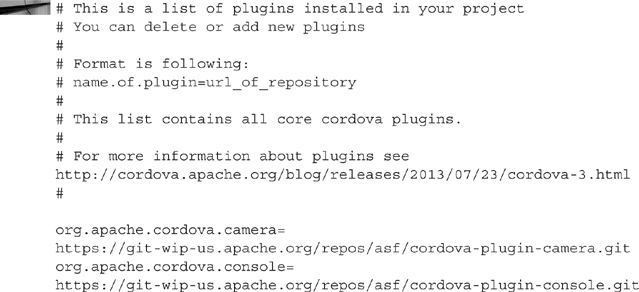
The first time you run a Cordova application, NetBeans will download each plugin listed in plugins.properties. This could take a significant amount of time. Since we won’t be using any of the other plugins, it is better to delete them now rather than waste our time waiting for them to download.
Running a Cordova Project from NetBeans
After your emulator is running, return to NetBeans and locate the Browser Select toolbar icon. It should be one icon to the left of the two “hammer” icons. Click this icon and select Cordova (Android Emulator). Figure 10-3 is a screenshot of the browser selection menu.
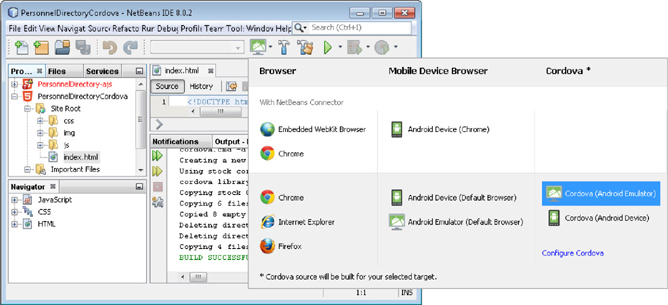
FIGURE 10-3. Browser selection menu
Launch the new application by either clicking the green run (play) button in the toolbar or choosing Run | Run Project from the NetBeans menu bar. If this is your first time running a Cordova application from NetBeans, then NetBeans will display the error described in Figure 10-4.

FIGURE 10-4. Android Platform not configured error
Click the OK button to open the NetBeans options dialog so you can enter the location of your Android SDK. Figure 10-5 is a screenshot of my NetBeans options showing the path to the Android SDK (downloading the Android SDK was part of Chapter 1). NetBeans should proceed with the build and deploy process. If not, run the project again.
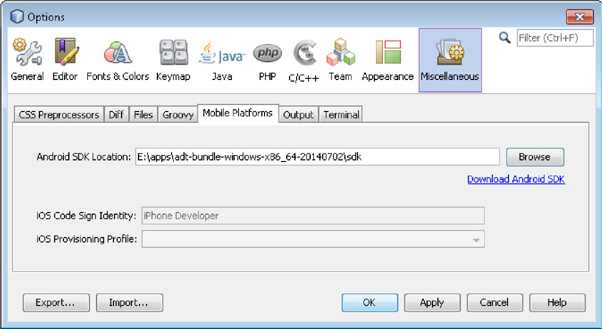
FIGURE 10-5. NetBeans mobile platform options
![]()
NOTE
You must be connected to the Internet the first time you launch your project so that Apache Cordova can download the plugins identified in the plugins.properties file.
After running the project, switch to your emulator. You should see something that resembles Figure 10-6. If you don’t, then return to NetBeans and review both tabs of the Output window.
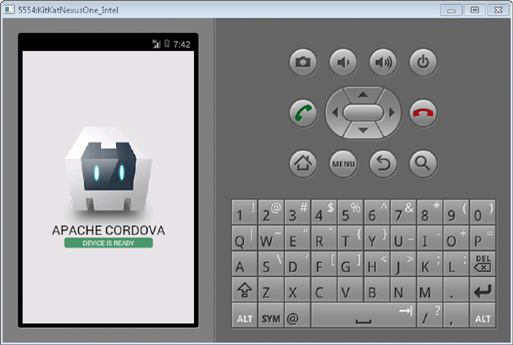
FIGURE 10-6. Cordova Hello World template running in an Android emulator
![]()
NOTE
The Android emulator should automatically launch the Cordova Hello World application. You should not need to launch it yourself. If it isn’t running, then look for the Personnel Directory icon on the emulator home screen.
From Website to On-device
Let’s convert our Chapter 6 AngularJS Personnel Directory HTML5 remote mobile website into an on-device application running in the Cordova container. Here is how we will perform this transformation:
![]() Copy source files from the AngularJS Personnel Directory we created in Chapter 6 and finalized in Chapter 8.
Copy source files from the AngularJS Personnel Directory we created in Chapter 6 and finalized in Chapter 8.
![]() Change URLs so the emulator can connect to our PeopleSoft instance.
Change URLs so the emulator can connect to our PeopleSoft instance.
![]() Implement authentication for the profile page.
Implement authentication for the profile page.
Copying Source Files
Locate your PersonnelDirectory-ajsapp directory on your file system. We created this folder in Chapter 8 through the PersonnelDirectory-ajs NetBeans project. Copy the contents of the app directory into your new project’s (PersonnelDirectoryCordova) www directory. For example, I copied C:UsersjmarionDocumentsNetBeansProjectsPersonnelDirectory-ajsapp to C:UsersjmarionDocumentsNetBeansProjectsPersonnelDirectoryCordovawww. Say yes when prompted to overwrite files or merge folders.
![]()
NOTE
You can identify a project’s source directory by right-clicking the project’s node in the NetBeans project explorer and choosing Properties from the context menu.
Connecting the Emulator to Your PeopleSoft Instance
In Chapter 8, we ran a local web server for development purposes. Since our PeopleSoft web services were hosted by a different web site (domain), we had to reverse proxy those services to make the web browser think the web service content was coming from the same web server as the HTML files. Chapter 9, on the other hand, used the same web services, but didn’t require a reverse proxy. The Chapter 9 application was able to connect directly to remote PeopleSoft services. The two chapters differed in that all content for Chapter 8 came from a remote location, whereas most of the Chapter 9 content was installed directly on the device. Even though this chapter uses the same source files as Chapter 8, we won’t access them from a web server. Instead, the mobile device will behave more like Chapter 9—with locally installed content and allowing us to connect directly to remote services. This means the Chapter 9 URL rules and concepts apply. You can access the target Service Operations by
![]() IP address
IP address
![]() Host name
Host name
![]() IP address to host name mapping in the emulator hosts file (see Chapter 9 for example)
IP address to host name mapping in the emulator hosts file (see Chapter 9 for example)
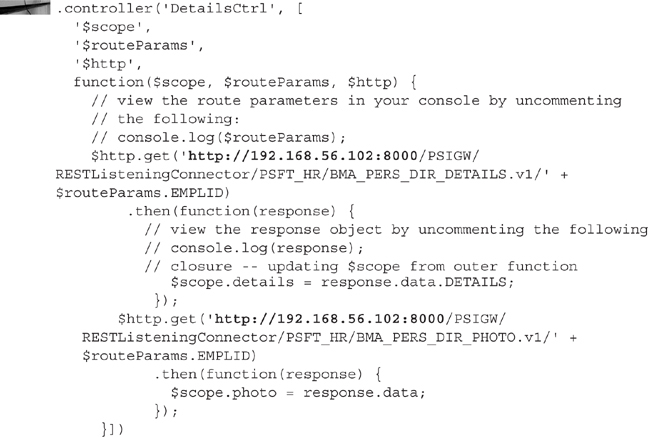
The Chapter 8 code we just copied into our PersonnelDirectoryCordova project references REST Service Operations as relative URLs. Since this project’s HTML and JavaScript will run locally on the device with no need to reverse proxy content, we need to change the Service Operation URLs into absolute URLs that point to a PeopleSoft instance. Open the file js/controllers.js and search for the DetailsCtrl controller definition. Inside the DetailsCtrl controller function, identify the $http.get method invocations and convert the relative URLs into absolute URLs. For example, instances of /PSIGW/RESTListeningConnector/ become http://192.168.56.102:8000/PSIGW/RESTListeningConnector/. The following is my DetailsCtrl with updated URLs in bold:
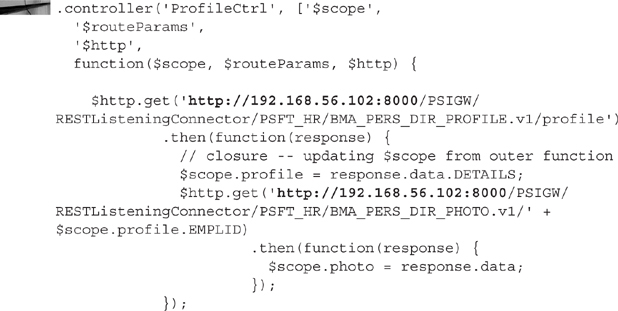
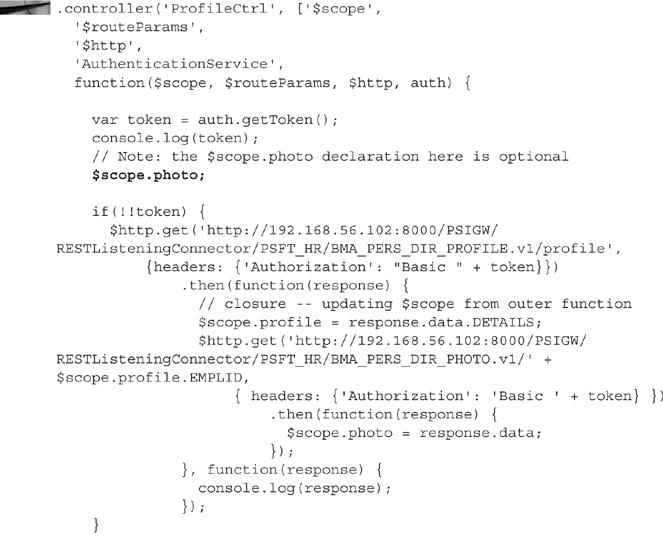
Make the same change to the ProfileCtrl controller:
The js/services.js file also contains a reference to a relative Service Operation URL. Open js/services.js and find the SearchService factory method. A few lines down from the factory definition you should find the searchService.search method definition. Inside that method, you will see the URL/PSIGW/RESTListeningConnector/PSFT_HR/BMA_PERS_DIR_SEARCH.v1. Convert this URL into an absolute URL. The following is a fragment of the services.js file with the necessary changes in bold. I included a few lines before and after for reference:

Test your changes to ensure connectivity by selecting Run | Run Project from the NetBeans menu bar. Figure 10-7 is a screenshot of the AngularJS Personnel Directory running as a Cordova application inside a NexusOne Android emulator.
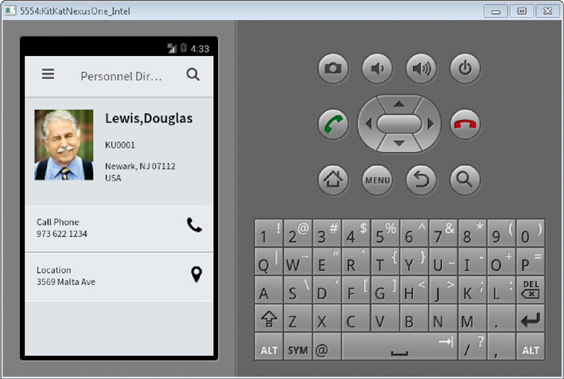
FIGURE 10-7. AngularJS PersonnelDirectory
Debugging Cordova Applications
In Chapter 1 you learned how to use Weinre. Weinre is a great tool for debugging CSS and page layout as well as JavaScript. In this chapter, you already have a working application. At most, we just need to debug connectivity issues. I find Fiddler to be very helpful when debugging connection issues. Basically, we just need to find out what the Cordova application attempted to access and why it didn’t receive the response we expected. Chapter 1 described how to configure Fiddler to accept connections from an emulator as well as how to get an emulator to use Fiddler as its proxy server. Review the steps from Chapter 1 and then reload the Personnel Directory Cordova application. Figure 10-8 is a screenshot of both the Cordova application and Fiddler with the Cordova PeopleSoft HTTP request highlighted.
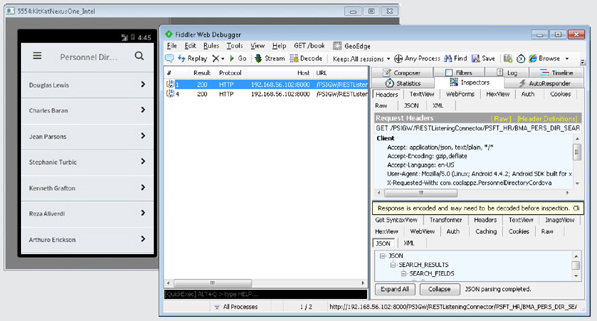
FIGURE 10-8. Cordova HTTP request displayed in Fiddler
Another option is to litter your JavaScript with console.log statements. The output of these statements is visible in the Android Device Monitor (monitor.bat) as well as the NetBeans Browser Log (visible when you launch a Cordova application from NetBeans).
Fixing Annoyances
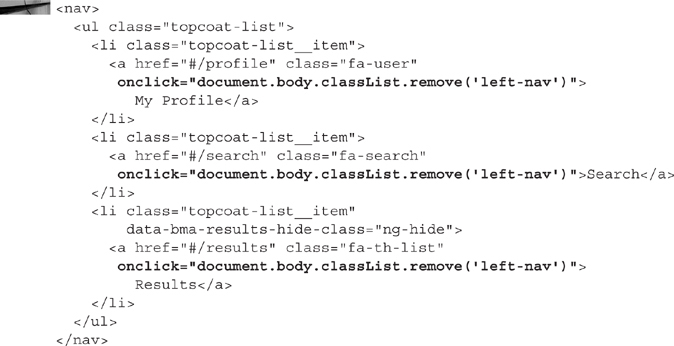
In Part II of this book, we created the user interface that we are now porting to Cordova. While building that user interface, we primarily used a desktop web browser, which has a much larger form factor than a mobile phone. In this chapter, however, we are using an emulator with a significantly smaller screen size. I don’t know about you, but I’m getting really annoyed that the side menu doesn’t automatically close when I click one of the links. If you haven’t experienced this, tap the “hamburger” menu button in the upper left corner of the Personnel Directory application. Now tap one of the links from the menu that appears. The new content will load but the menu will remain visible. We can hide the menu on click by adding a couple of lines to the index.html file. In NetBeans, open index.html and scroll through the text until you find the <nav> element. To each link within the nav element, add the attribute onclick='document.body.classList.remove('left-nav')'. Here is the nav fragment after making this change. The attribute additions are in bold.
After implementing this change, run the Cordova application again and verify that the side menu slides out of view when you tap a link from the menu bar.
Implement Authentication
Try to access My Profile from the side menu. Were you prompted for your credentials? When the page loaded, did you see any data? The answer is no. The Cordova application did not prompt for credentials. Since you aren’t authenticated, you won’t see any data. This is a critical difference between an HTML application running in Cordova and a web application delivered through a web browser. Basic authentication is built into a web browser. If you use one of the debugging techniques described above, such as Fiddler, you will see the 401 status code returned by PeopleSoft Integration Broker. What this means is that we have to handle authentication ourselves.
Let’s implement authentication by creating the following:
![]() A service to hold credentials for the duration of the user session.
A service to hold credentials for the duration of the user session.
![]() A login page to capture credentials.
A login page to capture credentials.
![]() A controller to marshal data between the login data model and the service.
A controller to marshal data between the login data model and the service.
The Authentication Service
Open your project’s js/services.js file and scroll to the end. Find the very last semicolon in the file and delete it. Next, add the following JavaScript to the end of the file:
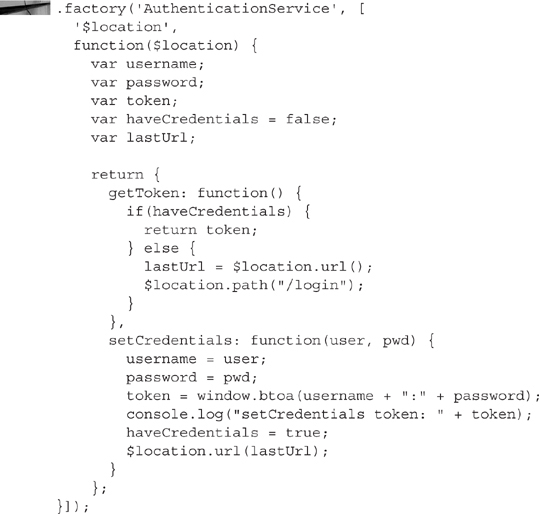
This factory method creates a service named AuthenticationService with two methods: getToken and setCredentials. The setCredentials method requires a user name and a password.
The Login Template
Now we need a way to prompt the user for the parameters to setCredentials. Inside the partials folder, create a new HTML file named login.html. Replace the contents of the login.html file with the following:
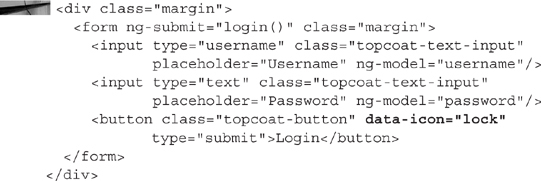
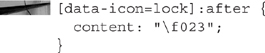
I added extra emphasis to the data-icon=“lock” attribute in the code sample. The point of this attribute is to insert a lock icon into the login/submit button. The CSS for this icon, however, does not yet exist. Open the css/app.css file from your PersonnelDirectoryCordova project and add the following:
Login Controller
Open the js/controller.js file and scroll to the very bottom. Delete the last semicolon present in that file and then append the following:
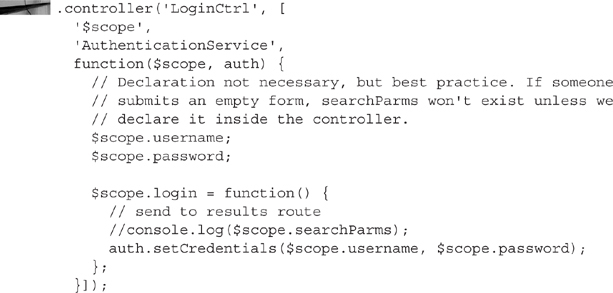
This code creates a controller for the login.html partial. It manages the data model for the login.html partial and then sends data to the AuthenticationService when a user taps the login button.
Unfortunately, it isn’t enough to just add a new controller. We also have to tell the profile controller (ProfileCtrl) to use the new AuthenticationService service. Locate the ProfileCtrl controller and insert the AuthenticationService dependency as shown in the following fragment:
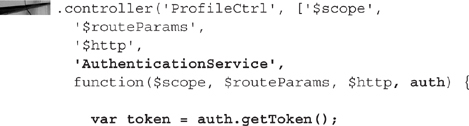
I snuck an extra line into that last code fragment. Now that we have a reference to the AuthenticationService, the extra line at the bottom of the fragment asks the service for its token. If the service has a token, then we can invoke the PeopleSoft REST service. If it does not have a token, however, well…we don’t have to worry about that. Our previous call to getToken will redirect to the login partial and ask the user for credentials.
The next fragment inside the ProfileCtrl controller contains a $http.get followed by a $scope.save. Wrap the $http.get in a logical if statement, but end that statement right before the $scope.save. Next, we need to add credentials to each of the profile’s $http.get requests. Here is the code for the complete ProfileCtrl controller after making these modifications (changes are in bold text):
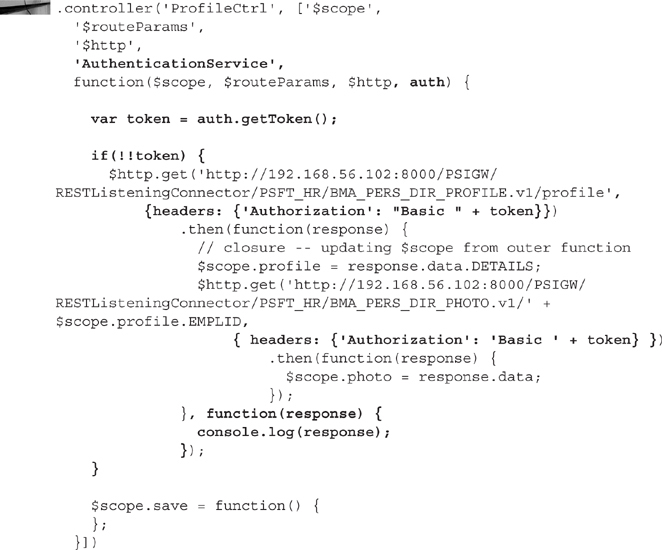
![]()
Since getToken will redirect to the login partial and prompt for credentials, you may be wondering why we need to test the token variable for a value. This is because the redirect doesn’t happen until after the controller finishes. The logical if statement helps us get to the finish line a little faster.
Now we just need a route to tie everything together. Open the js/app.js file and locate the otherwise route near the bottom. Just before that route, insert the following:
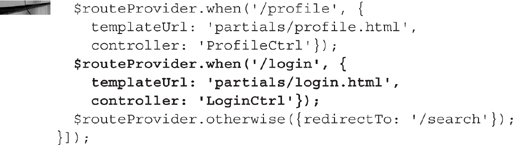
![]()
NOTE
I included the profile and otherwise routes for context.
Deploy and test the Cordova application again. This time when you attempt to access your profile page, you will be presented with a login page as shown in Figure 10-9. After authenticating you should see data appear in the profile page.
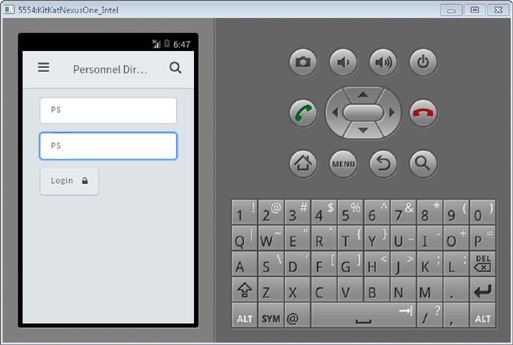
FIGURE 10-9. Personnel Directory authentication page
![]()
NOTE
The code in this example assumes the profile service is protected and preemptively inserts credentials. This is how custom applications access known protected resources, but is not the way basic authentication works on the Internet. When a browser attempts to access a protected resource, the server will return a 401 Not Authorized response. It is this response that tells a web browser to prompt the user for credentials. We could modify this example to test for a 401 return code before performing authentication. The tradeoff would be reduced performance over a broadband network due to the extra HTTP request to ensure you didn’t send credentials to a service that doesn’t require credentials.
Implementing Native Features
By using Cordova for our web application container we have already gained several benefits:
![]() Reduced bandwidth consumption by only sending data (no images, CSS, HTML, and so on)
Reduced bandwidth consumption by only sending data (no images, CSS, HTML, and so on)
![]() Easy access through an on-screen icon
Easy access through an on-screen icon
![]() Cross domain AJAX
Cross domain AJAX
One of the primary reasons for choosing a native implementation over a mobile web application, however, is the ability to leverage secure device capabilities such as the camera. Let’s extend this Cordova application to use the device camera. We can add on-click behavior to the profile page’s photo to launch the camera. This will allow the user to replace his or her profile photo with a selfie.
Updating the ProfileCtrl Controller
Normally the first step would be downloading and installing the camera Cordova plugin (or configuring it in NetBeans). We already have this plugin installed because we chose to keep it in the plugins.properties file when we were first configuring this project. The next step is to make Cordova features available to our application by adding the Cordova JavaScript file to index.html. Open index.html and scroll near the end, just before the first <script> tag. Insert the following below the <main> element and before the first <script> tag:
![]()
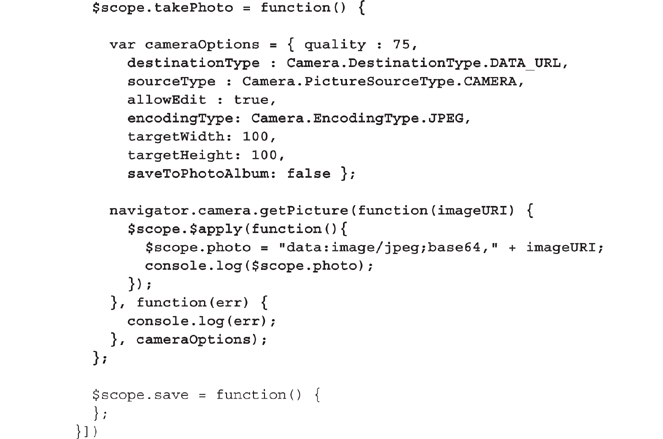
To the ProfileCtrl controller we need to add a scope method for taking photos. Later we will bind this to the ng-click attribute of the avatar img tag within the profile partial. Open the js/controllers.js file and scroll to the ProfileCtrl controller definition (it is pretty close to the bottom of the file). Add the following JavaScript just before the $scope.save method definition:
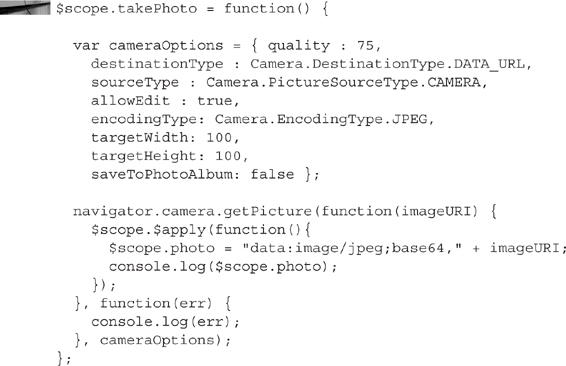
The above JavaScript configures the camera to return an image as base64 encoded data. As we learned in a previous chapter, we can specify base64 encoded data as the source for an HTML image tag. After configuring the camera, the code invokes the camera (navigator.camera.getPicture), passing in a reference to an anonymous callback function. The callback then updates the $scope.photo variable with the proper data URL containing the base64 encoded photo taken by the camera. An interesting feature of this code is the $scope.$apply. Since the callback will be invoked outside the AngularJS framework, AngularJS will not be notified of scope changes. $scope.$apply tells AngularJS to update references to variables updated within the $apply closure. Here is a complete listing of the ProfileCtrl controller with changes in bold:
Updating the Profile Partial
It is now time to bind the avatar to the $scope.photo model property and the ng-click attribute of the avatar to the $scope.takePhoto method. Open the partials/profile.html file and locate the <img> element. Update its attributes to resemble the following (changes in bold text):
![]()
Run the project by choosing Run | Run Project from the NetBeans menu bar. When your Personnel Directory application appears in the emulator, expose the side bar menu and access the Profile item. After the profile loads, tap the photo. The emulator camera should appear. Snap a photo of yourself and watch the emulator update the Profile page to display your photo. Figure 10-10 is a screenshot of the profile page after I took a selfie in my hotel room.
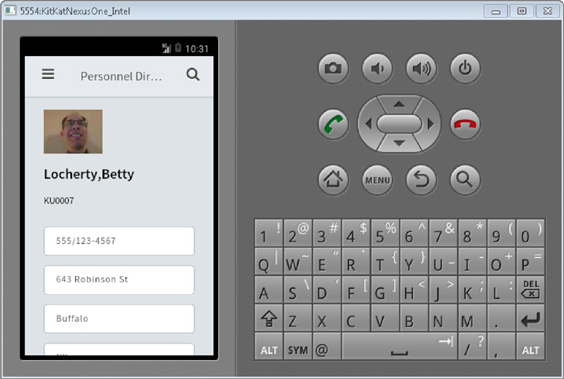
FIGURE 10-10. Selfie on the Profile page ready for upload
Conclusion
Through the example in this chapter, you learned how to install Apache Cordova, how to access PeopleSoft REST Service Operations from a Cordova hybrid application, and how to use the Cordova camera plugin. What about uploading the selfie to your PeopleSoft application? Implementing the PeopleSoft side of this service operation is beyond the scope of this chapter, but let me give you a few hints:
![]() Since the photo will contain a lot of information, you will POST to the REST service operation instead of using the GET HTTP method.
Since the photo will contain a lot of information, you will POST to the REST service operation instead of using the GET HTTP method.
![]() The server will receive a JSON document containing values from the profile page. You would therefore create a Document containing a matching structure to allow you to access properties of the JSON Document.
The server will receive a JSON document containing values from the profile page. You would therefore create a Document containing a matching structure to allow you to access properties of the JSON Document.
![]() The browser will send base64-encoded data. How you decode base64 is a matter of preference. You could, for example, use the PeopleTools 8.52+
The browser will send base64-encoded data. How you decode base64 is a matter of preference. You could, for example, use the PeopleTools 8.52+ File.WriteBase64StringToBinary method. After moving the image into a file, you could then use the PutAttachment PeopleCode function to copy the file into PeopleSoft application tables. Another option would be to stream the base64 data directly into the database using database-specific procedures to convert base64 to binary.
The next chapter will conclude this section of the book by showing you how to use the Oracle Mobile Application Framework (MAF) to consume PeopleSoft REST Service Operations. The development approach will be similar to using the Android SDK in Chapter 9, but the result will be a hybrid application, which is what we built in this chapter.