
14. Rock Out: Music on the iPad
In this chapter, you learn all about where to get—and not get—music for your iPad. You also find out how to use the app that stores, organizes, and plays your songs: Music. The topics in this chapter include:
• Using the built-in Music app
• Protecting your hearing
With all the cool Internet, chat, and FaceTime features on the iPad, don’t forget that it’s also a great music player! Whether you want to listen to your own music or stream songs over the Internet, the iPad puts thousands of your favorite songs right at your fingertips.
Getting Music for Your iPad
There are many things to keep in mind when looking for music for your iPad, such as whether it costs money, is it a download that you keep or a stream that you just listen to, and do you want to choose songs or listen to the radio? Luckily, there are a lot of options for where you can get music: CDs, online music stores, and apps are just some of the most common ways.
Ripping CDs
Even though the iPad doesn’t have a slot to put a CD in, you can still play the songs from almost any CD on it. To do this, you have to use a computer to convert the CDs you have into MP3 or AAC files (this is known as “ripping” a CD) and then sync them to your iPad. To rip a CD, launch iTunes on your computer and then follow these steps:
1. Put the CD you want to rip in your computer’s CD/DVD drive.
2. Depending on your iTunes settings, iTunes should automatically begin ripping the CD. If it doesn’t, click the CD icon in iTunes.
3. Click Import CD.
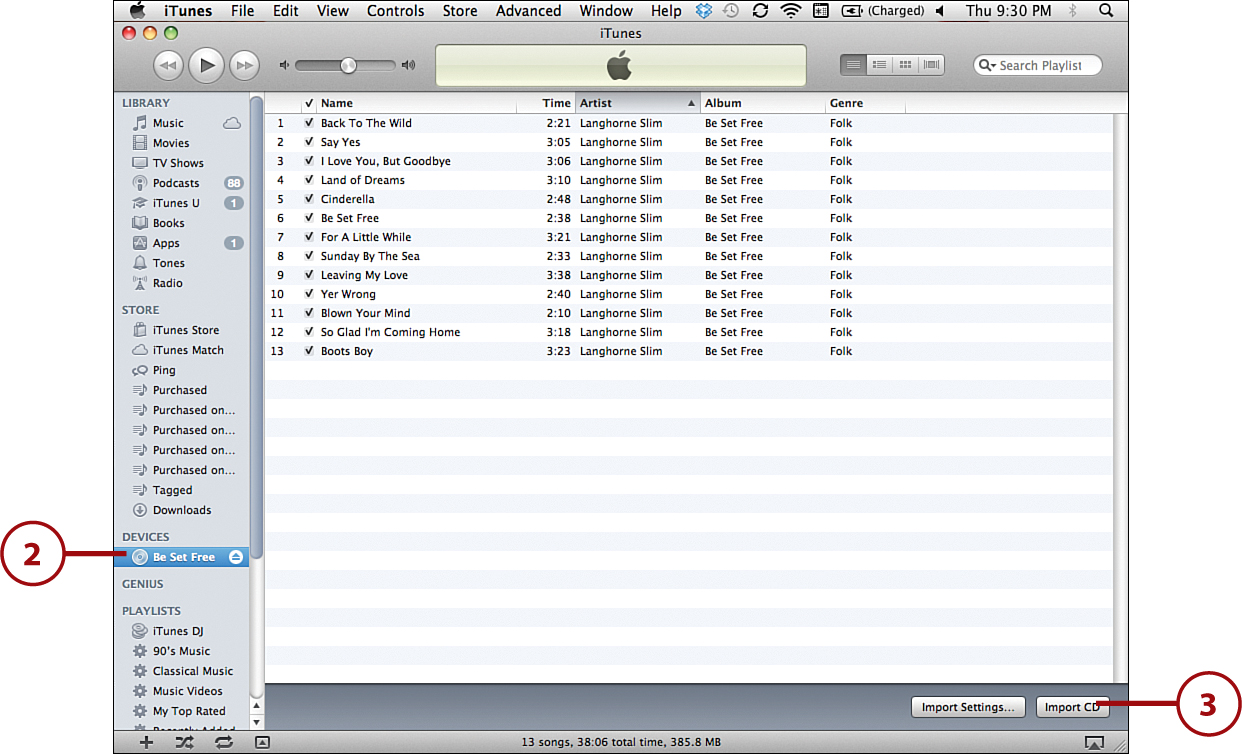
4. When iTunes is finished (it take a few minutes to rip a CD), the songs are in your computer’s iTunes library. To add the songs to your iPad, just sync. For a reminder on how to do that, check out “Setting Up and Syncing Your iPad” in Chapter 2, “Getting Started: Set Up and Sync Your iPad.”
iTunes and Other Online Music Stores
Aside from ripping CDs that you own, you can also ask your parents about buying songs at online music stores such as the iTunes Store or Amazon.com. Here are a few good music stores for iPad owners:
• iTunes—This is the main music store for all Apple products (including the iPhone and iPod). Your iPad comes with an iTunes Store app built in that lets you start shopping for music with just one tap. Songs at iTunes cost $0.69–$1.29, and albums cost about $7.99–$15.99. You need an iTunes account to buy the songs (you and your parents set one up back in the “Getting an Apple ID” section of Chapter 2, right?). When you buy a song, it downloads right to your iPad.
• Amazon—Amazon has about the same number of songs as iTunes and pretty much the same prices. One big difference is that Amazon puts music on sale more often, so if you pay attention, you can get the music you like for less than at iTunes. Just like with e-books, you need an Amazon account to buy here. You can’t buy music from Amazon on your iPad; you need to buy it on your computer at www.amazon.com/mp3.
• Google Play—Google Play is a lot like Amazon. It also has a large selection and offers sales. You can download music from it, but one neat feature of Google Play is the ability to store your music on the Web, so that you can listen to it anywhere you have a web browser. (You can do this with Amazon, too.) There are apps that let you listen to your Google Play or Amazon songs right on your iPad, but to buy music, you have to use http://play.google.com/store/music.
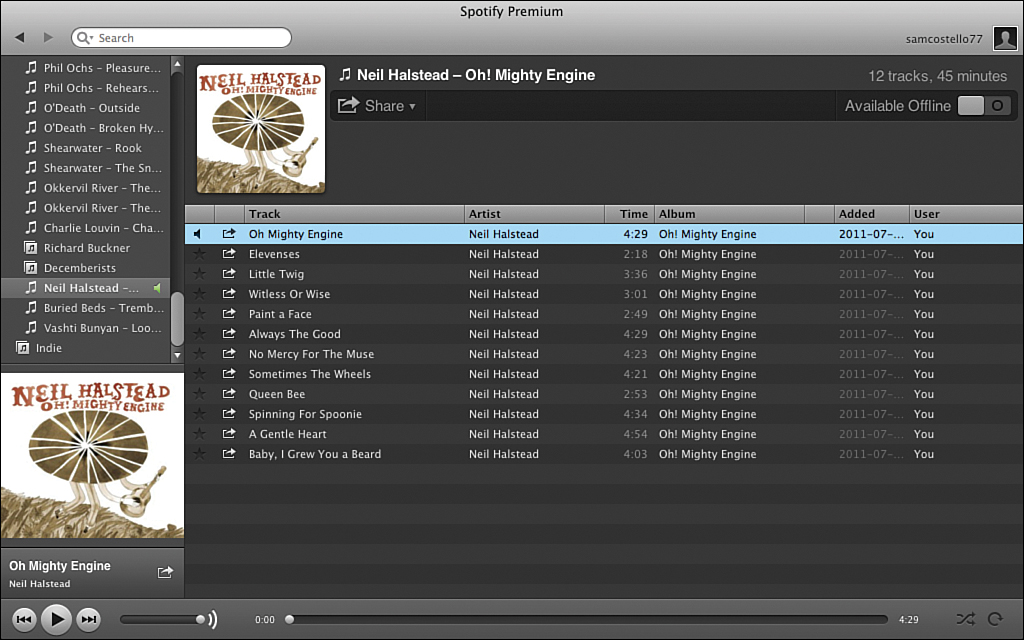
• Spotify—Spotify isn’t really a store; instead, it’s kind of like the radio. You search for the song or album you want to hear and listen to it over the Internet. If you want to use Spotify on your iPad, you need to pay $10 a month, which gives you unlimited listening, no ads interrupting the music, and the ability to listen to songs even when your iPad isn’t on the Internet. You need your parents’ permission to get a Spotify account, but if you have it, you can sign up at http://www.spotify.com.
Apps
A lot of apps give you free music. Most of them won’t let you save the music they give you; instead, you use them to stream songs over the Internet to your iPad, much like listening to the radio (some of these apps are radio stations). Because you’re streaming the music, you need to be connected to the Internet to use them. Even though you don’t own the songs you hear in these apps, you can still listen to a ton of free tunes with them. Check out “Awesome Apps,” later in this chapter, for some recommendations.
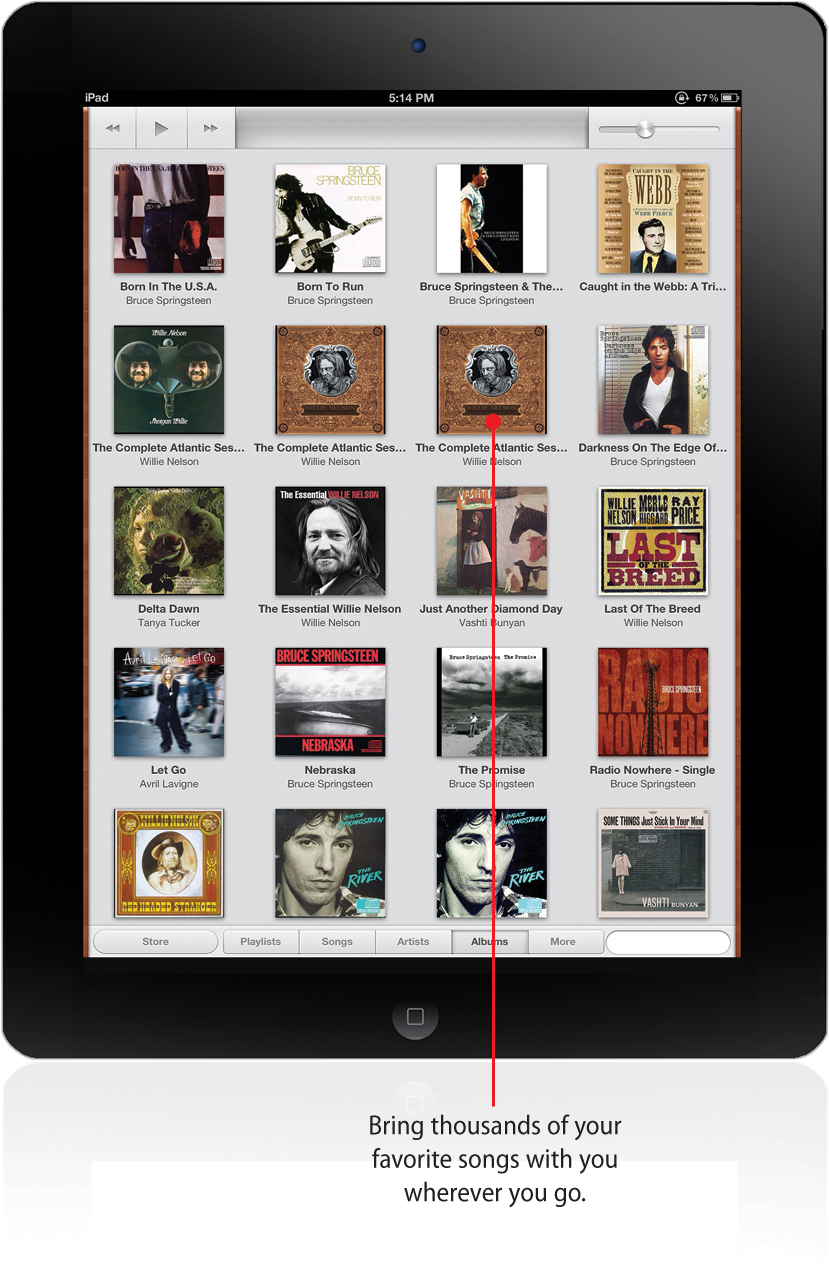
Using the Music App
When you’ve added music to your iPad, there’s no need to get a new app to listen to it. Just like with email, web browsing, and video chatting, your iPad comes with a built-in music player app. That app is called Music.
Playing Music
To play music on your iPad, tap the Music app to launch it and then follow these steps:
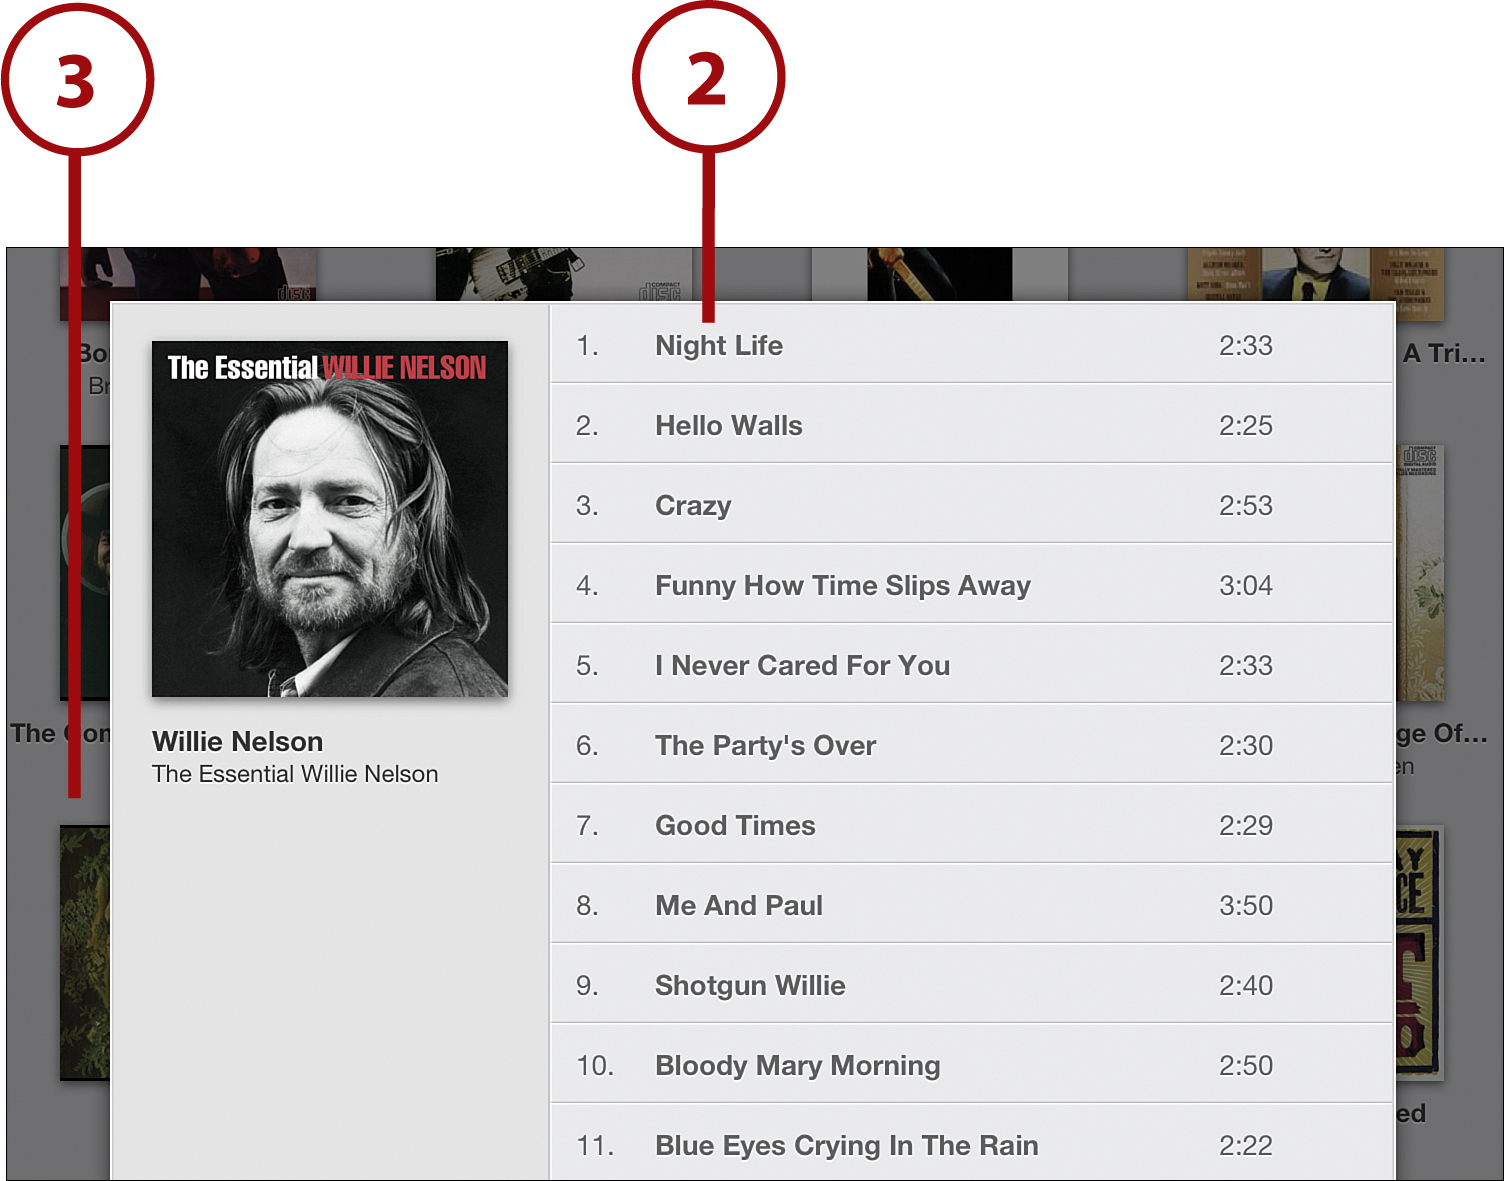
1. You see your music categorized by Album. Tap the album you want to listen to.
2. If you want to just listen to one song, tap that song. If you want to listen to the whole album, tap the first song and let it play.
3. To get rid of the song window, tap on the background of the app.
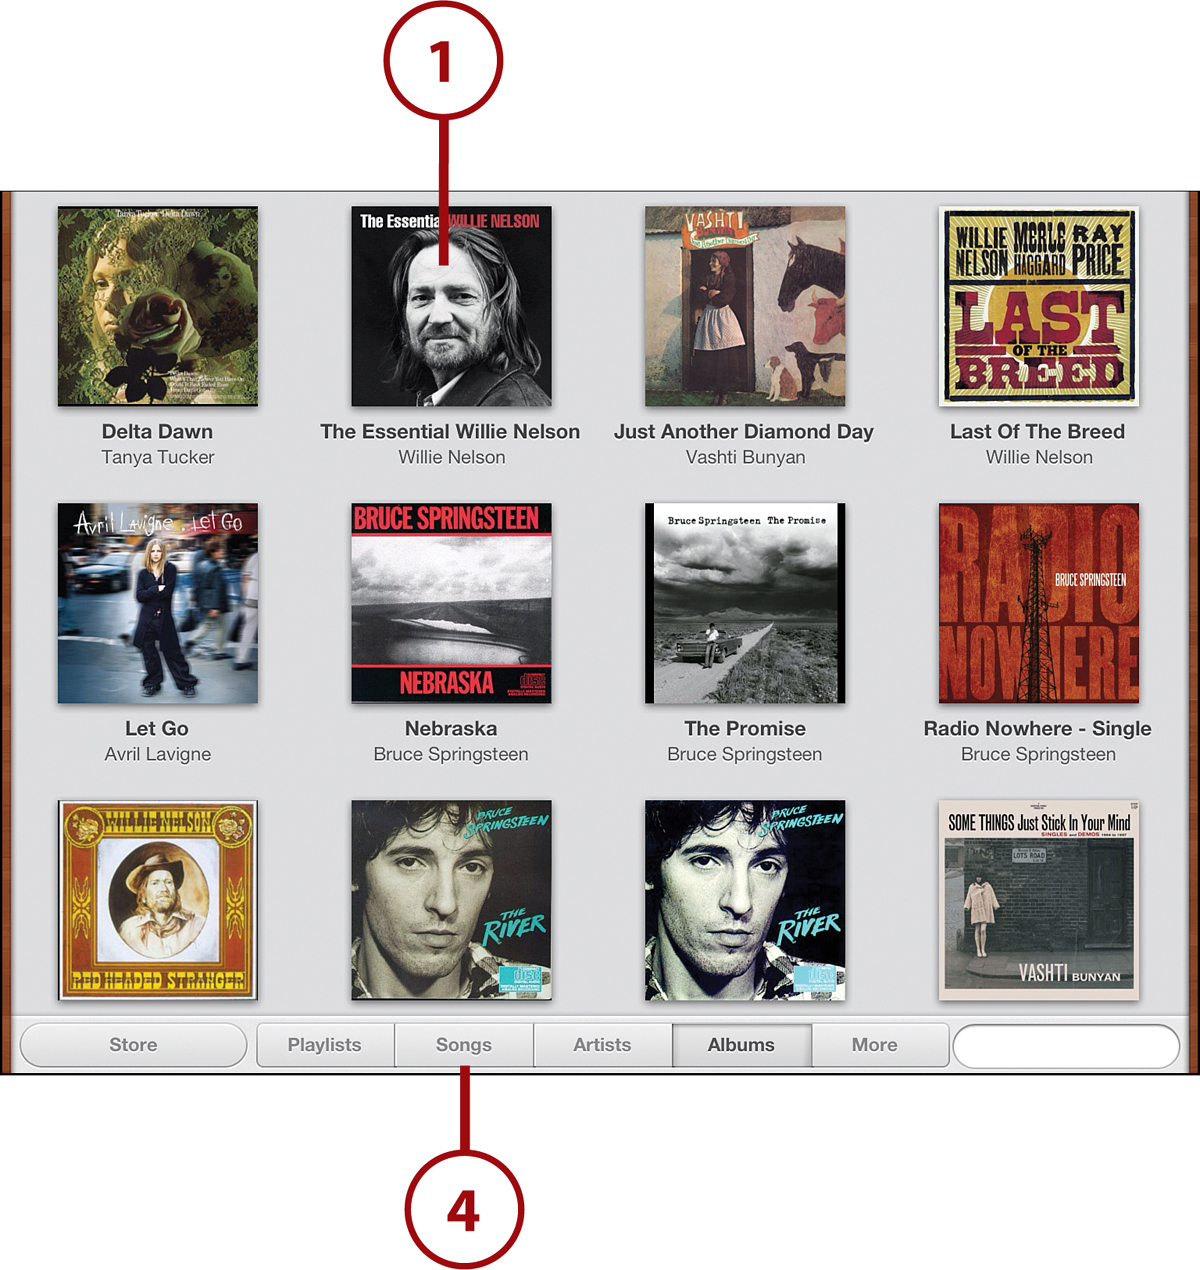
4. If you want to see your music organized in other ways, such as by artists or songs, you can tap the buttons along the bottom of the screen.
Music App Options and Controls
When music is playing, the row of buttons across the top of the app control the music, volume, and other features. Here’s what they do:
• Play/Pause/Forward/Back—These are the most basic controls. To go to the last song you heard, tap the arrow that points left. To skip to the next song, tap the arrow pointing right. Tap the big button in the middle to pause a song and tap it a second time to start playing it again.
• Album art—You can tap the little square album so it enlarges to fill the screen. Tap the cover to show the controls, or tap a second time to hide them. When the cover is filling the screen, tap the arrow in the bottom left to go back to the last screen or the three lines in the bottom right to see all songs on the album.
• Repeat song—Like a song so much that you want to hear it over and over? Tap the button that looks like two arrows chasing each other to repeat the song. Repeat is on when the button is black. Tap it a second time to repeat the song just one time. Tap it one more time to turn repeat off.
• Move forward/back in the song—The long bar with the orange line in it lets you skip forward to another part of a song or hear a certain part again. It also shows how much of the song has played and how much is left. Tap and drag the orange line to move around in the song. When you let it go, the song starts playing at that point in the song.
• Shuffle—If you like to listen to songs in random order, tap the Shuffle button. It looks like two arrows crossing over each other. The button is black when it’s on and white when it’s off.
• Genius Playlist—Your iPad creates this playlist starting with what you’re currently listening to. It adds other music to the playlist that it thinks will sound good together.
• Volume—Use this slider to control the volume (the right side of the slider is louder). You can also adjust the volume with the up/down button on the right side of the iPad.
• Store—To move over to the iTunes Store app to buy new music, tap the Store button.
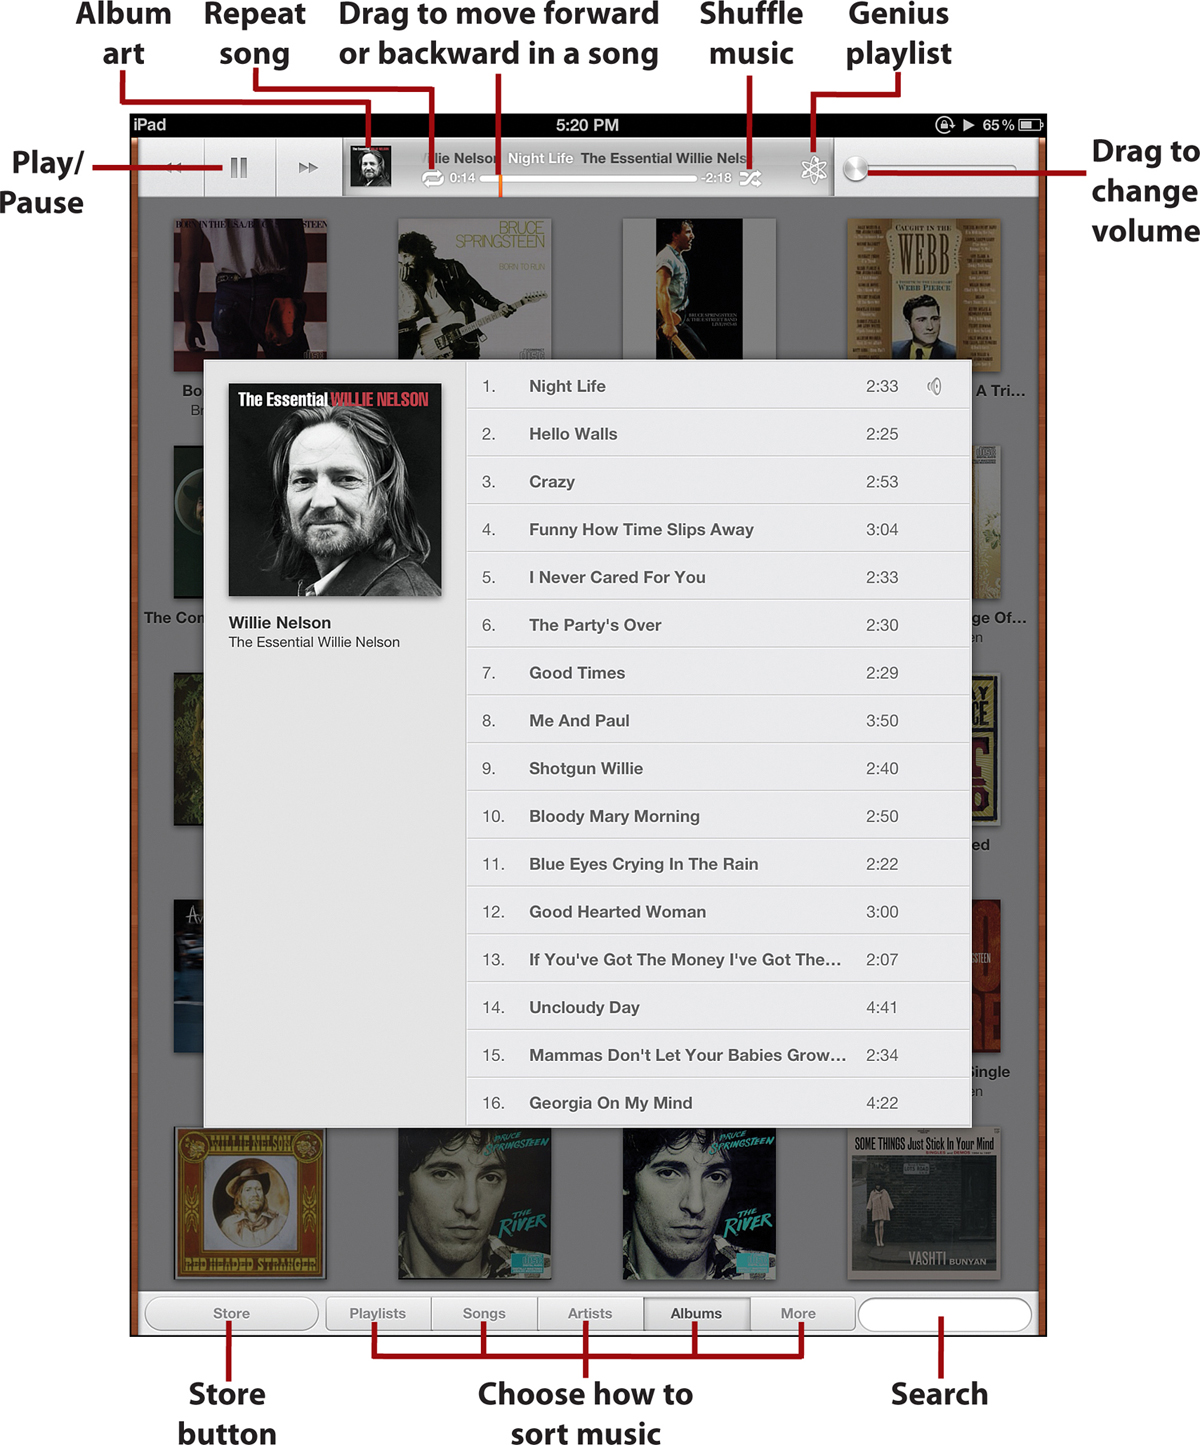
• Bottom buttons—Use the buttons along the bottom to choose how you see your music. Want to see it sorted by the name of the song? Tap Song. Tap Artists to see a list of all the different musicians and bands.
• Search—Want to search all the songs on your iPad? Tap in this box and type the song, artist, or album you’re looking for.
If you want to shuffle all the songs on your iPad for a mega-mix, tap the Songs button at the bottom of the app. Tap the Shuffle button to turn on the Shuffle feature. Then tap the Play button, and rock on!
Making and Using Playlists
Do you want to put together a collection of your favorite songs in the order you like best? Want to make a mix of songs for a trip or to celebrate an event such as a birthday? Then you need a playlist. Here’s how to make and edit one.
Making a Playlist
To make a new playlist, you first have to tap the Music app to open it. Then follow these steps:
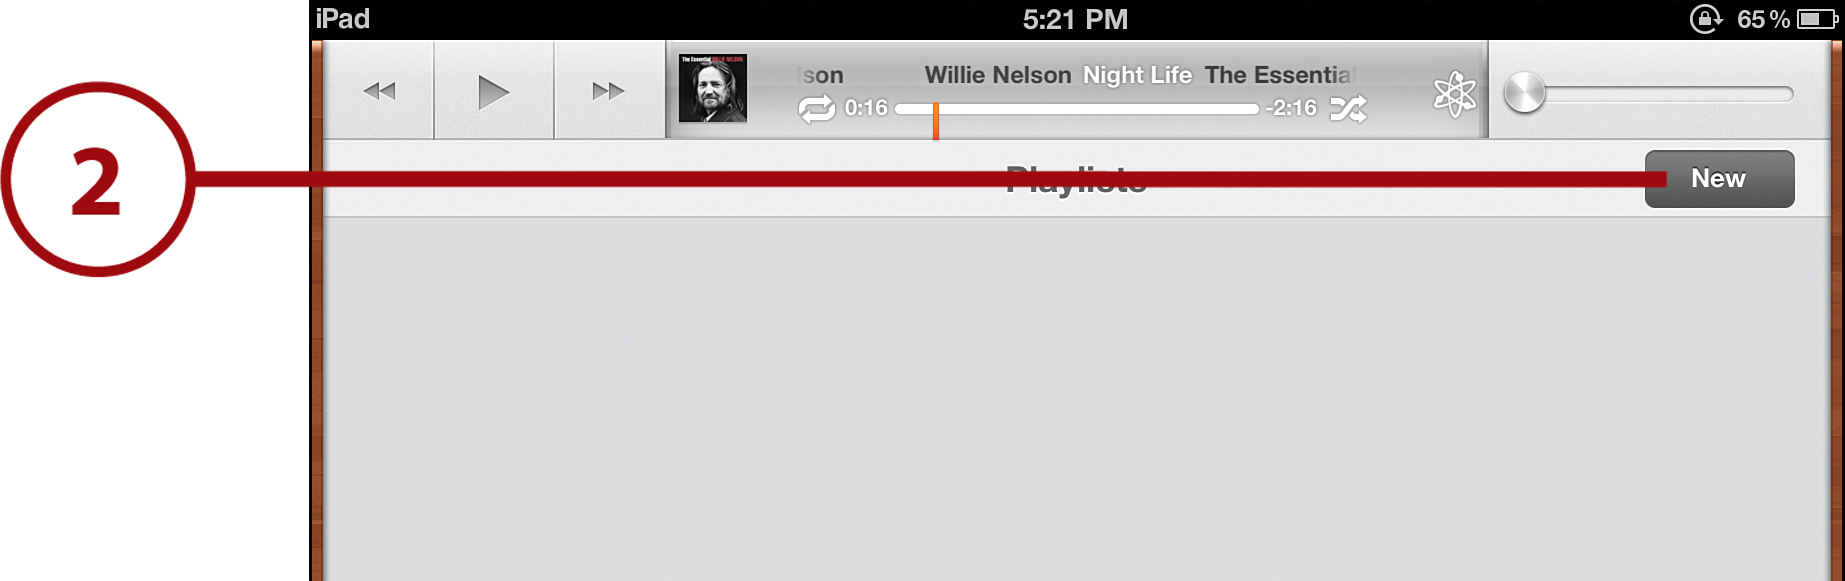
1. Tap Playlists to begin creating a playlist.

2. Tap New to create a new playlist.
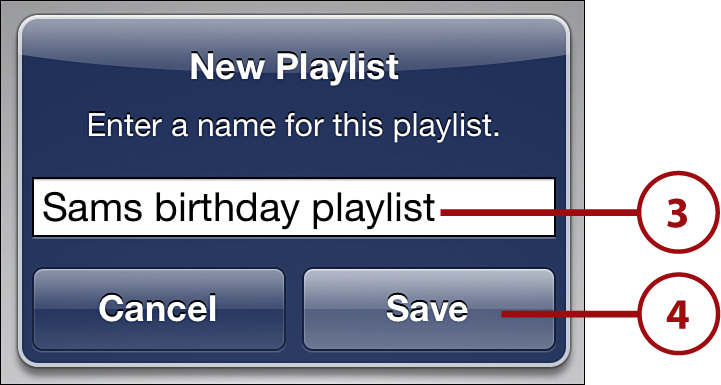
3. Give your playlist a name.
4. Tap Save.
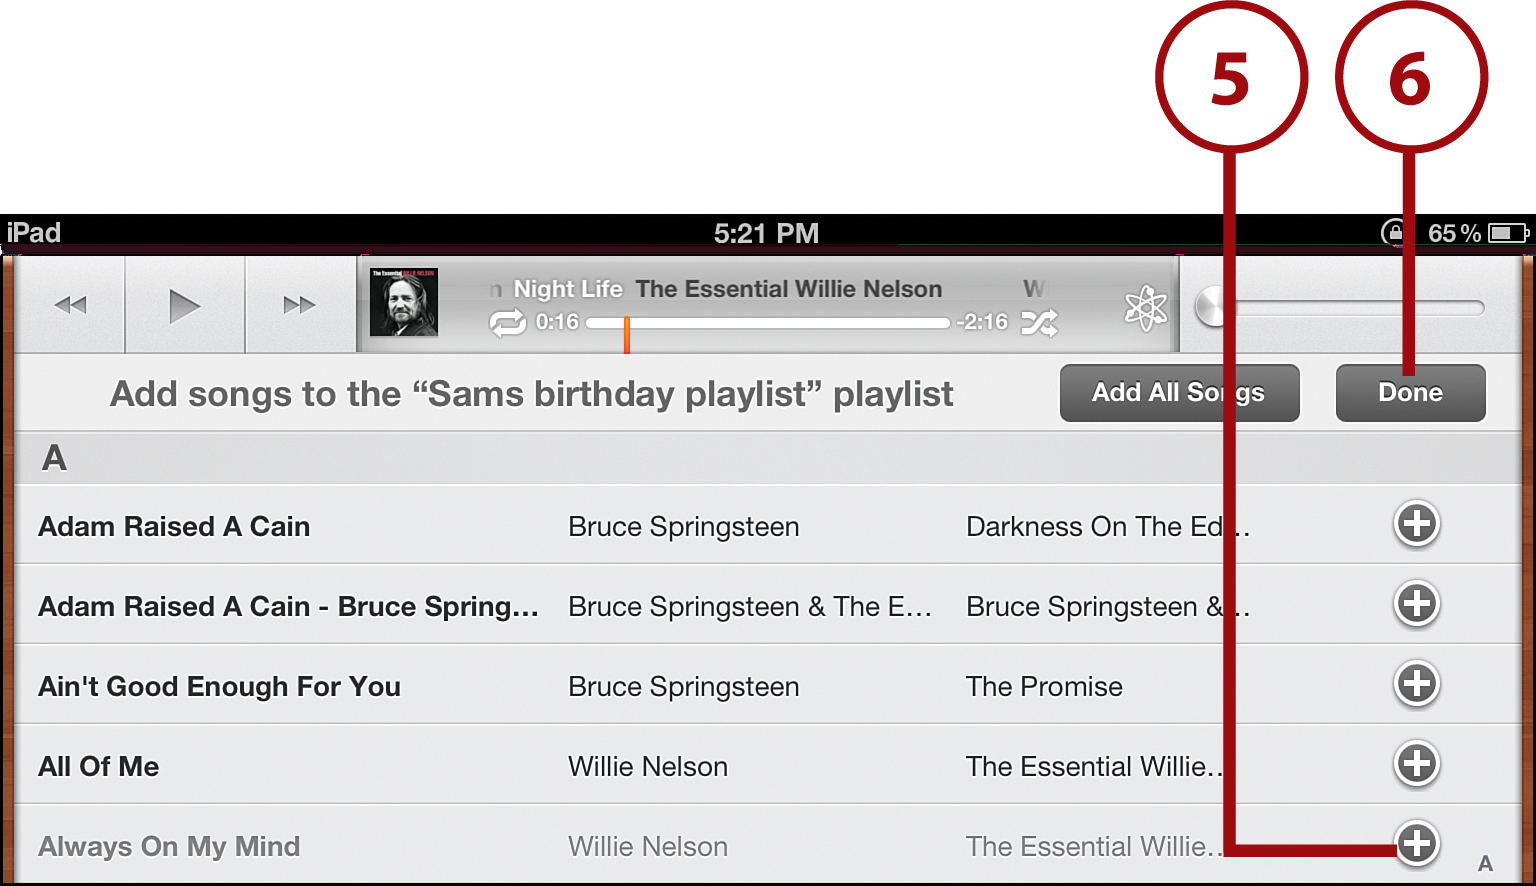
5. A list of all the songs on your iPad pops up. Find a song that you want and tap the + next to the song to add it to the playlist. Repeat this for every song you want to put in the playlist.
6. When you’ve added all the songs you want, tap Done.
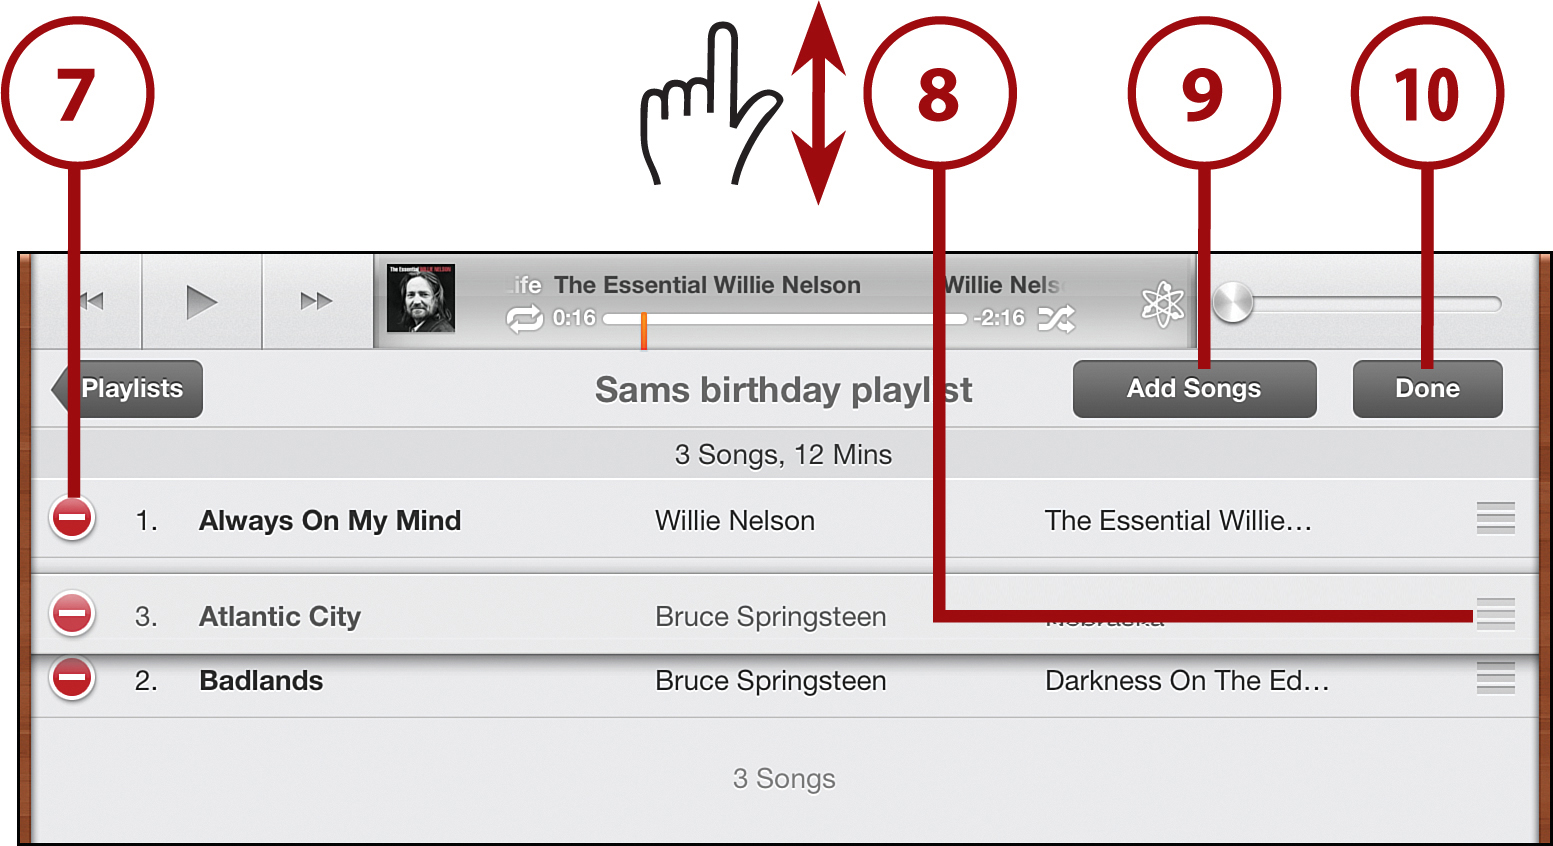
7. You see your playlist. You can delete songs by tapping the red icon and then Delete.
8. Rearrange the order of the songs by tapping and holding the three lines next to a song and dragging it to a new place in the list.
9. Add more songs by tapping Add Songs and choosing songs from your iPad, just like you did in step 5.
10. If you like the playlist you’ve made and want to keep it, tap Done to save it.
Syncing Playlists from Your Computer
The Music app isn’t the only place you can make playlists. You can also create them in iTunes on your desktop or laptop computer. If you’ve done that, you can add those playlists to your iPad by syncing. For a reminder of how to sync, check out “Setting Up and Syncing Your iPad” in Chapter 2.
Deleting a Playlist
When you don’t like a playlist anymore, the event you made it for has passed, or you just want to freshen things up, you can delete playlists. When you do, you’re deleting only the playlist, not the songs in it, so you don’t have to worry about losing your music.
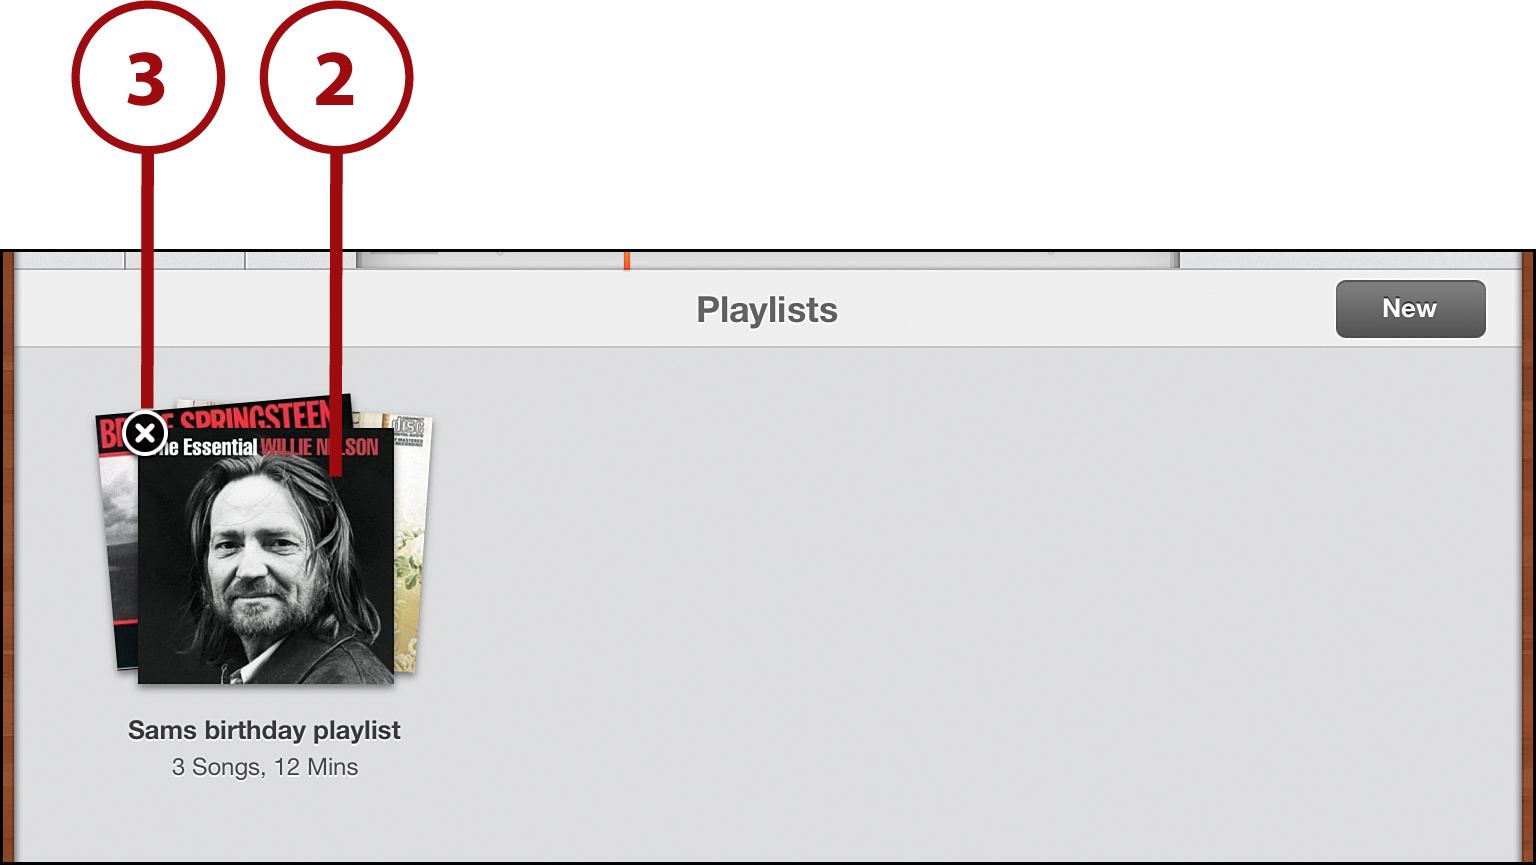
1. To delete a playlist, display all your playlists by tapping the Playlist button in the Music app.
2. Tap and hold on the playlist you want to delete until an X appears on it.
3. Tap the X and the playlist is deleted. Make sure you really want to delete it, though—after you tap that X, the playlist is gone for good.
Listen Carefully: Protecting Your Hearing
You can hurt your hearing if you listen to music or TV too loud. Your parents probably warn you about this kind of thing all the time—and they’re right. That might not seem very serious now, but you don’t want to be wearing your grandmother’s hearing aid when you’re in college, do you?
Your iPad is a great music player, but you have to be careful about how you use it. If you’re playing music through the iPad’s speaker, there’s not much to worry about—that speaker can only get so loud. But if you’re listening to music through headphones, here are four things you can do to protect your hearing:
• Not so loud! This might seem obvious, but loud music is a very common source of hearing loss in young adults. Try to keep your iPad’s volume at 75% or less of the maximum—and never listen to your iPad as loud as it can go.
• Use the Volume Control setting. It can be hard to remember to pay attention to your iPad’s volume when you’re enjoying a song, so let a setting called Volume Control do it for you. Volume Control sets a limit on how loud your iPad can get. To use it, just go to the Music section of the Settings app and tap Volume Limit. Move the slider to the middle of the line and then tap Lock Volume Limit. Your iPad asks you to create a four-digit code. Now, whenever you want to go past the limit, you have to remember that code.
• Don’t listen too long. Giving your ears a break can help keep them from getting damaged. Every time you listen for an hour, take a 10–15 minute break.
• Ditch the earbuds. Your iPad comes with Apple’s trademark white earbuds, but they’re actually not that good for your hearing. Because the earbuds go right inside your ears, they’re closer to your eardrums and can cause more damage. Get headphones that fit over your ears, instead of inside them.
Awesome Apps
Here are some great apps that you can use to listen to music, sports, and radio on your iPad for not much money (another reason to have an iTunes Allowance!) or even for free. Search for them at the App Store.
• iHeartRadio—You can listen to more than 750 live radio stations from across the U.S. with this app. It basically turns your iPad into a radio that works over the Internet and lets you listen to stations from far, far away instead of just those in your local area. Free
• NPR for iPad and Music—This is actually two different apps from the same organization. The NPR for iPad app helps you stay up to date on important news and events. It also gives you news articles to read, NPR podcasts, and the ability to listen to NPR stations from all over the country. The NPR Music app focuses just on podcasts, music, and live concerts. Free
• Pandora and Last.fm—These two apps take radio to the next level because they let you be the DJ. Instead of listening to a radio station created by someone else, they let you choose a song or musician you like and then play other songs that are similar so you can discover new music that you like. Pandora lets you listen to 40 hours a month for free, but Last.fm is unlimited. Both are free
• Shazam and SoundHound—Ever heard a song that you love but you don’t know its name? These apps can help. Next time you’re in that situation, just launch one of them, hold your iPad up to the nearest speaker, and, if you have an Internet connection, they tell you what the song is called, who sings it, and where to buy it. Kind of like magic, huh? Shazam is free; SoundHound is free or $6.99 for a version without ads