Chapter Six. Shooting People Like a Pro
Tips for Making People Look Their Very Best
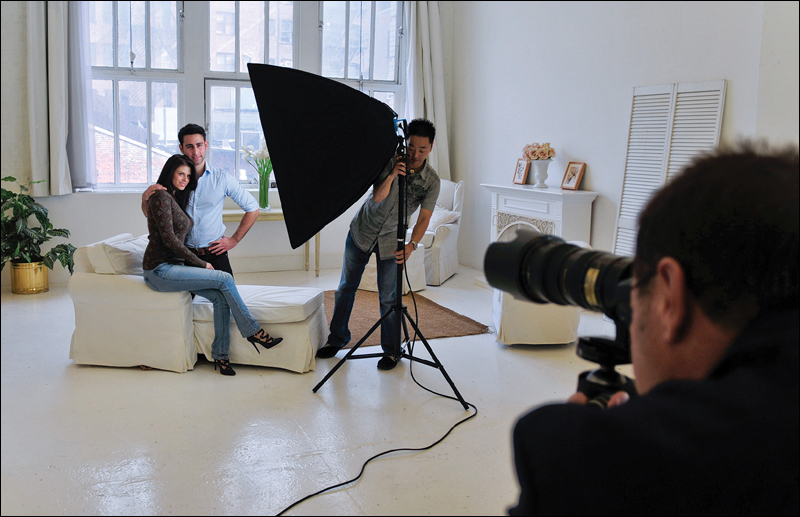
SHUTTER SPEED: 1/125 SEC F-STOP: F/13 ISO: 100 FOCAL LENGTH: 185MM | PHOTOGRAPHER: SCOTT KELBY

Now, the subhead above says this chapter is how to make people look their very best, and that is kind of misleading because it’s really about making your photos of people look better. If you’ve got some really ugly looking people in your photos, there’s not much you or I can do to help these poor souls. They’ve been hit with the ugly stick, and they don’t make a digital camera that will make these people, who didn’t have a date for the prom, suddenly look like Mila Kunis or Channing Tatum (who, not coincidentally, were chosen as the Sexiest Woman Alive by Esquire magazine and Sexiest Man Alive by People magazine, just in case you cared). By the way, although I did not make last year’s cut, if you read my bio at the beginning of this book, you learned that I was among People magazine’s top 50 sexiest picks back in 2004. This surprises many people, including my wife, as she has no recollection of this whatsoever, but I’m actually thankful for that because she has also completely erased any memory of my brief but highly publicized affair with Angelina Jolie while we were filming the movie Taking Lives in Toronto. But I digress. Now this chapter isn’t so much about studio portrait techniques, because if you’re shooting in a studio, then you’re a professional photographer and, honestly, this chapter (and this book for that matter) really isn’t for you. This is really for getting better outdoor, or candid, or posed shots that are supposed to look candid, but really aren’t, but you can tell they are because they’re posed. Are you taking all this down?
The Best Lens for Portrait Photography
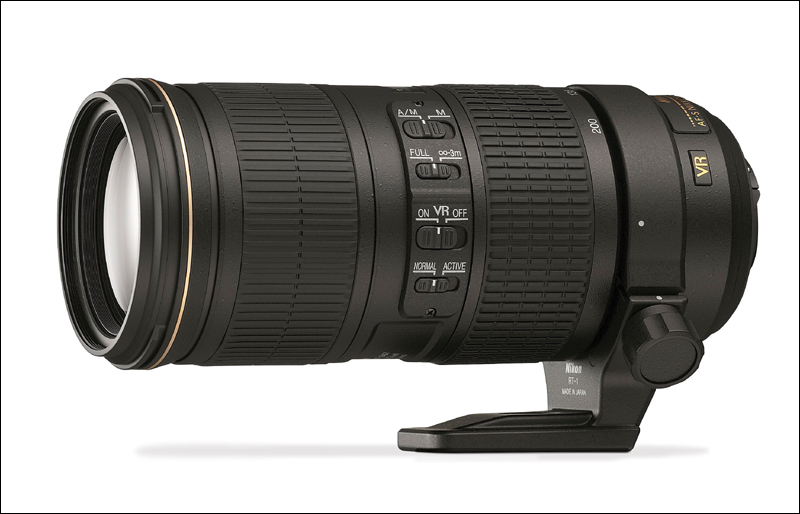
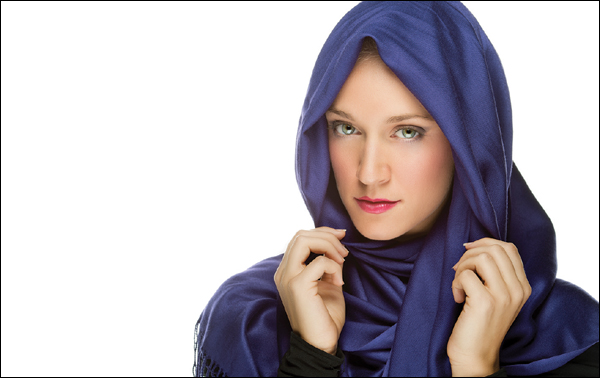
There are not many aspects of photography that have a specific focal length you should try to shoot with, but luckily portrait photography is one of them because there’s kind of a “sweet spot” that pros generally choose, and that’s anywhere between an 85mm focal length and a 105mm range (these are pretty much thought of as “classic” portrait focal lengths). The main reason these focal lengths are popular is that they are literally flattering to your subjects. At lengths 85mm and over, these lenses provide a really flattering perspective and compression that makes people look great (by the way, you can go farther than 105mm. In fact, my go-to portrait lens is my 70–200mm, and I normally shoot somewhere between 150mm and 200mm). Although this is the kind of topic people love to argue endlessly about in online photography forums, I can tell you that most pros I know shoot portraits with an 85mm telephoto lens or longer. By the way, another benefit of shooting with a longer focal length like this is that you don’t wind up being right in your subject’s face with your lens—the telephoto lens puts some breathing room between you and their face—and if your subject is more comfortable, that usually translates into better-looking images. (Note: Nikon, Canon, and Sony all make zoom lenses that fall somewhere in this portrait focal range, as do Sigma and Tamron, so you’ll have plenty to choose from in that sweet spot of around 85mm to 105mm, up to 200mm. Also, don’t forget, you can buy a 24–105mm, a 24–120mm, or a 70–200mm. Just don’t shoot portraits in those lower ranges—use the long end of the zoom, starting at around 85mm and going up from there.)
Which Aperture to Use
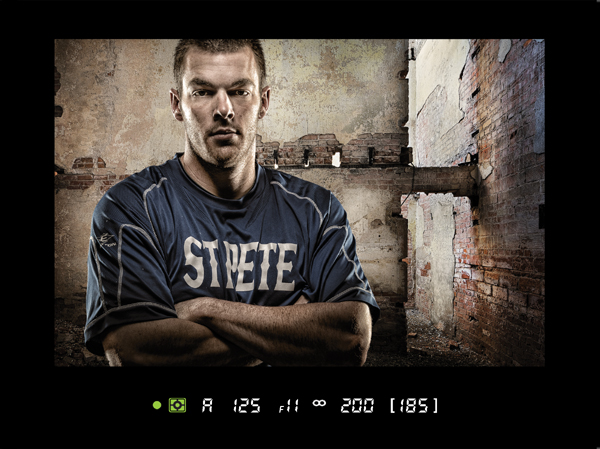
One thing I love about portrait photography is that a lot of the decisions are made for you (like which lens/focal length to use), so you can focus on the harder parts of portrait photography—ensuring that you have great light and capturing the personality of your subject. So, now that you know which lens to use, believe it or not (and this is very rare), there is a special aperture (f-stop) that seems to work best for most portrait photography. When it comes to portraits, f/11 is the ticket because it provides great sharpness and depth on the face (and isn’t that what portraits are all about?), which gives you a great overall look for most portrait photography (now, I say “most” because there are some artistic reasons why you might want to try a different aperture if you’re trying to get a special effect, but for the most part you can choose aperture priority mode, set your aperture at f/11, and then worry about the really important stuff—the lighting, capturing your subject’s personality, how much to bill your client, etc.). Okay, as always, there’s an exception to every rule, so see page 118 for when f/11 wouldn’t be your first choice.
Using Seamless Backgrounds
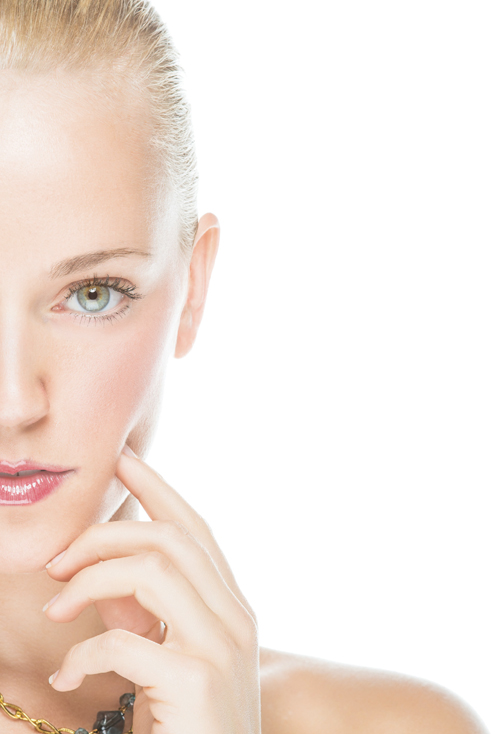
Backgrounds provide quite a challenge for portrait photographers because they generally get in the way of the portrait photographer’s goal—capturing the personality, the drama, the soul (if you will) of the person they’re shooting. That’s why so many portrait photographers shoot their subjects on as plain a background as possible. In the studio, perhaps the least expensive option is to use a seamless background—these are very inexpensive because they’re made of paper. That’s right, it’s just a big giant roll of paper, and a standard size (53"x36′) will only run you about $22. That ain’t bad for a professional studio background (you can find these backgrounds at your local camera store). Some photographers tape it to the wall, others nail it to the wall, but the best option is probably to buy an inexpensive stand that holds the roll up for you (you can get a decent one for around $70). Now, which colors should you use? For starters, stick with black (for dramatic portraits) or white (for everything else). The nice thing about a white seamless background is that it usually appears as a shade of gray. To make it really appear white like the one above, you’ll have to aim one or more lights at the background or the light from your flashes will fall off, giving you a gray backround. Gray is not a bad background color (in fact, it’s very popular), but if you’re really going for white, make sure to position one or two lights behind your subject, aiming at the background itself. If you go with a black seamless background, you may need an extra light to backlight your subject (especially if they have dark hair), so they stand out against the black.
Canvas or muslin backgrounds aren’t quite as cheap—I mean as inexpensive—as seamless rolls, but they’re inexpensive enough that you should consider using one as a formal background, as well (a decent canvas background only runs around $140). These backgrounds are seamless too, and I’d recommend buying one (at least to start) that’s kind of neutral, like one that’s mostly gray or mostly brown. These backgrounds add texture to your photo without distracting from the subject, and they’re very popular for use in everything from formal business portraits to engagement photos. Again, an inexpensive stand will pay for itself in no time (they start at around $70), and you’ll be amazed at how quickly you can change the look of your background by repositioning your lighting.
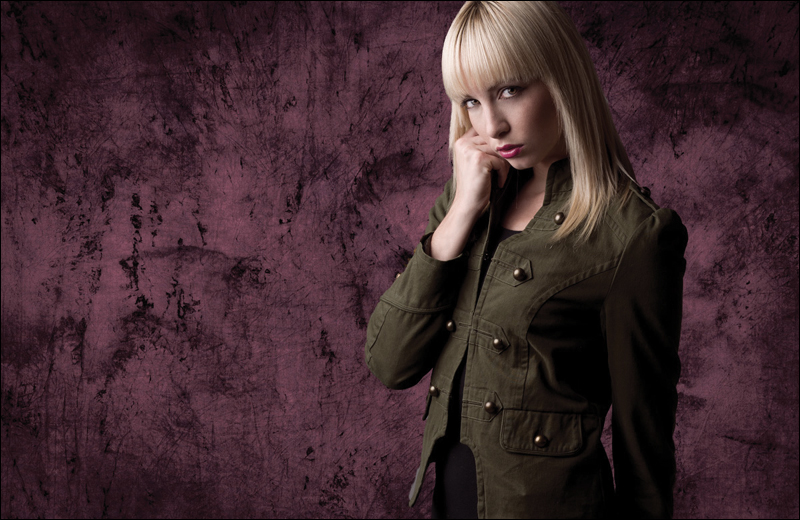
The Right Background Outdoors
When shooting portraits outdoors, you’re not going to be able to use a muslin background or seamless paper (did I even have to say that?), and because of that you have to think about your background even more. The background rule for shooting portraits outdoors is to keep the background as simple as possible. The simpler the background, the stronger your portrait will be, so position your subject where the least possible amount of activity is going on behind them. Here’s where you might want to break the f/11 rule, so you can throw the background out of focus by using an aperture like f/2.8 or f/4 with the portrait focal length you like best. Remember, when it comes to portrait backgrounds outdoors, less is more.
Where to Focus
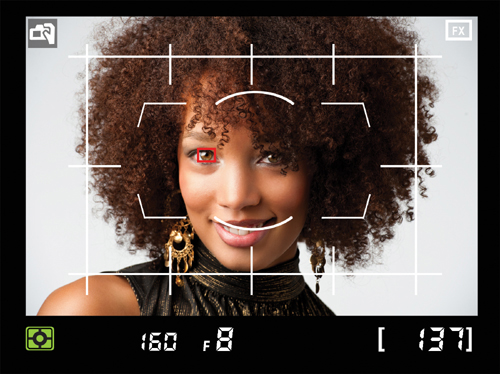
Over the years, there have been conflicting thoughts as to where the optimal place is to focus your camera when shooting portraits (the cheek, the tip of the nose, the hairline, etc.). Luckily, today the consensus is fairly clear (you’ll still find some cheek holdouts here and there, but don’t let them throw you): focus directly on the subject’s eyes. By shooting at f/11 and focusing on the eyes, this will give you a nice level of sharpness throughout the face (and most importantly, the eyes will be tack sharp, and in portraits that is absolutely critical).
Where to Position Your Camera
Portraits generally look best when you position your camera at the subject’s eye level, so set your tripod up so you’re shooting level with their eyes. This is particularly important when shooting children—don’t shoot down on children (just like you don’t shoot down on flowers), or you’ll wind up with some very disappointing shots. So, with kids, you’re either going to raise them up to your eye level (on a tall seat) or you’re going to lower your tripod down to their eye level and shoot on your knees (I know—the indignities we have to suffer for our craft and all that...). Also, now that you’re at the right height, about how far back should you position your tripod from your subject? Your focal length will pretty much dictate that for you, but if you’re about 6 to10 feet from your subject, depending on your lens, you’ll be in good shape.
Positioning Your Subject in the Frame
If you’re shooting portraits, especially candid portraits or editorial style shots, there’s a rule that many pros use about where to position the subject’s eyes in the frame—position them 1/3 of the way down from the top of the frame. This is another one of those tricks that gives your portraits more visual interest, and it’s easy enough to do since you just compose the shot so your subject’s eyes are 1/3 of the way down from the top.
Tip for Framing Portraits

If you’re looking for another tip for great portrait shots, try zooming in close so your subject’s face nearly fills the entire frame. Also try zooming in close enough so that either the top of their hair, or even the top of their head, gets cut off and extends outside of the frame. This is a very popular look in professional headshots, and you see it all the time in magazines, in ads, and on the web, so don’t be afraid to cut off their hair or the top of their head—it can make for a more dynamic portrait.
Getting Great Light Outdoors
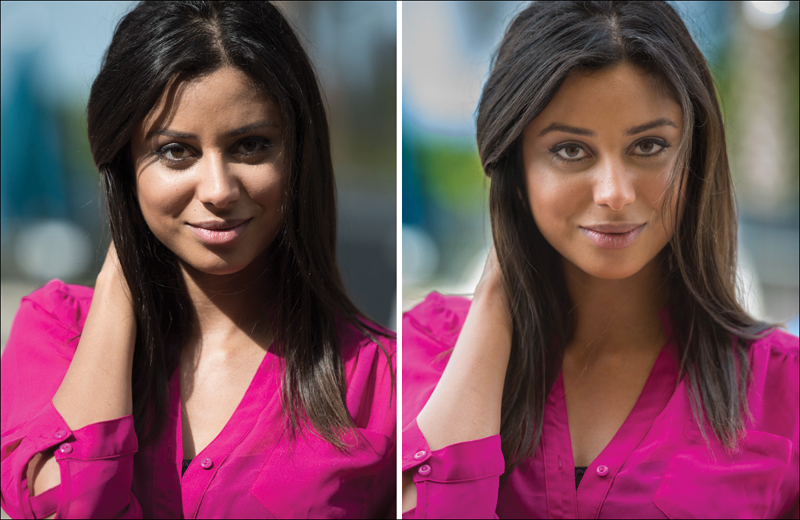
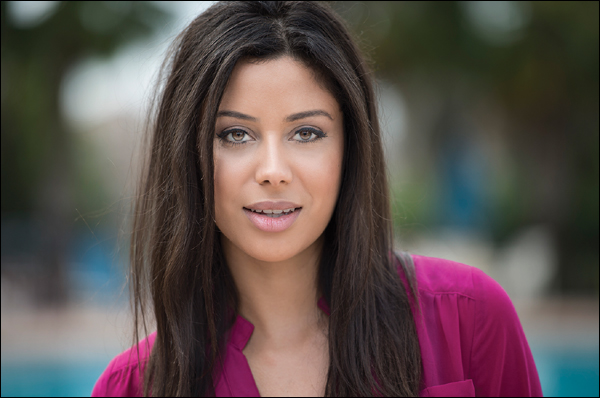
Although there’s plenty of light for shooting portraits outdoors in the middle of the day, most of that light is very direct and will wind up casting hard, unflattering shadows on your subject’s face (not to mention that your subject will usually be squinting, sweating, or both). So, how do you get great outdoor portraits at two o’clock in the afternoon? It’s easy—move your subject into the shade, where the light is softer, and the shadows are less prominent and much softer. Now, don’t move into a cave—just move to a shady area near the direct sunlight (typical places include under a large tree, under the overhang of a building or house, on the porch of a house, under an umbrella, etc.). Just find a place you’d normally go to get out of the sun on a hot day, and you’re ready to get portraits where your subject isn’t squinting, and the light is soft and flattering. The photos above perfectly demonstrate the advantage of doing this. The shot on the left was taken in direct sunlight and the shot on the right, of the same model in a similar pose, was taken one minute later less than 30 feet away but in open shade. Notice how much softer and warmer the light is, how vibrant the color is, and how much better the same model looks. All I did was move her into the shade. It makes that big a difference.
Getting Great Light Indoors
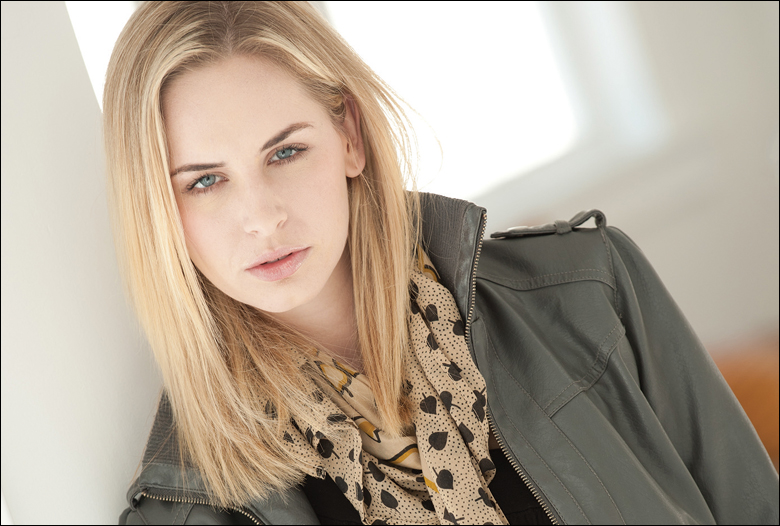
What’s the pros’ trick for getting great portrait light indoors without setting up some extensive studio lighting? Use the best light ever created—natural light. This is such wonderful light that many pros insist on using nothing but natural light for their portraits. To take advantage of this wonderful light source, just position your subject beside a window in your house, office, studio, etc., that doesn’t get direct light. The most ideal window light is a north-facing window, but any window getting nice, soft, non-direct sunlight will work. If the window is dirty, that’s even better because it helps diffuse the light and makes it even softer. If the only window you have gets direct light, try using sheers (thin curtains that are almost see-through—you find these in hotel rooms quite often, and they make great light diffusers). You can position your subject standing or sitting, but make sure your subject is getting side light from the window—not harsh direct light. The soft shadows on the other side of the face will enhance the portrait and give it depth and interest.
Taking Great Photos of Newborn Babies
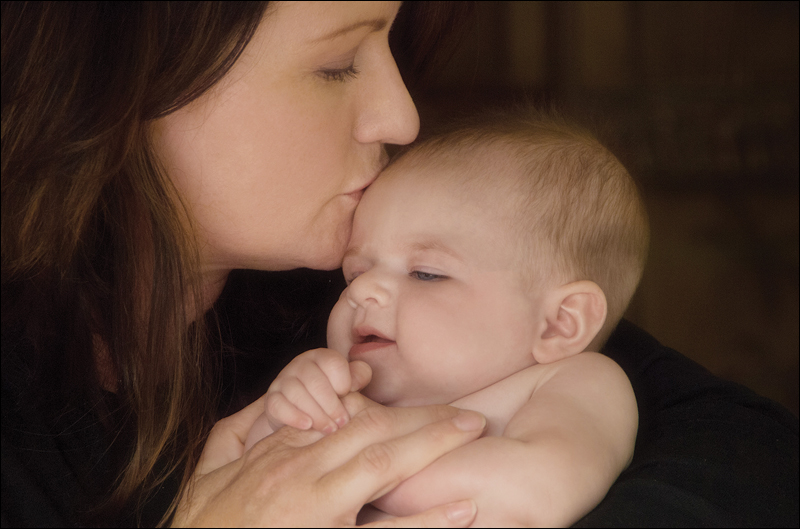
By now you’ve probably heard how hard it is to photograph babies. That may be true, but newborn babies usually have a distinct advantage—they’re asleep. That’s right, newborns spend most of their days sleeping, so getting great shots of them is easier than you’d think, but you have to put them in the right setting or everyone who looks at the photos will say something along the lines of, “Aw, too bad she was asleep.” Generally, people like babies to be wide awake and smiling in photos, but there’s a very popular brand of newborn photography where the baby and mom (or dad) are sharing a quiet moment, and it really sets the stage for a touching portrait. I saw this first-hand when David Ziser (the world-class wedding and portrait photographer) spent one evening photographing my newborn daughter, Kira. Now, David had a huge advantage because my daughter just happened to be the cutest little baby in the whole wide world, but he did stack the deck in his favor with a simple, but extremely effective, technique—he had my wife and I both wear long-sleeved black turtleneck shirts (you can find these at Target). Then, he photographed Kira as my wife held her in her arms (I took a turn as well). David shot very tight (zoomed in), so what you basically got was a sweet little baby resting peacefully in her mother’s (and father’s) arms. You can use a diffused flash (more on this in Chapter 3), or you can use soft natural light from a side window.
Great Sunset Portraits
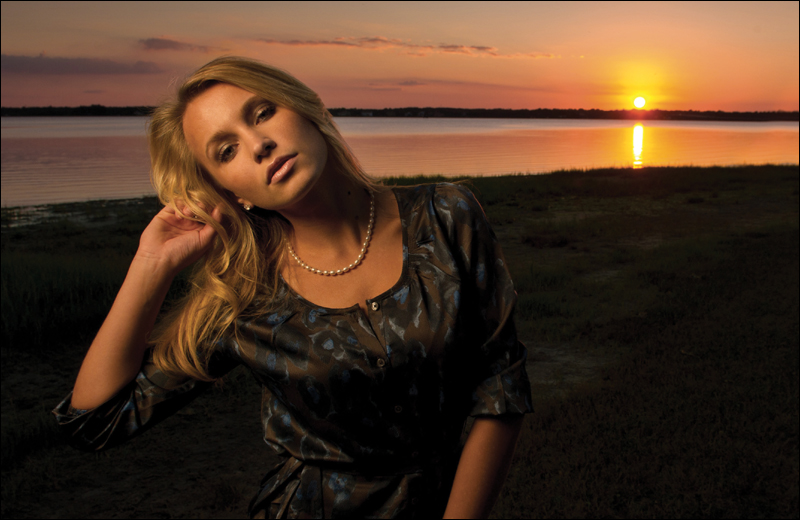
Everyone wants to shoot portraits at sunset because the sky is so gorgeous, but the problem generally is that (a) your subject either comes out as a silhouette because the sunset is behind them, or (b) you use a bright flash so your subject looks washed out. Here’s how to get great portraits at sunset without washing out your subject: Start by turning off your flash and aim at the sky. Then hold your shutter button halfway down to take an exposure reading from the sky, and while still holding the shutter button halfway down (or you can turn on the exposure lock button on your digital camera), recompose the shot by aiming at your subject, but now turn the flash on (with the power of the flash way down low—maybe 1/4 power or less) and just that small amount of light from your flash is what you use to reveal your subject. This way, your subject gets fill flash, but the sky behind them still looks great. It’s an old trick, but it’s still around because it works so well.
Better Natural-Light Portraits with a Reflector
If you want better-looking outdoor portraits, get a reflector. It does just what it sounds like—it lets you reflect light back onto your subject—and one reason why this is so handy is that sunlight isn’t always where you’d like it when you’re shooting a portrait, so you use a reflector to bounce some of that sunlight over onto your subject, right where you need it. Reflectors are great because: (1) They’re cheap. I use a Westcott 30" 5-in-1 circular collapsible reflector (it lets you have gold, silver, white, black, and a translucent light diffuser [for shooting in harsh direct light—you put it between the sun and your subject to soften and diffuse the light]) and they sell for around $30 (told you they were cheap). (2) That collapsible part is important as they fold into a small, flat circle. (3) They’re very lightweight, so they’re easy to take with you just about anywhere. (4) You’ll be amazed at how this one $30 accessory can improve your portraits, either to provide fill light (like when your subjects are backlit [their backs are to the sun], so they’re virtually a silhouette—you can bounce some of that sunlight back onto them almost like you’re using a light), or when you just want to fill in some dark shadows on one side of your subject’s face. The white side of the reflector is probably what you’ll wind up using most, as it’s the most subtle (and doesn’t wind up blinding your subject or, at the very least, making them squint). The silver side is usually used inside a studio or when you need really “punchy” reflected light outdoors (it reflects a lot more light than the white side). The gold side is only for outdoor portraits and works best later in the day because it changes the color of the light it reflects to a very warm sunset-like gold.
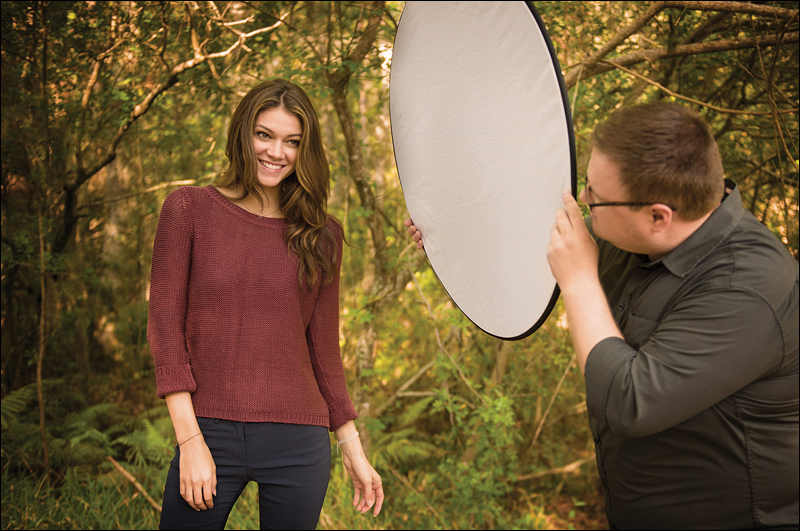
Aiming Your Reflector
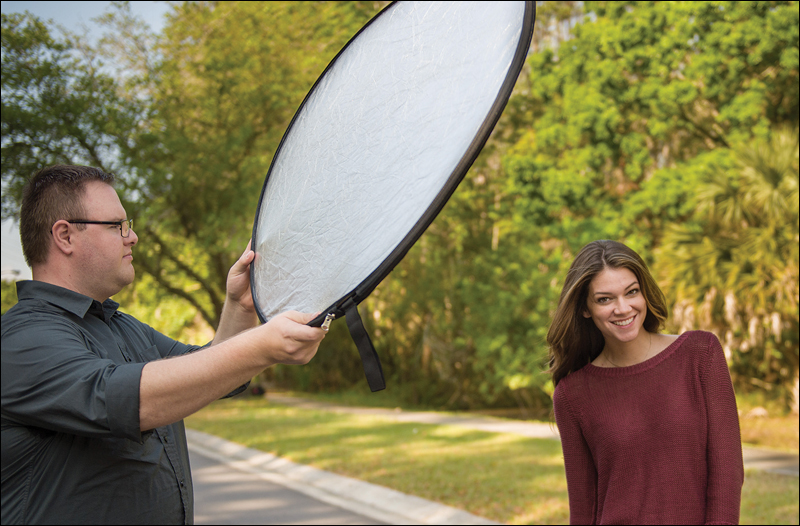
If you’ve ever watched somebody aim a reflector at their subject, they usually hold it down low and bounce the sunlight from above back onto their subject. That works fine if you’re just trying to fill in some shadows, but if your reflector is providing most of the light (your subject is in the shade), then you’re “uplighting” your subject (kind of like they do in monster movies to make the monster look more menacing, which probably isn’t the look you’re going for, unless of course you’re lighting your mother-in-law. Not my mother-in-law, mind you, as she is a saint, but ya know, other mothers-in-law). Anyway, people generally look best when lit from above, so the person holding your reflector will need to hold it up high and bounce the light back onto your subject from up there, which is definitely more flattering. (Did I mention that it helps to have a friend hold your reflector? It does. Otherwise, it’ll just be sitting there on the ground. Luckily, they do sell reflector stands if you don’t have any friends, but if that’s the case, reflecting light might not be your biggest concern right now. But I digress.) Have your friend hold the reflector up high and then have them slowly tip it down until you see it starting to light your subject’s face. You’ll have to direct your friend how far to tip it (ideally, you’d like it aiming down at your subject at a 45° angle), but luckily, while they’re moving it, you can see the light move so this won’t be too hard to figure out. When it looks good, have them hold it there while you make the shot. Simple enough.
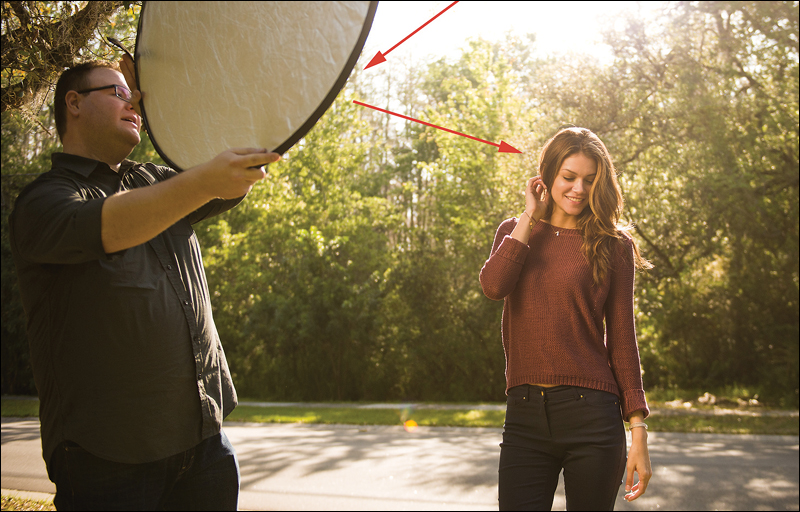
Use a Reflector When the Lighting Is Flat
Another time you’ll want to reach for your reflector is on a cloudy day because the light tends to be kind of flat (meaning, there are no shadows on one side of your subject’s face. It’s not horrible light—like harsh, direct sunlight—but it’s not great light either, because great light generally has some direction to it). So, on a cloudy day, or if someone is in the shade, we use the reflector to redirect some sunlight onto one side of their face, so it creates a soft shadow on the other side. In this case, your friend holding the reflector will hold the reflector up high to catch the sun, then they’ll stand, not in front of your subject, but to either the left or right of them, bouncing the light onto the side of their face and spilling a little bit over onto their cheek on the other side.