
Implementing the Photo View
The photo view, shown in Listing 27.11, is the main view for the application in this example. It is loaded at the root route, /. The header of the view registers the <html> element with the AngularJS application and loads the comment_styles.css file. The <body> element is broken down into two main sections.
The upper section initializes the AngularJS ng-controller="photoController" to provide the functionality to interact with the photos from the webserver, including comments on photos. The lower section initializes ng-controller="photoController" to provide the functionality to interact with the webpage comments. You use two controllers to keep the scope separate because both are implementing comment sections.
The following code defines the AngularJS template that renders an array of Photo documents stored in $scope.photos in the model, using the ng-repeat directive:
<div id="photosContainer">
<div class="photoItem" ng-repeat="photo in photos">
<img class="listPhoto" ng-click="setPhoto(photo._id)"
ng-src="../images/{{photo.filename}}" />
</div>
</div>
Notice that ng-click is set to the setPhoto() method in the controller code to set the current photo. Figure 27.2 shows the rendered element on the pages.

The following template code renders the current $scope.photo object to the screen by using photo.title for display and photo.filename to set the src attribute on the <img> element:
<div id="photoContainer">
<p class="imageTitle">{{photo.title}}</p>
<img class="mainPhoto"
ng-src="../images/{{photo.filename}}" />
</div>
Figure 27.3 shows the rendered image portion of the page.

You add the comments portion of the webpage by using the following code, which uses ng-init to initialize the addComment, replySubject, and replyBody values in the current scope and then ng-include to include the comment_thread.html partial template code described in the next section:
<div id="photoComments"
ng-init="addComment=false;replySubject='';replyBody=''">
<div class="comment"
ng-include="'/static/comment_thread.html'"></div>
</div>
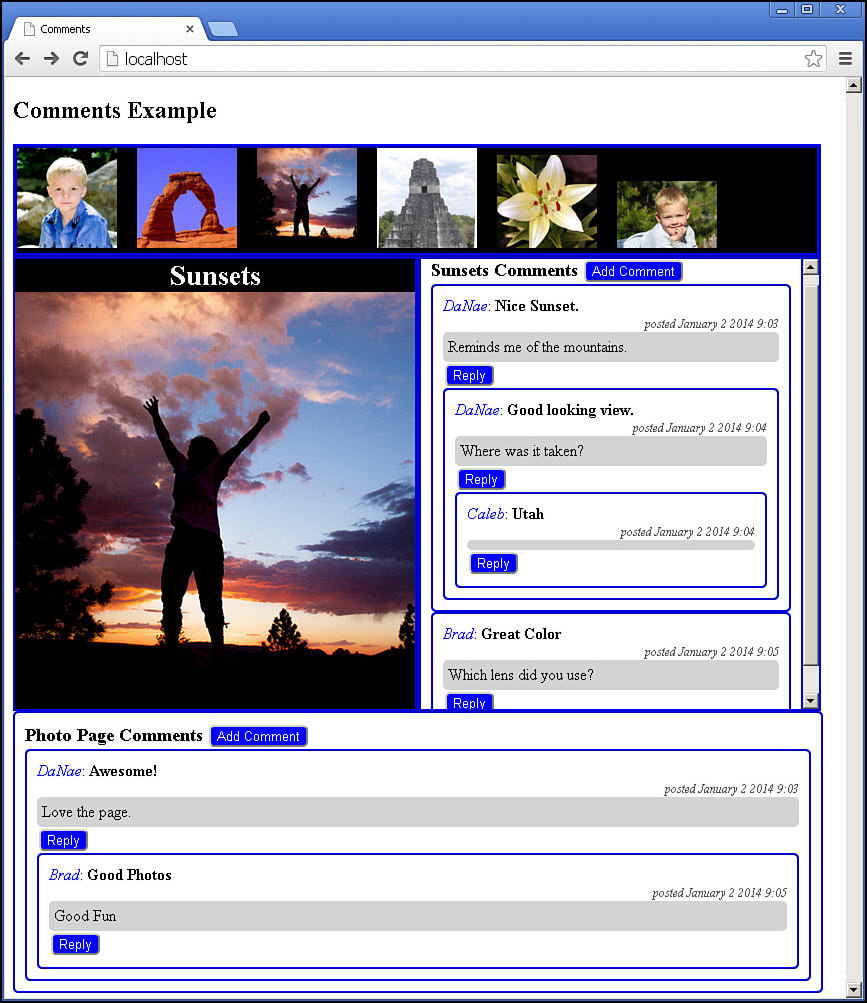
A section similar to this is added to the photo portion of the page and to the bottom of the page, allowing you to have comments in both places. You use the addComment value in the comment_thread.html template to determine whether to turn comments on or off.
Figure 27.4 shows the full application, with comments in the photo section and at the bottom for the page.
Listing 27.11 photos.html: Implementing the main photo page AngularJS template code
01 <!doctype html>
02 <html ng-app="myApp">
03 <head>
04 <title>Comments</title>
05 <link rel="stylesheet" type="text/css"
06 href="/static/css/comment_styles.css" />
07 </head>
08 <body>
09 <h2>Comments Example</h2>
10 <div ng-controller="photoController">
11 <div id="photosContainer">
12 <div class="photoItem" ng-repeat="photo in photos">
13 <img class="listPhoto" ng-click="setPhoto(photo._id)"
14 ng-src="../images/{{photo.filename}}" />
15 </div>
16 </div>
17 <div>
18 <div id="photoContainer">
19 <p class="imageTitle">{{photo.title}}</p>
20 <img class="mainPhoto"
21 ng-src="../images/{{photo.filename}}" />
22 </div>
23 <div id="photoComments"
24 ng-init="addComment=false;replySubject='';replyBody=''">
25 <div class="comment"
26 ng-include="'/static/comment_thread.html'"></div>
27 </div>
28 </div>
29 </div>
30 <div ng-controller="pageController">
31 <div id="pageComments"
32 ng-init="addComment=false;replySubject='';replyBody=''">
33 <div class="comment"
34 ng-include="'/static/comment_thread.html'"></div>
35 </div>
36 </div>
37 <script src="http://code.angularjs.org/1.2.9/angular.min.js"></script>
38 <script src="/static/js/comment_app.js"></script>
39 </body>
40 </html>