
Prologue: Getting Started with the iMac
This book explains how your iMac and the latest edition of the OS X operating system, Yosemite, are used to create your ideal working environment. If you’ve never worked with a Mac before, OS X is the name applied to Apple’s desktop operating system—like “Windows” on a PC. iPhones and iPads run iOS, and Macintosh computers run OS X.
Before you can begin hiking Yosemite, let’s start by reviewing the hardware capabilities of your system and the prerequisites necessary to use this book.
Getting to Know the iMac Hardware
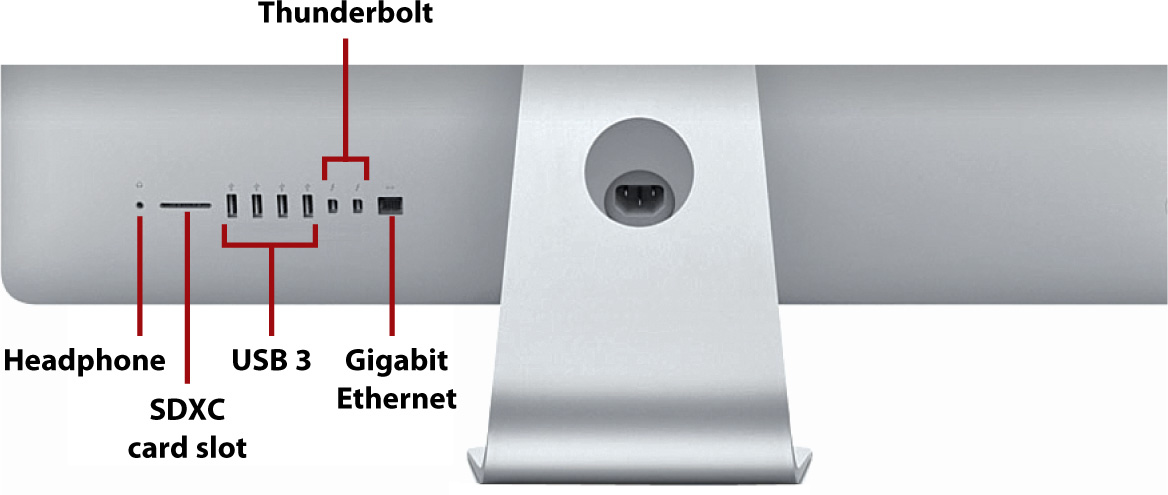
The iMac family has always included a wide array of ports and plugs for connecting to other computers, handheld devices, and peripherals such as printers and external displays. As of 2014, two different models of the iMac are available: the 21.5" iMac and the 27" iMac. These (and future) models drop support for optical drives but can easily be expanded with external CD, DVD, and Blu-ray drives. To understand the hardware options that are included in your system, let’s review the different expansion options that Apple has shipped in the iMac since 2010.
• Ethernet—Ethernet provides high-speed wired network connections with greater speeds and reliability than wireless service. Your iMac supports a very fast version of Ethernet, Gigabit Ethernet, that makes it a first-class citizen on any home or corporate network.
• FireWire 800—FireWire 800 is a fast peripheral connection standard that is frequently used to connect external storage and video devices. This was dropped as of the 2012 models, but an adapter is available from Apple.
• Mini DisplayPort—The DisplayPort enables you to connect external monitors to your iMac. Although few monitors support the DisplayPort standard, you can get adapters from Apple for connecting to both VGA and DVI interface standards. DisplayPort was dropped in favor of Thunderbolt in 2011 and later iMacs.
• Thunderbolt—The highest-speed interconnect available on a personal computer, Thunderbolt makes it possible for monitors, storage units, and other devices to be daisy-chained together. This means that each device connects to the next device, rather than all having to plug into a separate port on your iMac.
• USB 2.0/3.0—Universal Serial Bus is a popular peripheral connection standard for everything from mice, to scanners, to hard drives. iMac models released in 2012 or later support USB 3.0, the next, much faster, evolution of USB.
• SD Card Slot—SD (Secure Digital) RAM cards are a popular Flash RAM format used in many digital cameras. Using the built-in SD RAM slot, you can create a bootable system “disk” that you can use to start your computer in an emergency.
• Audio In—A connection for an external microphone.
• Audio Out—An output for headphones, speakers, or a home theater/amplifier system.
• 802.11ac—The fastest standard currently available for consumer wireless network connections. Your iMac’s wireless hardware can connect to any standards-based wireless access point for fast, long-range Internet access.
• Bluetooth—Bluetooth connects peripheral devices wirelessly to your Mac. Unlike 802.11ac, Bluetooth has a more limited range (about 30 feet, in most cases), but it is easier to configure and doesn’t require a specialized base station.
• SuperDrive—An optical drive that can be used to write CDs and DVDs. In 2012 and later iMac models, optical drives are no more.
So what does your computer have? Apple’s iMac lineup changes throughout the year, so your features depend on the model and the date it was made. Be sure to consult your owner’s manual for a definitive description of what is included in your system.
Special Keyboard Keys
Take a look across the top of your keyboard. Notice that even though there are “F” (function) designations on the keys, there are also little icons. The keys marked with icons provide system-wide control over important Yosemite features.
• F1, F2—Dim and brighten the display, respectively
• F3—Start Mission Control and display all application windows
• F4—Open the Launchpad
• F7, F8, F9—Act as Rewind, Play, and Fast Forward controls during media playback
• F10, F11, F12—Mute, decrease, and increase volume
The Eject key is located in the farthest-right corner of the keyboard and is used to eject any media in your iMac’s SuperDrive—if you have one!
Accessing the Function Keys
If you are using an application that requires you to press a function key, hold down the Fn button in the lower-left corner of the keyboard and then push the required function key.
What You Need to Know
If you’re holding this book in your hand, you can see that it contains a few hundred pages packed with information about using your iMac with Yosemite. You might also notice books dedicated to the same topic and sitting on the same shelf at the bookstore that include a thousand pages or more! So what’s the difference?
My iMac doesn’t cover the basics of using a computer; you already know how to drag windows around the screen and move files by dragging them from folder to folder. Instead, this book focuses on using and configuring the core features of OS X—file sharing, Internet access, social networking, calendaring, and entertainment.
If you’re switching from Windows, you might encounter a few unique features of OS X. Review these features in the next few sections.
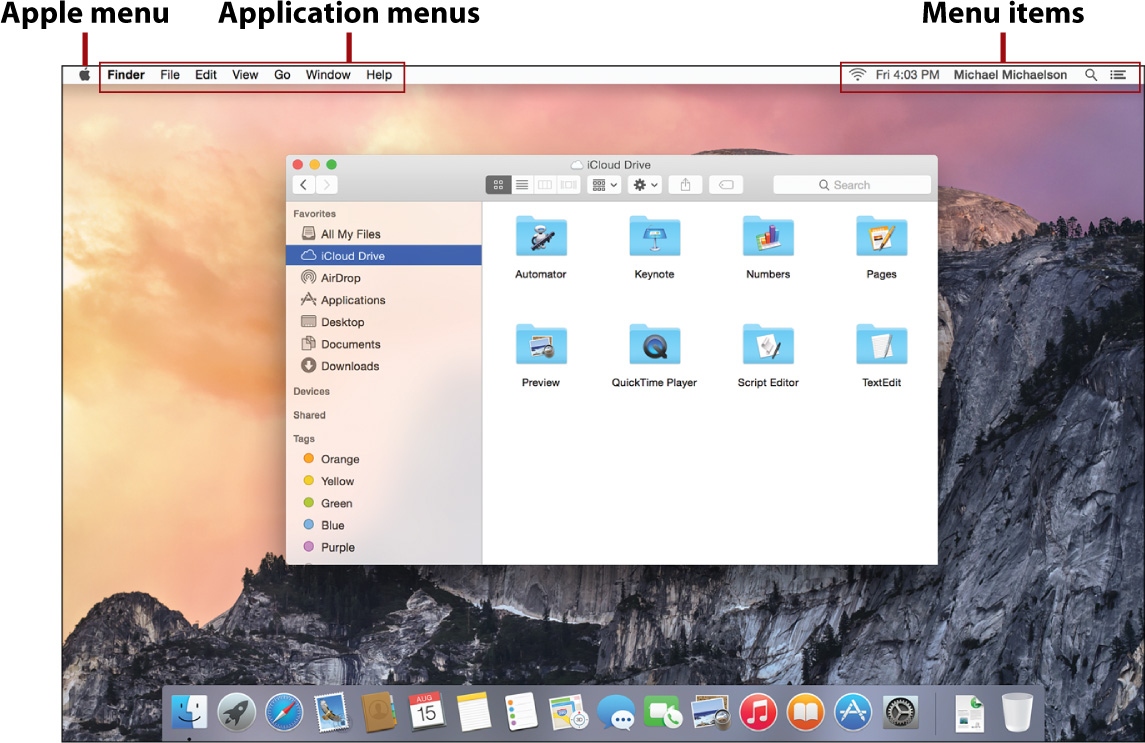
The Menu Bar
The menu bar is universally accessible across all running applications and contains a combination of the Apple menu, which is used to access common system functions; the active application’s menus; and menu items, which are global utilities for controlling and monitoring system functions.
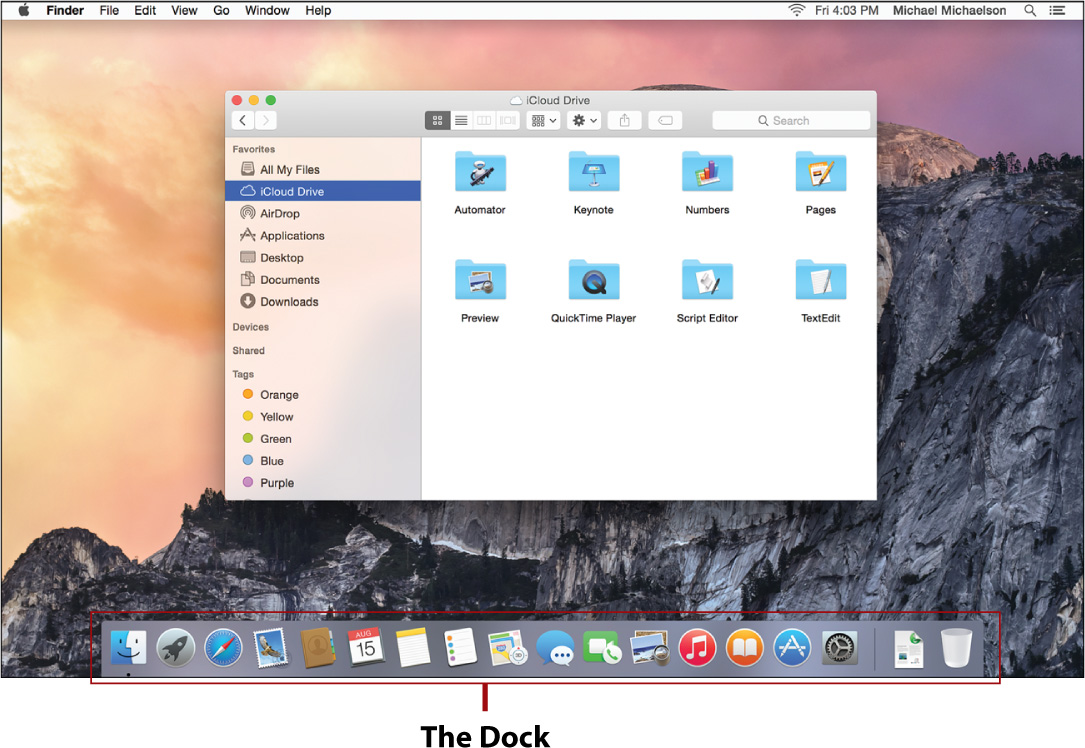
The Dock
The Yosemite Dock is the starting point for many of your actions when using the iMac. Part application launcher, part file manager, and part window manager, the Dock gives you quick access to your most frequently used applications and documents without requiring that you navigate the Finder to find things on your hard drive.
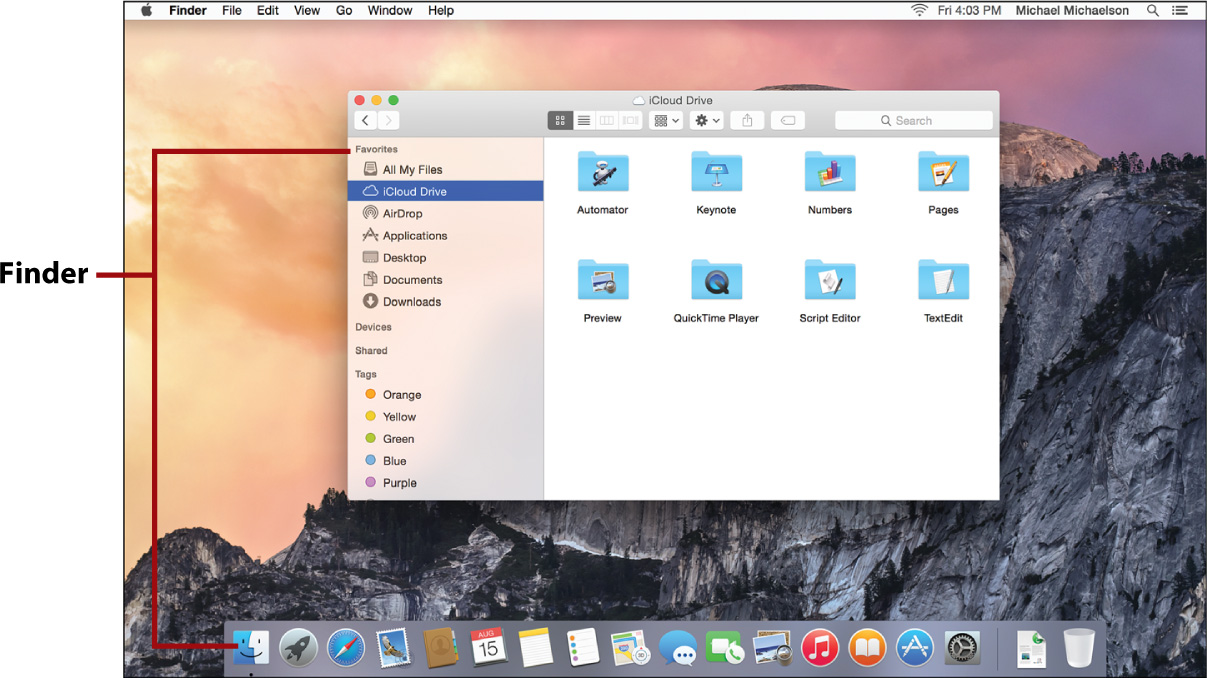
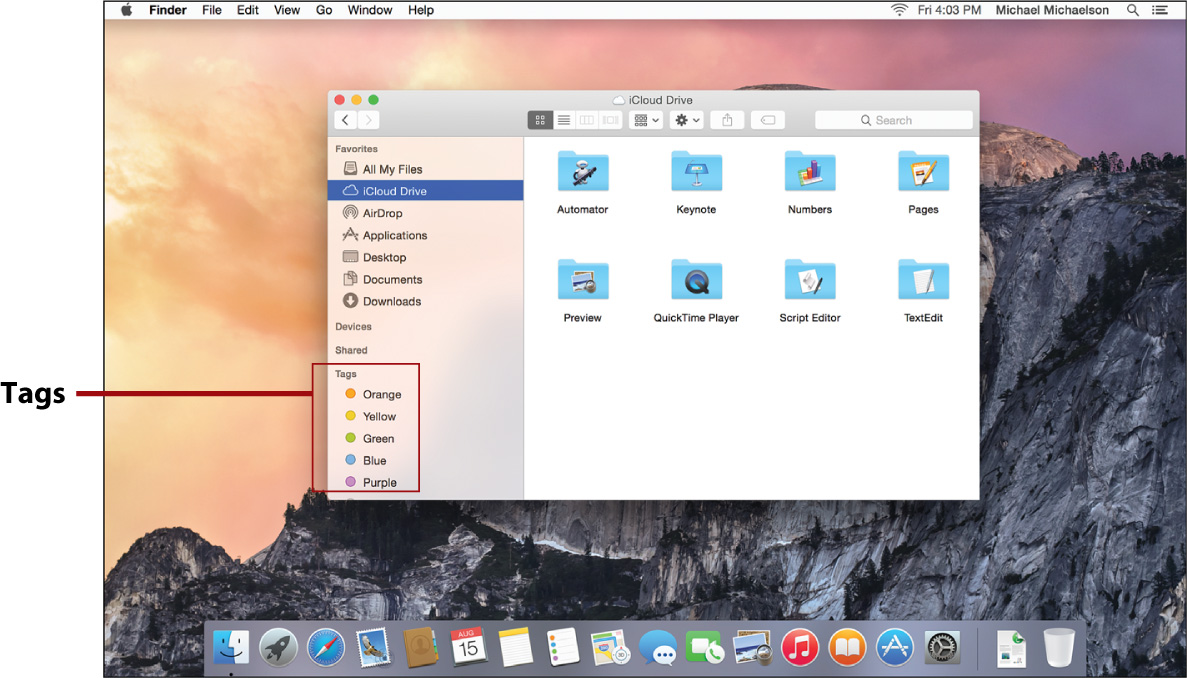
The Finder
In Windows, Explorer provides many of your file management needs. In OS X, you work with files within an ever-present application called Finder. The Finder starts as soon as you log into your computer and continues to run until you log out.
To switch to the Finder at any time, click the blue smiling icon at the left end of the Dock.
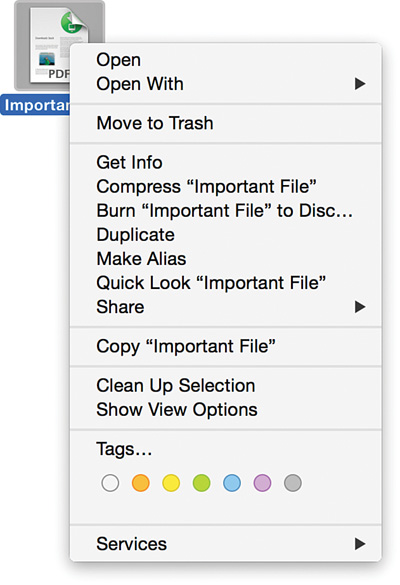
Tags
Don’t like trying to fit all your files in a folder structure that doesn’t make sense? In Yosemite, you don’t have to. Create tags that represent different attributes of your files (Projects, Important, Personal, and so on) and then apply as many or as few as you’d like. Once applied, you view your files by tag, rather than having to dig through folders.
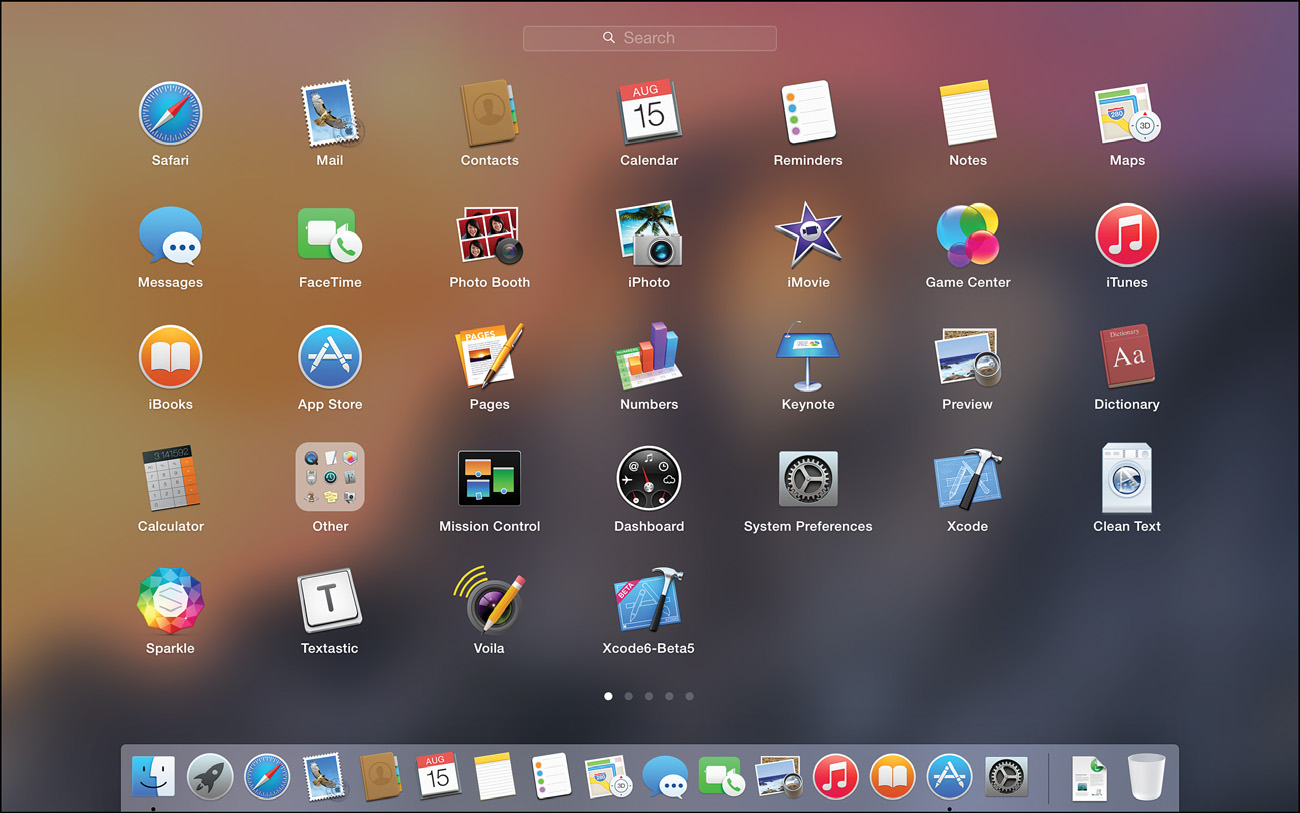
The Launchpad
Applications are installed in folders, nested in folders, or even just lumped together with no organization at all. For simple setups, this is fine; after you’ve accumulated a few years of downloads, however, finding what you’re looking for becomes difficult. The Launchpad offers a consolidated view of all your applications and even lets you group them logically, without having to worry about what folders they’re in.
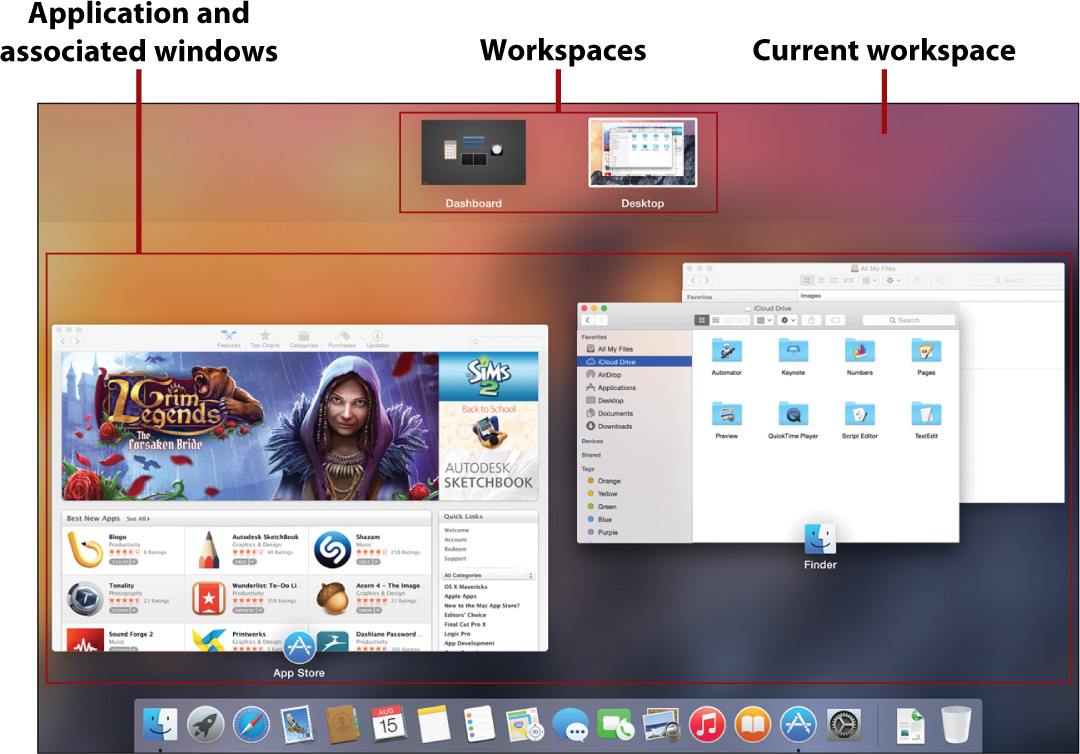
Mission Control
Mission Control is a power-user feature that is easy for anyone to use. With Mission Control, you can manage all your running applications and their windows in a single consolidated display. You can even create new workspaces to hold specific apps or navigate between existing workspaces.
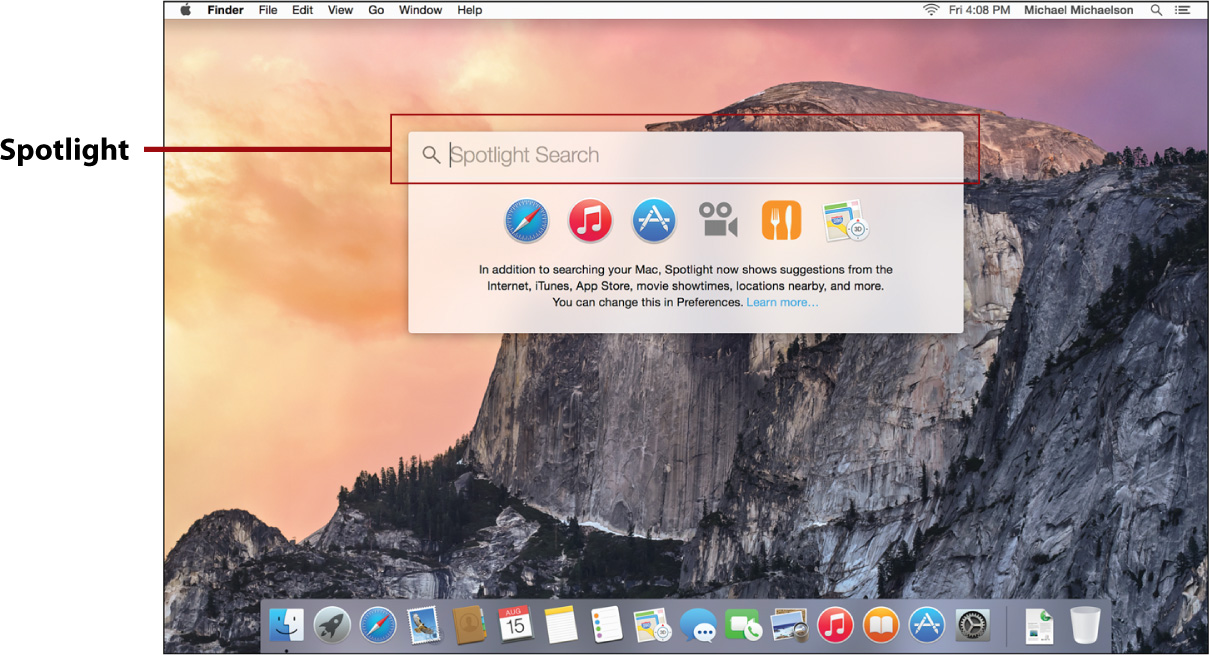
Spotlight
Spotlight is a systemwide tool for locating and launching anything on your Yosemite Mac. Use it to quickly locate, preview, and load documents; start applications; and even look up information from Wikipedia. Although Spotlight has existed for quite some time on OS X, Yosemite brings new capabilities and a new look to this tool.
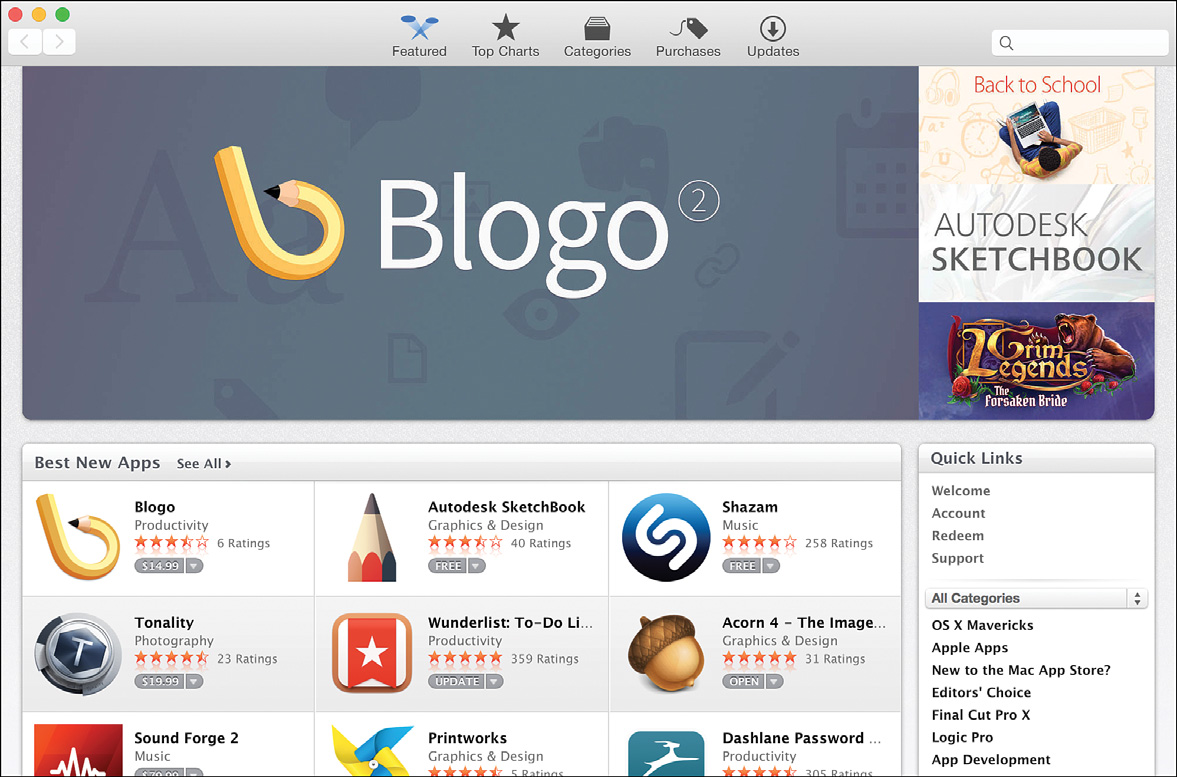
The App Store (and Security)
If you’ve used a modern smartphone or tablet, you’ve almost certainly used an “app store” of some sort. The Mac App Store is fully integrated with the operating system and provides fast access to screened and safe applications that are installed, updated, and even removed through a simple point-and-click process. Yosemite also implements security controls to prevent undesirable software installation.
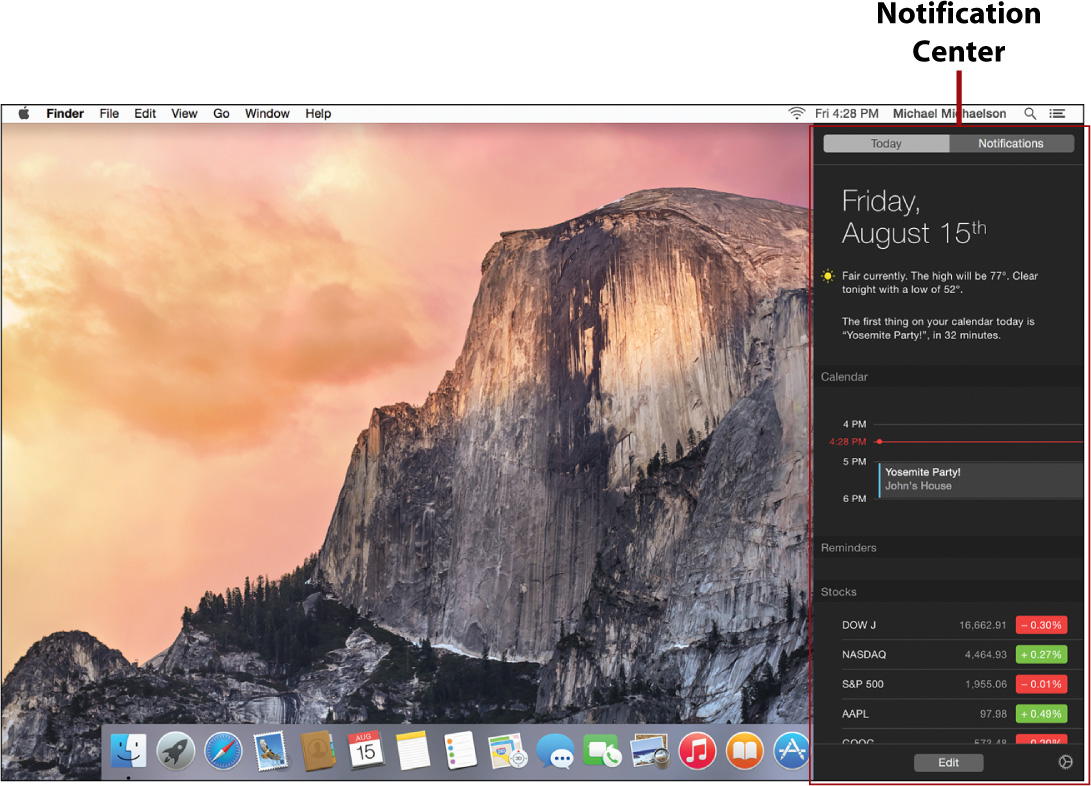
The Notification Center and Today View
Does Yosemite need to tell you something? If so, it lets you know in the Notification Center. The Notification Center/Today view, activated by clicking the far right side of the menu bar, shows alerts from your applications that help you stay on top of important events. New mail, software updates, meeting invitations, and more are consolidated in this area and presented in a unified fashion.
New in Yosemite is a special “Today” view contained within the Notification Center. This view gives you instant access to upcoming events in your day and even lets you access widgets for simple tasks—like performing calculations.
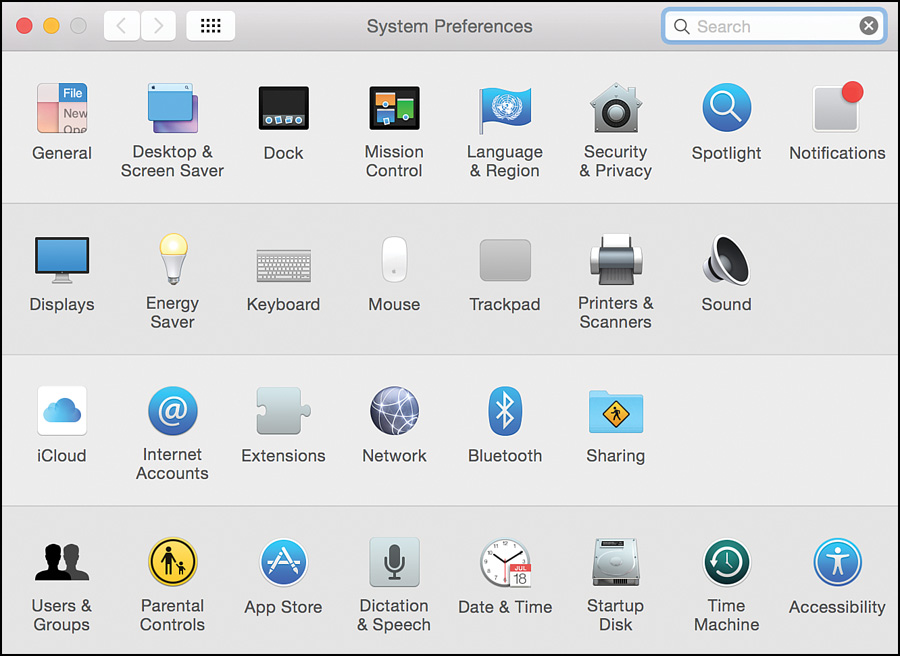
System Preferences
Many configuration options for features in this book require you to access the Yosemite System Preferences. The System Preferences application (accessible from the Dock or the Apple menu) is the central hub for system configuration. You can do everything from setting your password to choosing a screen saver in the System Preferences application.
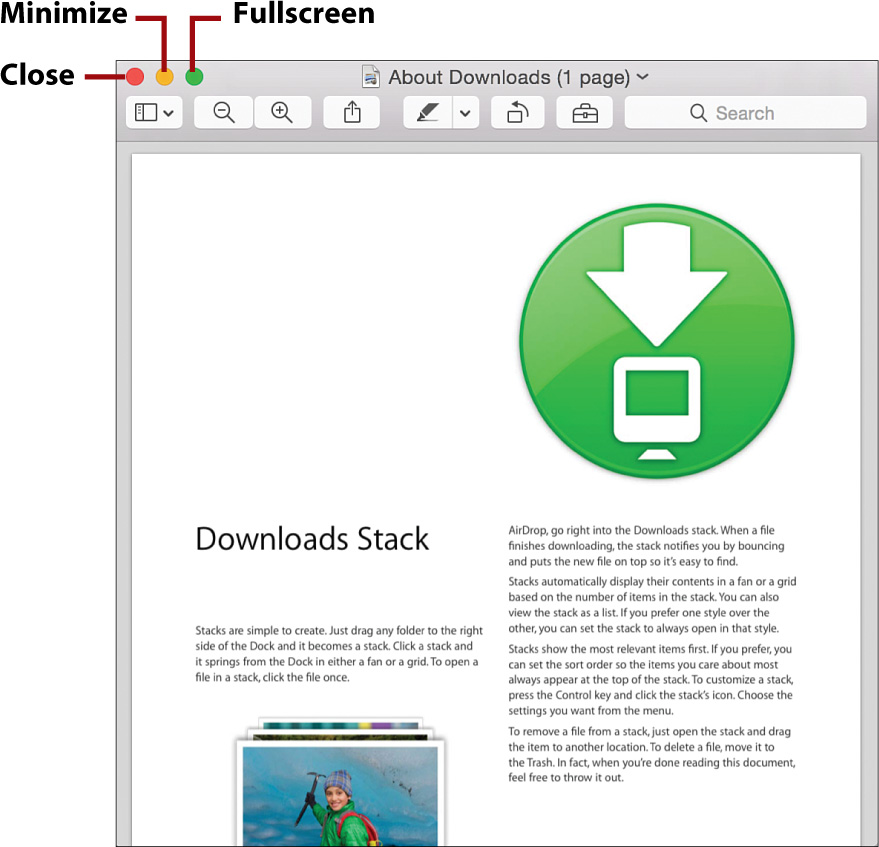
Window Controls
Yosemite provides three controls at the top of each window. At the top left are the Close, Minimize, and Fullscreen controls. The Close control shuts the window; Minimize slides the window off the screen and into the Dock; and the Fullscreen control switches many applications into a unique full-screen view—sometimes with a very different interface.
Traditionally, the “third” button on Mac windows has been “resize,” which sizes windows to fit the content. You can still access this by holding Option when clicking the Fullscreen button.
Contextual Menus
If you’re new to OS X, you might find it hard to believe that the Mac has a “right-click” (also known as the “secondary click”) menu in its operating system—and it’s been there for a long time! You can invoke contextual menus by right-clicking using a mouse, Ctrl-clicking with your trackpad, or clicking with two fingers simultaneously.
Contextual menus are rarely required in any application, but they can give you quick access to features that might otherwise take more clicks.
Gestures
Gestures are motions that you can make on an Apple Magic Trackpad to control your computer. In Yosemite, gestures are used heavily to navigate between applications and access special features. Gestures can help you navigate web pages, resize images, and do much more with just your fingertips. In fact, without a trackpad, you’ll likely miss out on all Yosemite has to offer.
Dictation
Don’t like typing? With Yosemite, you don’t have to. Yosemite supports dictation into any application where you would normally type—performed either “in the cloud” or locally on your Mac (with an optional install). You learn more about activating dictation in Chapter 11, “Making the Most of Your Mac Hardware.”
Understanding iCloud and Apple ID
Apple’s iCloud and its corresponding Apple ID deserve special attention during your foray into Yosemite. iCloud provides services such as calendars, notes, and reminders that you can use to synchronize information across multiple Macs and multiple iOS devices. It also offers free email, a means of locating your Mac (if you lose it), a tool for controlling your system from remote locations, and even an online office application suite! You don’t need to use iCloud, but you’ll see references to it, like the one shown here, as you navigate the operating system.
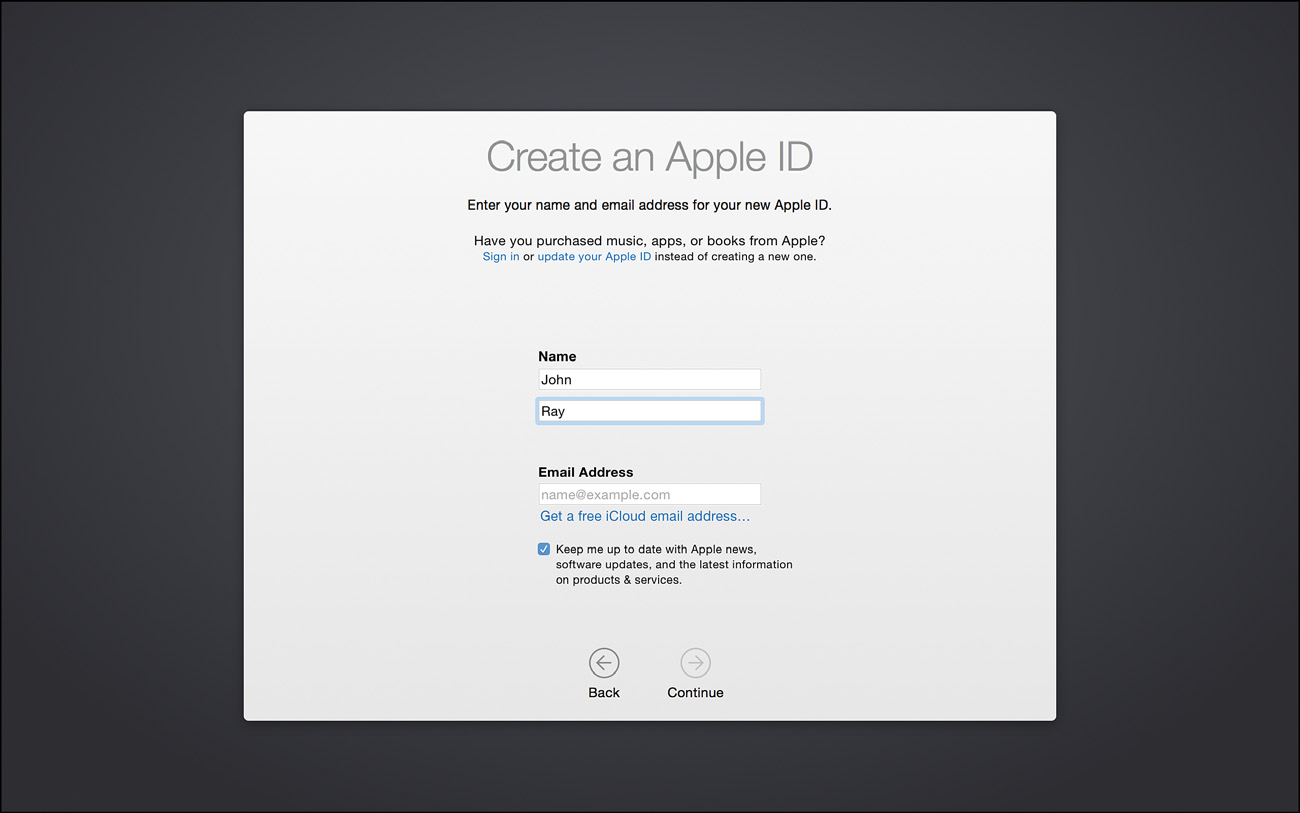
To use iCloud, you must establish an Apple ID to authenticate with the service. If you’ve installed Yosemite, chances are you’ve created an Apple ID in the process and already have everything you need to start using iCloud. If you aren’t sure whether you have an Apple ID or you want to generate a new one, I recommend visiting https://appleid.apple.com/ and using the web tools to verify, or start, your setup.
You learn more about configuring iCloud in Chapter 4, “Setting Up iCloud and Internet Accounts.”
iCloud Everywhere
Because iCloud makes many of your Yosemite features more useful, it is referenced throughout this book. The information doesn’t fit into a single category, so I discuss it in the places where I hope you’ll find it most useful.
Windows Compatibility
If you have a Mac, you have a powerful Intel-based computer in your hands—a computer that is capable of natively running the Windows operating system. The goal of this book is to make you comfortable using your Mac with Yosemite, but I’d be remiss in my authoring duties if I didn’t mention the options available for running Windows on your hardware.
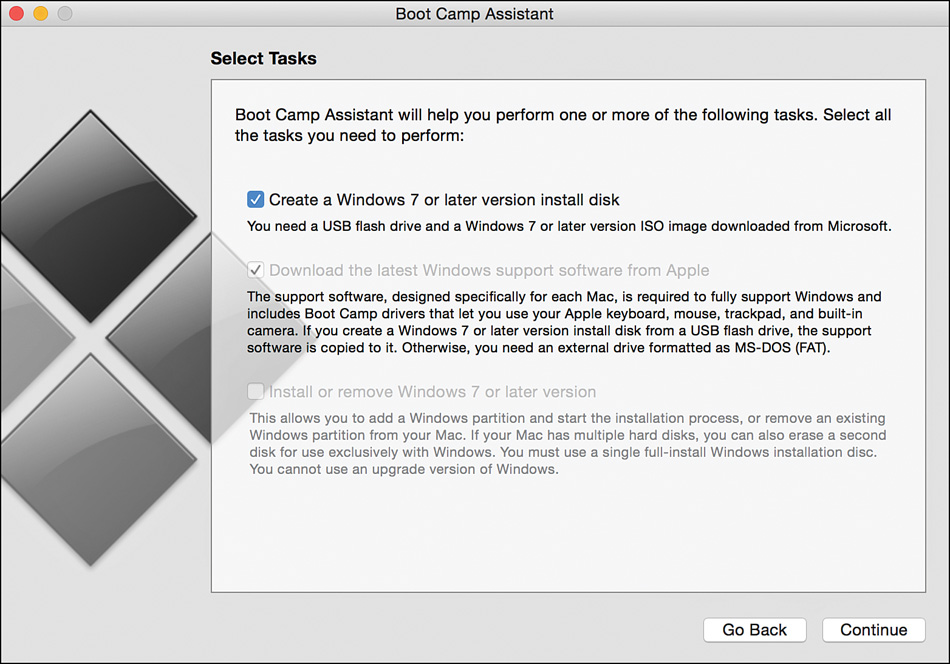
Boot Camp
Boot Camp is included with Yosemite and gives you the capability to install and boot Windows directly on your iMac. Put simply, when you do this, your Mac becomes a Windows computer. Switching between Yosemite and Windows requires a reboot, so this option is best if you need to work in Windows for extended periods of time.
Apple’s Boot Camp Assistant (found in the Utilities folder within the Applications folder) guides you through the process of partitioning your iMac for Windows, creating a disk of drivers for Windows, and configuring your system to boot into Windows or OS X.
You can install Boot Camp at any time, as long as you have enough room (about 28GB) for a Windows installation. Boot Camp even works correctly with the iMac’s fusion drive—just install using the Boot Camp drivers and go.
Virtualization
Another solution to the Windows compatibility conundrum is the use of virtualization software. Through virtualization, you can run Windows at near-native speeds at the same time you run Yosemite. Some virtualization solutions even go so far as to mix Mac and Windows applications on the same screen, blurring the lines between the operating systems.
Unlike Boot Camp, virtualization runs operating systems simultaneously. Virtualization requires more resources and has lower performance than a Boot Camp solution, but it is more convenient for running an occasional application or game.

Consider three options for virtualizing Windows on your iMac:
• VMWare Fusion (www.vmware.com)—A stable solution from a leader in virtualization software. VMWare Fusion is rock solid and fully compatible with a wide range of virtual “appliances” available for VMWare on Windows.
• Parallels Desktop (www.parallels.com)—The widest range of features available of any virtualization solution for OS X, including near-seamless integration with Mac applications.
• VirtualBox (www.virtualbox.org)—Free virtualization software that offers many of the same features of VMWare and Parallels. VirtualBox is not as polished as the commercial solutions, but it’s well supported and has excellent performance.
Other Operating Systems
Virtualization isn’t limited to running Windows. You can also run other operating systems, such as Linux, Chrome, and Solaris, using any of these solutions. In fact, if you have enough memory, you can run two, three, or more operating systems simultaneously.