Chapter 6. Installing and Configuring Windows Server 2016 DHCP Server
This chapter covers the following subjects:
![]() DHCP fundamentals: The DHCP server role is a core networking feature supported on Windows Server 2016. This chapter covers the benefits of DHCP, the differences between stateless and stateful configuration types, DHCP address allocation, the lease generation and renewal process, the DHCP database and backups, and issues related to DHCP moving and migration.
DHCP fundamentals: The DHCP server role is a core networking feature supported on Windows Server 2016. This chapter covers the benefits of DHCP, the differences between stateless and stateful configuration types, DHCP address allocation, the lease generation and renewal process, the DHCP database and backups, and issues related to DHCP moving and migration.
![]() DHCP server installation: A Windows Server 2016 DHCP server can be installed through the DHCP Manager or with PowerShell commands and scripts. This chapter shows you how to authorize a DHCP server in Active Directory and configure important DHCP server settings, with the focus on PowerShell commands.
DHCP server installation: A Windows Server 2016 DHCP server can be installed through the DHCP Manager or with PowerShell commands and scripts. This chapter shows you how to authorize a DHCP server in Active Directory and configure important DHCP server settings, with the focus on PowerShell commands.
![]() DHCP scopes: This chapter covers the different types of DHCP scopes, including IPv4 and IPv6 scopes, multicast scopes, and superscopes. It explains the differences, illustrates the configurations, and discusses the scope properties in detail. You learn how to use PowerShell to manage Windows Server 2016 DHCP scopes.
DHCP scopes: This chapter covers the different types of DHCP scopes, including IPv4 and IPv6 scopes, multicast scopes, and superscopes. It explains the differences, illustrates the configurations, and discusses the scope properties in detail. You learn how to use PowerShell to manage Windows Server 2016 DHCP scopes.
![]() DHCP options: Through DHCP options, you can deliver additional IP configurations to DHCP clients such as DNS servers, routers, and SNTP servers. You learn about the different scope options for IPv4 and IPv6 on a Windows Server 2016 DHCP server and how to configure them using PowerShell and the DHCP Manager.
DHCP options: Through DHCP options, you can deliver additional IP configurations to DHCP clients such as DNS servers, routers, and SNTP servers. You learn about the different scope options for IPv4 and IPv6 on a Windows Server 2016 DHCP server and how to configure them using PowerShell and the DHCP Manager.
![]() DHCP relay agent: If DHCP network traffic has to flow through routers, you should understand the purpose of a DHCP relay agent. This chapter explains the main purpose of DHCP relay agents and illustrates their use.
DHCP relay agent: If DHCP network traffic has to flow through routers, you should understand the purpose of a DHCP relay agent. This chapter explains the main purpose of DHCP relay agents and illustrates their use.
![]() DHCP security options: Here you learn about DHCP security options, including the importance of limited network access for rogue DHCP servers, DHCP auditing possibilities, and DHCP Name Protection and how to configure it.
DHCP security options: Here you learn about DHCP security options, including the importance of limited network access for rogue DHCP servers, DHCP auditing possibilities, and DHCP Name Protection and how to configure it.
![]() DHCP high availability: Windows Server 2016 DHCP servers support different high-availability configuration possibilities, such as failover clustering, split scopes, and DHCP failover configuration. The focus is the DHCP failover feature.
DHCP high availability: Windows Server 2016 DHCP servers support different high-availability configuration possibilities, such as failover clustering, split scopes, and DHCP failover configuration. The focus is the DHCP failover feature.
![]() DHCP Policies: Windows Server 2016 DHCP servers support DHCP Policies, which enable you to deliver specific IP addresses and optional information to clients based on criteria such as MAC addresses and FQDNs. In this chapter, you get an overview of the important DHCP Policy settings, conditions, and PowerShell cmdlets for managing DHCP Policies.
DHCP Policies: Windows Server 2016 DHCP servers support DHCP Policies, which enable you to deliver specific IP addresses and optional information to clients based on criteria such as MAC addresses and FQDNs. In this chapter, you get an overview of the important DHCP Policy settings, conditions, and PowerShell cmdlets for managing DHCP Policies.
This chapter covers DHCP fundamentals that an administrator needs to know, including stateless and stateful configuration, address allocation, lease generation and renewal, backups, and moving and migration issues. It explains the necessary steps for installing a Windows Server 2016 DHCP server, including post- installation tasks and authorization with the DHCP Manager and PowerShell.
You learn about IPv4 and IPv6 DHCP scope management, multicast and superscopes, Windows Server 2016 DHCP scope overall configuration settings, DHCP options, DHCP relay agents, and important DHCP security options. DHCP auditing and DHCP Name Protection are also integral parts of this chapter.
In addition, this chapter discusses DHCP high-availability considerations; points out the differences in failover clustering, split scope, and DHCP failover hot standby or load sharing mode; and shows when to use which technology.
DHCP Policies can be used to fine-tune IP address delivery and DHCP options based on client criteria conditions, to build individual DHCP server solutions with less administrative effort and resources. This chapter helps you understand how to create and configure DHCP Policies for foreign DHCP clients using a guest DNS suffix.
Key topic selections, memory tables, key term definitions, and exam preparation questions give you some powerful tools to increase your knowledge about Windows Server 2016 DHCP server configuration for both the Microsoft exam 70-741 and your daily work.
“Do I Know This Already?” Quiz
The “Do I Know This Already?” quiz enables you to assess whether you should read this entire chapter or simply jump to the “Exam Preparation Tasks” section for review. If you are in doubt, read the entire chapter. Table 6-1 outlines the major headings in this chapter and the corresponding “Do I Know This Already?” quiz questions. You can find the answers in Appendix A, “Answers to the ‘Do I Know This Already?’ Quizzes and End-of-Chapter Review Questions.”

Caution
The goal of self-assessment is to gauge your mastery of the topics in this chapter. If you do not know the answer to a question or are only partially sure of the answer, you should mark that question as wrong for purposes of the self-assessment. Giving yourself credit for an answer you correctly guess skews your self-assessment results and might provide you with a false sense of security.
1. You want to migrate the DHCP configuration (including scope configuration) of an existing Windows Server 2012 R2 DHCP server to a new Windows Server 2016 DHCP server. Which PowerShell command should you use?
a. Export-DhcpServer
b. Import-DhcpServer
c. Backup-DhcpServer
d. Restore-DhcpServer
2. You manage a domain named pearson.com. You have a Windows Server 2016 DHCP server named DHCP1 and you want to implement DHCP failover with hot standby mode. You want to choose DHCP2, which is a Windows Server 2016 Nano Server, as a partner server. Which changes must you make so that you can use DHCP2 as a DHCP failover replication partner for DHCP1? (Choose two.)
a. Authorize DHCP server DHCP2 in ADDS
b. Add DHCP server DHCP2 to the domain pearson.com
c. Replace DHCP2 with a Windows Server 2016 Datacenter server
d. Install the DHCP server role on DHCP2 and authorize DHCP2
3. In the DHCP Manager on your Windows Server 2016 DHCP server, you select New Scope to create an IPv4 multicast scope starting with 224. You cannot create the scope. What is the best solution for this problem?
a. Use the PowerShell cmdlet Add-DhcpServerv4Scope
b. Create another scope and use Set-DhcpServerv4Scope
c. Use the PowerShell cmdlet Add-DhcpServerv4MulticastScope
d. Use the PowerShell cmdlet Add-DhcpServerv4Superscope
4. You have set up a Windows Server 2016 WDS server that includes the DHCP server role on the server wds.pearson.com. You have configured your DHCP scope with the PowerShell cmdlet Add-DhcpServerv4OptionDefinition using the necessary DHCP scope options for clients. Which scope option do you also need to configure that requires using a different command?
a. Option 59
b. Option 60
c. Option 66
d. Option 67
5. Your company consists of one domain with two sites named Paris and Chicago. Subnet1 (10.10.0.0/16) resides in Paris; Subnet2 (192.168.2.0/24) resides in Chicago. You have installed a Windows Server 2016 DHCP server named DHCP1 in Subnet1. Clients from Subnet2 have problems getting IP addresses from DHCP1. A router between Paris and Chicago does not support the RFC 1541 standard. It is not possible to install a DHCP server in Subnet2. What is the best solution to resolve this issue?
a. Install a second DHCP server in Subnet1
b. Install and configure a DHCP relay agent in Paris
c. Install and configure a DHCP relay agent in Chicago
d. Install a DHCP relay agent in Paris and a DHCP relay agent in Chicago
6. You have enabled server logging on your Windows Server 2016 DHCP server. You also have configured that server to dynamically update DNS requests on behalf of the DHCP clients with default settings. You want to view the log information about failed DNS dynamic update events. How do you accomplish this?
a. View failed DNS dynamic update events on the DNS server
b. View events with an event ID of 31 on the DHCP server
c. View failed DNS dynamic update events on the DHCP client
d. View events with an event ID of 30 on the DHCP server
7. You want to split your DHCP scope with a ratio of 70:30 between two DHCP servers. You want to use a solution without changing the default settings. Which split-scope solution is the best option for this scenario?
a. Use two DHCP servers configured for DHCP failover with load sharing mode
b. Use two DHCP servers with manually configured DHCP IPv4 scopes
c. Use two DHCP servers configured for DHCP failover with hot standby mode
d. Use two DHCP servers and replicate the DHCP scope through a PowerShell script
8. You think about a high-availability solution for your DHCP service. You have two virtual DHCP servers with Windows Server 2016 Datacenter running on a Windows Server 2016 Hyper-V host. The servers are in the same domain, but in different subnets. You want to implement the solution with the least amount of administrative effort and automatic failover functionality for DHCP scopes. Which solution is the best option?
a. Failover cluster with two nodes
b. DHCP failover with hot standby mode
c. DHCP failover with load sharing mode
d. Hyper-V Replica feature
9. You want to register domain clients of a partner company domain named also.ch on a guest DNS suffix zone in your DNS server named guests.pearson.com when they try to obtain IP address configuration from your DHCP server. Which kind of policy must you create for that?
a. Group Policy with Name Resolution Policy Table settings
b. DHCP Policy based on FQDN and operator Is Not Single Label
c. DHCP Policy based on FQDN and operator Is Single Label
d. DHCP Policy based on MAC address condition
e. DNS Policy with zone scope configuration
f. DNS Policy with recursion policy settings
Foundation Topics
DHCP Fundamentals
The DHCP server role simplifies the client device configuration by distributing network configuration information to network devices and network-enabled services.
The DHCP protocol simplifies the configuration of IP clients in a network environment. Manually configuring the network interface settings (IP address, subnet mask, gateway address, DNS server) of thousands of desktop computers, laptops, servers, printers, scanners, handhelds, and other network devices is not efficient and probably prone to error.
The solution is a DHCP server that manages the IP address information centrally and delivers it automatically to DHCP clients running the DHCP client service. All Windows-based clients are configured to automatically get an IP address after initial installation.
With the PowerShell cmdlet get-service DHCP | FL *, you can verify the existence, running state, and properties of the DHCP client service (see Figure 6-1).


This DHCP Server service ensures that all DHCP client devices have appropriate IP address configuration information, which helps to eliminate human error during configuration. When an IP address configuration changes, you can update the DHCP clients centrally using the DHCP Server service; you do not have to change the information directly on each device locally. The DHCP Server service runs only on computers that have the DHCP server role configured.
DHCP is also a key service for mobile users who often change networks. By using DHCP servers, administrators can configure a complex network configuration information offering to nontechnical users.
DHCP clients can use the assigned IP address for a certain period (a lease). You can set the lease time to optimize your overall IP address scheme. Clients normally renew their lease automatically after 50 percent of the lease period has passed. As long as IP addresses are available, DHCP continues to provide the renewals.
A Windows Server 2016 DHCP server also supports DHCP version 6 (v6) stateful and stateless configurations for clients in an IPv6 environment:
![]() Stateful configuration: The DHCPv6 server assigns IPv6 addresses and additional DHCP data.
Stateful configuration: The DHCPv6 server assigns IPv6 addresses and additional DHCP data.
![]() Stateless configuration: The router assigns IPv6 addresses, but the DHCPv6 server assigns additional DHCP data.
Stateless configuration: The router assigns IPv6 addresses, but the DHCPv6 server assigns additional DHCP data.
DHCP Address Allocation Process
DHCP allocates IP addresses on a dynamic basis, otherwise known as a lease. Although you can set the lease duration from a few minutes to unlimited, you typically want to set the duration for only a few hours or days. Here are some important facts about DHCP address allocation:
![]() The default lease time is 8 days for wired clients and 3 days for wireless clients.
The default lease time is 8 days for wired clients and 3 days for wireless clients.
![]() The DHCP server offers the next available IP address from the pool.
The DHCP server offers the next available IP address from the pool.
![]() The IP address can be reversed, based on the MAC address of the client’s NIC.
The IP address can be reversed, based on the MAC address of the client’s NIC.
![]() DHCP initiation traffic is the broadcast network traffic.
DHCP initiation traffic is the broadcast network traffic.
![]() DHCP servers are limited to communication within their IP subnet.
DHCP servers are limited to communication within their IP subnet.
![]() A non-DHCP client has a manual locally configured IP address.
A non-DHCP client has a manual locally configured IP address.
DHCP Lease Generation
DHCP uses a four-step lease-generation process to assign an IP address to clients. Understanding how each step of this process works helps you troubleshoot problems when clients cannot obtain an IP address. The following list outlines the DHCP lease generation process.
1. The client broadcasts a DHCPDISCOVER packet to every computer in the subnet. The DHCP server or the devices/routers that run a DHCP relay agent respond. In the latter case, the DHCP relay agent forwards the message to the DHCP server for which it is configured to relay requests.
2. A DHCP server responds with a DHCPOFFER packet, which contains a potential IP for the client.
3. The client receives the DHCPOFFER packet. It might receive packets from multiple servers. If it does, it usually selects the server that made the fastest response to its DHCPDISCOVER, which normally is the closest DHCP server. The client broadcasts a DHCPREQUEST that contains a server identifier informing the DHCP servers receiving the broadcast that the client has chosen to accept that server’s DHCPOFFER.
4. The DHCP servers receive the DHCPREQUEST. DHCP servers that the client has not accepted use this message as notification that the client has declined that server’s offer. The chosen DHCP server stores the IP address client information in the DHCP database (dhcp.mdb) and responds with a DHCPACK message. If the DHCP server cannot provide the IP that was offered in the initial DHCPOFFER, the DHCP server sends a DHCPNAK message.
DHCP Lease Renewal Process
The default DHCP lease renewal process works as follows:
1. The DHCP client sends a DHCPREQUEST packet.
2. The DHCP server sends a DHCPACK packet.
3. If the client fails to renew its lease after 50 percent of the lease duration has expired, the DHCP lease renewal process begins again after 87.5 percent of the lease duration has expired.
4. If the client fails to renew its lease after 87.5 percent of the lease has expired, the DHCP lease generation process starts over again, with a DHCP client broadcasting a DHCPDISCOVER.
When the DHCP lease reaches 50 percent of the lease time, the client automatically attempts to renew the lease. This process occurs in the background. A device might have the same DHCP-assigned IP address for a long time if the computer is not restarted because the device renegotiates the lease periodically.
Every time a client device restarts within the lease period, it contacts the configured default gateway. If the gateway does not respond, the client considers itself to be on a new subnet and enters the discovery phase.
Of course, client devices might be moved while they are turned off (for example, a laptop might be plugged into a new subnet), so client devices also attempt renewal during the startup process or when they detect a network change. If renewal is successful, the lease period is reset.
DHCP Database
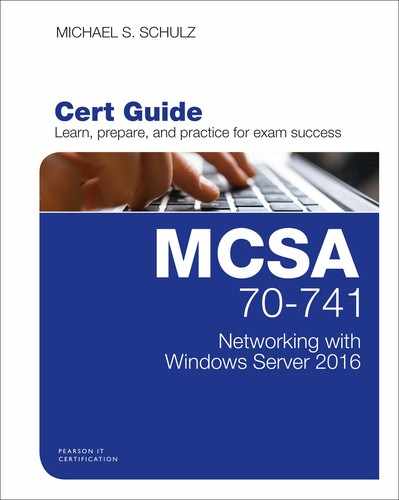
The DHCP database of a Windows Server 2016 DHCP server is a dynamic database containing data that relates to scopes, address leases, and reservations. It contains the data file that stores both the DHCP configuration information and the lease data for clients that have leased an IP address from the DHCP server.
By default, the DHCP database files are stored in the %systemroot%System32Dhcp folder. Table 6-2 describes the DHCP database files.
DHCP Backup
The DHCP database is automatically backed up every 60 minutes. You can manually back up the database anytime in the DHCP management console by right-clicking the DHCP server and selecting Backup or by using the PowerShell cmdlet Backup-DhcpServer. If you want to export the DHCP configuration, including scope configuration (without DHCP data), you can use the PowerShell cmdlet Export-DhcpServer.
The following items are backed up:
![]() All scopes
All scopes
![]() Reservations
Reservations
![]() Leases
Leases
![]() All options, including server options, scope options, reservation options, and class options
All options, including server options, scope options, reservation options, and class options
![]() All registry keys and other configuration settings that are set in DHCP server properties.
All registry keys and other configuration settings that are set in DHCP server properties.
You can initiate the database restoration process from the DHCP console by right-clicking the DHCP server and then clicking Restore or by using the PowerShell cmdlet Restore-DhcpServer. During the restoration, process the DHCP Server service is automatically restarted.
Moving a DHCP Database
You might have to move the DHCP server role to another server (for example, as part of the migration process from Windows Server 2012 R2 to Windows Server 2016). If so, you also need to move the DHCP database to the same target server. This ensures that client leases are retained and reduces the likelihood of client configuration issues.
The steps for moving a DHCP database follow:
Step 1. Back up the DHCP database on the old server.
Step 2. Stop the old DHCP Server service.
Step 3. Copy the DHCP database to the new server and, if necessary, install the DHCP server role.
Step 4. Restore the database.
Step 5. Start the DHCP Server service.
DHCP Server Migration
When you decommission an outdated or old server (for example, Windows Server 2003), you must migrate the services from the old server to a new server. Migrating the DHCP server is not difficult, but you must use command-line utilities to export the DHCP data from the old server to a file and then import the data from that file to the new DHCP server. You can use netsh or Windows PowerShell commands to accomplish this. The following list outlines how to migrate a DHCP server.
Step 1. Install the DHCP server role on the computer that will be the new DHCP server.
Step 2. Stop the DHCP service on the current DHCP server.
Step 3. Export the DHCP data from the current server.
Step 4. Copy the DHCP data to the new server (or make it available on the network).
Step 5. Import the DHCP data to the new server.
Use Windows PowerShell to export DHCP data with the Export-DhcpServer cmdlet. The following command exports DHCP data from the DHCP server D1 to a file named d1.xml:
Export-DhcpServer
-ComputerName D1
-Leases
-File C:d1.xml
DHCP Data Import
Use Windows PowerShell to import DHCP data with the Import-DhcpServer cmdlet. The following command imports DHCP data from the DHCP data file D1.xml to the new DHCP server D2:
Import-DhcpServer
-ComputerName D2
-Leases
-File C:exportd1.xml
-BackupPath C:dhcp
Exporting and Importing DHCP Data with netsh
You also can still use netsh commands by opening an elevated command prompt and pressing Enter at the end of each line:
You export DHCP data with netsh in this way:
Netsh
DHCP
Server D1
Export C:D1.txt all
You import DHCP data with netsh as follows:
Netsh
DHCP
Server D2
Import C:D1.txt all
DHCP Server Installation
As a first step to implementing a DHCP solution, you need to know how to install and authorize a DHCP server. You can install the DHCP server role by using the following:
![]() The Add Roles and Features Wizard in Server Manager
The Add Roles and Features Wizard in Server Manager
![]() Windows PowerShell (Add-WindowsFeature DHCP)
Windows PowerShell (Add-WindowsFeature DHCP)
The DHCP server role can be installed only on Windows Server operating systems. You can install the DHCP server on a DC, but any server running Windows Server can host the DHCP server (except a Windows Server 2016 Nano Server). For example, a branch office file and print server might also act as the local DHCP server. Local administrative rights are required to perform the installation, and the server must have a static IP address.
Tip
A DHCP server cannot be installed on a Windows Server 2016 Nano Server: no Nano Server package is available for a DHCP server.
Tip
You should not install a DHCP server on an application server, Exchange, or SQL Server.
The following list outlines the main steps of a DHCP server installation process:
Step 1. Install the DHCP server role with Server Manager or PowerShell (Add-WindowsFeature DHCP -includeManagementTools).
Step 2. Perform DHCP server post-installation tasks (creating DHCP security groups, restarting DHCP service, authorizing DHCP server in ADDS).
Step 3. Configure the DHCP server settings.
Figure 6-2 shows how to install the DHCP server role with PowerShell.

Figure 6-3 shows a successful DHCP server role installation and verification with PowerShell.

Figures 6-4 and 6-5 show the DHCP server post-installation configuration tasks in the Server Manager.

Figure 6-6 shows the DHCP Post-Install Configuration Wizard Authorization page. On the Authorization page, you choose the credentials to be used to authorize the DHCP server in ADDS (the user must be a member of the Enterprise Admins security group).

Figure 6-7 shows the Summary page of the DHCP Post-Install Configuration Wizard.

Alternatively, you can authorize a DHCP server through PowerShell (see Figure 6-8).

You also can authorize a DHCP server through the DHCP Manager (see Figures 6-9 and 6-10).
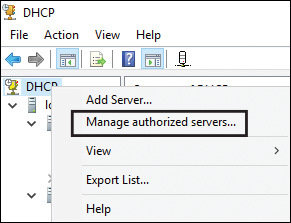

You can verify which DHCP servers are authorized in ADDS through the DHCP Manager and the Manage Authorized Servers window (see Figure 6-11).

You also can verify that your DHCP server is successfully authorized in ADDS through the DHCP Manager. When you see the green check marks by IPv4 and IPv6, as in Figure 6-12, you know that the DHCP server is authorized.

Performing DHCP Post-Installation Tasks with PowerShell Commands
You can perform the DHCP post-installation tasks using the following commands:
Step 1. Create the security groups: Netsh DHCP Add SecurityGroups
Step 2. Restart the service: Restart-Service DHCPServer
Step 3. Authorize the DHCP server in ADDS: Add-DHCPServerinDC <hostname or IP address>
If you want to manage a remote DHCP server, you must install the Remote Server Administration Tools (RSAT) component. The following PowerShell command installs the DHCP Manager utility on your system:
Add-WindowsFeature RSAT-DHCP
To get all authorized DHCP servers in Active Directory, you can use the following PowerShell cmdlet:
Get-DhcpServerinDC
To get the list of all DHCP scopes on DHCP server DHCP1, use the following PowerShell cmdlet:
Get-DhcpServerv4Scope -computername DHCP1
To create a new DHCP IPv4 scope with a range of IP addresses from 172.16.0.1 to 172.16.0.100 on a DHCP server named DHCP1 use the following PowerShell command:
Add-DhcpSrverv4Scope -StartRange 172.16.0.1 -EndRange 172.16.0.100
-Name TestScope
-SubnetMask 255.255.255.0 -State Active -Computername DHCP1
Use the following PowerShell command to configure the DHCP server parameters of DNS server, domain, and router address for the created IPv4 scope:
Set-DhcpServerv4OptionValue -computername DHCP1 -DnsServer
172.16.0.200 -DnsDomain pearson.com -Router 172.16.0.99
To exclude the range of 172.16.0.80 to 172.16.0.100 from the IP addresses given for the created scope, use the following PowerShell command:
Add-DhcpServerv4ExclusionRange -computername DHCP1 -ScopeID 172.16.0.0
-StartRange 172.16.0.80 -EndRange 172.16.0.100
To create a reservation for a client named CL1 with the IP address 172.16.0.80, use the following PowerShell command:
Get-DhcpServerv4Lease -computername CL1 -IPAddress 172.16.0.80 |
Add-DhcpServerv4Reservation -computername CL1
To perform a mass reservation of IP addresses for computers listed in a CSV file, first create a text file, as in the following example:
ScopeID,IPAddress,Name,ClientID,Description
172.16.0.81, Client1, b1-ac-5a-f1-9e-6f,Reservation Client1
172.16.0.82, Client2, f1-bc-7a-f1-9a-1a,Reservation Client2
172.16.0.83, Client3, D1-a9-5b-e1-2a-6f,Reservation Client3
Save this file as C: eservations.csv and run the following PowerShell command to create the DHCP reservations:
Import-Csv -Path C:
eservations.csv | Add-DhcpServerv4Reservation
-computername DHCP1
To deactivate an IPv4 scope, use the following PowerShell command:
Set-DhcpServerv4Scope -computername DHCP1 -ScopeID 172.16.0.0 -State
InActive
To get DHCP server statistics, use the following PowerShell command:
Get-DhcpServerv4Statistics -computername DHCP1
Figure 6-13 shows the output of that PowerShell command.

You can also use a PowerShell script that installs the DHCP server role, authorizes the DHCP server in ADDS, adds a DHCP server IPv4 scope, sets DHCP options for that scope, and changes the lease duration time, as in the following example:
$DNSDomain="pearson.com"
$DNSServerIP="172.16.1.10"
$DHCPServerIP="172.16.1.10"
$StartRange="172.16.1.150"
$EndRange="172.16.1.200"
$Subnet="255.255.255.0"
$Router="172.16.1.1"
Install-WindowsFeature -Name 'DHCP' -IncludeManagementTools
cmd.exe /c "netsh dhcp add securitygroups"
Restart-service dhcpserver
Add-DhcpServerInDC -DnsName $Env:COMPUTERNAME
Set-ItemProperty -Path registry::HKEY_LOCAL_MACHINESOFTWARE
Microsoft ServerManagerRoles12 -Name ConfigurationState -Value 2
Add-DhcpServerV4Scope -Name "DHCP Scope" -StartRange $StartRange
-EndRange $EndRange -SubnetMask $Subnet
Set-DhcpServerV4OptionValue -DnsDomain $DNSDomain -DnsServer
$DNSServerIP -Router $Router
Set-DhcpServerv4Scope -ScopeId $DHCPServerIP -LeaseDuration
1.00:00:00
DHCP Authorization
Because the DHCP protocol is based on broadcasts, an unknown DHCP server can provide invalid information to clients. You can avoid this by authorizing the server. Administrators use a process called DHCP authorization to register the DHCP server in the AD domain before it can support DHCP clients.
Active Directory Requirements
You must authorize a Windows Server 2016 DHCP server in AD DS before it can begin leasing IP addresses. It is possible to have a single DHCP server providing IP addresses for subnets that contain multiple Active Directory domains.
Tip
You must use an Enterprise Administrator account to authorize the DHCP server.
Standalone DHCP Server Considerations
A standalone DHCP server is a Windows Server 2016 DHCP server without domain membership. If the standalone DHCP server detects an authorized DHCP server in the domain, it does not lease IP addresses and automatically shuts down.
Unauthorized DHCP Servers
Many routers and firewalls can act as DHCP servers, but often these servers do not recognize DHCP-authorized servers and might lease IP addresses to clients. When you detect unauthorized DHCP servers, you should disable the DHCP service or functionality on them.
DHCP Scopes
You need to configure your Windows Server 2016 DHCP server with the range of IP addresses and DHCP options to be distributed to the clients. These ranges of IP addresses are called scopes. After the initial configuration of the DHCP server, you must create a scope. A DHCP scope is a range of IP addresses that a DHCP server manages. A DHCP scope typically is confined to the IP addresses in a given subnet, although a DHCP server can host scopes for multiple different subnets.
A DHCP scope for the network 192.168.5.0/24 (subnet mask of 255.255.255.0) can support a range from 192.168.5.1 through 192.168.5.254. When a computer or device on the 192.168.5.0/24 subnet requests an IP address, the scope that defined the range in this example allocates an address between 192.168.5.1 and 192.168.5.254.
Table 6-3 describes the four types of DHCP scopes.

Superscopes
A superscope is a collection of individual scopes that are grouped for administrative purposes. You use a superscope to allow clients to receive an IP address from multiple logical subnets even when the clients are located on the same physical subnet. You can create a superscope only if you have two or more IP scopes already created.
To understand the benefit of a superscope, you must think about what you need to do when a scope runs out of addresses and you cannot add more addresses from the subnet. The solution is to add a new subnet to the DHCP server. This scope will lease addresses to clients in the same physical network, but the clients will be in a separate network logically. This process is known as multinetting. After you add a new subnet, you must configure routers to recognize the new subnet so that you ensure local communications in the physical network. In addition, suppose that you need to move clients gradually into a new IP numbering scheme. Having both numbering schemes coexist for the original lease’s duration means that you can transparently move clients into the new subnet. When you have renewed all client leases in the new subnet, you can retire the old subnet and remove the superscope.
You can create, configure, and remove DHCP superscopes with PowerShell. Figure 6-14 shows the available DHCP server superscope PowerShell cmdlets.

Multicast Scopes
A multicast scope is a collection of multicast addresses from the class D IP address range of 224.0.0.0 to 239.255.255.255 (224.0.0.0/3). These addresses are used when applications need to communicate with numerous clients efficiently and simultaneously. Multiple hosts then listen to traffic for the same IP address.
A multicast scope is commonly known as a Multicast Address Dynamic Client Allocation Protocol (MADCAP) scope. Applications that request addresses from these scopes need to support the MADCAP API. Windows Deployment Service (WDS) is an example of an application that supports multicast transmissions. Multicast scopes allow applications to reserve a multicast IP address for data and content delivery.
You can create, configure, and remove DHCP multicast scopes with PowerShell. Figure 6-15 shows the available DHCP server multicast scope PowerShell cmdlets.

You can create IPv4 scopes, IPv4 superscopes, and IPv4 multicast scopes in the DHCP Manager (see Figure 6-16).

You can create only IPv6 scopes in the DHCP Manager because it does not have the capability to create IPv6 superscopes or IPv6 multicast scopes (see Figure 6-17).
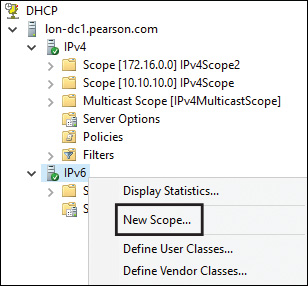
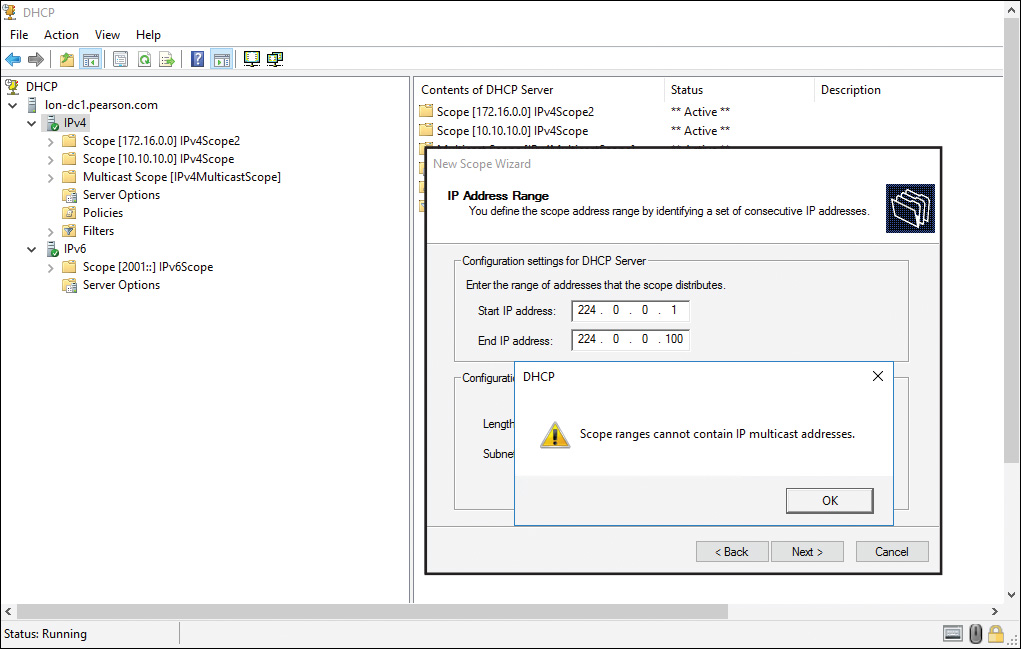
When you use the New Scope Wizard to create a scope and you try to create a multicast scope starting with 224 in that wizard, you get an error message (see Figure 6-18). The solution is to use the New Multicast Scope Wizard to create IPv4 multicast scopes.
When you try to create an IPv6 scope starting with Fe80::, which is a link-local address, this is not possible and you get the error message in Figure 6-19.
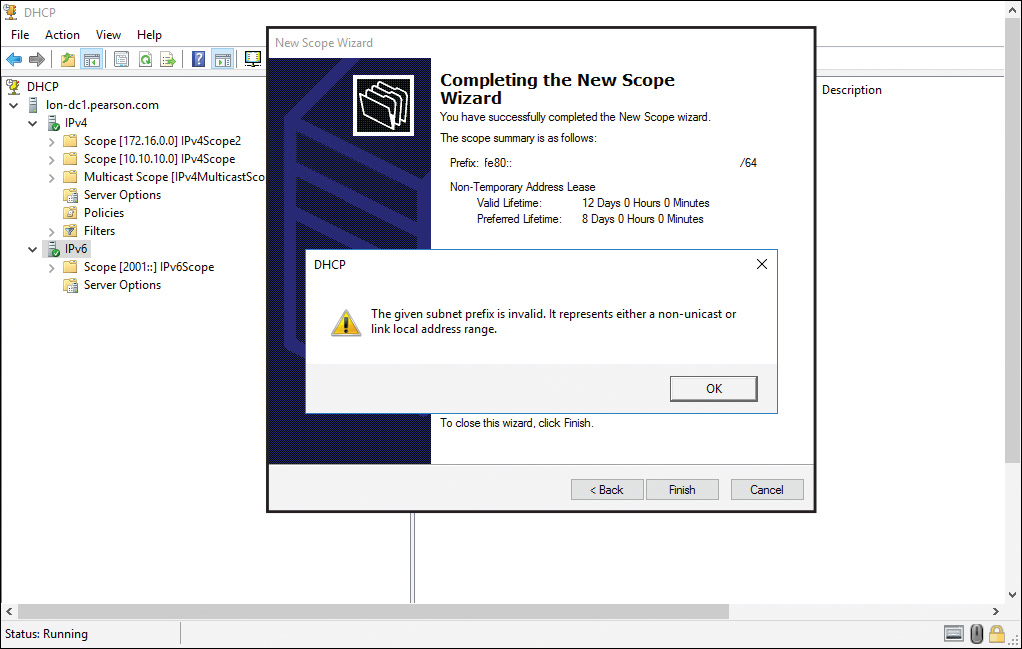
Figure 6-19 Nonunicast and Link-Local Address Ranges Are Not Allowed in IPv6 Scopes in the DHCP Manager
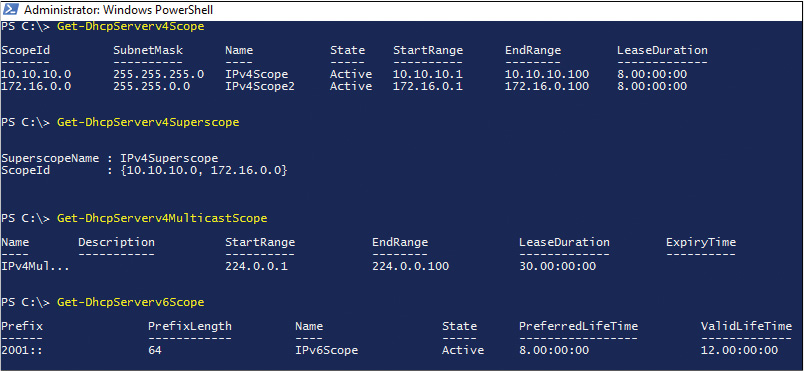
When you want to verify the successful creation of all scope types, you can use the PowerShell cmdlets demonstrated in Figure 6-20.
Creating and Configuring DHCP Scopes
To create and configure a scope, you must define the properties outlined in Table 6-4.

For example, imagine that you want to create an IPv4 scope named PearsonScope with an IP range of 192.168.1.100/24 to 192.168.1.200/24 with an exclusion range of 192.168.1.180 to 192.168.200. In addition, it has a DHCP Option 003 with three routers (192.168.1.201, 192.168.1.202, and 192.168.1.203) and a DHCP Option 006 with a DNS server of 192.168.1.210 and a default lease time of 8 days. Figure 6-21 through Figure 6-26 show the graphical configuration steps in the DHCP Manager on a Windows Server 2016 DHCP server.


Creating DHCP Scopes with PowerShell
In Windows Server 2012, Microsoft introduced several new Windows PowerShell cmdlets for configuring and managing DHCP servers. Each cmdlet has parameters that need to be met, depending on actions to be taken. Many of the new cmdlets address scope creation and management (see Table 6-5).
Tip
For more information about all Windows Server 2016 DHCP server PowerShell cmdlets, refer to http://aka.ms/Blsmzw.
If you want a computer or device to obtain a specific address from the scope range, you can reserve that address to be assigned permanently to the device in DHCP. Reservations are useful for tracking IP addresses assigned to devices such as printers. To create a reservation in the DHCP Manager, select the scope in the DHCP console and, from the Action menu, click New Reservation. Figure 6-27 shows an example of a reservation for a printer named Printer1.

You need to provide the information outlined in Table 6-6 to create the reservation.

With the PowerShell cmdlet Add-DhcpServerv4Reservation, you can create a DHCP reservation for an IPv4 IP address with a MAC address. You also can add an IPv6 reservation for an IPv6 scope with the PowerShell cmdlet Add-DhcpServerv6Reservation.
Figure 6-28 shows all Windows Server 2016 DHCP server PowerShell cmdlets for reservations.

DHCP Options
Chapter 3, “Configuring and Managing DNS Policies,” covered DHCP options in detail. However, you need to understand some additional topics that are more appropriately covered within the context of this chapter.
Common IPv4 DHCP Scope Options
DHCP options are values for common configuration data. They can be applied to the server, scope, class, and reservation levels. Option codes identify DHCP options and come from RFC documentation found on the IETF website. Table 3-2 in Chapter 3 shows the most common DHCP options.
In the following example, you add a DHCP IPv4 option 60 for a DHCP server named DHCP1 with PowerShell:
Add-DhcpServerv4OptionDefinition -ComputerName DHCP1 -Name PXEClient
-Description "PXE Support" -OptionId 060 -Type String
With the PowerShell command, you can add a DHCP IPv4 option 43 for a DHCP server named DHCP1 (you have to give it the value for option 43 in hexadecimal):
Set-DhcpServerv4OptionValue -ComputerName MyDHCPServer -ScopeId
"PearsonScope"
-OptionId 043 -Value 0x01,0x04,0x00,0x00,0x00,0x00,0xFF
Figure 6-29 shows the PowerShell cmdlets you can use for configuring DHCP options.

PXE Boot Options
PXE-enabled network cards add the DHCP option 60 to their discover packets. Normally, DHCP clients send a DHCP option 67 packet, and then DHCP servers return a DHCP 68 option offer. DHCP uses the same ports used by the Windows Deployment Services PXE server function.
If you deploy DHCP and a PXE server on the same machine, you must set DHCP to make offers that also include the 60 option. A DHCP server then makes the DHCP 60 offer back to the client. You need to set DHCP options 60 (PXE Client), 66 (Boot Server Host Name), and 67 (Bootfile Name). You can set options 66 and 67 in the Scope Options window in the DHCP console, but you must set the 60 option via the command line. The following code sample lists the procedure:
netsh
dhcp
server \<server_machine_name>
add optiondef 60 PXEClient String 0 comment=PXE support
set optionvalue 60 STRING PXEClient
exit
After this, a PXE server sends back boot server and boot information to the PXE-enabled network client so that it can accept an operating system installation.
Common IPv6 DHCP Scope Options
Windows Server 2016 DHCP servers support DHCP IPv6, and IPv6 DHCP options can be assigned at the server and scope levels. Table 6-7 lists the IPv6 DHCP scope options.

Applying DHCP Options
DHCP options are applied in an order of precedence at four different levels:
1. Server level: Assigns a server-level option to all DHCP clients of the DHCP server.
2. Scope level: Assigns a scope-level option to all clients of a scope. Scope options override server options.
3. Class level: Assigns a class-level option to all clients that identify themselves as members of a class. Class options override both scope and server options.
4. Reserved client level: Assigns a reservation-level option to one DHCP client. Reserved client options apply to devices that have a DHCP reservation.
DHCP Relay Agent
When attempting to obtain an IP address, clients use broadcasts to initiate communications. Therefore, DHCP servers and clients can communicate only within their IP subnet. As a consequence, many networks have a DHCP server in each subnet. For a DHCP server to respond to a DHCP client request, it must be capable of receiving DHCP requests. You can enable this by configuring a DHCP relay agent on each subnet.
A DHCP relay agent is a computer or router that listens for DHCP broadcasts from DHCP clients and then relays them to DHCP servers in different subnets. You configure a DHCP relay agent to point to the IP address of the DHCP server in the remote subnet.
The DHCP relay agent relays any DHCP broadcast packets to unicast packets. These packets are sent to the relay agent’s listed DHCP server, which typically is on another IP subnet across a router. The DHCP server sends DHCP offer and acknowledge packets back to the relay agent by using unicast broadcasts. The relay agent then broadcasts these packets on the local subnet, so the client that needs an address can receive it without having to change its core processing.
You also can relay DHCP packets into other subnets by using a router that is compatible with RFC 1542. This means that, upon receiving a DHCP broadcast packet, the router can replay the DHCP broadcast on the other subnets to which it connects. Because this DHCP relay happens within the router, you do not have to create a specific DHCP relay agent on a server running Windows Server. Most modern routers have RFC 1542 capabilities.
For more information regarding RFC 1542, visit https://tools.ietf.org/html/rfc1542.
DHCP Security Options
Because DHCP is not an authentication protocol, you must take precautions to ensure that only valid clients are receiving network information. You also should take precautions to ensure that the names your client computers have registered in your organization’s DNS are protected.
Be sure to consider three important points regarding DHCP security options:
![]() Limit physical access to the network.
Limit physical access to the network.
![]() Enable DHCP auditing to track DHCP usage.
Enable DHCP auditing to track DHCP usage.
![]() Use DHCP name protection to prevent attacks.
Use DHCP name protection to prevent attacks.
Limited Network Access
DHCP by itself is designed to work before the necessary information is in place for a client computer to authenticate with a domain controller. Administrators need to take precautions to prevent unauthorized computers from obtaining a lease with DHCP.
DHCP Auditing
You should enable audit logging on all DHCP servers. This gives you a historical view of activity and enables you to trace when an unauthorized user obtained an IP address in the network. Be sure to review the audit logs at regular intervals. You can enable DHCP server logging by following these steps:
Step 1. Open the DHCP Manager.
Step 2. In the console tree, click the DHCP server you want to configure.
Step 3. On the Action menu, click Properties.
Step 4. On the General tab, select Enable DHCP Audit Logging and then click OK.
Table 6-8 lists some of the most important DHCP server log event codes.

Table 6-8 Windows Server 2016 DHCP Server Log Common Event Codes and DHCP DNS Dynamic Update Event Codes
DHCP Name Protection
A DHCP server can automatically create resource records for DHCP clients in the DNS database.
You should protect the names that DHCP registers in DNS on behalf of other computers or systems from being overwritten by non-Windows operating systems that use the same names. In addition, if DHCP is not configured for conflict detections, you should protect the names from being overwritten by systems that use static addresses that conflict with DHCP-assigned addresses when they use unsecure DNS.
For example, a UNIX-based system named CL1 could potentially overwrite the DNS address that DHCP assigned and registered on behalf of a Windows-based system also named CL1. DHCP Name Protection addresses this issue.
Name squatting describes the conflict that occurs when one client registers a name with DNS, but another client already is using that name. This problem causes the original machine to become inaccessible. It typically occurs with systems that have the same names as Windows operating systems.
DHCP Name Protection addresses this by using a resource record known as a Dynamic Host Configuration Identifier (DHCID) to track which machines originally requested which names. The DHCP server provides the DHCID record, which is stored in DNS. When the DHCP server receives a request from a machine with an existing name for an IP address, the DHCP server can refer to the DHCID in DNS to verify that the machine requesting the name is the original machine that used the name. If it is not the same machine, the DNS resource record is not updated. You can implement this for IPv4 and IPv6, and you can configure it at the server scope level. However, the server-level implementation will apply only for newly created scopes.
You can enable DHCP Name Protection for an IPv4 or IPv6 node in this way:
Step 1. Open the DHCP console.
Step 2. Right-click the IPv4 or IPv6 node and then open the Property page.
Step 3. Click DNS, click Advanced, and click the Enable Name Protection check box.
You also can enable DHCP Name Protection for an individual scope in this way:
Step 1. Expand IPv4 or IPv6, right-click the scope, and open the Property page.
Step 2. Click DNS and Advanced, and then click the Enable Name Protection check box.
Figure 6-30 shows where to enable DHCP Name Protection in the Windows Server 2016 DHCP Manager.

With the following PowerShell command, you can enable DHCP name protection for a scope:
Set-DhcpServerv4DnsSetting -ComputerName "dhcpserver.pearson.com"
-ScopeId 10.10.10.0
-DynamicUpdates "OnClientRequest" -NameProtection $True
Just Enough Administration
The new Just Enough Administration (JEA) and Just in Time Administration (JIT) features are new to Windows Server 2016 features and provide a generic RBAC solution that uses PowerShell remotely. Role-based access control (RBAC) is a method of regulating access to computer or network resources based on the roles of individual users within an enterprise. In this context, access is the capability of an individual user to perform a specific task, such as viewing, creating, or modifying a file. JEA and JIT enable you to give administration credentials only when needed for a finite time and only for specific tasks. You can implement JEA or JIT for all possible PowerShell cmdlets, as well as for DHCP server PowerShell cmdlets.
For example, suppose you start a remote PowerShell session to your DHCP server with the following PowerShell command, and the $AdminCred variable includes DHCP Administrator credentials:
Enter-PSSession -Computername dhcp.pearson.com -credential $AdminCred
When connected, you have permission to run all DHCP PowerShell cmdlets on dhcp.pearson.com.
When you want to use JEA, start the remote PowerShell session in another way:
Enter-PSSession -Computername dhcp.pearson.com -configurationname
JEA_Demo -credential $NonAdminCred
The value JEA_Demo for the parameter -configurationname is the JEA endpoint, which a highly trusted administrator pre-created through the PowerShell cmdlet New-PSSessionConfigurationFile. The JEA endpoint was configured to define which DHCP PowerShell cmdlets you are allowed to use through that endpoint.
Suppose you want to restrict DHCP administrators to allow them just to configure DHCP scope settings. The JEA endpoint defines that you can use only the Set-DhcpServerv4Scope PowerShell cmdlet and no other DHCP cmdlets.
When you are connected through a PowerShell remote session with Enter-PSSession and are using a JEA/JIT endpoint, your endpoint access is applied to the WinRM Virtual User for this remote session, not the connected user you are logged in as.
Using the following steps, you can restrict permissions to the default directory security group DHCP Administrators so that only members of this group can use the Set-DhcpServerv4Scope cmdlet on the DHCP server:
Step 1. Create a maintenance role capability file in PowerShell ISE and run it:
# Fields in the role capability
$MaintenanceRoleCapabilityCreationParams = @{
Author = 'Pearson Admin'
CompanyName = 'Pearson'
VisibleCmdlets = 'Set-DhcpServerv4Scope'
FunctionDefinitions =
@{ Name = 'Get-UserInfo'; ScriptBlock = {
$PSSenderInfo } }
}
# Create the demo module, which will contain the maintenance Role
Capability File
New-Item -Path "$env:ProgramFilesWindowsPowerShellModulesDemo_
Module" -ItemType Directory
New-ModuleManifest -Path "$env:ProgramFilesWindowsPowerShell
ModulesDemo_ModuleDemo_Module.psd1"
New-Item -Path "$env:ProgramFilesWindowsPowerShellModulesDemo_
ModuleRoleCapabilities" -ItemType Directory
# Create the Role Capability file
New-PSRoleCapabilityFile -Path "$env:ProgramFiles
WindowsPowerShellModulesDemo_ModuleRoleCapabilities
Maintenance.psrc" @MaintenanceRoleCapabilityCreationParams
Step 2. Create and register a Demo Session configuration file and run it:
# Determine domain
$domain = (Get-CimInstance -ClassName Win32_ComputerSystem).
Domain
# Replace with your non-admin group name
$NonAdministrator = "$domainDHCP Administrators"
# Specify the settings for this JEA endpoint
# Note: You will not be able to use a virtual account if you are
using WMF 5.0 on Windows 7 or Windows Server 2008 R2
$JEAConfigParams = @{
SessionType = 'RestrictedRemoteServer'
RunAsVirtualAccount = $true
RoleDefinitions = @{
$NonAdministrator = @{ RoleCapabilities = 'Maintenance' }
}
TranscriptDirectory = "$env:ProgramDataJEAConfiguration
Transcripts"
}
# Set up a folder for the Session Configuration files
if (-not (Test-Path "$env:ProgramDataJEAConfiguration"))
{
New-Item -Path "$env:ProgramDataJEAConfiguration" -ItemType
Directory
}
# Specify the name of the JEA endpoint
$sessionName = 'JEA_Demo'
if (Get-PSSessionConfiguration -Name $sessionName -ErrorAction
SilentlyContinue)
{
Unregister-PSSessionConfiguration -Name $sessionName
-ErrorAction Stop
}
New-PSSessionConfigurationFile -Path "$env:ProgramData
JEAConfigurationJEADemo.pssc" @JEAConfigParams
# Register the session configuration
Register-PSSessionConfiguration -Name $sessionName -Path
"$env:ProgramDataJEAConfigurationJEADemo.pssc"
Step 3. Test the JEA configuration.
Figure 6-31 illustrates the use of JEA configuration. In this example, the only DHCP server PowerShell cmdlet available for the remotely connected user is the Set-DhcpServerv4Scope PowerShell cmdlet.

Figure 6-32 shows the information for both the ConnectedUser and the RunAsUser.

The output of Get-UserInfo shows the information for both the ConnectedUser and the RunAsUser. The connected user is the account that is connected to the remote session (for example, your account). The connected user does not need to have administrator privileges. The RunAs account is the account that actually performs the privileged actions. By connecting as one user and running as a privileged user, you allow nonprivileged users to perform specific administrative tasks without giving them administrative rights.
Tip
With the PowerShell cmdlet Get-PSSessionConfiguration, you can list the JEA endpoints you have set up.
In the Windows Remote Management operational log in Event Viewer, Event ID 193 records the ConnectedUser’s SID and name, as well as the RunAs virtual account’s SID. In the PowerShell operational log in Event Viewer, Event ID 4104 records each command invoked if you have enabled Module Logging. You enable PowerShell Module Logging through Group Policy. You can set Turn on Module Logging to Enabled at Computer ConfigurationAdministrative Templates Windows ComponentsWindows PowerShell.
DHCP High Availability
DHCP is a critical service in modern networks and needs to be available when clients have to get IP configuration information from the central IP configuration delivery service. You have three main possibilities for making DHCP high available: clustering, split scopes, and DHCP failover.
DHCP Clustering
The DHCP Server service can run on Windows Server 2016 in a two-member failover cluster. Both cluster nodes have the DHCP server role installed with identical scopes. Configuration information is stored in shared storage. If one node of the cluster fails, the other member in the cluster detects the failure and starts the DHCP service on the surviving member of the cluster.
Split Scopes
Split scope involves two DHCP servers. In this case, each DHCP server controls a part of the entire range of IP addresses and both servers are active on the same network. For example, if your subnet is 172.16.0.0, you might assign an IP address range of 172.16.0.1 to 172.16.0.150 to DHCP server A (the primary server) and assign the range 172.16.0.151 to 172.16.0.254 to DHCP server B (a secondary DHCP).
DHCP Failover
DHCP manages the distribution of IP addresses in TCP/IP networks of all sizes. When this service fails, clients lose connectivity to the network and all its resources. DHCP failover is a feature in Windows Server 2016 that addresses this issue.
DHCP Failover Overview
DHCP clients renew leases at regular intervals. When a DHCP service fails, clients no longer have IPs. Before Windows Server 2012, DHCP failover was not possible because DHCP servers were independent and unaware of each other. Therefore, configuring two separate DHCP servers to distribute the same pool of addresses could lead to duplicate addresses. Providing redundant DHCP services required that you configure clustering and perform a significant amount of manual configuration and monitoring.
The solution since Windows Server 2012 is the new DHCP failover feature, which is still supported in Windows Server 2016 and enables two DHCP servers to provide IP addresses and optional configurations to the same subnets or scopes. Therefore, you now can configure two DHCP servers to replicate lease information. If one of the servers fails, the other server services the clients for the entire subnet.
Tip
You cannot configure DHCP failover for more than two DHCP servers. In addition, DHCP failover cannot be used with IPv6 scopes and subnets.
Configuring DHCP Failover
When you want to avoid building a failover cluster to implement a high availability (HA) solution for your DHCP server, you need to establish a DHCP failover relationship between the two DHCP servers that you want to configure for the DHCP failover feature. This partnership is stored in Active Directory and needs a unique name. The failover partners exchange this name during configuration. This enables a single Windows Server 2016 DHCP server to have multiple failover relationships with other Windows Server 2012 or Windows Server 2016 DHCP servers, as long as they all have unique names.
To configure the Windows Server 2016 DHCP failover feature, you can choose between two modes. Table 6-9 explains the load sharing and hot standby modes in detail.

You can use two important DHCP failover parameters to configure the behavior of a DHCP server, the required wait time when the partner DHCP server is unavailable, and when to enable automatic transition:
![]() MCLT: The Maximum Client Lead Time parameter determines the amount of time a DHCP server should wait when a partner is unavailable before assuming control of the address range. This value cannot be zero; the default is 1 hour.
MCLT: The Maximum Client Lead Time parameter determines the amount of time a DHCP server should wait when a partner is unavailable before assuming control of the address range. This value cannot be zero; the default is 1 hour.
![]() Auto state switchover interval: When a server loses the connection with its partner, the server has no way to know what is causing the communication loss. It remains in this state until an administrator changes it to Partner Down state. You can enable automatic transition to Partner Down state through the auto state switchover interval. The default value is 10 minutes.
Auto state switchover interval: When a server loses the connection with its partner, the server has no way to know what is causing the communication loss. It remains in this state until an administrator changes it to Partner Down state. You can enable automatic transition to Partner Down state through the auto state switchover interval. The default value is 10 minutes.
To configure failover, use the Configuration Failover Wizard, which you launch by right-clicking the IP node or the scope node. The following steps give an example of DHCP failover configuration between two DHCP servers.
Suppose you want to configure a DHCP failover relationship (hot standby mode, with DHCP1 as the primary DHCP server) for a scope between two Windows Server 2016 DHCP servers named DHCP1 and DHCP2 in the domain pearson.com through the following steps. (All DHCP servers must be authorized before DHCP failover feature can be configured.)
Step 1. On DHCP1 in the DHCP Manager, under the IPv4 node, select Configure Failover.
Step 2. On the Configure Failover page, select the scope you want to replicate.
Step 3. On the Specify the Partner Server to Use for Failover page, type the name of your partner server (in this case DHCP2) or select Add Server to add DHCP2.
Step 4. On the Create a New Failover Relationship page, leave the Relationship Name value. Here you can configure the Maximum Client Lead Time setting, the DHCP failover mode (load balance or hot standby), Load Balance Percentage, State Switchover Interval, Message Authentication, and Shared Secret. Under Mode, select Hot Standby. Leave the default settings at 5% for addresses reserved for the standby server.
Step 5. Finish the DHCP failover configuration.
After that configuration, the failover scope exists on DHCP1 and DHCP2, with DHCP1 serving as the active (primary) DHCP server and DHCP2 working as the passive (secondary) DHCP server. If DHCP1 stops working, clients obtain their IP addresses and options from DHCP2. Replication traffic between DHCP failover partners is encrypted. The DHCP servers cannot be in different domains, but they can exist in different sites and subnets. DHCP uses TCP port 647 to listen for DHCP failover traffic. The DHCP installation creates the following inbound and outbound firewall rules:
![]() Microsoft-Windows-DHCP-Failover-TCP-In
Microsoft-Windows-DHCP-Failover-TCP-In
![]() Microsoft-Windows-DHCP-Failover-TCP-Out
Microsoft-Windows-DHCP-Failover-TCP-Out
You also can configure DHCP failover through PowerShell cmdlets. Figure 6-33 shows the DHCP failover PowerShell cmdlets.

With the PowerShell cmdlet Invoke-DhcpServerv4FailoverReplication, you can invoke scope replication between DHCP failover partners.
When you want to remove a DHCP failover partnership and you want to completely remove its settings, you must go to IPv4 Properties and select the Failover tab. This removes the DHCP failover object completely.
DHCP Policies
With Windows Server 2016 DHCP Policies, you can create policies that deliver specific IP addresses and optional information to clients based on a set of conditions.
This gives you the possibility of having different types of IP devices receive addresses and other options from a subset of IP addresses in the scope range. This strategy can assist you in identifying the device type based on the IP address.
For example, with the DHCP subnet 192.168.1.0/24, you can use policies to dictate that IP-based phones receive addresses from 192.168.1.80 to 192.168.1.100 and have long leases, whereas laptops receive addresses from 192.168.1.101 to 192.168.1.150 with much shorter leases.
Table 6-10 outlines the characteristics of DHCP0.

DHCP Policy Conditions
Figure 6-34 shows the possible conditions of a DHCP Policy.

DHCP Policies Example
One example of the usefulness of DHCP Policies is registering foreign clients using a guest DNS suffix. Today, thanks to bring your own device (BYOD), devices are not necessarily all domain members. These foreign devices are workgroup or domain-joined devices. You can handle the DNS registrations of such devices via DHCP Policies.
Windows Server 2016 DHCP Policies offer criteria enabling you to group clients based on FQDN. You can use wildcards to group clients based on their DNS suffix or hostnames. Then you can either disable PTR registration for them or register these clients with a different DNS suffix. You can think of the PTR record as the opposite of the A record. Whereas the A record points a domain name to an IP address, the PTR record resolves the IP address to a domain/hostname. PTR records are used for the reverse DNS lookup. Using the IP address, you can get the associated domain/hostname. An A record should exist for every PTR record.
The following configuration explains the implementation of a DHCP Policy at the scope level. Figure 6-35 shows the DHCP Policy Configuration Wizard. The name of the DHCP Policy will be ForeignDeviceDHCPPolicy.

Figure 6-36 shows possible DHCP Policy criteria for domain-joined foreign devices. For these kinds of devices, you must select the criteria of Fully Qualified Domain Name and also select the operator Is Not Single Label.

Figure 6-37 shows how to define a DHCP Policy condition for foreign devices with a hostname starting with DELL or a suffix of either consuit.ch or also.ch.

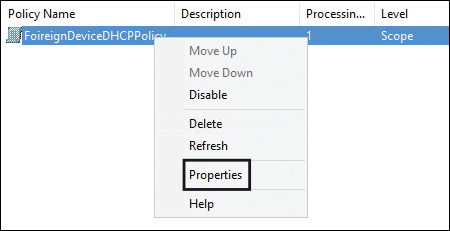
After you have created the DHCP Policy, you can edit the properties of that policy. Figure 6-38 shows where to find the properties of a DHCP Policy.
In the DHCP scope policy properties on the DNS tab, you can select the setting Register DHCP Clients Using the Following DNS Suffix to ensure that all foreign domain or workgroup-joined clients are registered under the guest DNS suffix guestdomain.pearson.com. For successful registration of DNS records, this DNS suffix must be configured on the DNS server. Figure 6-39 shows this setting.

You also can create, configure, and remove DHCP Policies with PowerShell cmdlets. Figure 6-40 shows the DHCP Policy PowerShell cmdlets.

Exam Preparation Tasks
Review All the Key Topics
Review the most important topics in the chapter, noted with the Key Topics icon in the outer margin of the page. Table 6-11 lists these key topics and the page numbers where each is found.

Table 6-11 Key Topics for Chapter 6
Complete the Tables and Lists from Memory
Print a copy of Appendix B, “Memory Tables” (on the book’s website), or at least the section for this chapter, and complete the tables and lists from memory. Appendix C, “Memory Tables Answer Key,” also on the website, includes completed tables and lists to check your work.
Definition of Key Terms
Define the following key terms from this chapter and check your answers in the glossary.
DHCP server
DHCP failover
DHCP hot standby
DHCP load sharing
DHCP Policy
DHCP reservation
End-of-Chapter Review Questions
1. You have configured a hot standby failover partnership between two Windows Server 2016 DHCP servers named DHCP1 and DHCP2 for the IP scope Scope1. DHCP1 is the active partner. The DHCP service on DHCP1 has crashed after a database corruption. You want to restore Scope1 and ensure that the partnership between both servers is still working after the restore process. Which three commands should you use?
a. netsh dhcp server import
b. netsh dhcp server export
c. Backup-DhcpServer
d. Restore-DhcpServer
e. Remove-Item
f. Stop-Service
2. You must run a PowerShell script to install and configure the DHCP server role on a Windows Server 2016 with the IP address 172.16.1.10. You have to do the following tasks:
![]() Install the Windows Server 2016 DHCP server role with management tools
Install the Windows Server 2016 DHCP server role with management tools
![]() Create the necessary security groups
Create the necessary security groups
![]() Authorize the DHCP server in Active Directory with the following parameters
Authorize the DHCP server in Active Directory with the following parameters
![]() Add the following DHCP IPv4 scope : 172.16.1.150-172.17.1.200/24
Add the following DHCP IPv4 scope : 172.16.1.150-172.17.1.200/24
![]() Configure the following DHCP scope options: Domain: pearson.com, DNS: 172.16.1.10, Gateway: 172.16.1.1
Configure the following DHCP scope options: Domain: pearson.com, DNS: 172.16.1.10, Gateway: 172.16.1.1
![]() Configure lease duration
Configure lease duration
You have the following PowerShell script:
$DNSDomain="pearson.com"
$DNSServerIP="172.16.1.10"
$DHCPServerIP="172.16.1.10"
$StartRange="172.16.1.150"
$EndRange="172.16.1.200"
$Subnet="255.255.255.0"
$Router="172.16.1.1"
______A________ -Name 'DHCP' -______B________
______C________ /c "netsh dhcp add securitygroups"
Restart-service dhcpserver
______D________ -DnsName $Env:COMPUTERNAME
______E________ -Name " Scope" -Start $StartRange -End $EndRange -SubnetMask $Subnet
______F________ -DnsDomain $DNSDomain -DnsServer $DNSServerIP
-Router $Router
Match the PowerShell cmdlet in the list that follows (a–m) with the placeholders A–F in the PowerShell script.
a. IncludeAllSubFeature: __
b. IncludeManagementTools: __
c. Install-Package: __
d. Add-WindowsFeature: __
e. Add-DhcpServerinDC: __
f. Cmd.exe: __
g. Netsh.exe: __
h. Add-DhcpServerv4Class: __
i. Add-DhcpServerInDC: __
j. Add-DhcpServerV4Scope: __
k. Add-DhcpServerV4MulticastScope: __
l. Set-DhcpServerV4OptionValue: __
m. Add-DhcpServerv4OptionDefinition: __
3. You manage your Windows Server 2016 DHCP servers. You use IPv4 and IPv6 scopes. Which requirement can you not implement through Windows Server 2016 DHCP for IPv6 scopes?
a. Use the DHCP failover feature in hot standby mode
b. Deliver the SIP server domain list to DHCP clients
c. Deliver IP addresses and options
d. Configure exclusions for scopes
e. Configure reservations for scopes
4. You have configured a hot standby failover partnership between two Windows Server 2016 DHCP servers named DHCP1 and DHCP2 for the IP scope Scope1, with DHCP1 as the active partner. DHCP1 is not operating, but DHCP2 is not responding to DHCP client requests. Which setting allows DHCP2 to respond to DHCP client requests if DHCP1 is not operating?
a. Set Maximum Client Lead Time to Zero
b. Enable State Switchover Interval setting
c. Enable AutoStateTransition setting
d. Change Reserve Percentage setting
5. Paul, a DHCP administrator, wants to create a new DHCP IPv4 scope on a Windows Server 2016 DHCP server named DHCP1 using the following PowerShell command:
Enter-PSSession -computername DHCP1 -Configurationname DHCPPaul
-credential $PaulCred.
When he tries to use the Add-DhcpServerv4Scope PowerShell cmdlet, he gets the following message:
"The term 'Add-DhcpServerv4Scope' is not recognized as the name
of a cmdlet, function, script file, or operable program…."
You need to allow Paul to create DHCP IPv4 scopes on DHCP1 through remote PowerShell sessions. Which two steps must you do to allow him the use of the PowerShell cmdlet Add-DhcpServerv4Scope?
a. Add Paul to the DHCP Administrators security group
b. Add Add-DhcpServerv4Scope to the maintenance role capability file
c. Add Add-DhcpServerv4Scope to the session configuration file
d. Use Register-PSSessionConfiguration
e. Add Paul’s computer to TrustedHosts