23. Managing Files on Your iPad and in the Cloud

In this chapter, you learn how to manage the files stored on your iPad.
![]() Managing iCloud Files with the Files App
Managing iCloud Files with the Files App
![]() Using AirDrop and AirPlay to Share Content with Other Devices
Using AirDrop and AirPlay to Share Content with Other Devices
How do you get your photos and other files from your iPad to your computer—or vice versa? How do you manage those files stored on your iPad? How can you share your files with others? This chapter shows you how to do all these things. (Hint: It’s all about the “cloud.”)
Managing Your iPad Storage
First off, let’s find out how much storage you’re using on your iPad. You have limited storage, after all; if you fill it, you won’t have enough space to install new apps or shoot new pictures or videos.
Examine Available Storage
You can see how much storage space you’ve used—and still have available—from your iPad’s Settings screen.
![]() From the Dock or Home screen, tap the Settings icon to open the Settings screen.
From the Dock or Home screen, tap the Settings icon to open the Settings screen.

![]() Tap General in the left column.
Tap General in the left column.

![]() Tap iPad Storage in the right column.
Tap iPad Storage in the right column.

![]() The iPad bar graph shows the amount of storage spaced used by type of file (Media, Apps, Photos, and so on). The light gray area shows the amount of remaining storage space available.
The iPad bar graph shows the amount of storage spaced used by type of file (Media, Apps, Photos, and so on). The light gray area shows the amount of remaining storage space available.

Manage Available Storage Space
Which apps are using the most storage space? If you’re running short on space, which apps are the best to delete?
Fortunately, Apple makes it easy to look at storage on an app-by-app basis—and, just as easily, delete those apps and files that you’re not using.
![]() From the Settings screen, tap General and then tap iPad Storage.
From the Settings screen, tap General and then tap iPad Storage.

![]() At the bottom of the iPad Storage screen, you see a list of all the apps installed on your iPad, with the largest apps (those using the most storage space) first. Tap an app to view more details.
At the bottom of the iPad Storage screen, you see a list of all the apps installed on your iPad, with the largest apps (those using the most storage space) first. Tap an app to view more details.
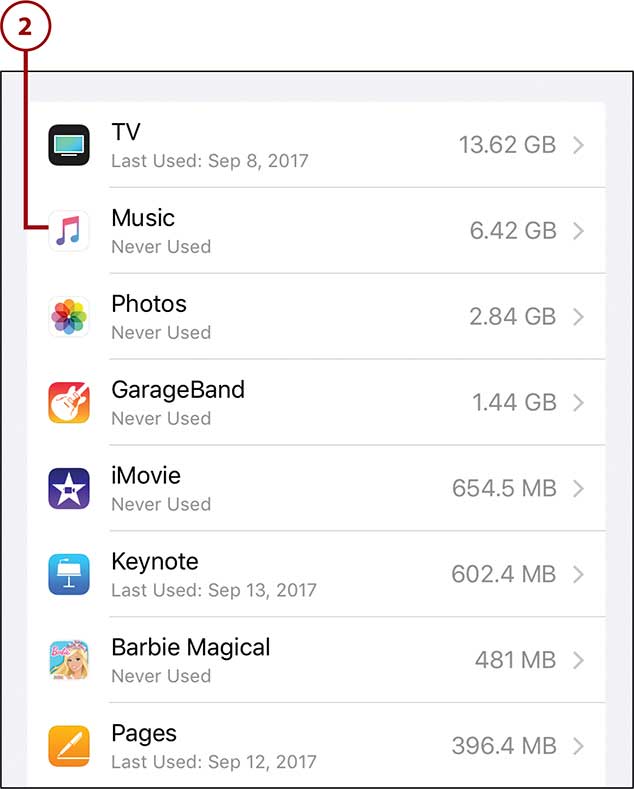
![]() The TV and Music apps list the corresponding media files used by each app—individual songs (and songs by artist) for the Music app and TV shows and movies for the TV app. Tap an item to view more details.
The TV and Music apps list the corresponding media files used by each app—individual songs (and songs by artist) for the Music app and TV shows and movies for the TV app. Tap an item to view more details.

![]() Delete a media item by tapping Edit in the top-right corner.
Delete a media item by tapping Edit in the top-right corner.


![]() Tap Delete.
Tap Delete.
![]() Tap Done.
Tap Done.

![]() Other apps display the amount of space used by that app and its data. Tap Delete App to delete the app and its corresponding data.
Other apps display the amount of space used by that app and its data. Tap Delete App to delete the app and its corresponding data.

![]() Tap Delete App in the confirmation box.
Tap Delete App in the confirmation box.

>>>Go Further: WHAT TO DELETE
When you’re looking to free up storage space on your iPad, it makes sense to look at the largest apps first—which is why Apple sorts them that way. You get the most bang for your buck by deleting a single large app than by deleting several smaller ones. So look at the apps in order of largest to smallest, and find those you no longer use or want. The first ones you come across are the ones you should delete.
Managing iCloud Files with the Files App
It used to be that the only way to transfer media files to and from your iPad was by connecting your device to a computer. Today, however, you use Apple’s iCloud service to store and transfer your files.
iCloud is a cloud-based storage service, which means it stores your files on Apple’s servers, over the Internet. All files are synced wirelessly when you’re connected to a Wi-Fi network, so you don’t have to physically connect your iPad to your computer.
>>>Go Further: UNDERSTANDING iCLOUD AND CLOUD STORAGE
When it comes to storing data, there are two types of storage: local and cloud. Local storage means that your data is stored locally, on your device. (In your case, your iPad.) Cloud storage stores your data on computer servers in the “cloud”—that is, on the Internet. The advantage of local storage is that you always have your data at hand, even if you don’t have an Internet connection. The advantage of cloud storage is that you can access your data from any device connected to the Internet, from wherever you might happen to be. All you need is an Internet connection and the username and password for your cloud storage account.
Apple’s cloud storage service is called iCloud, and it’s integrated into iOS and your iPad. This is a good thing, as you have a lot more storage space available in the cloud than you do on your iPad itself. You can also access the photos and videos you shoot with your iPad from any other device—your iPhone, for example, or your desktop or laptop computer.
One nice thing about how iCloud works is that once you enable it, you really don’t have to do much else. Any new photo or file you create on your iPad is automatically uploaded to iCloud; you don’t have to manually transfer any files. This also syncs your data between multiple devices; if you have a shared calendar, when you add an event on your iPad’s Calendar app, that new event appears on all other devices linked to your iCloud account.
Access isn’t limited to Apple devices, either. You can log onto iCloud.com from any computer or mobile device, using any web browser. It’s all connected.
You were prompted to create an iCloud account when you first powered up your new iPad. You can also create a new account at a later date by going to iCloud.com and selecting the Don’t Have an Apple ID? Option.
You get 5GB of free storage with your iCloud account. That’s a lot, and it might be all you need. If it’s not enough storage space, however, you can upgrade your account to get more storage. In the U.S., you pay $0.99/month for 50GB of storage (that’s ten times the default storage space), $2.99/month for 200GB, or $9.99/month for a whopping 2TB (that’s two terabytes, or 2,000 gigabytes!).
Configure iCloud on Your iPad
You probably set up iCloud when you first powered up your iPad. You can change any iCloud settings at any time from your iPad’s Settings screen.
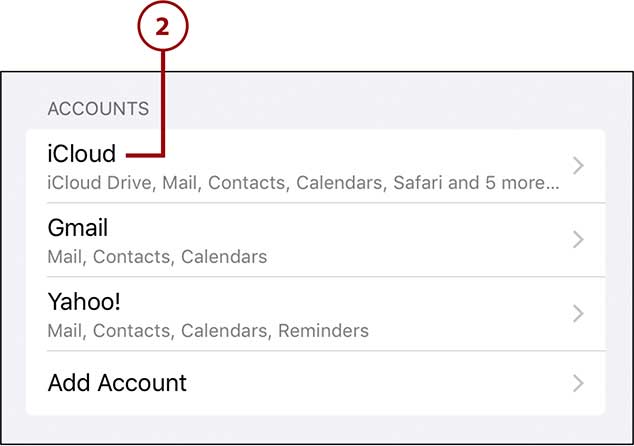
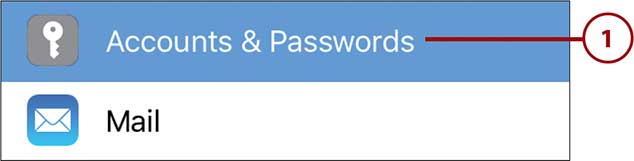
![]() From your iPad’s Settings screen, tap Accounts & Passwords in the left column.
From your iPad’s Settings screen, tap Accounts & Passwords in the left column.

![]() In the right column, go to the Accounts section and tap iCloud.
In the right column, go to the Accounts section and tap iCloud.
![]() Tap your username to change contact information, password, payment information, and other account info.
Tap your username to change contact information, password, payment information, and other account info.
![]() Tap Set Up Family Sharing to share photos, music, movies, schedules, and more with other family members.
Tap Set Up Family Sharing to share photos, music, movies, schedules, and more with other family members.
![]() The Storage section tells you how much iCloud storage space you have free. Tap Storage to manage your storage or buy more storage space.
The Storage section tells you how much iCloud storage space you have free. Tap Storage to manage your storage or buy more storage space.
![]() Tap iCloud Drive to enable/disable storage for specific apps.
Tap iCloud Drive to enable/disable storage for specific apps.

![]() Tap “on” the iCloud Drive switch to enable apps to store their documents and data in iCloud.
Tap “on” the iCloud Drive switch to enable apps to store their documents and data in iCloud.
![]() Tap “on” the switch for each individual app for which you want to enable storage.
Tap “on” the switch for each individual app for which you want to enable storage.
![]() Tap the back arrow to return to the previous screen.
Tap the back arrow to return to the previous screen.

![]() Tap Photos to enable/disable photo sharing via iCloud.
Tap Photos to enable/disable photo sharing via iCloud.

![]() Tap “on” the iCloud Photo Library switch to automatically upload and store your photo library in iCloud.
Tap “on” the iCloud Photo Library switch to automatically upload and store your photo library in iCloud.
![]() Tap Optimize iPad Storage to store all your photos online and automatically delete them from your iPad. Or…
Tap Optimize iPad Storage to store all your photos online and automatically delete them from your iPad. Or…
![]() Tap Download and Keep Originals to keep your original photos on your iPad (and copies in iCloud).
Tap Download and Keep Originals to keep your original photos on your iPad (and copies in iCloud).
![]() Tap “on” Upload to My Photo Stream to automatically share your photos and videos with other iCloud-connected devices.
Tap “on” Upload to My Photo Stream to automatically share your photos and videos with other iCloud-connected devices.
![]() Tap “on” iCloud Photo Sharing to create photo albums to share with other users.
Tap “on” iCloud Photo Sharing to create photo albums to share with other users.
![]() Tap “on” Upload Burst Photos to upload to iCloud all the photos you shoot in a burst. (By default, this is switched off and only key photos in a burst are uploaded, to save storage space.)
Tap “on” Upload Burst Photos to upload to iCloud all the photos you shoot in a burst. (By default, this is switched off and only key photos in a burst are uploaded, to save storage space.)
![]() Tap the back arrow to return to the previous screen.
Tap the back arrow to return to the previous screen.

![]() Tap “on” the switch for any app or service that you want to sync via iCloud. (Probably all of them.)
Tap “on” the switch for any app or service that you want to sync via iCloud. (Probably all of them.)
![]() Tap Keychain to enable iCloud Keychain, which stores passwords and credit card information across other iCloud-connected devices.
Tap Keychain to enable iCloud Keychain, which stores passwords and credit card information across other iCloud-connected devices.
![]() Tap iCloud Backup to enable iCloud Backup, which automatically backs up important data from your iPad to iCloud.
Tap iCloud Backup to enable iCloud Backup, which automatically backs up important data from your iPad to iCloud.
![]() Tap Find My iPad to enable the Find My iPad service, which helps you find or disable your iPad if it’s lost.
Tap Find My iPad to enable the Find My iPad service, which helps you find or disable your iPad if it’s lost.

View and Open Files with the Files App
You use the Files app (new with iOS 11) to view and manage those files you’ve stored in iCloud.
![]() From your iPad’s Home screen, tap the Files icon to open the Files app.
From your iPad’s Home screen, tap the Files icon to open the Files app.

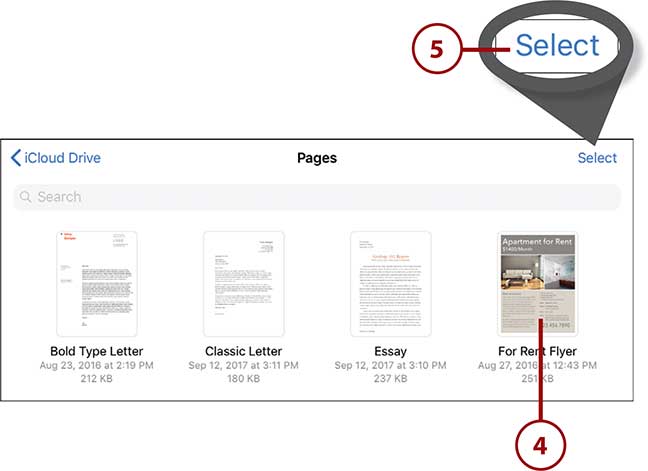
![]() Files are stored in folders. You can sort folders by name, date, size, or tags. Tap Select, and then select a sort criteria at the top of the screen.
Files are stored in folders. You can sort folders by name, date, size, or tags. Tap Select, and then select a sort criteria at the top of the screen.
![]() By default, each app has a folder for its own files. Tap a folder to view its contents.
By default, each app has a folder for its own files. Tap a folder to view its contents.

![]() Tap a file to open that item.
Tap a file to open that item.
![]() Tap Select to copy, move, or delete a file.
Tap Select to copy, move, or delete a file.
![]() Tap to select one or more items. A blue check mark indicates selected items.
Tap to select one or more items. A blue check mark indicates selected items.
![]() Tap Move to move the selected item(s) to another folder.
Tap Move to move the selected item(s) to another folder.
![]() Tap Duplicate to copy the selected item(s) to another folder.
Tap Duplicate to copy the selected item(s) to another folder.
![]() Tap Delete to delete the selected item(s) item from iCloud.
Tap Delete to delete the selected item(s) item from iCloud.
![]() Tap Done when you’re done moving or deleting files.
Tap Done when you’re done moving or deleting files.

>>>Go Further: ACCESS iCLOUD FROM YOUR COMPUTER
You can view all items stored in your iCloud account from any connected device, including your desktop or laptop computer. Just open your web browser, go to iCloud.com, and then enter your Apple ID and password.
Once you’ve signed in, you see icons for all the iCloud-related services—Mail, Contacts, Calendar, Photos, and such. If you want to view your uploaded photos, click Photos. If you want to view other uploaded files, click iCloud Drive. From there you can navigate through the folders to view individual files.
Create a New Folder
You don’t have to settle for the default folders created by your iPad apps. You can create your own custom folders and move appropriate files there.
![]() From within the Files app, tap the New Folder icon.
From within the Files app, tap the New Folder icon.

![]() Type a name for this folder.
Type a name for this folder.
![]() Tap Done.
Tap Done.

Add Other Cloud Storage Services to the Files App
The Files app manages files stored in iCloud by default. You can also use the Files app to manage files stored in other cloud-based storage services, including Google Drive and Microsoft’s OneDrive. All you have to do is enable those drives (what the Files app calls locations) within the app.
![]() From within the Files app, tap Locations. This opens the Browse panel on the left side of the screen.
From within the Files app, tap Locations. This opens the Browse panel on the left side of the screen.

![]() Tap Edit.
Tap Edit.

![]() Tap the service(s) you want to enable.
Tap the service(s) you want to enable.
![]() Tap Done.
Tap Done.

![]() To view files in another location, open the Browse panel and tap the name of the cloud service.
To view files in another location, open the Browse panel and tap the name of the cloud service.

![]() If prompted, select or enter the name of your account and the password.
If prompted, select or enter the name of your account and the password.

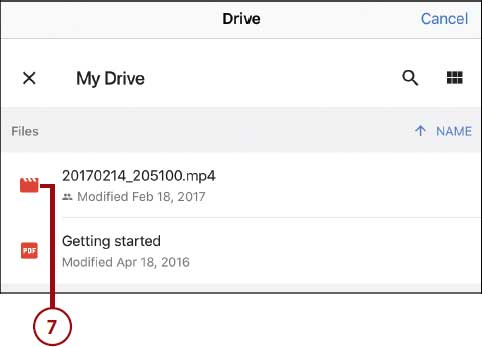
![]() You now see the contents of the selected drive. Tap to open a file.
You now see the contents of the selected drive. Tap to open a file.
>>>Go Further: SYNC FILES BETWEEN YOUR iPAD AND YOUR COMPUTER
In the past (pre-iCloud), you had to connect your iPad to a personal computer to back up and sync files. With the advent of iCloud and other cloud-based services, however, you do all your file backup and syncing in the cloud, and you don’t need a personal computer for these tasks.
That said, you can still connect your iPad to your computer to manage your files, using Apple’s iTunes software. Just connect a Lightning-to-USB cable between your iPad and your computer (Mac or Windows); this should automatically launch the iTunes software on your computer. (If the iTunes software doesn’t launch automatically, open it manually.)
Within iTunes, click the iPad icon below the menu bar. Click Summary in the left column to view key information about your iPad and to turn on automatic backups to either your computer or your iCloud account. Click Music, Movies, TV Shows, Audiobooks, or Photos to manage which items are synced to your iPad. Click File Sharing to transfer data and documents for selected apps between your iPad and your computer.
Using AirDrop and AirPlay to Share Content with Other Devices
One nice thing about committing to the Apple ecosystem (that is, using multiple Apple devices—iPads, iPhones, Mac computers, and the Apple TV set-top device) is that it’s easy to share data and files between each device. This is particularly easy using Apple’s AirDrop and AirPlay feature. AirDrop lets you easily sync files between devices, whereas AirPlay enables wireless streaming of music and videos to other devices.
Share Files with AirDrop
Use AirDrop to share photos, videos, locations, websites, and more with other compatible devices. AirDrop uses both Wi-Fi and Bluetooth to transfer data; if the other device isn’t on the same Wi-Fi network as your iPad, you can connect them via Bluetooth, instead.
To use AirDrop, you must have your iPad’s Wi-Fi and Bluetooth turned on, and each device must be connected to the same network and signed into iCloud. All transfers are encrypted for security.
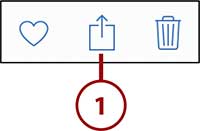
![]() Within an iPad app, tap the Share icon.
Within an iPad app, tap the Share icon.
![]() Nearby users are displayed in the top row of the share panel. Tap the name of a user to share this file with that user.
Nearby users are displayed in the top row of the share panel. Tap the name of a user to share this file with that user.

![]() To receive files from another user, swipe up from the bottom of any screen on your iPad to display the Control Center, and then tap the AirDrop tile.
To receive files from another user, swipe up from the bottom of any screen on your iPad to display the Control Center, and then tap the AirDrop tile.

![]() Tap Contacts Only to receive files from people in your contacts list only.
Tap Contacts Only to receive files from people in your contacts list only.
![]() Tap Everyone to receive files from anyone nearby.
Tap Everyone to receive files from anyone nearby.
![]() Tap Receiving Off to turn off AirDrop for receiving files.
Tap Receiving Off to turn off AirDrop for receiving files.

Stream Media with AirPlay
Use AirPlay to stream music and videos from your iPad to any compatible device in real time. You can use AirPlay to stream music from your iPad to an Apple TV box, AirPort Express device, AirPlay-enabled wireless speakers, or other AirPlay-enabled devices (such as some audio/video receivers). You can also use AirPlay to stream photos and videos to an Apple TV box.
To stream media via AirPlay, both your iPad and the target device need to be connected to the same Wi-Fi network. You may also need to enable AirPlay on the other device.
![]() With music or a video playing, swipe up from the bottom of any screen to open the Control Center, and then long press the Now Playing pane.
With music or a video playing, swipe up from the bottom of any screen to open the Control Center, and then long press the Now Playing pane.

![]() From the enlarged Now Playing pane, tap the AirPlay icon.
From the enlarged Now Playing pane, tap the AirPlay icon.

![]() AirPlay looks for and displays nearby devices. Tap the device to which you want to stream.
AirPlay looks for and displays nearby devices. Tap the device to which you want to stream.
![]() Use the playback controls to start and pause playback. The current media is now streamed to the selected device—and not played on your iPad.
Use the playback controls to start and pause playback. The current media is now streamed to the selected device—and not played on your iPad.
![]() Tap iPad to return playback to your iPad.
Tap iPad to return playback to your iPad.

Screen Mirroring
Your iPad also offers Screen Mirroring, which lets you display your entire iPad screen (apps and all) on an Apple TV set-top device. Open the Control Center, tap the Screen Mirroring tile, and then select your Apple TV device from the list. (If a passcode appears on your TV screen, enter that code into the appropriate field on your iPad screen.) You now see your iPad screen on your TV display.
Backing Up Your iPad to iCloud
The data that you store on your iPad—pictures, videos, music, and more—is valuable to you. You don’t want to lose these items if you happen to lose or damage your iPad, or if your iPad quits working.
This is why you want to back up all your data—and settings and apps—in case something bad happens. When you have a backup of your important stuff, you can then restore those items to your iPad when it’s found or fixed.
You back up your iPad files online to your iCloud account. It’s easy to do.
Back Up to iCloud
When your iPad is connected to the Internet via Wi-Fi, backups happen automatically in the background. All you have to do is configure your iPad for automatic iCloud backup.
![]() From your iPad’s Settings screen, tap Accounts & Passwords in the left column.
From your iPad’s Settings screen, tap Accounts & Passwords in the left column.
![]() In the right column, go to the Accounts section and tap iCloud.
In the right column, go to the Accounts section and tap iCloud.

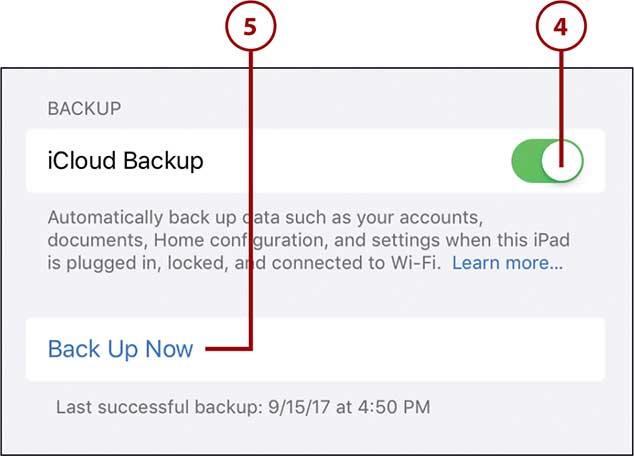
![]() Scroll down the list of apps and tap iCloud Backup.
Scroll down the list of apps and tap iCloud Backup.

![]() Tap “on” the iCloud Backup switch.
Tap “on” the iCloud Backup switch.
![]() If you want to back up your data now, tap Back Up Now.
If you want to back up your data now, tap Back Up Now.