9. Sending and Receiving Email
In this chapter, you learn how to use your iPad’s Mail app to send and receive email messages.
![]() Sending and Receiving Messages
Sending and Receiving Messages
For the past several decades, email has been an important means for people to communicate with each other. Whether you’re trading messages with friends and family members, receiving messages from groups to which you belong, or receiving confirmation messages after you’ve purchased merchandise online, it’s important to have an email address and master the workings of a full-featured email program.
The email app included with your iPad is called Mail. You can use Mail to send and receive emails using your Apple email account, or you can configure the app to work with other email services, such as Yahoo! Mail and Google’s Gmail.
Configuring the Mail App
You use your iPad’s Mail app to send and receive email messages. It works like most other email apps and can work with your Apple iCloud email, Microsoft Outlook, Google’s Gmail, Yahoo! Mail, and other email services.
Add an Email Account
When you set up your iPad with your Apple ID, that information was automatically added to the Mail app. So if you have an Apple or iCloud email address, that account is already set up in the Mail app—there’s nothing more you need to do to get started.
If you have an email address with a different service, however, you can add that account to the Mail app and check that email from the app. The Mail app lets you add multiple accounts and check messages from multiple addresses and inboxes. It’s convenient to be able to check all your emails in one place.
Although you can still go to the Gmail website for your email, for example, it’s just as easy to check your Gmail messages from within the Mail app. All you have to do is configure the Mail app for the new account.
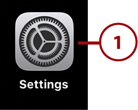
![]() From the Dock or Home screen, tap the Settings icon to open the Settings screen.
From the Dock or Home screen, tap the Settings icon to open the Settings screen.
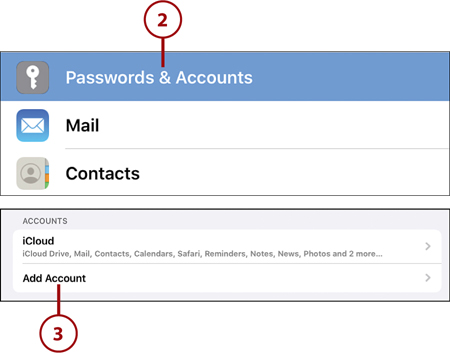
![]() Scroll down the left column and tap Passwords & Accounts.
Scroll down the left column and tap Passwords & Accounts.
![]() In the Accounts section, tap Add Account to display the Add Account screen.
In the Accounts section, tap Add Account to display the Add Account screen.
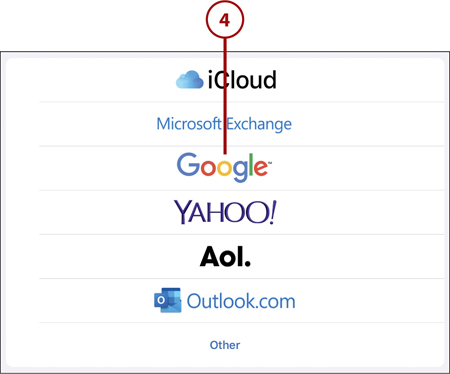
![]() Tap the type of email account you want to add—iCloud, Exchange, Google, Yahoo!, AOL, or Outlook.com. (If you have another type of email, tap Other.)
Tap the type of email account you want to add—iCloud, Exchange, Google, Yahoo!, AOL, or Outlook.com. (If you have another type of email, tap Other.)
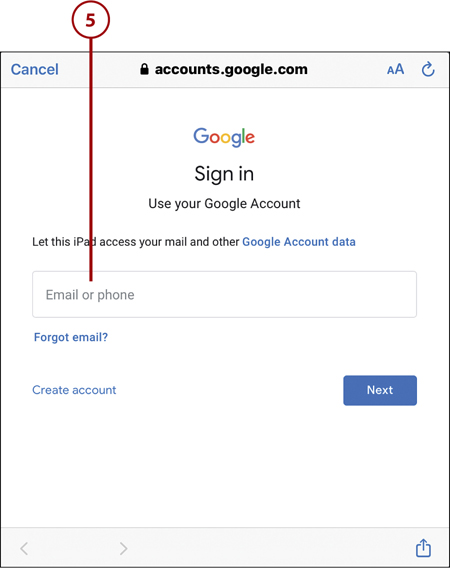
![]() When prompted, sign in to the email account you selected with that account’s email address or phone number and password. (Different email providers require different information.)
When prompted, sign in to the email account you selected with that account’s email address or phone number and password. (Different email providers require different information.)
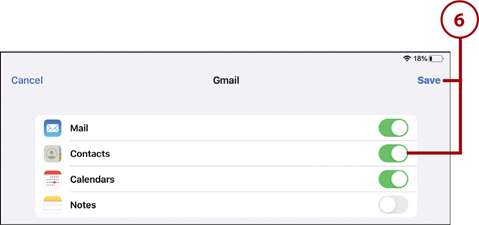
![]() If prompted to enable various aspects of your email account (such as calendar or contacts), select those options you want and tap Save. This account is now added to the Mail app.
If prompted to enable various aspects of your email account (such as calendar or contacts), select those options you want and tap Save. This account is now added to the Mail app.
Get Notified of New Messages
The Mail app can notify you when you receive new messages.
![]() Tap the Settings icon on the Dock or Home screen to open the Settings screen.
Tap the Settings icon on the Dock or Home screen to open the Settings screen.
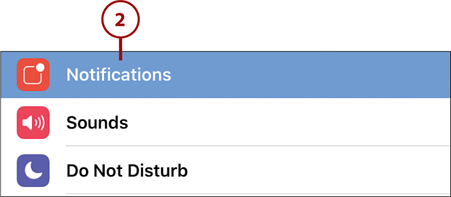
![]() Tap Notifications in the left column.
Tap Notifications in the left column.
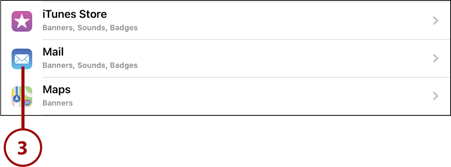
![]() Tap Mail.
Tap Mail.
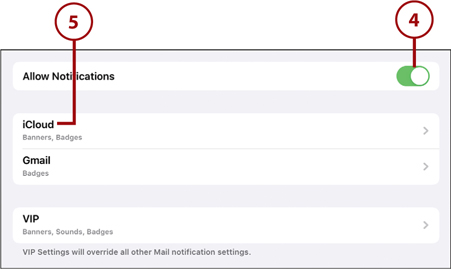
![]() Tap “on” the Allow Notifications switch.
Tap “on” the Allow Notifications switch.
![]() Tap the account from which you want to receive notifications.
Tap the account from which you want to receive notifications.
![]() Indicate that you want to show notifications from this account on the Lock screen, Notification Center, or Banners by tapping “on” the appropriate option(s).
Indicate that you want to show notifications from this account on the Lock screen, Notification Center, or Banners by tapping “on” the appropriate option(s).
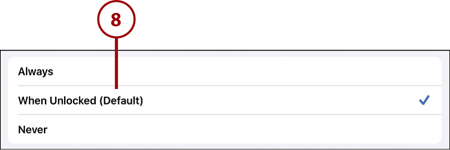
![]() To display previews of message contents in the alerts, tap Show Previews.
To display previews of message contents in the alerts, tap Show Previews.
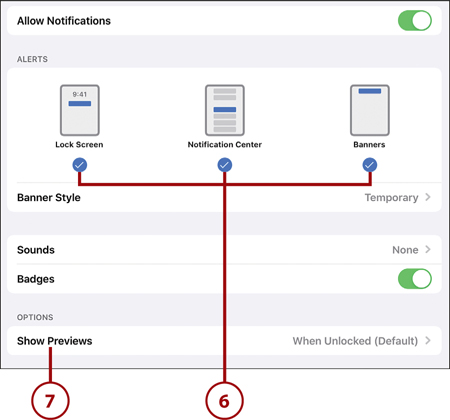
![]() Select when you want to show message previews: Always, When Unlocked, or Never.
Select when you want to show message previews: Always, When Unlocked, or Never.
Create a Signature
By default, when you send email from the Mail app, it automatically attaches a line of text to the bottom of each message: “Sent from my iPad.” This line is called a signature, and you can customize what text you include in yours.
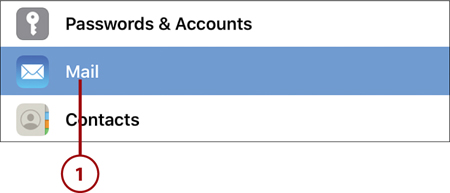
![]() From the Settings screen, scroll down the left column to the list of apps and tap Mail.
From the Settings screen, scroll down the left column to the list of apps and tap Mail.
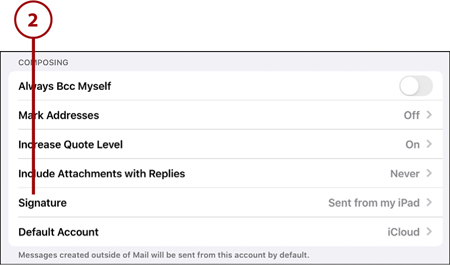
![]() Scroll down the Mail screen to the Composing section and tap Signature.
Scroll down the Mail screen to the Composing section and tap Signature.
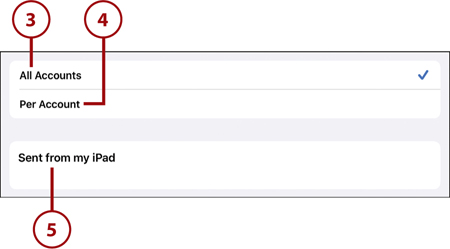
![]() Tap All Accounts to create a signature for use with all your email accounts. Or…
Tap All Accounts to create a signature for use with all your email accounts. Or…
![]() Tap Per Account to create a signature for a specific email account.
Tap Per Account to create a signature for a specific email account.
![]() Tap within the text box for a specific account, delete the default signature (“Sent from my iPad”), and type a new one.
Tap within the text box for a specific account, delete the default signature (“Sent from my iPad”), and type a new one.
Sending and Receiving Messages
The whole point of the Mail app is to let you send and receive email messages to and from your friends and family (and any other person or organization who uses email, as well). To that end, it’s relatively easy to use—just like most other email apps and services.
Select an Inbox
If you’ve configured the Mail app for more than one email account, you have more than one inbox to deal with. The Mail app includes inboxes for each account you use as well as a VIP inbox, which lists messages from people you’ve decided are very important.
![]() From the Dock or Home screen, tap the Mail icon to open the Mail app. (If you have unread email, you see a number on the Mail icon, which signifies how many messages you have waiting.)
From the Dock or Home screen, tap the Mail icon to open the Mail app. (If you have unread email, you see a number on the Mail icon, which signifies how many messages you have waiting.)
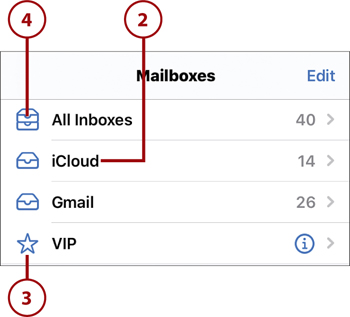
![]() Tap the name of an account to view messages from that specific account. Or…
Tap the name of an account to view messages from that specific account. Or…
![]() Tap VIP to view messages from your most important contacts. Or…
Tap VIP to view messages from your most important contacts. Or…
![]() Tap All Inboxes to see all your email from all your accounts together.
Tap All Inboxes to see all your email from all your accounts together.
Read a Message
Reading a message in the Mail app is subtly different depending on how you hold your iPad. When you hold the device horizontally, you see a split screen with inbox contents on the left and the selected message on the right. When you hold the device vertically, so the screen isn’t quite as wide, you see only the selected message; the inbox list slides offscreen to give more room to the selected message.
In this and the following tasks, I show you how Mail works in horizontal mode—which works best for reading emails.
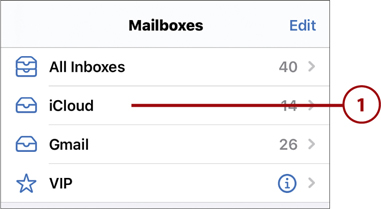
![]() From within the Mail app, tap the inbox you want to view. The left column slides offscreen to reveal all the messages in this inbox.
From within the Mail app, tap the inbox you want to view. The left column slides offscreen to reveal all the messages in this inbox.
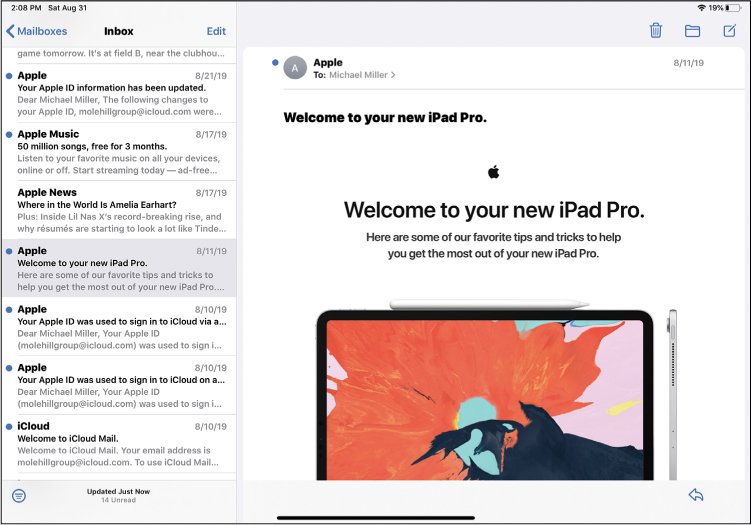
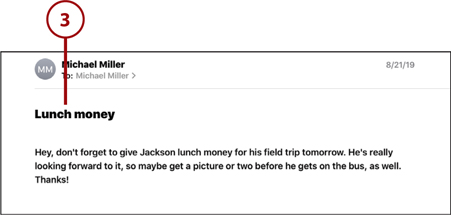
![]() Unread messages are displayed with a blue dot next to the subject line; messages you’ve read don’t have this blue dot. Each message displays the sender’s name and/or email address, the time or date received, message subject, and the first line or so of the message. Tap the message you want to read; the selected message header is shaded.
Unread messages are displayed with a blue dot next to the subject line; messages you’ve read don’t have this blue dot. Each message displays the sender’s name and/or email address, the time or date received, message subject, and the first line or so of the message. Tap the message you want to read; the selected message header is shaded.
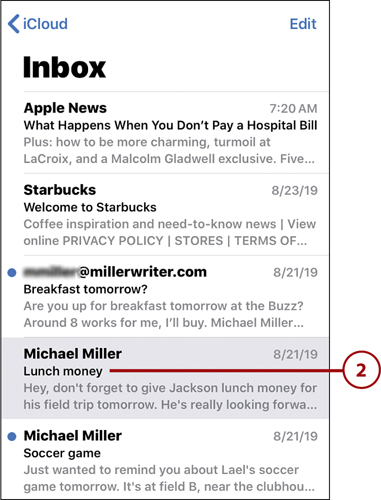
![]() The selected message displays on the right side of the screen. (Or, if the iPad is held vertically, it appears full screen.) The name of the sender appears at the top, with the message subject beneath that. The text of the message fills the bottom of the message pane; if this message is in reply to a previous message, the previous message is “quoted” beneath that.
The selected message displays on the right side of the screen. (Or, if the iPad is held vertically, it appears full screen.) The name of the sender appears at the top, with the message subject beneath that. The text of the message fills the bottom of the message pane; if this message is in reply to a previous message, the previous message is “quoted” beneath that.
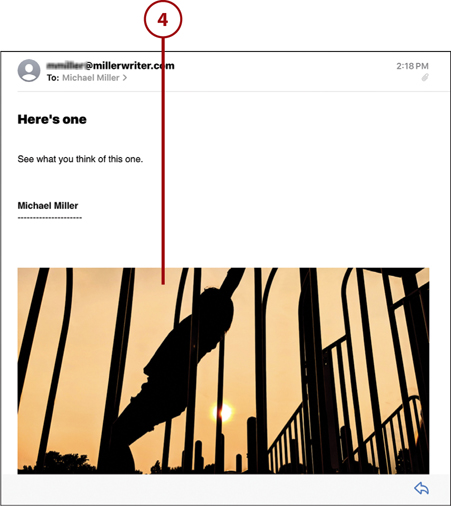
![]() If the sender has attached photos to the message, those photos are automatically downloaded and displayed within the message text. (If a photo is not automatically displayed, tap the Download link to display it.)
If the sender has attached photos to the message, those photos are automatically downloaded and displayed within the message text. (If a photo is not automatically displayed, tap the Download link to display it.)
Reply to a Message
When you reply to an email message, the original message is “quoted” beneath your reply.
![]() Open the original message and then tap the Reply icon. This displays a panel of options.
Open the original message and then tap the Reply icon. This displays a panel of options.
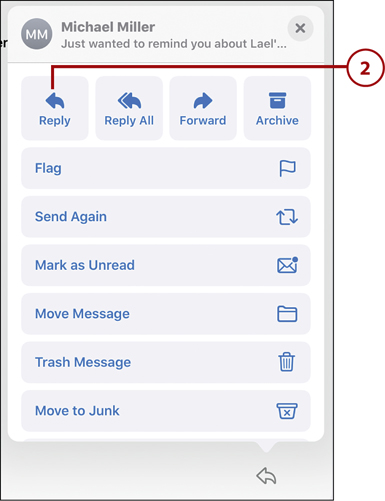
![]() Tap Reply to open the Reply pane. (Alternatively, tap Reply All to reply to everyone copied on the original message, or Forward to forward this message to someone new.)
Tap Reply to open the Reply pane. (Alternatively, tap Reply All to reply to everyone copied on the original message, or Forward to forward this message to someone new.)
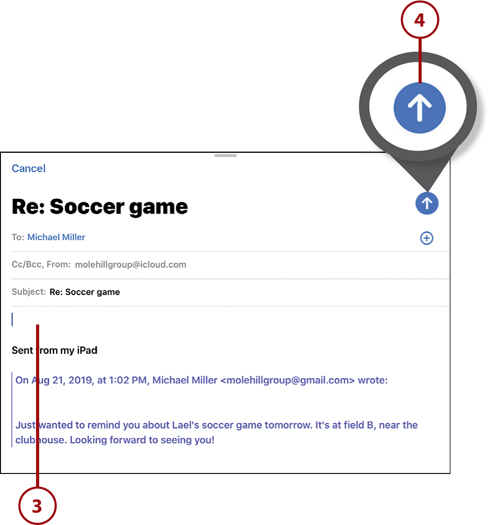
![]() The original sender is listed as the recipient in the To field, and the subject is also automatically filled in (although you can edit the subject, if you want). Enter your reply into the main text box.
The original sender is listed as the recipient in the To field, and the subject is also automatically filled in (although you can edit the subject, if you want). Enter your reply into the main text box.
![]() Tap Send to send your reply to the original sender.
Tap Send to send your reply to the original sender.
Create and Send a New Message
Writing and sending a new email message is similar to replying to an existing message. All you need to know is who you’re sending it to!
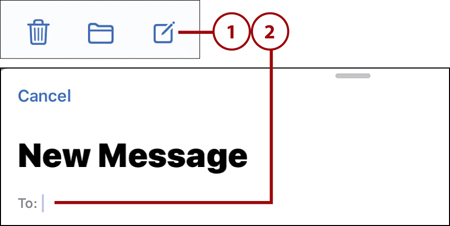
![]() From within the Mail app, tap the New Message icon at the top-right corner of the screen. This displays the New Message pane.
From within the Mail app, tap the New Message icon at the top-right corner of the screen. This displays the New Message pane.
![]() Tap within the To field and start typing the name or email address of the intended recipient.
Tap within the To field and start typing the name or email address of the intended recipient.
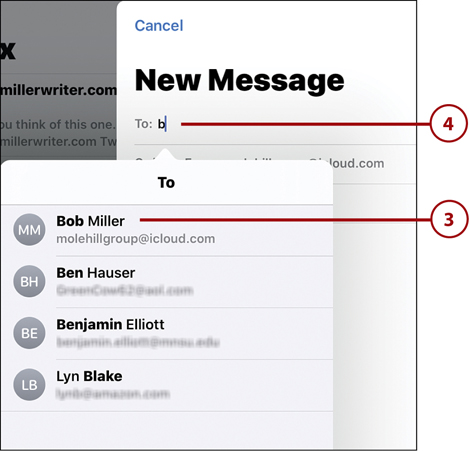
![]() As you type, the Mail app displays matching names from your contacts list. If this person is listed there, tap his or her name.
As you type, the Mail app displays matching names from your contacts list. If this person is listed there, tap his or her name.
![]() If you’re sending an email to someone not in your contacts list, continue entering the person’s email address manually.
If you’re sending an email to someone not in your contacts list, continue entering the person’s email address manually.
Contacts
Learn more about your contacts and the Contacts app in Chapter 10, “Managing Your Contacts.”
![]() Add another recipient by tapping again within the To field and repeating steps 2 and 3.
Add another recipient by tapping again within the To field and repeating steps 2 and 3.
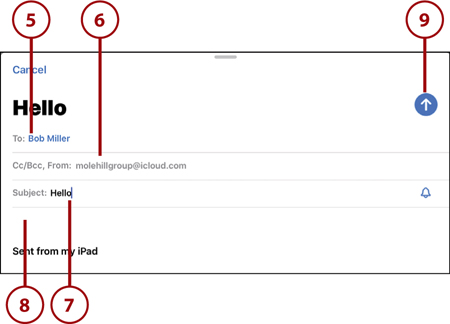
![]() Add Cc or Bcc recipients by tapping Cc/Bcc and adding the desired names.
Add Cc or Bcc recipients by tapping Cc/Bcc and adding the desired names.
Cc and Bcc
Cc stands for carbon copy and sends a copy of your message to additional recipients. Bcc stands for blind carbon copy and sends a copy of your message to additional recipients but hides their names and addresses from the main recipients.
![]() Tap within the Subject field and enter the subject of this email.
Tap within the Subject field and enter the subject of this email.
![]() Tap within the main text box and enter your email message.
Tap within the main text box and enter your email message.
![]() Tap Send to send the message.
Tap Send to send the message.
Attach a Photo to a Message
The Mail app lets you attach photos and other files to your email messages. This makes it easy to share pictures with your friends and family.
Attachments
A file of any sort attached to an email message is called an attachment.
![]() Create a new message as usual, and then tap within the main text box to display the icons above the onscreen keyboard.
Create a new message as usual, and then tap within the main text box to display the icons above the onscreen keyboard.
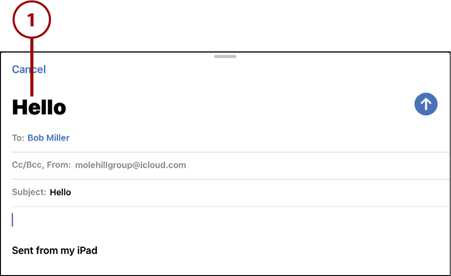
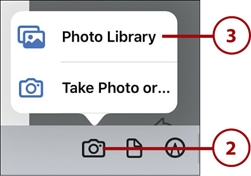
![]() Tap the Camera icon.
Tap the Camera icon.
![]() Tap Photo Library, and the Photos pane displays.
Tap Photo Library, and the Photos pane displays.
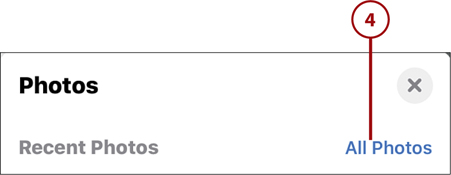
![]() Tap All Photos.
Tap All Photos.
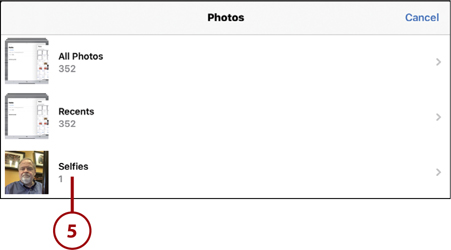
![]() Tap to select a photo album.
Tap to select a photo album.
![]() Tap to select the photo you want to attach.
Tap to select the photo you want to attach.
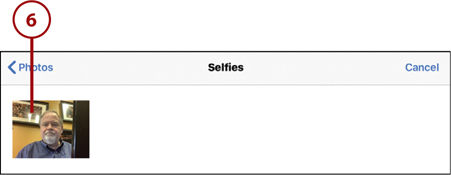
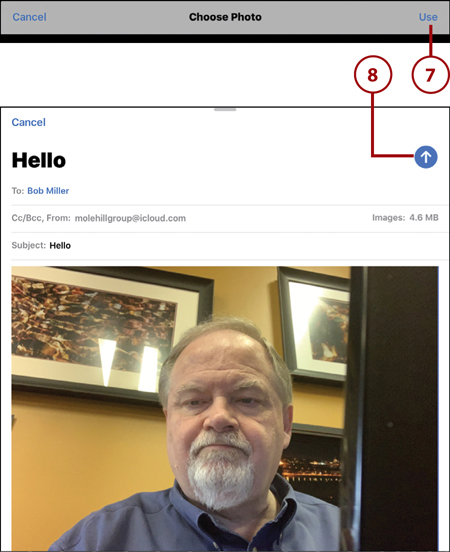
![]() Tap Use.
Tap Use.
![]() The photo is added to your new message. Close the Photos pane, complete your email as normal, and tap Send.
The photo is added to your new message. Close the Photos pane, complete your email as normal, and tap Send.
Delete a Message
When you’re done reading a message, you might want to delete it. You might even want to delete a message before you read it if it’s from some entity from which you don’t want to hear. Fortunately, you can delete messages from the inbox itself or from the reading pane.
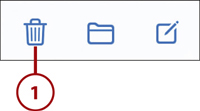
![]() To delete a message after you’ve read it, display the message and then tap the Trash icon.
To delete a message after you’ve read it, display the message and then tap the Trash icon.
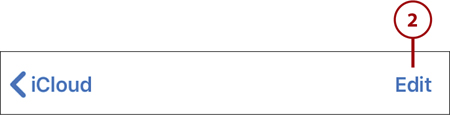
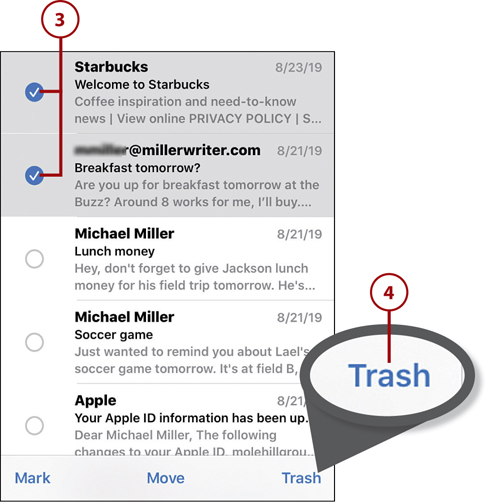
![]() To delete one or more messages from the inbox, tap Edit.
To delete one or more messages from the inbox, tap Edit.
![]() Tap to select the message(s) you want to delete.
Tap to select the message(s) you want to delete.
![]() Tap Trash.
Tap Trash.
Organize Messages in Files
What do you do with your old messages after you’ve read them? You might want to delete some of them (and you just learned how), but you might want to keep some around for future reference. Instead of letting old messages clog up your inbox, create folders to organize and store your old messages.
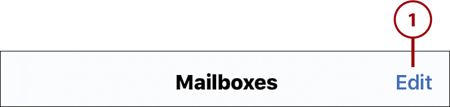
![]() From the Mailboxes list, tap Edit.
From the Mailboxes list, tap Edit.
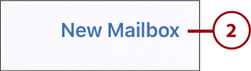
![]() Tap New Mailbox. (The Mail app refers to folders as mailboxes.)
Tap New Mailbox. (The Mail app refers to folders as mailboxes.)
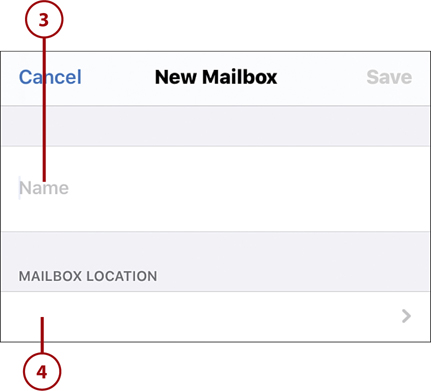
![]() Tap within the Name field and enter a name for this new folder/mailbox.
Tap within the Name field and enter a name for this new folder/mailbox.
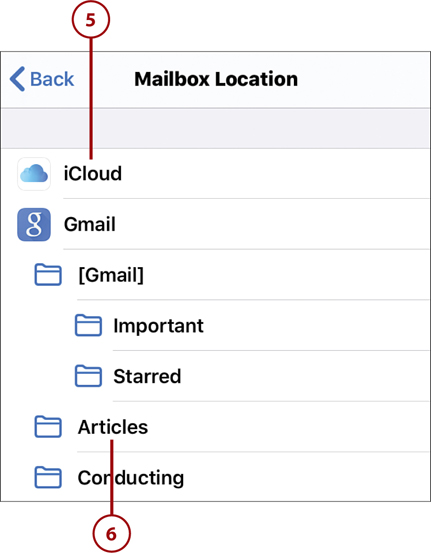
![]() Tap Mailbox Location.
Tap Mailbox Location.
![]() Tap the account where you want to store this folder.
Tap the account where you want to store this folder.
![]() You can also select a master folder for this new folder; the new folder then becomes a subfolder within that folder.
You can also select a master folder for this new folder; the new folder then becomes a subfolder within that folder.
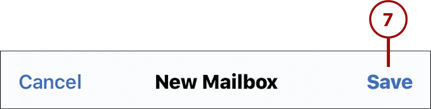
![]() Tap Save.
Tap Save.
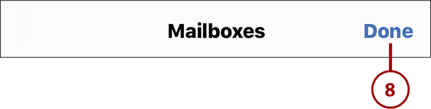
![]() Tap Done. The new folder/mailbox is now created.
Tap Done. The new folder/mailbox is now created.
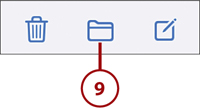
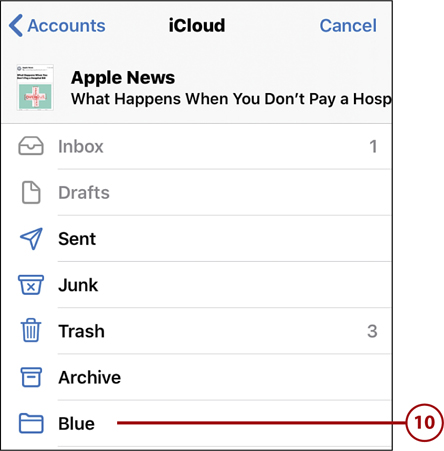
![]() Move an email message to a folder by opening the message and then tapping the Folder icon at the top of the screen.
Move an email message to a folder by opening the message and then tapping the Folder icon at the top of the screen.
![]() Tap the folder to which you want to move this message. The message is moved to that folder.
Tap the folder to which you want to move this message. The message is moved to that folder.
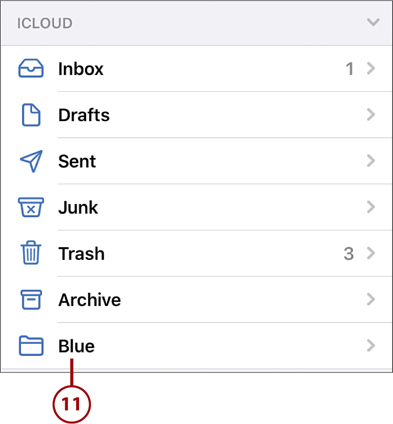
![]() Tap a folder/mailbox in the Mailboxes pane to view the contents of that folder/mailbox.
Tap a folder/mailbox in the Mailboxes pane to view the contents of that folder/mailbox.
Deal with Junk Email (Spam)
One of the more annoying things about email is the amount of junk email, or spam, you sometimes receive. Fortunately, the Mail app includes a spam filter that attempts to identify junk email and automatically send it to a special Junk E-mail folder.
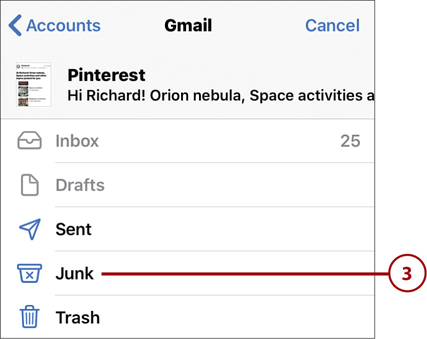
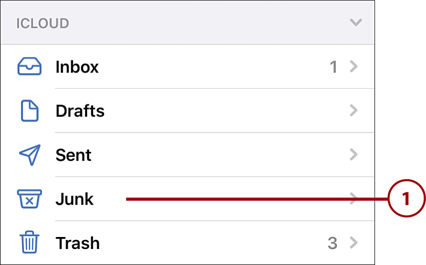
![]() View messages in the Junk folder by going to a given account in the Mailboxes pane and tapping Junk. (If you find something there that isn’t spam, you can move it back to your normal inbox.)
View messages in the Junk folder by going to a given account in the Mailboxes pane and tapping Junk. (If you find something there that isn’t spam, you can move it back to your normal inbox.)
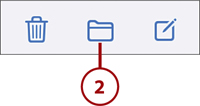
![]() Send a spam message you’ve received to the Junk E-mail folder by opening the message and tapping the Folder icon.
Send a spam message you’ve received to the Junk E-mail folder by opening the message and tapping the Folder icon.
![]() Tap to select the Junk folder.
Tap to select the Junk folder.