
21. Getting Productive

In this chapter, you learn how to use your iPad for business with key productivity apps.
![]() Using Your iPad’s Built-In Productivity Apps
Using Your iPad’s Built-In Productivity Apps
![]() Discovering More Productivity Apps
Discovering More Productivity Apps
It might not look like it, but your iPad is as powerful as many notebook computers (and especially powerful if you have an iPad Pro). That means you can use your iPad for just about any office tasks from word processing to spreadsheets to presentations. You can also use your iPad to take notes and create illustrations. All you need are the right apps—and the right accessories, like a physical keyboard.
Using Your iPad’s Built-In Productivity Apps
Your iPad comes with three apps that can help you be more productive in the office and beyond. These apps are Pages for word processing, Numbers for spreadsheets, and Keynote for presentations. These free apps, which are comparable to and file-compatible with similar Microsoft Office apps, serve the day-to-day productivity needs of many users.
iPad Pro for Productivity
Although the standard iPad is the best solution for most home users, productivity apps work even better if you have an iPad Pro. The Pro’s larger screen, more powerful processor, and Smart Keyboard make office work as easy and intuitive as it is on a traditional notebook computer. If you want to take your work on the road (even if it’s just to your local coffee shop), this is the combination for success.
Pages
The Pages app is a word processor much like Microsoft Word, but it’s optimized for use on the iPad. You can use Pages with your iPad’s onscreen keyboard or, even better, use a wireless keyboard for faster and more accurate typing.
![]() From the iPad’s Home screen, tap the Pages icon to launch the Pages app.
From the iPad’s Home screen, tap the Pages icon to launch the Pages app.
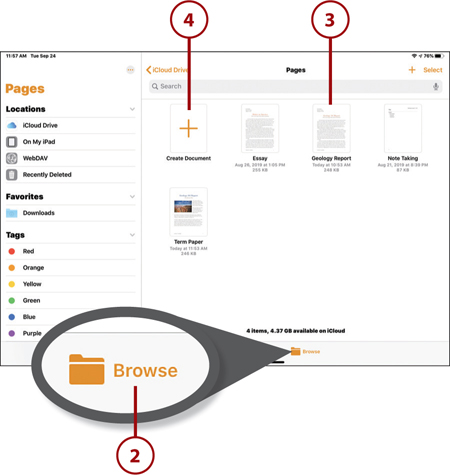
![]() Tap Browse at the bottom of the screen.
Tap Browse at the bottom of the screen.
![]() Tiles for documents you’ve previously created are displayed. Tap one of these tiles to reopen an existing document. Or…
Tiles for documents you’ve previously created are displayed. Tap one of these tiles to reopen an existing document. Or…
![]() Tap Create Document (+) to create a new document.
Tap Create Document (+) to create a new document.
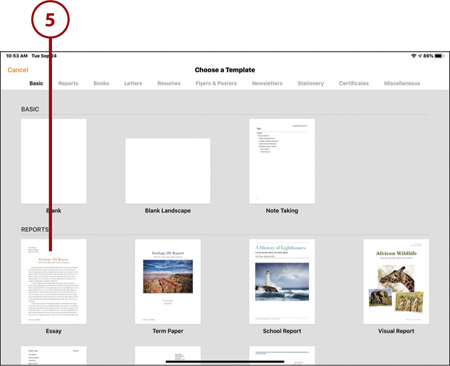
![]() Tap to select a template for your new document.
Tap to select a template for your new document.
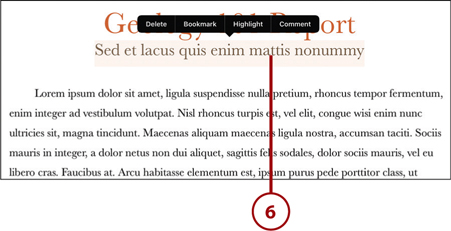
![]() Most documents include placeholder text as defined by the template you selected. Tap any block of placeholder text to replace that text with your own text.
Most documents include placeholder text as defined by the template you selected. Tap any block of placeholder text to replace that text with your own text.
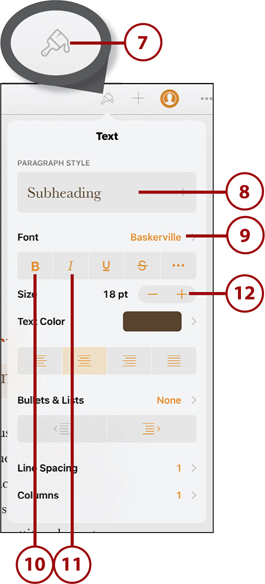
![]() Tap the paintbrush icon in the toolbar to format the selected text.
Tap the paintbrush icon in the toolbar to format the selected text.
![]() Tap the Paragraph Style control to change the paragraph style.
Tap the Paragraph Style control to change the paragraph style.
![]() Tap Font to change the font family.
Tap Font to change the font family.
![]() Tap B to boldface text.
Tap B to boldface text.
![]() Tap I to italicize text.
Tap I to italicize text.
![]() Tap the – and + buttons to decrease or increase the size of the selected text.
Tap the – and + buttons to decrease or increase the size of the selected text.
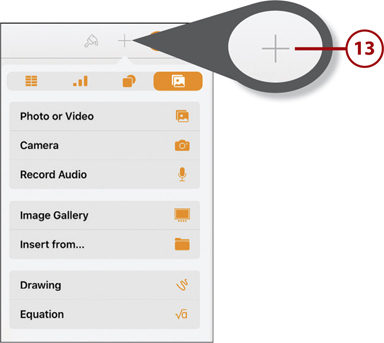
![]() Tap the + icon to insert a table, chart, shape, or picture.
Tap the + icon to insert a table, chart, shape, or picture.
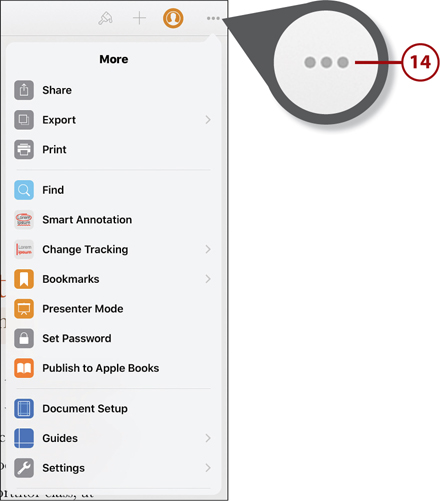
![]() Tap the More (three-dot) icon to collaborate with others, send a copy of this document, print this document, and more.
Tap the More (three-dot) icon to collaborate with others, send a copy of this document, print this document, and more.
Stored in the Cloud
By default, all Pages, Numbers, and Keynote documents are stored in the cloud—in Apple’s iCloud, to be specific. This means you don’t have to manually save your work; all changes are saved automatically as you make them. It also means that your documents won’t fill up the limited storage on your iPad, and they will be available to any device connected to the Internet via your iCloud account.
Numbers
You use the Numbers app to… well, to work with numbers. You can create spreadsheets in which you can enter and manipulate numerical data. It’s great for creating budgets, expense reports, financial plans, and the like. You can perform all sorts of complex calculations and then display your results in attractive charts and graphs.
![]() From the iPad’s Home screen, tap the Numbers icon to launch the Numbers app.
From the iPad’s Home screen, tap the Numbers icon to launch the Numbers app.
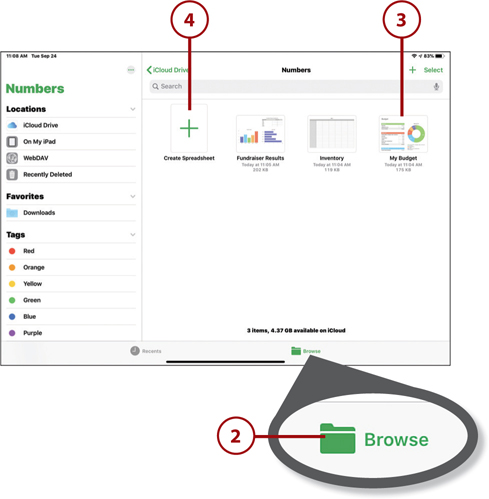
![]() Tap Browse at the bottom of the screen.
Tap Browse at the bottom of the screen.
![]() You now see tiles for spreadsheets you’ve previously created. Tap one of these tiles to reopen an existing spreadsheet. Or…
You now see tiles for spreadsheets you’ve previously created. Tap one of these tiles to reopen an existing spreadsheet. Or…
![]() Tap Create Spreadsheet (+) to create a new spreadsheet.
Tap Create Spreadsheet (+) to create a new spreadsheet.
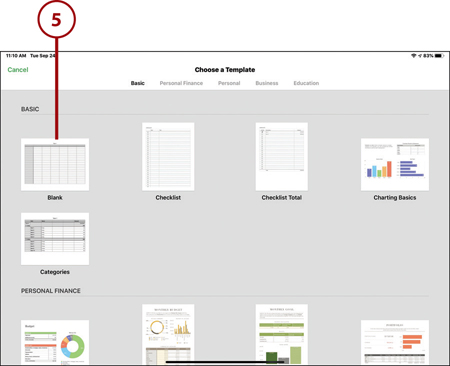
![]() Tap to select the template you want to use for your new spreadsheet.
Tap to select the template you want to use for your new spreadsheet.
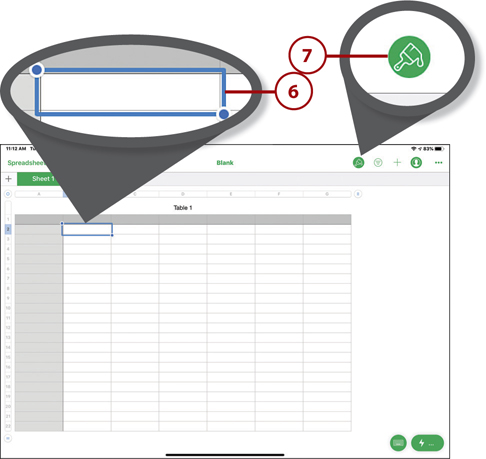
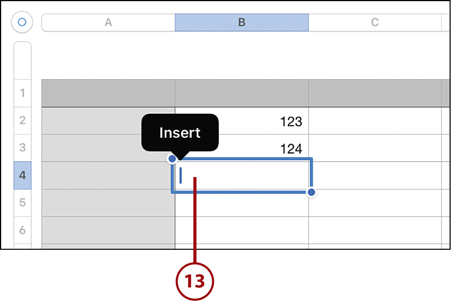
![]() Tap any cell to enter text or numbers. If a cell includes placeholder contents, tap to enter your own text or numbers. (To select more than one cell, use your finger to drag any of the selection corners to include additional cells.)
Tap any cell to enter text or numbers. If a cell includes placeholder contents, tap to enter your own text or numbers. (To select more than one cell, use your finger to drag any of the selection corners to include additional cells.)
![]() Tap the paintbrush icon to format the selected cell(s).
Tap the paintbrush icon to format the selected cell(s).
Rows, Columns, and Cells
A spreadsheet consists of multiple rows (arranged down the left edge of the screen) and columns (arranged along the top of the screen). The intersection of any given row and column is called a cell; all the contents of a spreadsheet are contained in individual cells.
![]() Tap the Table tab to format the selected cells as a table.
Tap the Table tab to format the selected cells as a table.
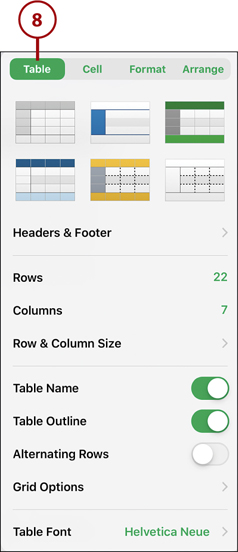
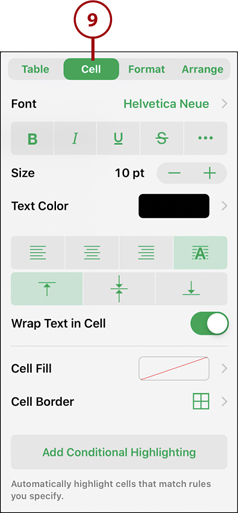
![]() Tap the Cell tab to format the contents of the selected cell(s). You can apply text formatting (bold, italic, underline, strikethrough); change text options (size, color, and font); apply cell fill color; add various types of borders; and opt whether to wrap long text in a cell.
Tap the Cell tab to format the contents of the selected cell(s). You can apply text formatting (bold, italic, underline, strikethrough); change text options (size, color, and font); apply cell fill color; add various types of borders; and opt whether to wrap long text in a cell.
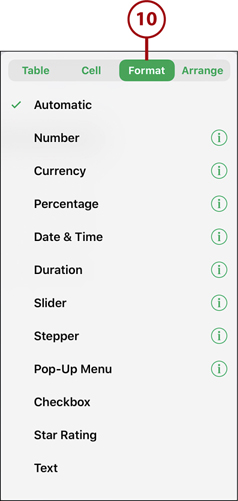
![]() Tap the Format tab to format the numerical data in the selection. You can choose a general Number format, Currency format, Percentage, and so forth.
Tap the Format tab to format the numerical data in the selection. You can choose a general Number format, Currency format, Percentage, and so forth.
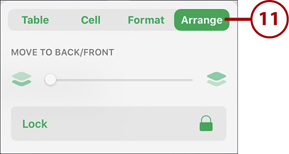
![]() Tap the Arrange tab to move the selected element forward or backward on the page.
Tap the Arrange tab to move the selected element forward or backward on the page.
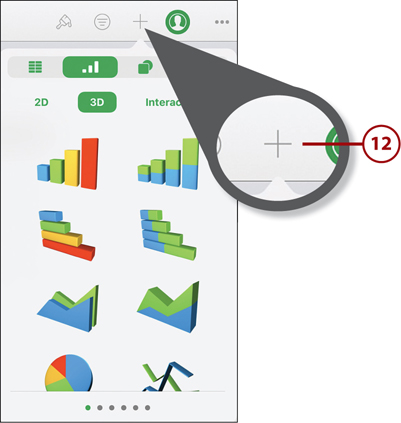
![]() Tap the + icon to insert a table, chart, shape, or picture.
Tap the + icon to insert a table, chart, shape, or picture.
![]() Tap a cell to enter a formula or function to perform a numerical calculation.
Tap a cell to enter a formula or function to perform a numerical calculation.
Formulas and Functions
You perform a calculation in a spreadsheet by entering a formula that may include the contents of specified cells. You can include built-in formulas, called functions, within your larger formulas. (Unfortunately, the whole concept of formulas and functions is much more involved than I can discuss in this chapter; tap More and select Numbers Help to view coaching tips onscreen.)
Keynote
When you need to put on a presentation to any size group, Keynote can’t be beat. The Keynote app lets you create highly visual presentations that you can present on your iPad or through a larger monitor or projector. (You first have to connect your iPad to said monitor, of course.)
![]() From the iPad’s Home screen, tap the Keynote icon to launch the Keynote app.
From the iPad’s Home screen, tap the Keynote icon to launch the Keynote app.
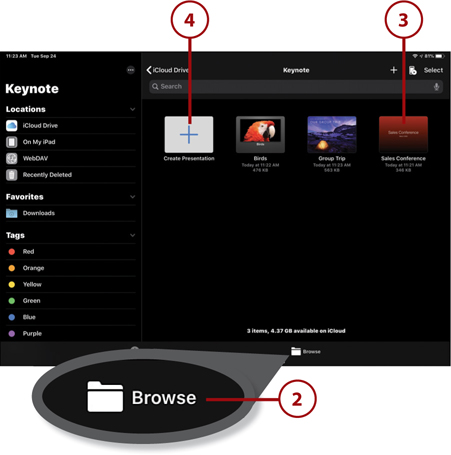
![]() Tap Browse at the bottom of the screen.
Tap Browse at the bottom of the screen.
![]() You see tiles for presentations you’ve previously created. Tap one of these tiles to reopen an existing presentation. Or…
You see tiles for presentations you’ve previously created. Tap one of these tiles to reopen an existing presentation. Or…
![]() Tap Create Presentation (+) to create a new presentation.
Tap Create Presentation (+) to create a new presentation.
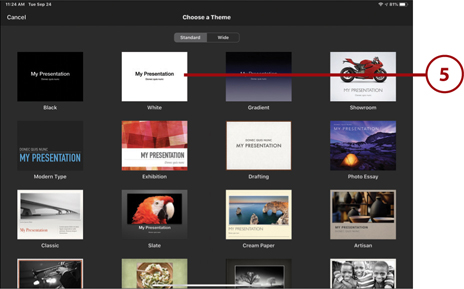
![]() Tap to select the template you want to use for your new presentation.
Tap to select the template you want to use for your new presentation.
![]() The new presentation includes a preselected visual theme, along with a single opening slide. The slides in your presentation are displayed in the slide sorter on the left side of the screen. Tap any slide to view it in the larger editing area.
The new presentation includes a preselected visual theme, along with a single opening slide. The slides in your presentation are displayed in the slide sorter on the left side of the screen. Tap any slide to view it in the larger editing area.
![]() Each new slide includes placeholder text and graphics. Double-tap any placeholder to replace its contents with your own.
Each new slide includes placeholder text and graphics. Double-tap any placeholder to replace its contents with your own.
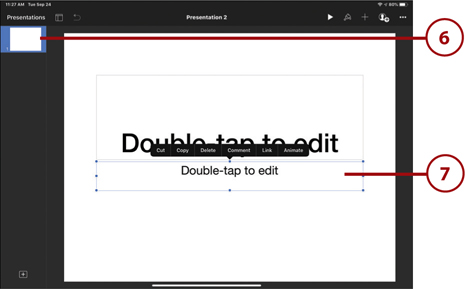
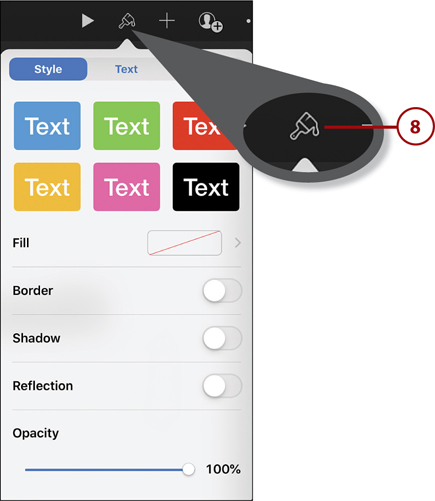
![]() Select a block of text and then tap the paintbrush icon to format the text’s Style (background and text colors), format selected Text (font family and size, bold and italic formatting, and text alignment), and Arrange elements on the screen.
Select a block of text and then tap the paintbrush icon to format the text’s Style (background and text colors), format selected Text (font family and size, bold and italic formatting, and text alignment), and Arrange elements on the screen.
![]() Tap the + icon to insert a table, chart, shape, or picture.
Tap the + icon to insert a table, chart, shape, or picture.

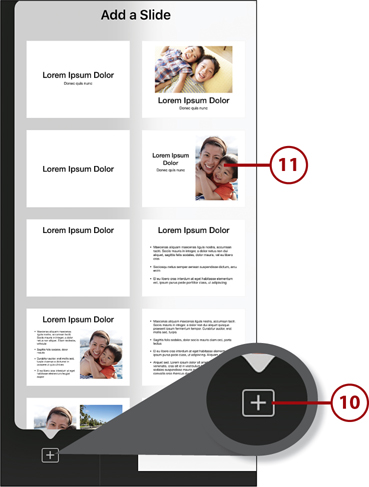
![]() Tap the New Slide (+) icon in the lower-left corner to add a new slide to the presentation.
Tap the New Slide (+) icon in the lower-left corner to add a new slide to the presentation.
![]() Tap to select the type of slide you want to add. (Repeat the preceding steps to add content to the slide and add additional slides to the presentation.)
Tap to select the type of slide you want to add. (Repeat the preceding steps to add content to the slide and add additional slides to the presentation.)
Discovering More Productivity Apps
As good (and as free) as Apple’s productivity apps are, they’re not the only such apps available for your iPad. Google, Microsoft, and other software publishers offer similar productivity apps for iPad users, all available from Apple’s App Store.
Google Docs, Sheets, and Slides
Taken together, Apple’s Pages, Numbers, and Keynote apps comprise what some call an office suite—a collection of apps that enable you to perform most office productivity functions. Apple’s apps are kind of an ad hoc or unofficial suite, compared to the more formal app suites from other companies.
Case in point is Google’s office suite, dubbed Google Docs. The apps in the Google Docs suite include Docs (word processing), Sheets (spreadsheet), and Slides (presentations). These apps are a little more traditional in their operation than the iPad- (and Mac-) focused nature of Apple’s productivity apps. But, unlike Apple’s apps, they’re cross-platform compatible; you can use the Google Docs apps on your iOS device, your Android device, your Windows computer, and your Google Chromebook, if you have one.
All three Google Docs apps are free to download from the App Store and work great on the iPad.
Microsoft Excel, PowerPoint, and Word
Speaking of office suites, the big daddy of all office suites is Microsoft Office. Long available only on Windows PCs, Microsoft now has Office apps available for all platforms, including Apple’s iOS. The apps include Word (word processing), Excel (spreadsheet), and PowerPoint (presentations). All of these apps are available for free download from the App Store.
Functionality of Microsoft’s iOS apps isn’t quite as robust as that of their PC counterparts, but files are fully compatible. If you’re used to using Office apps in your office, then using those same apps on your iPad makes a lot of sense.