
6. Push Notifications
One of the things that makes mobile apps so engaging is the mobile platform push notification capabilities that enable app developers to send information to the device running the app. Depending on the device OS and the type of notification, the information sent to the device displays in the device’s notification area or appears in-app. Notifications expand the scope of the app beyond what’s currently available on the device and deliver a clean way to keep app users informed of almost anything.
Service workers give web apps some of the same capabilities. In this chapter, I show how to configure a web app to support notifications plus how to send notifications to subscribed browsers through a server process. Like the previous one, this chapter is chock-full of code, so let’s get started.
Introducing Push Notifications
In web apps, notifications are little pop-up windows browsers display when they receive a notification message. The web app can send notifications to itself, or you can send them to the browser from a remote system, usually an app or web server. Notifications appear only when the target browser is running, but the default browser on many smartphones runs constantly, and Google Chrome has a setting that users can enable to keep that browser running in the background as well. Figures 6.1, 6.2, and 6.3 show the same notification on Windows, macOS, and Android.
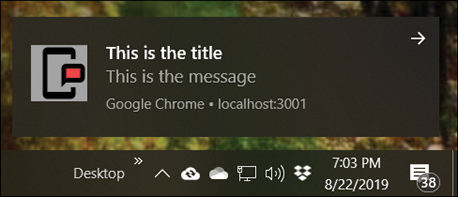
Figure 6.1 Browser Notification on Windows

Figure 6.2 Browser Notification on macOS
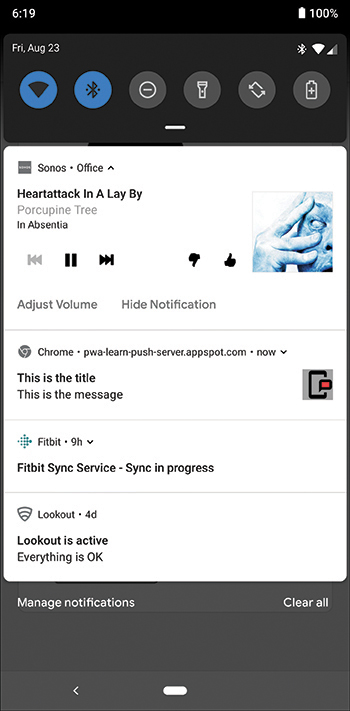
Figure 6.3 Browser Notification on Android
Windows notifications appear at the bottom-left corner of the desktop, while macOS notifications appear in the upper-right corner of the desktop. On Android, notifications appear alongside other notifications displayed by the device. If you’re wondering why I’m not saying anything about iOS, that’s because as I write this, iOS doesn’t support browser notifications.
These are often called push notifications because they’re usually pushed to the browser over a network connection. I prefer to call them remote notifications because they’re sent from a remote service. The other type of notification is what I call local notifications, that is, notifications sent to the browser by the web app running in that browser. You’ll see examples of both in the code we use later in the chapter.
Local notifications work only when the web page requesting them is hosted. If you open the page directly from the file system (rather than using a URL), notifications don’t work.
Remote notifications, however, require service workers to function. For notifications sent by a remote system, it’s the service worker that processes the notification when it arrives and decides what to do with it.
Before the browser can receive notifications from a web app or a remote system, the browser user must first grant permission to authorize the browser to show notifications on behalf of the app. If the user doesn’t grant permission, you can’t send notifications to the browser.
You’ve probably seen this permissions prompt periodically as you surf the web, sites that immediately ask for permission to send notifications to your browser before you even know whether the site contains anything of interest. This approach leads to greatly annoyed users and causes tweets such as the one shown in Figure 6.4.
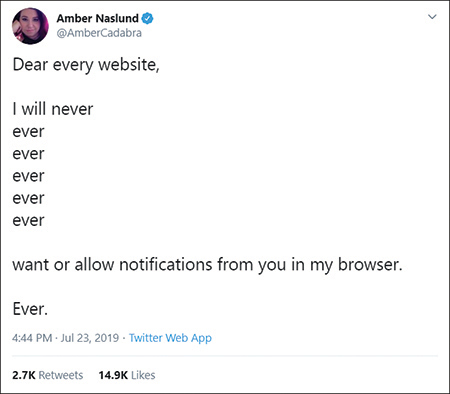
Figure 6.4 Twitter Complaint about Push Permission Prompts
Web apps should wait until they’re certain site visitors are interested in receiving notifications before asking permission to send them. You could gauge interest based on how many pages users visit or how much time they spend on each, then display the permissions prompt only when you’re sure they may want them. One option is to use the beforeinstallprompt event discussed in Chapter 2, “Web App Manifest Files,” to unhide a subscribe button or link. This event only fires once the browser thinks the visitor has shown real interest in the app. In the app we work on in this chapter, the code never prompts automatically; it instead provides a button the visitor must click to subscribe to notifications.
The browser provides several events a web app can listen for to know when the user clicked or closed the notification window. Notifications can even be interactive; you can provide action buttons with your notifications and execute specific code depending on which action button the user clicks or taps. We cover all this and more as we work through the chapter’s code.
Remote Notification Architecture
Before we jump into all the examples and code, let’s talk about how push works. The ability to send notifications to browsers requires three things:
A browser capable of receiving, processing, and displaying notifications.
An app to send notifications to one or more browsers. This is your app backend.
Some hardware/software solution to manage delivering notifications to the
browser—a push service.
The first one probably makes a lot of sense; the forced split between the second and third requirements causes some confusion.
The browser is a container for running other people’s code, and consequently, there’s risk that ill-behaved or malicious code could wreak havoc on the user’s system. HTML, CSS, and JavaScript are properly sandboxed by the browser, and there are limits on how they can affect anything outside of the current app. Service workers change that, of course, but we already talked about the extra security surrounding them.
Early on, many browser vendors allowed developers to publish extensions that tweaked the inner workings of the browser, but over the years, browsers became increasingly restrictive in what they would allow inside the guts of the browser. To deliver a secure environment for notifications, support for them must be a core component of the browser, available outside of your app’s context and able to wake up a service worker when necessary.
Sending notifications to browsers must be streamlined as well. Backend apps won’t have direct connections to the browser, especially when the app is not loaded in the browser. The browser requests a page, then closes the connection. Yes, I know you could use WebSockets to do this, but who wants to maintain thousands or millions of socket connections to target browsers? When a browser has ten or more service workers listening for notifications, do you really want each backend server maintaining a connection into your browser? No, you really don’t.
So, to make all this possible and minimize the impact on the browser and the computer system or smartphone running the browser, the push specification uses an intermediate server process to manage subscription and notification delivery. That server runs somewhere in the cloud and typically comes from the browser vendor. When a web app subscribes to notifications, the browser knows exactly where to go to register the subscription—to its own cloud push service.
Now that you know why browser push works like it does, let me show you how it works, starting with the subscription process:
A web app asks the user for permission to display notifications in the browser. Due to the invasive nature of browser notifications, the notification standard requires user approval before any notifications can be sent to the browser.
If approved, the web app subscribes the app for notifications through the browser’s push service.
The push service subscribes the app/browser combination, stores the information somewhere internally, then returns a subscription object that contains everything a backend app needs to send notifications to this app running on the subscribed browser.
The subscribing web app sends the subscription object (plus whatever additional information it thinks is pertinent) to the backend app where it’s stored away for future use when sending notifications.
The process (except for requesting permission) is highlighted in steps 1 through 3 in Figure 6.5.

Figure 6.5 Browser Push Notification Process
When the backend app server has information or data to send to a browser, the server
Encrypts the notification request using the server’s private key.
Sends the request to the push service using the Push API.1
The push service decrypts the request, verifies the identity of the sender, and, if verified, sends the notification to the target browser.
The browser wakes up the app’s service worker to process the notification.
1. https://www.w3.org/TR/push-api/
In this book, I do not cover anything related to implementation of the Push API. It’s an open standard with community-supported libraries, so I’m going to skip all the hard work and use a popular open source solution for managing delivery of notification requests to a push service. I show how the server uses the open source solution to send notifications at the end of the chapter.
Preparing to Code
The work we do in this chapter revolves around a new app I created for this chapter (styled by Scott Good, of course). Notifications don’t work unless the web app receiving them is hosted somewhere (rather than just loaded from the file system), so I included a server process much like the one used in the previous chapters. The setup process is a little different than what you’ve seen previously, so don’t skip the instructions here or in the next section.
The code for the server app is available in the book’s GitHub repository at https://github.com/johnwargo/learning-pwa-code. I provided complete instructions for how to download the code and configure your development environment in the section “Preparing to Code” in Chapter 3, “Service Workers.” If you haven’t already completed those steps, go there and complete them first before picking up here again.
Open a terminal window and navigate the terminal into the cloned project’s learning-pwa-codechapter-06 folder. This folder contains a relatively empty version of the web app we’ll build out as we work through the chapter. Install all the dependencies required by the app by executing the following command:
npm install
This command uses the Node Package Manager (npm) to install Node.js modules used by the server.
Generating Encryption Keys
The notification process requires a set of encryption keys: public and private keys used to ensure the integrity of the notification process. Browser notifications use Voluntary Application Server Identification (VAPID) for Web Push2 encryption keys to encrypt communication with the push service. I don’t to go into detail about these keys and how they’re made, as knowing that information won’t help you learn push. The push process uses them, so you must have a set of keys for any web app you create that sends browser notifications.
2. https://datatracker.ietf.org/doc/rfc8292/
One of the ways to generate a set of keys is to use the Secure VAPID key generator.3 The server process included with this chapter’s code uses the popular web-push module4 to manage delivery of notification requests to the browser cloud service. It includes a function that generates the keys automatically, so that’s what we’ll use.
3. https://tools.reactpwa.com/vapid
4. https://www.npmjs.com/package/web-push
Open a terminal window, navigate to the cloned project’s learning-pwa-codechapter-06 folder, and execute the following command:
node generate-keys.js
This executes a little node app I wrote that generates a set of VAPID keys and writes them to some configuration files used by the web app. The app calls the web-push modules webpush.generateVAPIDKeys() method, which handles the whole process5 for us.
5. You can read about the web-push process at https://www.npmjs.com/package/web-push#usage.
I mentioned earlier that the client app requires the server’s public key and the server uses the private key, so the process generates two files. The first is chapter-06appconfig.ts, which looks like this:
export const Config = {
  GCMAPI_KEY: '',
  VAPID_PUBLIC: 'SUPER-SECRET-PUBLIC-KEY',
  VAPID_PRIVATE: ' SUPER-SECRET-PRIVATE-KEY '
};
The server uses this file to provide the private encryption key when sending notification messages through a push service.
The other file is chapter-06publicjsconfig.js, which looks like this:
const Config = {
  VAPID_PUBLIC: 'SUPER-SECRET-PUBLIC-KEY',
};
The web app uses this file to provide the public encryption key when subscribing to notifications.
As in previous chapters, I coded the server app in TypeScript, so before you can use the server process with the new configuration file, you must open a terminal window, navigate to the project folder, and execute the following command:
tsc
This command invokes the TypeScript compiler, which compiles chapter-06appconfig.ts to chapter-06config.js. With this in place, we’re ready to go.
You probably noticed that I neglected to explain the GCMAPI_KEY shown in the first file example. Google provided support for browser notifications long before there was a push standard, and Google’s implementation used the now-deprecated Google Cloud Messaging (GCM) service. In this chapter, I’m assuming we’re targeting modern browsers that support the standard; if your app must support older browsers, you must set up an account in Google’s Firebase Cloud Messaging (FCM) service and generate the key required to support older browsers the GCMAPI_KEY mentioned earlier. For more information on this topic, refer to Matt Gaunt’s “What Is the Deal with GCM, FCM, Web Push and Chrome?”6 at Google’s Web Fundamentals FAQ.
6. https://developers.google.com/web/fundamentals/push-notifications/faq
With all the parts in place, it’s time to start the server. In the terminal window, execute the following command:
npm start
If everything’s set up properly in the code, the server will respond with the following text in the terminal:
[email protected] start D:devlearning-pwa-codechapter-06
node ./bin/www
At this point, you’re all set—the server is up and running and ready to serve content. If you see an error message, you must dig through any reported errors and resolve them before continuing.
To see the web app in its current state, open a browser that supports service workers and navigate to
http://localhost:3001
After a short delay, the server should render the simple web page shown in Figure 6.6. The app doesn’t do anything yet, but we’ll fix that soon. When we’re done, the app will let users subscribe to notifications, as shown in the figure, and will have a service worker that processes and displays any remote notifications sent to it through the server.
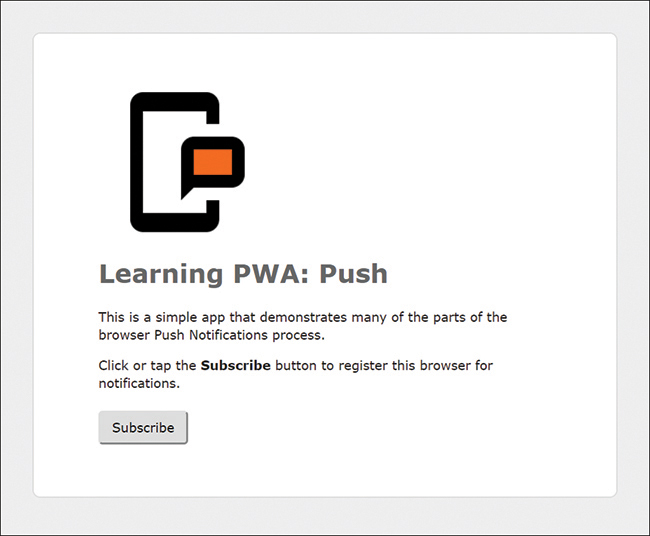
Figure 6.6 The Chapter’s Sample Client App
I created the web app for this chapter using the HTML5 Boilerplate7 template and grabbed a push icon from https://icons8.com/icon/25175/push-notifications. You’ll see jQuery and other stuff in the app, but we won’t make use of much of it—it’s just there because of the template.
7. https://html5boilerplate.com/
The server also includes an admin app, shown in Figure 6.7. It’s available at http://localhost:3001/admin; we’ll use it to manage subscriptions (edit and delete them) plus send notifications to selected browsers. We won’t make any changes to this app; it’s just here to make testing notifications easier.

Figure 6.7 The Chapter’s Sample Admin App
Validating Notification Support
Some browsers, such as Safari on iOS, don’t support notifications, so before an app does anything with them, the app must first check to see if notifications are even available in the browser. To do this, check for the existence of the Notification object using the following:
// does the browser support notification?
if (("Notification" in window)) {
  // yes! Do something interesting

} else {
  // no? Then display a warning message
  // or disable the part of the ui that handles notifications

}
This check is a core component of the updateUI function in the project’s chapter-06/public/js/index.js. The web app executes this function to update the UI at startup and every time the browser’s subscription status changes.
Does your app have to check for notification support before doing anything related to notifications? No, not really. If you don’t, any code that uses the Notification object will simply fail on browsers that don’t support notifications.
Checking Notification Permission
Once a web app knows the browser supports notifications, it should check whether the user has granted permission using the Notification object’s permission property, as shown in the following code:
if (Notification.permission === "granted") {
  console.log('User has approved notifications');
}
The supported permission values are
granted
denied
default
A permission value of ‘granted’ means that the user approved use of notifications for this app. A permission value of ‘denied’ means the opposite: the user did not grant permission for notifications for this app. Easy, right?
The ‘default’ value is a weird one as it means that the browser is not sure whether the user approved notifications. In this case, the browser simply assumes the user has not granted permission. This happens when the user closes the permissions prompt dialog without making a selection.
Getting Permission for Notifications
Now that you know how to check that the browser supports notifications and whether the user has granted permission for notifications, it’s time to get the user’s permission for notifications. To do this, an app calls the Notification object’s requestPermission method, and the browser takes over the approval process from there.
The requestPermission method returns a promise; when the promise resolves, it returns a DOMString containing ‘granted’, ‘denied’, and ‘default’ values described in the previous section.
The following code illustrates the requestPermission method in action. Open the web app project’s chapter-06publicjsindex.js file and add the code to the existing doSubscribe function.
Notification.requestPermission().then(result => {
  switch (result) {
    case 'granted':
      // the user gave us permission,
      // so we can go ahead and subscribe

      break;
    case 'denied':
      // code block
      console.error('Denied');
      Swal.fire({
        type: 'info',
        title: 'Subscribe',
        text: 'You denied access to notifications.',
        footer: 'Please try again when you are ready.'
      });
      break;
    default:
      // the user closed the permissions dialog
      // without making a selection
      console.warn('Default');
      Swal.fire({
        type: 'info',
        title: 'Subscribe',
        text: 'Dialog closed without making a selection.',
        footer: 'Please try again later.'
      });
  }
});
When an app user clicks or taps the Subscribe button, this code requests permission for notifications, then notifies the user of the result. We’ll do more with this result a little later, but for now let’s just get this working.
8. https://sweetalert2.github.io/
I could have checked to see if the user had already granted permission (using the code from the previous section) before requesting it again, but if the user has already granted permission, the call to requestPermission simply returns the previous result.
Save the changes to the file, then switch to a browser and open http://localhost:3001. The browser should display the page shown in Figure 6.6. If it doesn’t, then go back and check your code. When it’s working correctly, tap the Subscribe button and you should see the notifications prompt shown at the top of Figure 6.8.
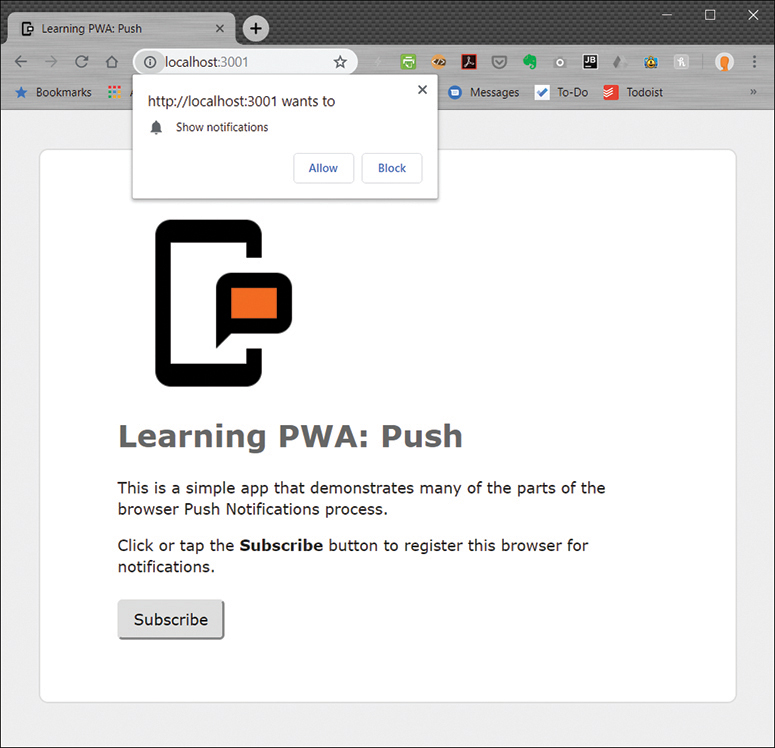
Figure 6.8 Prompting for Notification Permission
Open the browser’s developer tools, switch to the Console tab, then make a selection in the notifications prompt. You should see the permission result written to the console and, in some cases, dialogs popping up when you don’t allow notifications.
One of the things that I learned as I worked through the code for this chapter is that browsers are a little persnickety when you close the notifications prompt without making a selection too many times. After I closed the prompt a few times, Chrome stopped showing me the prompt at all, and a quick trip to the console showed me the following:
Notifications permission has been blocked as the user has dismissed the permission prompt several times. This can be reset in Page Info which can be accessed by clicking the lock icon next to the URL. See https://www.chromestatus.com/features/6443143280984064 for more information.
Looking at the link provided in the message let me know that Chrome will wait a week before allowing me to attempt to grant permissions for notifications again. The good news is that this is easily fixed; following the instructions in the console message, click the information icon to the left of the URL input field, and change the Notifications option to Ask, as shown in Figure 6.9.

Figure 6.9 Resetting Notification Permissions
Local Notifications
At this point, when you approve notifications, you can send one to the browser using the following code:
let theNotification = new Notification('I read Learning PWA, '
  + 'and all I got was this silly notification!');
Add that code to the project’s index.js file’s doSubscribe function, in the granted case.
When you reload the page and reset notification permissions (using the trick I showed you in Figure 6.9), then click the Subscribe button, you should see something like what is shown in Figure 6.10 pop up somewhere on the screen.

Figure 6.10 Displaying a Local Notification
You’ve just sent your first notification to a browser. How does it feel?
Notifications can be more robust than I’ve shown here; we’re only passing in a title, which generates the simple notification you see in the figure. You can also pass in a notification options object that enables you to create more sophisticated and interactive notifications. I describe these options in the next section.
The Notification object exposes several events that you can handle in your app:
onclickoncloseonerroronshow
To handle them in the app, add the following code to the granted case, immediately following the definition of the theNotification object.
theNotification.onclick = function (event) {
  console.log('Notification clicked');
  console.dir(event);
};

theNotification.onclose = function (event) {
  console.log('Notification closed');
  console.dir(event);
}

theNotification.onerror = function (event) {
  console.error('Notification error');
  console.dir(event);
}

theNotification.onshow = function (event) {
  console.log('Notification shown');
  console.dir(event);
}
Play around with the different options, making note of the event object in the console output. Your app can use data in the object to act according to the user’s selection or browser activity.
As fun and exciting as that was, if you try that code on a smartphone, you’ll get the error shown in Figure 6.11. Showing notifications that way is supported only on desktop browsers.
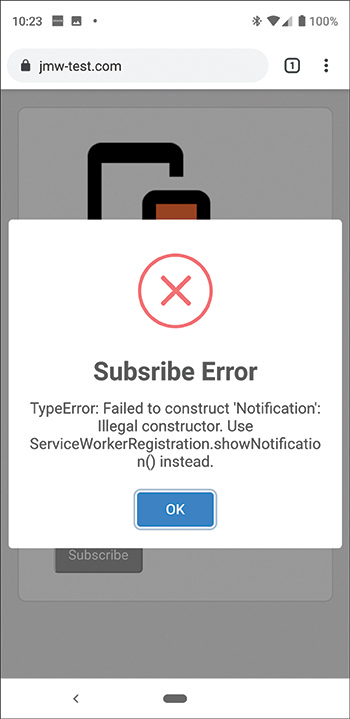
Figure 6.11 Notification Error on an Android Device
To display the same notification on both desktop and mobile browsers, you must let the registered service worker send the local notification for you using the following code:
navigator.serviceWorker.ready.then(registration => {
  registration.showNotification('I read Learning PWA, '
  'and all I got was this silly notification!');
});
Replace all the notification code (defining the theNotification object and its callbacks) you added earlier with the service worker–driven version just shown. With this in place, the notification will work on desktop and mobile browsers. The service worker–compatible version supports notification events as well; you’ll see them when we work with the service worker later.
The complete code for the project’s index.js file up to this point in the chapter is in the project’s chapter-06publicchapter-codeindex-61.js file.
Notification Options
As I explained in the previous section, what you saw in Figure 6.10 was just a simple notification using a title string passed to the Notification object’s constructor or, in the second example, to the registration.showNotification method. The browser is capable of much more.
To take advantage of additional notification options, you must pass an options object to the call to registration.showNotification, as shown in the following example:
registration.showNotification(title, options);
The options object is a simple JavaScript object containing one or more of the following properties:
actions: An array of items representing the actions the user can perform with this notification. You’ll see an example of this later.badge: A URL pointing to an image file used to represent the notification when there isn’t enough space to display the full notification.body: The body text for the notification. You’ll seen an example of this in use in a minute.data: An arbitrary data object associated with the notification. The service worker can use this data as it processes the notification.dir: The notification text display direction. This property defaults to auto; additional options are rtl (right to left) and ltr (left to right).icon: A URL pointing to an image file displayed in the notification (typically to the left of the notification on Windows and to the right for macOS).image: A URL pointing to an image file displayed in the notification (typically above the notification).lang: Specifies the language for the notification.renotify: A Boolean value (true/false) specifying whether the browser should notify the user when a new notification replaces the previous one. This property defaults to false.requireInteraction: A Boolean value (true/false) specifying whether the notification should remain active until the user clicks or dismisses it. The default value is false, which directs the browser to close the notification automatically after a few seconds.tag: A string value identifying the notification. To keep the browser from cluttering up the user’s system with notifications, when a new notification comes in with the same tag, it replaces any previous notifications in the queue with the same tag.vibrate: Specifies a vibration pattern array to use when notifying users of new notifications. The array contains play/pause items specifying number of milliseconds for each. For example, to vibrate for 200 milliseconds, pausing for 100 milliseconds, repeated three times, you would use[200, 100, 200, 100, 200, 100].
A more thorough description of these options plus listing of newer options not currently supported in many browsers can be found in Notification.Notification().9
9. https://developer.mozilla.org/en-US/docs/Web/API/notification/Notification
Now it’s time to see some of these in action. The following example sets the body text and an icon for a notification:
let options = {
  body: "Isn't this cool?",
  icon: "/img/push-icon-red.png"
};
let title = 'I read Learning PWA, and ' +
  'all I got was this silly notification!'
registration.showNotification(title, options);
When you run this in the browser, you’ll see the notification shown in Figure 6.12.

Figure 6.12 A Notification with a Body and Icon
One of my favorites is to include a random image file along with the notification, as shown in the following:
let options = {
  body: "Isn't this cool?",
  image: "https://picsum.photos/200/100",
  icon: "/img/push-icon-red.png",
};
let title = 'I read Learning PWA, and ' +
  'all I got was this silly notification!'
registration.showNotification(title, options);
This generates the notification shown in Figure 6.13.
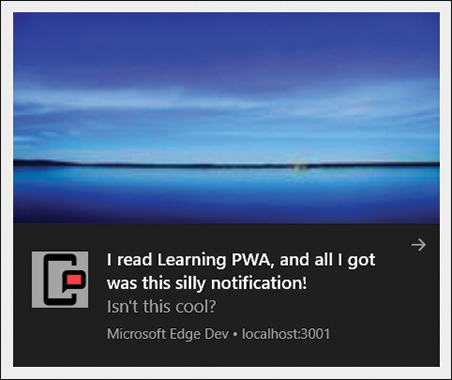
Figure 6.13 A Notification with a Body, Icon, and Random Image
You can also include actions for your notifications, as shown in the following example:
let options = {
  body: "Isn't this cool?",
  image: "https://picsum.photos/200/100",
  icon: "/img/push-icon-red.png",
  actions: [
    { action: 'like', title: 'Like' },
    { action: 'dislike', title: 'Dislike' }
  ]
};
let title = 'I read Learning PWA, and ' +
  'all I got was this silly notification!'
registration.showNotification(title, options);
This code generates the notification shown in Figure 6.14.

Figure 6.14 A Notification with a Body, Icon, Random Image, and Actions
Processing the user’s interaction with the action buttons requires some additional code in your service worker, which I cover when we get to service workers later in the chapter.
Subscribing to Notifications
In this section, we subscribe the browser for notifications with the push server and share the subscription details with the server so it can send notifications to the browser later. At this point in the process, we need the server’s VAPID public key, which we put in the project’s chapter-06publicjsconfig.js file earlier in the chapter.
Open the project’s chapter-06publicindex.html file and add the following lines to the bottom of the file’s body section
<!-- Push configuration file -->
<script src="js/config.js"></script>
This makes the file’s Config object available to the web app.
Next, open the project’s chapter-06publicjsindex.js file and add the following code to the top of the file (I’ll explain later what it’s used for):
const UUID_KEY = 'subscription-uuid';
With those changes in place, let’s talk through the subscription process and add the required code to the project’s index.js file. In the following paragraphs, and through the rest of the chapter, I’ll describe the building blocks we need, then ask you to add complete code blocks to the project. I apologize if this is confusing; just use the finished files in the project’s chapter-06publicchapter-code folder if that helps.
To subscribe the browser for notifications, the web app must execute the registration.pushManager.subscribe method. Getting access to the registration object and setting up the parameters for the method takes a bit of work we must do first.
The browser doesn’t have direct access to the registration object, but the app’s service worker does, so we can get the object through the following:
navigator.serviceWorker.ready.then(registration => {

});
The subscribe method requires a special set of options defined in the subOptions object:
var subOptions = {
  userVisibleOnly: true,
  applicationServerKey: urlBase64ToUint8Array(Config.VAPID_PUBLIC)
};
The userVisibleOnly is the app’s promise to the browser that it will display a notification for every push item sent to it. There’s only one supported value, and that’s true. The notification subscription won’t work with any other value assigned to the property.
The applicationServerKey is a specially formatted version of the server’s public key, which we have available through the Config.VAPID_PUBLIC property in the project’s config.js file. The function for converting the VAPID public key into the correct format is borrowed directly from “Using VAPID Key for applicationServerKey”10 and is shown here:
10. https://www.npmjs.com/package/web-push#using-vapid-key-for-applicationserverkey
function urlBase64ToUint8Array(base64String) {
  // this code borrowed from:
  // https://www.npmjs.com/package/web-push
  const padding = '='.repeat((4 - base64String.length % 4) % 4);
  const base64 = (base64String + padding)
    .replace(/-/g, '+')
    .replace(/_/g, '/');

  const rawData = window.atob(base64);
  const outputArray = new Uint8Array(rawData.length);

  for (let i = 0; i < rawData.length; ++i) {
    outputArray[i] = rawData.charCodeAt(i);
  }
  return outputArray;
}
Add the urlBase64ToUint8Array function to the project’s index.js file; we’ll need it in a little while.
Putting all of this together, the code to subscribe the browser for notifications is the following:
navigator.serviceWorker.ready.then(registration => {
  var subOptions = {
    userVisibleOnly: true,
    applicationServerKey: urlBase64ToUint8Array(Config.VAPID_PUBLIC)
  };
  registration.pushManager.subscribe(subOptions)
    .then(subscription => {
      console.log('Browser subscribed');

    })
);
If the browser successfully subscribes for notifications, the push service returns the subscription object, which looks like this:
{
  endpoint: "https://fcm.googleapis.com/fcm/send/some-unique-id"
  expirationTime: null
  options: PushSubscriptionOptions
  applicationServerKey: ArrayBuffer(65) {}
  userVisibleOnly: true
}
Remember, we need the subscription object on the server to send notifications to the browser later, so next we must upload the object to the server. To accommodate this, add the postRegistration function to the project’s index.js file:
function postRegistration(subscription) {
  const serverUrl = `${location.origin}/api/subscribe`;

  return new Promise((resolve, reject) => {
    if (subscription) {
      // build the URL to the app's APIs
      console.log(`Submitting subscription to ${serverUrl}`);

      // the data we're passing to the server
      const data = {
        subscription: subscription,
        name: `${platform.name} (${platform.version})`,
        platformName: platform.name,
        platformVersion: platform.version,
        platformLayout: platform.layout,
        platformOS: platform.os,
        platformDesc: platform.description
      };

      // POST the data to the server
      fetch(serverUrl, {
        method: 'POST',
        headers: { 'Content-Type': 'application/json' },
        body: JSON.stringify(data),
      })
        .then(response => {
          console.log('Received response from the server');
          if (response.status == 201) {
            console.log('Subscription submitted');
            response.json()
              .then(data => {
                console.log(`UUID: ${data.uuid}`);
                localStorage.setItem(UUID_KEY, data.uuid);
                resolve();
              })
          } else {
            // tell the user it failed
            Swal.fire('POST Error', response.statusText, 'error');
            reject(response.statusText);
          }
        });
    } else {
      reject('Missing endpoint value');
    }
  });
}
This code sends the subscription object to the server along with some additional information about the browser. You’ll see an example of this data later when we test out the changes. The code also writes the unique ID for the subscription generated by the server. We’ll store this value in the app’s local storage (using the UUID_KEY we added to the app earlier) so we have it during the unsubscribe process.
The final piece of this is how an app checks the status of a subscription. The app may want to update the UI on the basis of the browser’s subscription status; the code to do this is the following:
navigator.serviceWorker.ready.then(registration => {
  console.log('Checking subscription');
  // check to make sure the browser isn't already subscribed
  registration.pushManager.getSubscription()
    .then(subscription => {
      if (subscription) {
        // the browser is subscribed

      } else {
        // the browser is not subscribed

      }
    });
});
It’s finally time to wrap this section up and add the ability to subscribe to notifications to the web app. The following code replaces the entire granted case in the existing doSubscribe function in the app. It’s a slight variation on the subscription code shown earlier; in this case, it checks to make sure the browser isn’t subscribed before subscribing it. Go ahead and add this code to the doSubscribe function in the project’s index.js file:
case 'granted':
  // the user gave us permission,
  // so go ahead and do the registration
  console.log('Permission granted');
  navigator.serviceWorker.ready.then(registration => {
    console.log('Checking subscription');
    // check to make sure the browser isn't already subscribed
    registration.pushManager.getSubscription()
      .then(subscription => {
        if (subscription) {
          console.log('Browser is already subscribed');
          Swal.fire({
            type: 'info',
            title: 'Subscribe',
            text: 'This browser is already subscribed for notifications'
          });
        } else {
          // subscribe the browser
          console.log('Subscribing the browser');
          var subOptions = {
            userVisibleOnly: true,
            applicationServerKey:
              urlBase64ToUint8Array(Config.VAPID_PUBLIC)
          };
          registration.pushManager.subscribe(subOptions)
            .then(subscription => {
              console.log('Browser subscribed');
              registration.showNotification('I read Learning PWA, and ' +
                'all I got was this silly notification!');
              postRegistration(subscription)
                .then(() => {
                  console.log('Subscription POSTed to server');
                  updateUI();
                  Swal.fire({
                    type: 'info',
                    title: 'Subscribe',
                    text: 'The browser was successfully subscribed for notifications',
                    timer: 2000
                  });
                })
                .catch(error => {
                  console.error(error);
                })
            })
            .catch(error => {
              // hmmm, that didn't work
              console.error(error);
              // tell the user what we can
              Swal.fire({
                type: 'error',
                title: 'Subscribe Error',
                text: error
              });
            });
        }
      });
    updateUI();
  });
  break;
Now that we know how to tell if the browser is subscribed, let’s update the updateUI function to hide the subscribe button and unhide the unsubscribe button, depending on the browser’s subscription status:
function updateUI() {
  console.log('updateUI()');
  // does the browser support notification?
  if (("Notification" in window)) {
    navigator.serviceWorker.ready.then(registration => {
      // check to make sure the browser isn't already subscribed
      registration.pushManager.getSubscription()
        .then(subscription => {
          if (subscription) {
            console.log('Browser is already subscribed');
            document.getElementById("subscribeDiv").style.display = 'none';
            document.getElementById("unsubscribeDiv").style.display = 'block';
          } else {
            // no? Then unhide the subscribe div
            document.getElementById("subscribeDiv").style.display = 'block';
            document.getElementById("unsubscribeDiv").style.display = 'none';
          }
        })
    });
  } else {
    // no? Then display a warning
    document.getElementById("noNotificationsWarning").style.display = 'block';
  }
}
Go ahead and save your changes and refresh the page in the browser. When you reset the notification permission (shown in Figure 6.9) and then click the Subscribe button, you should see the results shown in Figure 6.15.
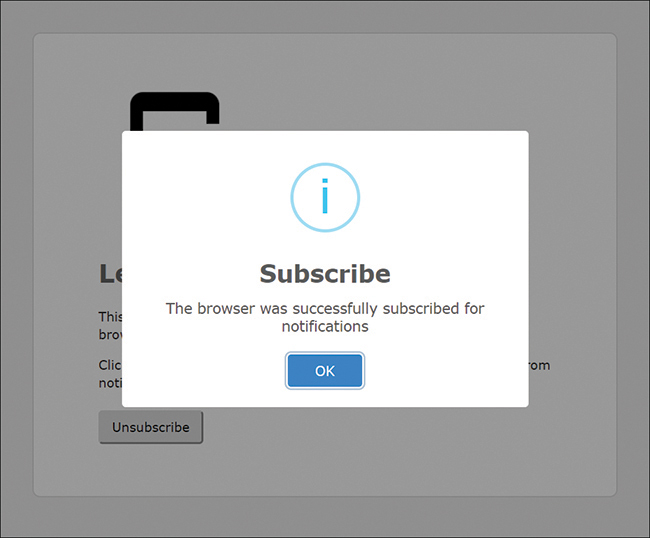
Figure 6.15 Successful Notification Subscription
For this project, I added a timeout value to the call to SweetAlert2 so the dialog closes automatically after two seconds, so don’t be surprised if these dialogs start disappearing.
The complete code for the project’s index.js file up to this point in the chapter is in the project’s chapter-06publicchapter-codeindex-62.js file.
Unsubscribing from Notifications
Unsubscribing from notifications is much easier than subscribing to them. You still need access to the registration object, and you must use the registration object to get access to the subscription object. Once you have that, it’s a simple call to subscription.unsubscribe to unsubscribe from notifications.
Of course, everything involved uses promises, so the complete code looks like this:
navigator.serviceWorker.ready.then(registration => {
  registration.pushManager.getSubscription()
    .then(subscription => {
      subscription.unsubscribe()
        .then(status => {
          if (status) {
            // successfully unsubscribed

          } else {
            // Failure

          }
        });
    });
});
The status value returned from unsubscribe is a Boolean value (true or false) indicating result of the operation.
For our app, we need a little more than that. We want to tell the user the subscription completed successfully (or not), plus we must remove the subscription from the server so it knows it can’t send notifications to this browser again. With that in mind, add the following code to the empty doUnsubscribe function in the project’s chapter-06publicjsindex.js file.
navigator.serviceWorker.ready.then(registration => {
  registration.pushManager.getSubscription()
    .then(subscription => {
      subscription.unsubscribe()
        .then(status => {
          console.log(`doUnsubscribe: status: ${status}`);
          if (status) {
            updateUI();
            Swal.fire({
              type: 'info',
              title: 'Unsubscribe',
              text: 'Successfully unsubscribed',
              timer: 2000
            });
            // get the UUID from storage
            let uuid = localStorage.getItem(UUID_KEY);
            // do we have a UUID?
            if (uuid) {
              // build a server URL using it
              let serverUrl =
               `${location.origin}/api/unsubscribe/${uuid}`;
              // POST the data to the server
              fetch(serverUrl, { method: 'POST' })
                .then(response => {
                  console.log(`doUnsubscribe: ${response.status} response`);
                });
            }
          } else {
            Swal.fire({
              type: 'error',
              title: 'Unsubscribe Error',
              text: "I'm not sure what happened here"
            });
          }
        });
    });
});
Save the updated code and refresh the app in the browser. The app should now have an awareness of subscription status and display the Subscribe or Unsubscribe button depending on the subscription status. When you click the Unsubscribe button, the app should unsubscribe the browser and display the notification shown in Figure 6.16.
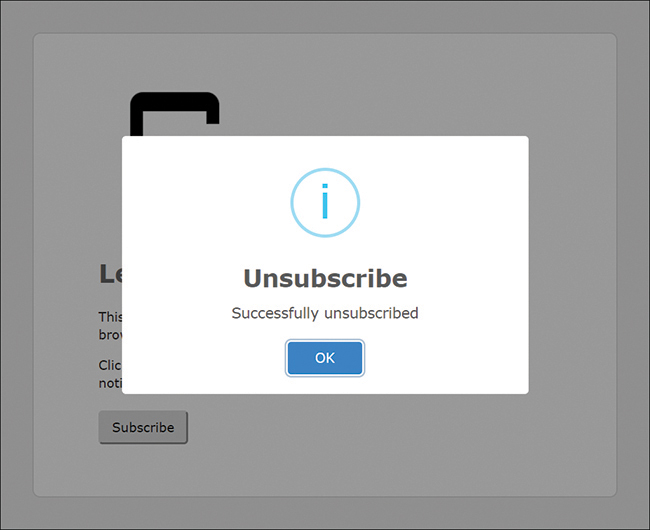
Figure 6.16 Successful Unsubscribe
The complete code for the project’s index.js file up to this point in the chapter is in the project’s chapter-06publicchapter-codeindex-63.js file.
At this point, we’re done with the web app’s index.js file. The web app has the UI we need to subscribe and unsubscribe the browser for notifications. All that’s left is to set the app up to process remote notifications sent from the server. This work must be done in the project’s sw.js file.
Remote Notifications
The browser delivers push notifications to the service worker to process. The browser fires a special push event in the service worker whenever the browser receives a remote browser notification (a notification sent by an external app, routed through the push service).
Earlier, when we created the subscription, we promised the browser’s push service that we’d display any notification alert that came from our app’s server. Now it’s time to deliver the code that does that. In the project’s service worker at chapter-06publicsw.js, add the following code to the bottom of the file:
self.addEventListener('push', event => {
    console.log('SW: Push event fired');
    console.dir(event);
    const data = event.data.json();
    console.dir(data);
    self.registration.showNotification(data.title, data);
});
This adds an event listener for the push event and contains all the code you need to respond to notifications sent to the browser by a remote server. When a notification arrives, the code pulls the title from the notification data included with the push event, then passes the title and the data object to the showNotification method.
In-Browser Testing
The browser’s developer tools give developers an easy way to test their app’s service worker code for processing browser notifications. In the Push section highlighted in Figure 6.17, you can enter the content for a push message, then click the Push button to send it. This delivers the message under the covers; the browser doesn’t know it came from the local developer tools.
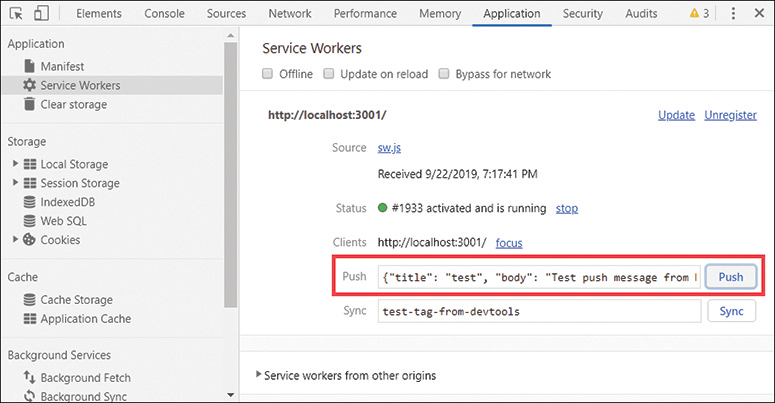
Figure 6.17 Browser Developer Tools: Sending Push Messages
When the browser receives the notification, it fires the push event (as expected), and the service worker’s push event listener executes to process the message.
Normally, you would just send a simple text string to the browser using this feature, and the event listener’s code would just create a generic notification like the first one shown in this chapter. For our app, the event listener expects a JSON object in the notification payload, so to make it display the notification using the title plus other options, you must format the notification string as follows:
{"title": "test", "body": "Test push message from DevTools"}
This is a quick and easy way to test notifications without involving external tools to send the notification through the browser’s push service.
If the notification includes an actions array, there’s still one more thing you must do: add an event listener for the notificationclick event to the sw.js file, which looks like this:
self.addEventListener('notificationclick', function (event) {
  console.log('SW: Notification clicked');
  console.dir(event);
  if (event.action === 'like' ) {
    event.waitUntil(
      // do something for the like action

    );
  } else {
    event.waitUntil(
      // do something for the dislike action

    );
  }
});
Notice that the event listener uses waitUntil to let the service worker know not to shut down the event listener until it’s done processing the user’s action click.
The complete code for the project’s sw.js file up to this point in the chapter is in the project’s chapter-06publicchapter-codesw-62.js file.
At this point, the web app is ready to test; I’ll show you two different ways to test the work we’ve done so far. We’ll start using a third-party developer tool, but also work with the project’s admin process (accessible through http://localhost:3001/admin).
Developers building backend apps like the server used in this chapter need some way to test the server’s API before they’ve completed building the frontend app that uses the API. They use tools such as Postman to exercise their APIs as they build them. Download a copy of Postman from https://www.getpostman.com/ and install it on your development workstation. Launch the app and create a new API call, as shown in Figure 6.18:

Figure 6.18 Displaying Browser Subscriptions Using Postman
Select GET as the API request method.
Enter
http://localhost:3001/api/subscriptionsfor the API endpoint.Click the Send button.
With the server running and at least one previous browser subscription completed during our work in this chapter, you should see a subscriptions list like the one shown in the bottom of the figure.
Next, let’s try sending a notification like the ones shown earlier in the chapter. Change the configuration of the request in Postman, as shown in Figure 6.19.

Figure 6.19 Sending a Browser Notification Using Postman
Start by changing the request type to POST.
Change the request URL to
localhost:3001/api/send/1. Select the Body tab, select Raw, and switch the input type to JSON, as shown in the figure.Populate the Body of the request as shown in the figure.
Click the Send button.
You should see a notification like the one shown in Figure 6.13 with a slightly different icon.
The 1 in the URL refers to the index (represented as idx in the subscription list shown in Figure 6.18) of the target browser from the database maintained by the server process. As you subscribe and unsubscribe browsers, that index will change, so make sure you grab the right value from the subscriptions list before trying to send notifications to browsers.
Notice that the content we’re sending the server is a little different than what you saw in previous examples:
{
    "title": "I read Learning PWA, and all I got was this silly notification!",
    "body": "Isn't this cool?",
    "image": "https://picsum.photos/200/100",
    "icon": "/img/push-icon-transparent-green.png"
}
This is because we’re sending the notification content through the server process and we must pass that content as a big string value to the server. What we’re sending is a JavaScript object as a string, so you must put both the keys and values in quotes.
Because I wanted to make it easy for you to test the browser notification process from end to end, Scott Good and I created an admin client you can use to manage subscriptions on the server and send notifications to browsers from a simple interface. You can see an example of this app in Figure 6.7. Open a new tab in the browser and navigate to localhost:3001/admin. You should see the list of browser registrations you have so far.
Hover your mouse over one of the browsers listed on the page, then select the Notify button that appears. A popup appears allowing you to edit the content of the notification message, as shown in Figure 6.20. Click the Send Message button highlighted in the figure to send the message to the selected browser.
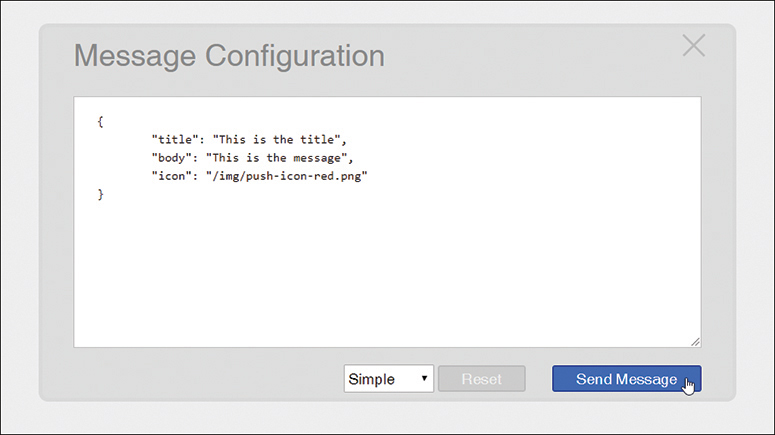
Figure 6.20 Sending a Notification Using the Server’s Admin App
Use the drop-down on the bottom of the form (highlighted in Figure 6.21) to select from canned notification options available in the app. Click the Reset button when you’ve completed the selection to copy the selected message content into the editor window.

Figure 6.21 Selecting Message Content
To adjust the default options, or to add your own, modify the contents of the project’s chapter-06publicadminindex.html and chapter-06publicadminjsadmin.js files.
Dealing with Subscription Expiration
One topic we haven’t covered yet is what happens when the browser’s subscription expires. The browser push services won’t hold onto these subscriptions forever, so they eventually whack them and let the browser know. When this happens, the browser fires the pushsubscriptionchange event to which the service worker can react through an event listener:
self.addEventListener("pushsubscriptionchange", event => {
  console.log('SW: Push Subscription Change event fired');
  console.dir(event);
  event.waitUntil(
    self.pushManager.subscribe(regOptions)
      .then(subscription => {
        console.log('Browser re-subscribed');
        console.log(subscription)
        // now, send the subscription object to the server
        // just like we did in index.js

      })
      .catch(error => {
        console.error(error);
      })
  );
});
In this example, the event listener simply re-subscribes the browser for notifications. In a real-world application, you would probably want to ask users if they want to subscribe again.
You can add this code to your project’s sw.js file if you want, but none of your subscriptions will expire as you work through this book.
The complete code for the project’s sw.js file up to this point in the chapter is in the project’s chapter-06publicchapter-codesw-63.js file.
Sending Notifications to Push Services
The one thing I haven’t shown you yet is how the server sends notifications to the browser’s push service. This is all done through code in the project’s chapter-06app
outesapi.ts file. If you open the file and look through it, you’ll find the following code at the top of the file:
// initialize the Web Push Module
// borrowed from https://www.npmjs.com/package/web-push
if (Config.GCMAPI_KEY) {
  // if we have a GCM key, use it
  webpush.setGCMAPIKey(Config.GCMAPI_KEY);
  /* in an early implementation of Push (in 2014)
     Google used Google Cloud Messaging (GCM)
     before any standards were in place. So
     If you're supporting users running
     really old browsers, then you'll want to
     populate this value in the config file */
}
webpush.setVapidDetails(
  'mailto:[email protected]',
  Config.VAPID_PUBLIC,
  Config.VAPID_PRIVATE
);
This TypeScript code (it doesn’t look much different from JavaScript, does it?) reads values from the external config.ts file we created earlier and sets the appropriate configuration values in the web-push module’s configuration. Remember, the server uses the third-party web-push module11 to send notifications through the browser push services, so this code simply initializes that module.
11. https://www.npmjs.com/package/web-push
With module configuration out of the way, the server sends notifications using the following code:
router.post('/send/:idx', function (req: any, res: any, next: any) {
  // send a notification message
  console.log('Router: POST /send');
  const pushBody = JSON.stringify(req.body);
  // convert the parameter to a number
  let idx = parseInt(req.params.idx, 10);
  // do we have a number in idx?
  if (idx && pushBody) {
    console.log(`Sending notification to Idx: ${idx}`);
    console.log(`Payload: ${pushBody}`);

    storage.getItem(STORAGE_KEY)
      .then(theResult: any => {
        let browsers = theResult ? theResult : [];
        // get the item from the array at idx
        let index = browsers.findIndex(function (subscription: any) {
          return subscription.idx === idx;
        });
        // did we find it?
        if (index > -1) {
          // get the subscriber
          let browser = browsers[index];
          webpush.sendNotification(browser.subscription, pushBody, {})
            .then(result: any => {
              console.log('Notification sent successfully');
              res.json(result);
            })
            .catch(result: any => {
              console.log('Notification failure');
              console.log(result);
              // does the response have an error code?
              if (result.statusCode) {
                // then return it to the calling application
                res.status(result.statusCode).send({ msg: result.body });
              } else {
                // otherwise who knows?
                res.status(500).send(result);
              }
            })
        } else {
          console.log('Browser not found');
          res.sendStatus(404);
        }
      })
      .catch(error: any => {
        console.log(error);
        res.sendStatus(500);
      })
  } else {
    res.sendStatus(400);
  }
});
This function handles the POST request highlighted in Figure 6.18; this code
Pulls the browser index off the request’s query string.
Grabs the message content from the request body.
Makes sure it has an index and message content to send.
Tries to retrieve the subscription object for the browser specified in
idx. The subscriptions are stored in a local file using the node-persist module.12If it has the browser subscription object, it sends it plus the message content to the browser’s push service through the call to
webpush.sendNotification(browser.subscription, pushBody, {}).
12. https://www.npmjs.com/package/node-persist
The web-push module abstracts away the complexities of the Push API, enabling a server process to reliably send browser notifications with just a few lines of code.
Wrap-Up
Well, this was a big chapter. We covered the complete browser notifications process from web client permission and subscriptions through notifications and the server process that sends the notification through the browser’s push service.
The next chapter is the book’s final chapter about service workers. In it, I’ll show how to send data between a service worker and the web app it services.