exploring the background, tools and techniques of computer animation
by Marcia Kuperberg
by Marcia Kuperberg
Exploring the background, tools and techniques of computer animation
INTRODUCTION
The first part of this chapter puts animation in context, and in the second part you’ll learn important animation concepts that will have a bearing on all the animation you produce. When you have finished reading this chapter you will have a basic understanding of:
• How we perceive moving images.
• How animation has evolved over the centuries from simple toys to today’s mass entertainment media.
• The impact of computers on animation and how ‘digital convergence’ affects you, the animator.
• Concepts of movement to help you create more effective animation.
Animation is inextricably bound up with other technologies, most notably cinematography – itself springing from photography and especially the discovery of a means of capturing a rapid, sequential flow of images: ‘moving’ pictures.
There is magic in making drawings move. As a child you probably also created your own mini animations by making flipbooks: you drew an illustration on one page, drawing it again in the same position on the .next page but moving an element or two, and so on until you had filled up many pages – then, the best part, flipping them to see your illustrations magically come to life. You can try it here (fig. 1.2). The magic’s been known about and exploited for many hundreds of years. The ancient Egyptians developed optical toys. In the 13th century, an English monk by the name of Roger Bacon studied optics and experimented with the optical illusion of movement and focusing light through a small aperture – principles we use today for photography. In the early 16th century, Leonardo Da Vinci drew diagrams of the Camera Obscura to study and measure the reflection of light and perspective. He contributed to the evolution of the moving picture by theorizing on the use of a pinhole camera in relation to the human eye.
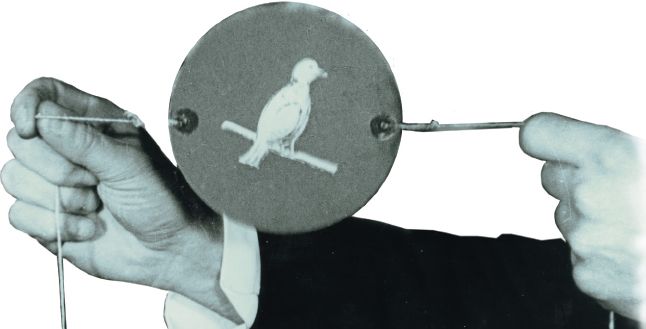
Fig. 1.1 Thaumatrope, side one: bird. Flip to see it in its cage.
PERCEPTION
When a series of separate sequential images are momentarily placed in front of our eyes – such as when we use our flipbook – they appear to blend together and we no longer perceive them as separate but as a single blended moving image.
This optical illusion is again due to the physiological phenomenon known as persistence of vision. But what exactly is ‘persistence of vision’? It is simply that the retinas of our eyes retain the image of what we see for a fraction of a second after the image has been removed from our sight. It is this fact that allows us to perceive animation or motion pictures when in reality what we are viewing is a series of static images. Strange, isn’t it, that the huge industries that rely on moving images – animation and motion pictures for cinema, TV, games, new media and Internet – are only possible because of this small quirk in our human ‘visual apparatus’?
We speak of a series of images being placed in front of our eyes in rapid succession. But how ‘rapid’ need this be to achieve the effect of a single moving image? That depends upon the individual but most people find that four images viewed per second appear to be clearly separate. Increase the speed to eight per second, and the images may blend together to some extent, but will seem very jerky. At twelve images per second, the illusion of continuous movement is much better. Most of the Disney hand-drawn animation movies were shot at this speed: each frame shot twice and projected at the standard cinematic rate of 24 frames per second. In certain circumstances, such as when an object or character crossed the screen horizontally – especially if the background had a number of vertical lines, e.g. a picket fence – the projected movie appeared to ‘strobe’. For this type of sequence it soon became apparent that 24 f.p.s. produced a better, more fluid effect. Whereas the standard cinematic rate of film projection is still 24 f.p.s., TV images are 25 f.p.s. (PAL European system) and 30 f.p.s. (NTSC American system).
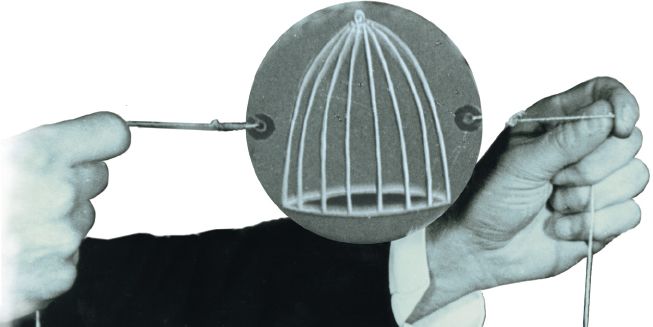
Fig. 1.2 Use the corner of this book as a flipbook (if you don’t mind a dog-eared appearance!). Hold all the pages together between thumb and forefinger of your right hand (near this top right-hand corner, just below the line). Now, using your left hand, flip from back of book to the front. See the little man walk.
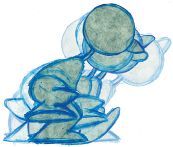
Fig. 1.3 The little man walking on the spot as you flipped through the book is an eight-drawing walk cycle. © Larry Lauria.
Fig. 1.4 Thaumatrope, side two. The ‘Thaumatrope’ named by its inventor, Dr John Ayrton Paris, an English physician, was an optical toy put on sale in 1825. It consisted of a flat disc, each side of which had a complementary picture, e.g. on one side, a bird and on the other side, a picture of a birdcage. When spun by means of strings attached to each side, the bird merged with the cage and appeared to be within it.
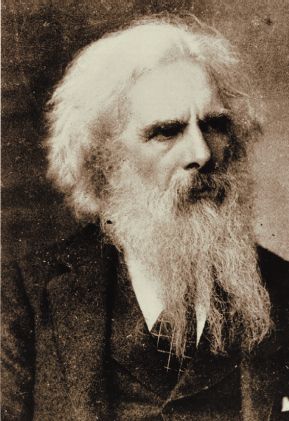
Fig. 1.5 Eadweard Muybridge.
Using the principles of persistence of vision to create the illusion of movement was one step in understanding the process of making movies. The other two main areas of understanding and technology that needed to be joined to this were the creation of a mechanism to shoot ‘moving pictures’ and finally a reliable mechanism to project these images.
THE MECHANISM TO MAKE MOVING PICTURES
From the mid-1900s the race was on to convert what today, we might term ‘glorified toys’, using the principle of persistence of vision, into a moneymaking entertainment medium. Many contributed along the way:
Those who invented photography
Joseph Nicephore Niepce, who in 1827 invented the very first film, using bitumen-coated pewter plate to capture the shadowy image of a rooftop near his window (it took eight hours to form), and William Henry Fox Talbot, an Englishman who in the1840s took the next leap forward to create photography by producing images (using a wooden-box camera) that could be reproduced. He used paper coated with silver salts to produce a single image in the form of a negative – so that many more positives could be printed, the same basic process used today.
Those who analysed motion through imagery
Eadweard Muybridge (fig. 1.5), the photographer, who conducted experiments to analyse different types of movement of humans, birds and animals (fig. 1.6). Animation students and artists interested in frame by frame movement still refer to Muybridge’s images to analyse frame by frame movement.
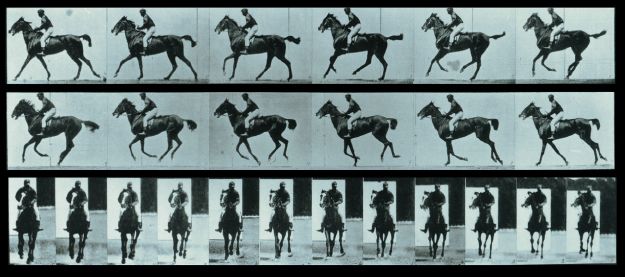
Fig 1.6 One experiment Muybridge conducted in 1880 involved placing 24 still cameras linked by trip wires at carefully placed intervals along a race track: when a horse stepped on the wire, the shutter was triggered. Here are the resultant images, still used as reference for animators today.
© 1887 Eadweard Muybridge, courtesy of Kingston Museum and Heritage Service, Surrey, UK.
Those who devised a mechanical camera which could capture movement
The actual discovery of a way of making moving pictures using a photographic process was made by the American inventor, Thomas Edison, and his young assistant, William K. Laurie Dickson.
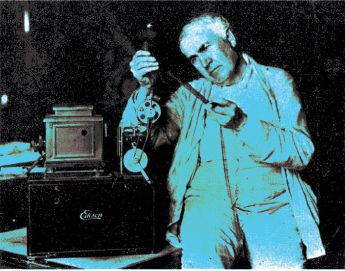
Fig. 1.7 Edison is shown here, looking over some film in the library of his laboratory around 1912. The machine is an Edison ‘Home Projecting Kinetoscope’. Film was passed over a magnifying glass to enlarge the pictures.
Dickson began working on the project under Edison’s guidance in 1888. They managed to make a movie camera which was able to take steady pictures, which they called a ‘Kinetograph’. No-one working in the field of creating moving pictures could possibly anticipate the impact that the movie industry would have in the next century. Nevertheless, Edison was well aware that the next logical step after the movie camera was to create a mechanical means of projection. It’s easy for us to judge priorities in hindsight, and unfortunately, Edison asked Dickson to put aside the work on this project in favour of what he thought a better ‘money earner’ at the time – their ‘kinetoscope’, a coin-in-the-slot peepshow. Dickson later expressed regret that this left the field open to all and the Lumière brothers soon stepped in with their own movie projection system. Only later did Edison put the finishing touches to his ‘home projecting kinetoscope’ (fig. 1.7).
Those who made group viewing possible
Emile Reynaud was an artist, showman and inventor who was a contemporary of Muybridge, working in Europe. He invented a device that was a major step forward from the ‘kinetoscope’ in that an individual no longer had to peer through a peep hole or slot to see the illusion of movement: it allowed a group to see moving images that were reflected in rapid succession onto a prism by revolving mirrors. He called it a ‘praxinoscope’ (fig. 1.9) and had it patented in 1877. Later, in 1892, he developed a further advance – his ‘Theatre Optique’, whereby images could be projected onto a screen and thus seen by a larger audience. Images were no longer confined to a short strip within a cylinder, they were painted onto a long ribbon that was wound from one reel to another. This projection equipment had two major defects: 1) it was fragile and 2) it had to be hand turned by a skilled operator, that ended up having to be Reynaud, himself.
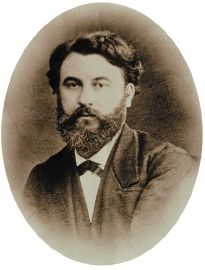
Fig. 1.8 Emile Reynaud: artist, showman and inventor, invented the praxinoscope (fig. 1.9) that allowed group viewing of moving images reflected from the revolving mirrors.
Those who were finally able to project movies
The Lumière brothers made the breakthrough of creating a means of mechanically projecting photographic images. The brothers ran Europe’s largest factory producing photographic materials. Their film, called La Sortie des Usines, was presented to a scientific society in Paris in 1895 and showed workers leaving their factory. It was the first film to combine use of live action photography with mechanical projection. Louis Lumière, himself, gave credit to those whose experiments in analysing motion through imagery had contributed to his success, particularly Muybridge and Etienne-Jules Marey, who had been experimenting into the movement of abstract shapes photographed onto glass plates (fig. 1.10). At the same time, he pointed out that none of the instruments made by these men was able to achieve animation of more than about thirty images in projection.
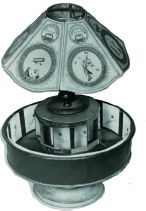
Fig. 1.9 Praxinoscope.
BIRTH OF THE MOVIE INDUSTRY
The first cinematograph screenings organized for a paying public took place in Paris on 28 December 1895 and were an immediate attraction, showing in London’s West End a few months later. Within a year, Queen Victoria saw films made by the Lumière brothers at Windsor Castle, which were accompanied by a full orchestra. These very early films were projected at 16 frames per second and were about 50 feet in length, lasting about 50 seconds. Within a few years the average length of films had increased, together with the number of cinemas and other exhibition venues.
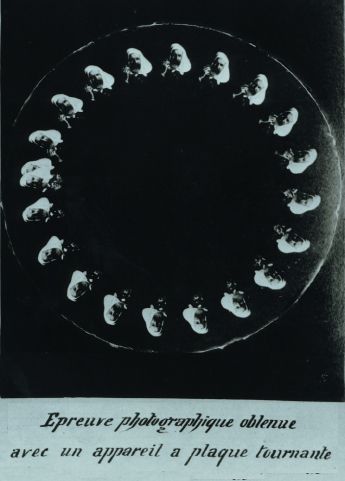
Fig. 1.10 Etienne-Jules Marey experimented into movement of images photographed onto glass plates. His work was acknowledged by the Lumière brothers as contributing to their breakthrough in projecting images to make movies.
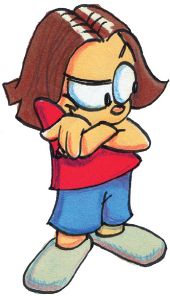
Fig. 1.11 (opposite) Hand-drawn sketched poses of the cartwheeling girl drawn by Larry Lauria. At a later stage Larry would turn them into numbered, sequential, registered images for animation, ‘cleaned up’ to become outlined images suitable either for scanning into a computer for digital inking and painting or, as in this case, for hand painting (fig. 1.12) by means of magic markers and crayons.
The movie industry was born: movies had suddenly become a novel form of mass entertainment throughout Europe and the USA. At this time audiences saw little difference between live action (real scenes shot with a movie camera) and animation (drawn or painted images photographed frame by frame). The fact that light and shadow on a screen created scenes and people that moved was enthralling enough.
In December 1937 Disney introduced the first full-length feature animation to a marvelling audience – the entirely hand-drawn, colour Snow White and the Seven Dwarfs. In 1998, some sixty years later, the Disney Studios, with Pixar, achieved another milestone with the first full-length feature 3D computer animated film, Toy Story. This time, although the computer-generated toys looked exactly like real toys, the challenge was not so much to create the illusion of reality but to endow the 3D toys with individualistic character and personality, as was so clearly achieved with Snow White. Good characterization is often more difficult to achieve in 3D animation than in 2D work. Read Chapter 7 for more information on character animation.
From 1902 to 2002 and beyond we have seen the massive growth of an industry – and the growth of audience expectations. Initially people were enchanted just peering through a slot and seeing a cycle of hand-drawn images moving. Then they were enthralled by the vision of real things and people moving on a large screen. Now they expect to see the impossible happen and look utterly real.
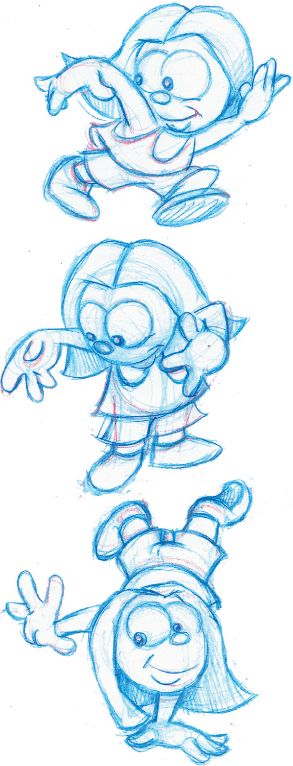
Fig 1.12 This character (see other poses opposite) has been hand coloured by magic marker between the black outlines. Additional shading has been done using coloured crayons.
Images on this spread © Larry Lauria 2000.
TRADITIONAL ANIMATION PRODUCTION TECHNIQUES
Hand-drawn images on paper and cel
In the early days of animation, each drawing was completed on paper. The use of transparent pieces of celluloid, known as ‘cels’, transformed the process of traditional animation allowing for longer, more elaborate productions. The means of hand painting between predrawn outlines created the look that became associated with cinematic animation: flat colours for characters which were outlined with thin black lines. Using cels meant that non-moving parts of the characters did not have to be redrawn each time the frame was photographed. Each frame to be shot then consisted of a layered sandwich – the bottom layer being the painted paper background with up to seven cels used on top (more cels could have affected the density of the painted colours when filmed).
The first stage of producing traditional cel animation remains the ‘drawing on paper stage’. Pegbars are used with hole punched paper to ensure correct registration of each drawing. The drawings are then shot, frame-by-frame, or more likely – to save artists’ time – double framed, i.e. each drawing is exposed twice. The resultant developed film allows the animator to check character movement, the ‘action’ in draft form, when changes can be easily made. This is known as a ‘pencil test’ or ‘line test’.
The drawings are later cleaned up with excess lines removed and then given to tracers who place registered cels over the paper and carefully trace the images with black outlines. These are passed to the painters, who paint between the lines with special animation paint on the reverse side of the cel so brush marks are not visible.
After a further cleaning process to ensure no fingerprints are left on the cels, they are transferred to the rostrum camera which has a single frame facility and is mounted vertically on a stand with polarized lights to eliminate reflections from the cells. The cel ‘sandwiches’ are then placed, registered by means of a pegbar, on the bed below the camera in the precise numbered order specified in the dopesheet (another name for this is ‘exposure sheet’ or ‘Xsheet’), the bottom layer being the background. Those handling the cels wear cotton gloves so as not to leave fingerprints which may show when filmed. Each frame of film is then exposed until each shot is complete – all in all, a very time and labour consuming process.
Although the use of cels is redundant for large-scale productions, they are still used for specialized ‘art’ productions shown at film festivals or for student productions. Computer-controlled rostrums greatly aid pans, zooms and other camera movements. Often cels are combined with drawings on paper using a variety of media such as magic markers, crayons, photographs and cutouts. Unless the film is destined for cinematic distribution, video, being a much cheaper production process with the advantage of instant replay, is likely to be used instead of film.
One of the first ways that computers helped to speed up this process was the use, initially by larger animation studios, of scanners to transfer the cleaned up pencil tests to digital systems. No more need for all that hand tracing and outlining in ink. Once computers became more powerful with increased memory, the digitized drawings could be played back in real time to test the action. Then, each digitized line drawing could be digitally painted. Digital compositing (layering) techniques meant that a number of animators could work on different parts of a scene at the same time. When finished, all the layers were composited digitally over the backgrounds. Complicated camera movements such as combination zooms with pans within a scene presented no problems to a computer’s virtual camera. These computerized techniques essentially duplicated the stages of traditional animation production.
Nowadays, there are a number of 2D computer software programs that speed up all aspects of 2D animation as described above. Drawings can be originated either by hand or directly into the computer using the animation program or another image creation program such as Adobe Photoshop or Illustrator. Two leading 2D animation programs used in Britain and the US are Animo and Toonz. Others, popular in various parts of the world, include Retas!Pro and MediaPegs. Toonboom is a 2D animation program that is a vector-based, resolution independent system. This means that when existing digital images are enlarged, they maintain their original clean lines unlike raster-based imagery which, when enlarged, becomes more ‘pixelated’.
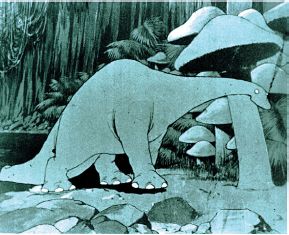
Fig. 1.13 Gertie the Dinosaur, by Winsor McKay, 1914.
There are also programs that specialize in particular types of 2D animation, such as cutout animation. Examples here are CelAction and CreaToon. Flash is a very popular, vector-based software package originally designed for animation on the web. With the continuous addition of updates it is fast becoming more of an all-purpose 2D animation tool.
Even with the aid of programs such as Animo or Toonz, the traditional first stage of drawing on paper, registered by the pegbar, is still preferred by the majority of traditional character animators. They much prefer the immediacy of pencil and paper. The other stages of inking, painting, backgrounds, compositing and camera movement can be left to the computer, but of course, the computer is only a tool and the creative force always lies with the artist.
3D computer animation software added a whole new dimension of creative possibilities to animators and filmmakers, particularly in making impossible things seem real. Unlike 2D animation, once a character has been modeled in 3D, it can be viewed realistically from any angle as in real life (fig. 1.14). The achievement of artificially creating objects that match the appearance of those in real life is known as photorealism and this was originally the main aim of most 3D programs. Great efforts are continuously being made to improve a program’s ability to simulate reality through what it can offer the animator in the areas of its modeling capabilities, lighting, use of textures and surface materials and rendering (colour renditions of scenes) of the final images. One wonders what Winsor McKay, creator of the charming, line drawn Gertie the Dinosaur, 1914 (fig. 1.13), would have made of today’s fearsome 3D dinosaurs.
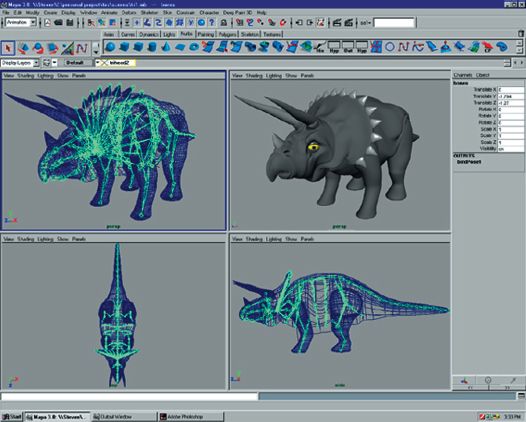
Fig. 1.14 Triceratops (created in Maya). © 2001 Aardman Animations, by Steven Elford.
Bringing it all together
From this potted history, you can see that simple forms of animation have existed for hundreds of years. Motion pictures – live action shot with a movie camera – are a relatively recent phenomenon, and projected animation became a part of this entertainment medium. Before long, live action and cinema ‘cartoons’ began to take separate paths and animation was perceived as a parallel entertainment form alongside that of live action movies. But, as with other areas of communication and entertainment, the advent of digital technology has, yet again, changed animation’s place in the movie world.
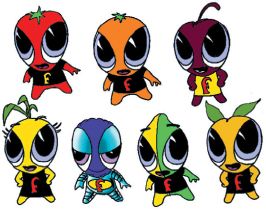
Fig. 1.15 The F-cru: Frutina characters (© 2001 5th Dimension) who feature in a wide range of media for this frozen fruit drink.
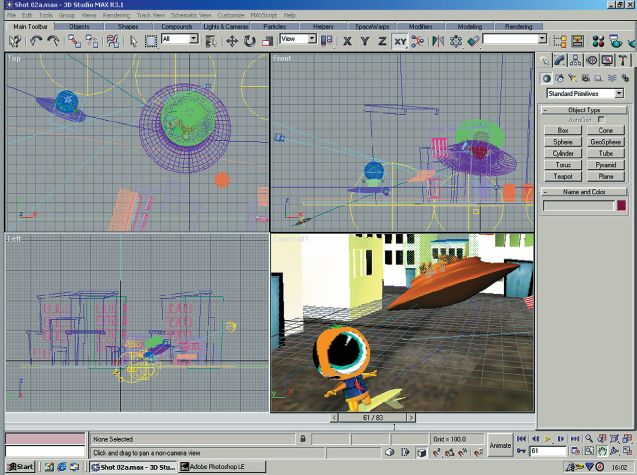
Fig. 1.16 3D animation of Frutina characters for CD-ROM and video.
There are many forms of visual communication: print, television, video, films, and ‘new media’ (though it is hardly ‘new’ anymore): multimedia, DVD and Internet. Because they have evolved at different times in different ways, each form – like animation itself – has grown up with its own conventions.
The onslaught of digital technology into all forms of communication really began in the industrial marketplace in the 1970s. It made itself visible in the ’80s, and really took off into mass-market ‘desktop’ technology in the ’90s. Computers have become cheaper and ever more powerful in the new millennium. In hundreds of ways, they have blurred the boundaries of what were once thought discrete industries.
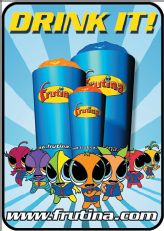
Fig. 1.17 Printed poster for Frutina.
Design studios used to deal mainly with designing for print. Post-production facility houses dealt with video editing and producing soundtracks. Multimedia companies specialized in providing content for and authoring CD-ROMs and then began branching out into designing websites and creating DVDs; animation studios produced animation that found its way into all these media. The thing they had in common was that they mostly all dealt with various combinations of text, images and (except for print) sound.
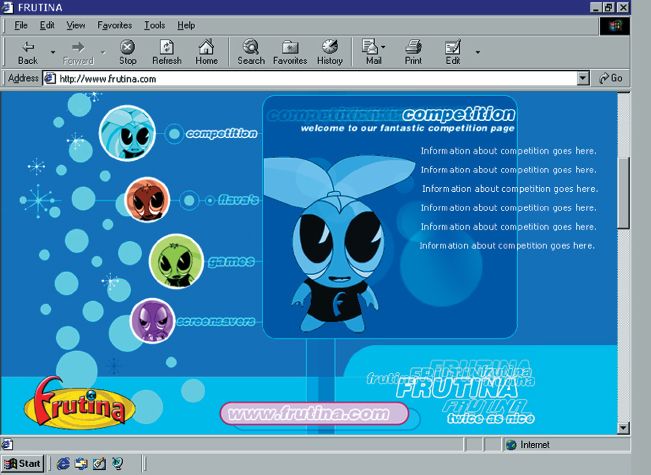
Fig. 1.18 Website for Frutina. © 2001 Fifth Dimension.
It is easy to see why there has been so much convergence within these industries if we look at a simple example of two software packages that most of us are familiar with: Microsoft Word (for word processing) and Adobe Photoshop (for image manipulation). Say we have some text – a message or a story – that is produced in Word and illustrated by, say, a photograph and an illustration produced in Photoshop. In the case of the illustrations, Photoshop can be used equally well to create imagery for a variety of media: e.g. manipulation of scanned drawings for print, drawings and backgrounds for 2D animations or to create backgrounds or texture maps for use on 3D models for 3D animation. In the case of the text, we no longer have to re-key it every time we need it for a different end product. Usually, we can import the text from our original word processing package into whatever specialist software package requiring it, be it for print, web or title for video/TV.
Regurgitating the material
So much of what is produced – image, text and sound – can be regurgitated for use in a variety of media. This is also the case with animation. The same imagery and animation can be used for TV, video, film, website, DVD or CD-ROM – with resolution and frame rate adjusted to allow for the different requirements of each medium. These requirements are explained in Chapter 2.
The strange thing is that there seems to be an ever-increasing range of software coming onto the market, despite the fact that many packages are capable of so many functions for different end products. Much of this new software takes account of what other software is already well established; it is designed to ‘plug-in’ or to be used together with the master package to achieve a particular effect or to improve the speed of producing various effects. Sometimes it’s better for two independent software companies to strike a deal to their mutual advantage. An instance of this is when the plug-in that users have to buy in addition to the main package becomes so popular that the add-on is swallowed up by the master software and becomes part of its next upgrade, helping it maintain or improve its position in the marketplace. Read the case studies in Chapter 6 to see how a number of packages are used together to achieve their end results.
ANIMATION: THE ART OF MAKING THINGS MOVE
Understanding animation concepts
If you have art/design training or experience you will recognize that whatever the final image to be produced, there are certain common considerations that form part of the creative process of producing a still image. These are the use of shape, colour, tone, contrast, texture and use of space, i.e. composition, or in filmic terms, framing. These will also play a part in animation, which consists, after all, of a series of images.
For now, however, we are dealing with the one big difference: movement. Although computers have altered the way animation is produced, most of the actual principles of producing convincing movement remain the same as those used by traditional animators for so many years. Regardless of whether you are using a 2D or a 3D animation package, understanding and applying these principles will be of enormous help in the animation you create. First it helps to be reminded of Newton’s Laws of Motion and then translate them into concepts that you can use in your animation.
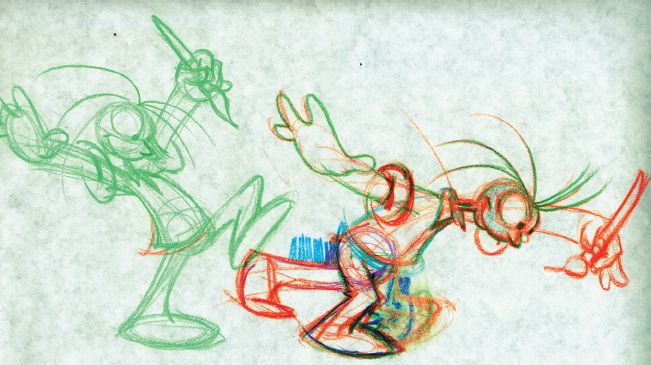
Fig 1.19 One can really feel the movement in this sketch by classical animator, Larry Lauria, former head of Animation at the Disney Institute and currently 2D Animation Professor at Savannah College of Art and Design, Georgia.
© Larry Lauria 2000.
• Every object has mass (weight) and will remain at its natural state of inertia (i.e. not moving) unless a force is applied to move it.
• The greater an object’s mass (weight), the greater the force that is required to move it.
The really important thing to bear in mind is that when you’re animating, although you may know how big or how heavy an object or character in your scene is meant to be, and you may draw or model it accordingly, its size and/or weight is only really made apparent to your audience by the way you make it move or be moved. For example, if a character picks up a box, your audience will know how heavy it is meant to be by how much effort your character is seen to expend in lifting it.
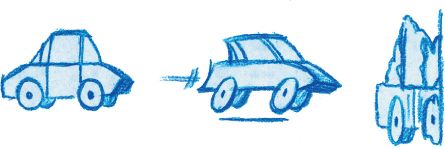
• Once an object is moving, it tends to keep on moving unless it is stopped by another object, or unless it is gradually brought to a halt by friction.
An example is the car in fig. 1.20. It has reached cruising speed but when it is stopped by crashing into the text, it crunches up not just because of hitting the text but because its back half is still moving forward along the smooth road, even after impact. A ball rolling along a smooth path will keep on rolling much longer than the same ball rolling along a rough path. A heavy object will be slow to get started moving and slow to stop; lighter objects will move more quickly.
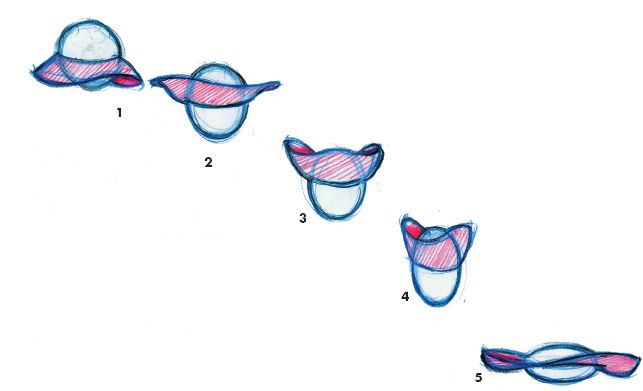
Overlapping action
When you think about animating any action of anything, you could break it down, like Newton, into two parts: starting and stopping. What you must bear in mind is that when a body in motion comes to a halt, not all parts stop at the same time. Various parts will finally halt their motion at different times to other parts. Look at fig.1.22. First the girl gets ready for the jump by bending her knees and crouching – see drawing 3 (anticipation). She then launches into the jump, lifting her arms. At the height of the jump (drawing 8), her skirt has lifted, but has not yet reached its highest position (drawing 9, lifted by air resistance on her downward path). As she lands, her feet may stop first (drawing 10), but the rest of her body will still be moving downwards: her upper body and arms, her hair, her clothes. Each part will finally come to rest at different times. This effect, following the laws of motion, is what we call ‘overlapping action’. Your animation will appear dull and unnatural if you ignore this.
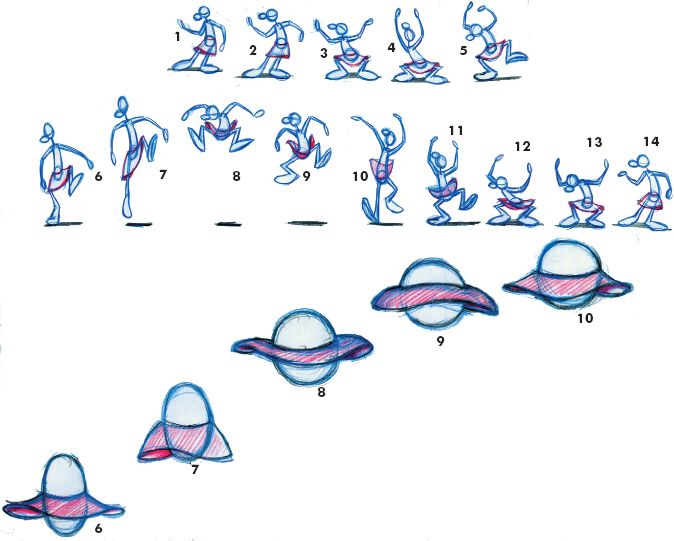
All images shown on this spread are © Larry Lauria.
Another aspect of starting and stopping is that objects will generally overshoot their mark before settling back into their final position. This is an effect that you’ll generally use for most objects in motion. This overshoot is likely to be the default for 3D software animation but you’ll need to override it for mechanical objects or where you don’t want your ball, say, to bounce right through the floor.
Follow through
If you’ve ever had tennis or golf coaching, you’ll remember your coach telling you to ‘follow through’ after you’ve hit the ball. By this, the coach meant ‘don’t try to stop the arm movement once racquet or golf club has made impact; allow natural carry through of movement’.
When animating an action, bear in mind that few movements end abruptly at a given point and objects are usually made up of a number of connected parts of varying weight and type. For example, Superman has tight clothing that would remain attached to his body like a second skin. His cloak, however, although attached to his shoulders, will behave quite differently; it will billow in the wind and come to rest after Superman, himself, has alighted. How far the cloak carries on moving and how swiftly it comes to rest after Superman has landed will depend on the type of fabric (e.g. gossamer light, or heavy velvet) and friction, e.g. air resistance. The same principle applies to the animation of all secondary objects attached to the main object as explained under ‘overlapping action’, e.g. hair or floppy ears.
Squash and stretch
You’re probably familiar with this animation concept from Disney characters. They have a rubbery, elastic quality when they move. Animation is the art of exaggerating movement for dramatic and comic effect. The principles are simple: when an object hits something, it squashes and when it rises, it stretches (figs 1.20–1.25). This is standard animation practice for 2D and much 3D. Just how much you exaggerate the effect will depend on the degree of realism you want to convey.
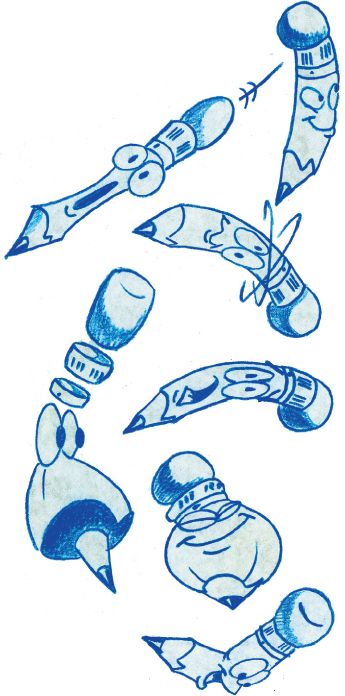
Fig 1.23 Application of squash and stretch for this pencil by Larry Lauria.
All images shown on this spread © Larry Lauria.
Most moving objects don’t begin and end the movement at full speed. They begin slowly, get up to speed and slow down before drawing to a stop. Think of a car starting, driving and stopping or perhaps something that you see constantly on TV station breaks and commercials: a flying logo. It takes off smoothly and slowly from a stationary position, gathers speed and spins or flies around before settling gently into its final position on screen. The bouncing ball demonstrates another type of slow-in/slow-out (fig.1.25).

Fig. 1.24 Application of squash and stretch for Larry’s Jack-in-the-box.
Because this smooth, slow-in/slow-out type of movement is so common, your software is, again, likely to use it as the ‘default’, meaning that the software may give you this type of movement whenever you move an item from point A to point B, unless you instruct it otherwise. You might not want this type of movement when you need the movement to be sharper, for example when a lid falls shut from an open position. The lid would slow-out but, similarly to the ball hitting the ground, it speeds up as gravity pulls it downwards to its shut position. Indiscriminate use of 3D software’s default slow-in/slow-out motion gives an unnatural, floating look, so use appropriately and with due care.
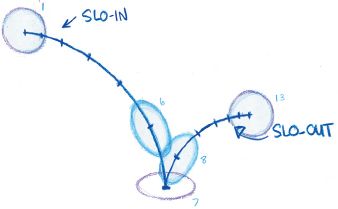
Fig. 1.25 This demonstrates slow-in/slow-out keyframes for Larry’s bouncing ball (shown by the crosses on the curve). As the ball slows, the keyframes are closer together, i.e. there are more in-betweens, and vice versa when the ball speeds up. You can also see the principle of squash and stretch as applied to speed (as well as impact when the ball hits the ground).
Joey is vertically challenged. He must get the golden ring at all costs!
Moving in arcs
Objects thrown into the air will go up and come down following a parabolic curve. A ball bouncing demonstrates this curve (fig.1.25). Move your objects in arcs – however slight – rather than in straight lines wherever possible, for example when a character’s head turns from one side to the other (fig.1.27) or, similarly, when a character’s eyes move left to right and vice versa. Even a door opening and closing follows this principle (fig.1.26).
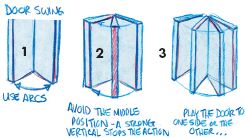
Fig. 1.26 Here, Larry demonstrates how a door swing moves in arcs.
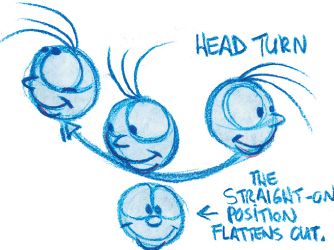
Fig. 1.27 This simple head turn drawn by Larry follows the same principles.
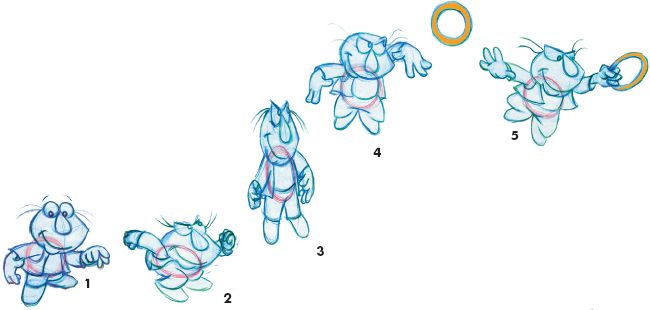
Fig 1.28 Larry’s drawings of Joey jumping to reach the golden ring demonstrate a number of animation techniques discussed: moving in arcs, slow-in/slow-out, anticipation, squash and stretch and overlapping action.
In drawing 1 we see Joey in normal standing position. In drawing 2 he is anticipating his leap by bending his knees prior to takeoff, clenching his fists and looking toward his goal with a determined expression.
In drawing 3 he takes off and we see how his body is stretched as he rises. Note the overlapping action of his hair and clothing at different parts of the action. When Joey lands, his knees bend once again before he straightens back into his normal standing position.
Character animation is all about timing and pacing. In order to maximize the drama or comic effect of any important action, it’s important to signal to the audience that something is about to happen before it actually does happen. That way, we not only gain greatest impact from the scene but we also allow the audience time to register what’s happening to a character on screen (things happen much faster in animation than in live action). We need to build in anticipation at all levels from a simple action such as jumping or reaching for a mug (figs 1.28 and 1.29) or doing a take or double take when something really shocks or excites a character.

Fig. 1.29 Grabbing the glass: anticipation is evident in how Larry has drawn the arm and hand movements. Notice how the arm bends before stretching out and how the hand opens (in drawing 3) in anticipation of closing around the glass in drawing 4. Also notice the balancing action of the other arm.
Takes and double takes
These are just exaggerated forms of anticipation, e.g. a character walks off a roof, a mountain ledge or whatever and continues to walk unconcernedly on thin air until some sixth sense tells him that his feet are no longer on terra firm, at which point he looks back or down and becomes aware of his plight. He shows us his reaction (the take) usually by a frozen expression of horror (a ‘hold’) – before falling very fast to an unhappy end. The double take is a variation when it takes two looks (the first look doesn’t quite register the situation) before he fully realizes his predicament and falls.

All images shown on this spread © Larry Lauria.
Holds are deliberate pauses in an action. But beware! In either 2D or 3D animation, just leaving a character in a static position, without even an eye blink, can be fatal – literally. Your character appears to die on screen and may look like part of the painted background. For this reason, your ‘hold’ should, more often than not, be a ‘moving hold’, i.e. your character pauses, but some small part still moves: it might just be an eye blink now and then or a slight shift in position.
How long should a hold last? This is an area where you should experiment, be very self critical and you will gain experience. There are many types of holds, not all for the purpose of dramatic effect. You may, for example, want to show your character looking at something off screen, before cutting to show what is being looked at. The hold on the character in this case should be for about 16 frames (if the running speed of your final video is at 25 f.p.s.) and for a few more frames if you are making a video at 30 f.p.s. Some holds are only a few frames long, e.g. the closed eye position for a blink (see Chapter 7). Normally a hold must be for a minimum of six frames to register that it is, in fact, still.
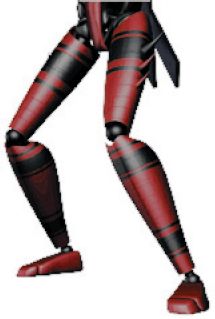
Fig. 1.30 Robots make excellent bodies for linking joints in either forward or inverse kinematics. These principles are outlined briefly under ‘Force and drag’ and explained further in Chapter 5. This robot is designed by Kenny Frankland. Image © Kenny Frankland 2001.
Force and drag
Many objects, most notably humans and animals, are made up of a series of flexible joints, all linked to each other (seen graphically in the body of the robot in fig 1.30). In 3D animation, this is a hierarchical structure, where each item can be termed the ‘parent’ of the children who are dependent upon it. Take the example of the leg. The knee is a child of the thigh (the thigh being the parent of the knee, but a child of the lower torso); the shin is a child of the knee; the foot is a child of the shin and the toes are children of the foot. When you move the ‘parent’ the children automatically follow but will lag a little behind the parent. Each successive child in the overall chain will trail a little behind its parent in slightly overlapping action. This type of linkage is known as ‘forward kinematics’ (or ‘kinemation’). Another form of this hierarchy is ‘inverse kinematics’. This is where the child initiates the movement and all the other links in the chain follow, bending or rotating according to their natural constraints which have been pre-set by the animator. Setting constraints for all the joints is often a lengthy process, but it saves much time in the long run if the character is, say, dancing or doing some other complicated action.
Using cycles, i.e. repeats of the same set of drawings, is a great time-saving device, particularly in the case of traditional hand-drawn animation. If, say, you want your character to walk past a house, it takes a great many drawings to have him cross the screen, left to right with a static background. If, on the other hand, you continually cycle two steps of the character, making him ‘walk on the spot’ while the background is panned behind, you achieve the same effect, but a great deal of drawing time is saved. The same principles can be applied in computer animation: a repetitive action can be accomplished by copying a given set of frames (e.g. the eight-frame walk cycle of the little man walking in the top right-hand corner of this book) to another part of the timeline. One of the great benefits of computer animation over traditional techniques is that your character no longer has to ‘walk on the spot’ while the background moves: the computer will allow him to follow any path automatically, cycling the set of frames over the path, no matter how winding or complicated. To make a seamless cycle, there should be a smooth transition between first and last drawings in the cycle.
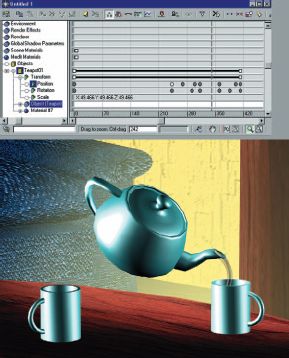
Fig. 1.31 3DS Max screen grab showing section of keyframe for an animation of a teapot lifting by itself, jiggling and pouring tea before reseating itself back on the table. The key spots on the timeline indicate the teapot’s position and rotation changes. Image © Marcia Kuperberg 2001.
Keyframe animation
In understanding this term, we firstly need to be aware that time, in movies, is measured in frames. There are 24 frames per second in projected movie film in cinemas, 30 f.p.s. in American (NTSC) television and video, and 25 f.p.s. in European and Australasian (PAL) TV and video, and often 15 f.p.s. or even fewer for online animations or movies.
Keyframe gains its name from its traditional hand-drawn origins when the chief animator (being the best artist) drew the ‘key poses’ (or ‘extremes’ of position and movement) of a character at a particular frame number (a given point in time) to mark each major change in a character’s position. The in-between artist then filled in all the intermediate (in-between) positions. Your computer is the in-between artist and you are the key animator. Keyframes can be thought of as poses if applied to a character, e.g. each of the numbered images of Joey in fig.1.28.
In 3D terms, each keyframe will set an object’s position, degree of rotation and/or scaling in the X (horizontal), Y (vertical) or Z (depth) axis – at a particular frame number (fig. 1.31) in the timeline, which is measured in frames and seconds.
It may seem obvious that your audience should notice and understand what your characters are doing on screen. Alas, very often, inexperienced animators spend much time working on a particular movement, only to find that its significance is totally lost on the audience.
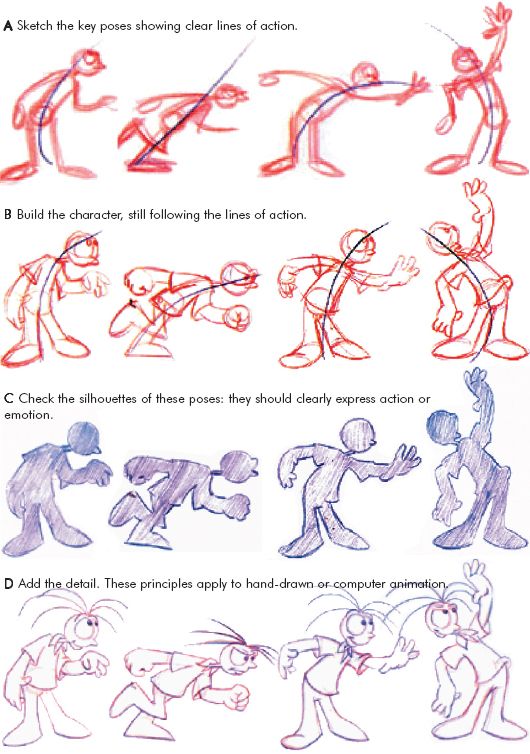
You need to choreograph the characters’ actions so that their meaning is immediately clear to the viewer. This is called ‘staging’ or ‘posing’.
Larry Lauria comes from a traditional Disney-style, craft animation background. These are his guidelines:
1. Posing involves mainly the key poses.
2. Exaggerate the line of action.
3. Look for strong silhouettes which express emotion.
4. Really push your drawings.
5. Look for secondary body elements to assist your posing, e.g. hair, hands, clothing, feet.
Straight ahead animation
You may hear this expression, although it is generally considered to be a less effective way of working than pose to pose. It springs from traditional 2D hand-drawn animation when an artist may have had an action in mind and just kept on drawing until the action was complete, i.e. without first mapping out the key poses. Obviously, even with this spontaneous way of working you would certainly need to rely on your computer to do the in-betweening for 3D work and for much 2D work, which really brings you right back to the pose to pose way of working. To try to create each frame’s movement, yourself, in the computer would be to negate this vital function of your animation program.
In computer animation it’s a good idea to get used to thinking of movements as beginning and end changes to the status quo of a character (or object) and these ‘changes’ are, in effect, key poses at keyframes. The really important thing is to create meaningful poses. The stages of creating these are shown in fig.1.32. If you are working with 3D characters rather than 2D drawings, you may still find it helpful to sketch out the poses to help visualize the action.
All images shown on this spread are © Larry Lauria.
Ways of making still drawn images appear to move have been known about for centuries, but it is only in the last hundred years or so that our understanding of this phenomenon has developed sufficiently to make screen-based animation as we know it today. Many innovative thinkers and artists have contributed along the centuries to make this possible.
Computer technology has not only speeded up the animation production process but has enlarged the field of animation into a much broader range of media than movies for cinema, televison or video. New media includes CD-ROM, DVD, computer games and the Internet. These media themselves have produced new types of animation which are explored in other chapters, notably the chapters on Games and Multimedia.
Artists and creative agencies who once restricted their talents to one or another medium are now becoming more broad-based, due to digital convergence.
Effective animation techniques spring from traditional crafts of hand-created drawings which, in turn, come from an understanding of Newton’s Laws of Motion.
Whether working in 2D or CGI (3D) you can improve your animation by experimenting with and exploring traditional techniques such as overlapping action, overshoot, follow through, squash and stretch, slow-in and slow-out, moving in arcs, anticipation, holds, cycles, staging and posing.
Animation is a never-ending creative art. Enjoy it!
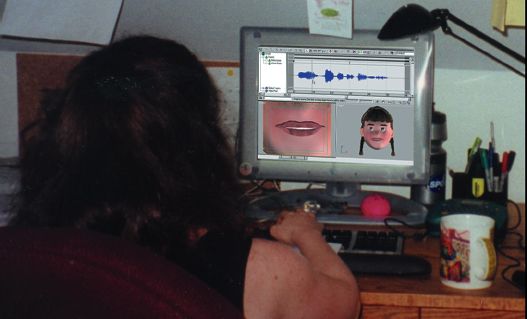
Fig. 1.33 Creating 3D lip synched animation (see Chapter 7).
