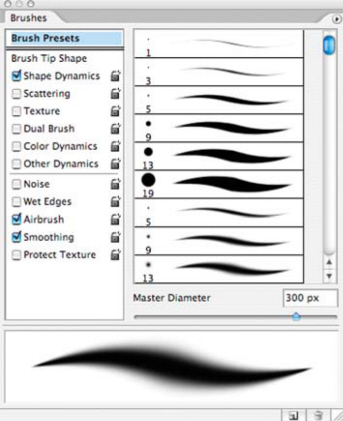
Opening the Software Toolbox
What’s in your toolbox?
Shopping for digital imaging software can be confusing. There are under-$30 programs that claim, “We’re as good as Photoshop!” Even Adobe Systems got into the act with their Windows-only $29 Photoshop Album, but at least they don’t claim it’s as good as their flagship product, although many digital imagers are quite happy with the $99 Photoshop Elements. Confused yet? Do you need the “real thing,” or one of the clones?

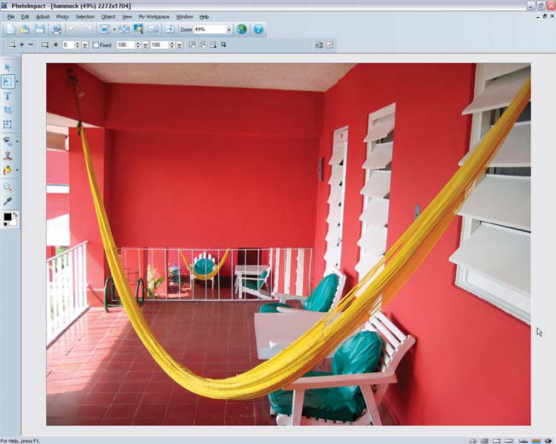
This digital photograph of Acapulco Harbor was made at night during the Winter Solstice fireworks celebration using a Leica D-Lux2. It is made up of three separate image files that were combined using Adobe Photoshop CS2, but I could have used any image-enhancement program that lets me use Layers to make this seamless montage. Layers, as you will discover later, can be an extremely useful tool. © 2005 Joe Farace.
There are many different products to choose from and many alternatives ranging from low-priced, entry-level image enhancement software to professional level packages. There is even freeware image editing software—no kidding. Sorting out which one is right for you is a matter of analyzing your needs. Start by making your own checklist.
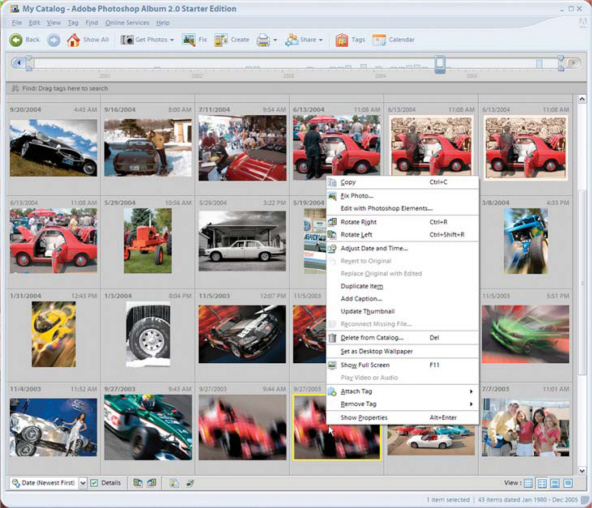
For digital imaging newbies, Adobe Photoshop Album has a great $29 starter set of tools. It has everything the casual photographer needs, in one easy-to-use product. You can share your photos with family and friends, fix flaws in seconds, and view all your photos in one convenient place. © 2005 Joe Farace.
How are you going to use the software? The first thing you need to do is define your digital imaging objectives. Your long-term goals may be different, and when it comes to software, by the time you’ve enough experience to make use of all of the features in a program that can handle these lofty aims, several generations of software will have passed, and perhaps even new, superior products introduced. Focus on your short-term goals. Do you want to create images for the Web? Family snapshots that can be shared on sites like SmugMug (www.smugmug.com)? Does your interest lie in printing fine art images to sell at art shows and galleries? Perhaps you need to provide professional clients with press-ready images? Make a list of your goals. If you’re not familiar with the equivalent digital terms, express them in traditional photographic language.
What Kind of Computer?
While programs like Adobe Photoshop run on Mac OS, Windows and UNIX systems, other equally capable software, such as Corel’s (www.corel.com) PaintShop Pro, is only available for Windows, and Binuscan’s (www.binuscan.com) PhotoRetouch Pro is designed specifically for the Mac OS.
While making your checklist, be sure to include the relevant specifications of your computer system. Most software boxes have “System Requirements” printed on the outside, telling what hardware is needed to run the program. Consider these recommendations to be minimum requirements. Some software companies list both “Minimum” and “Recommended” system requirements. Take these recommendations seriously. Often a minimum system will encounter problems working with larger image files, so be prepared to make a few upgrades to your system—or even replace your computer—when you’ve narrowed your search down to the “perfect” program. Usually, however, all you may to do is make a few minor upgrades, such as adding memory or a larger hard drive. With prices for both of these items at commodity levels, the cost of such upgrades shouldn’t create overdrafts in your checking account.

One of Ulead (www.ulead.com) PhotoImpact’s most interesting innovations is that it offers two workspaces: Basic Photo Mode uses a condensed tool set for everyday photo-editing, while Advanced users can choose from Standard, Photo, Graphics, or Web modes. © 2005 Joe Farace.
One of Ulead (www.ulead.com) PhotoImpact’s most interesting innovations is that it offers two workspaces: Basic Photo Mode uses a condensed tool set for everyday photo-editing, while Advanced users can choose from Standard, Photo, Graphics, or Web modes. © 2005 Joe Farace.
How much does it Cost?
The price of the product can be a good indication of its capabilities. Don’t buy more program than you can really afford, unless you are 100% sure it’s the only program for you. You can save some money by purchasing software from a mail order dealer because the company that produced the software, not the retailer who sells it, will provide post-sales support. Look for bargains too. Shop at used computer stores who also sell software. You can often purchase older versions of pro level programs at pennies on the original cost, and even if it doesn’t have all of the newest version’s capabilities, it may have all of the features you originally put on your list. Look for deals on upgrades or sidegrades from competing software. If you already own a digital imaging program, sometimes a company offers lower prices on a new version of their software to lure you away from what you’re currently using. A wise shopper can save money using any and all of these practices.
More and more companies provide a “tryout” or demo version of their software that you can use to see if you like it. Demo software typically has a few features turned off, usually the ability to Save or Print or Save and Print, but you can open files and play with images. Demo software can be time limited or access limited.
You may use the program for 30 or 45 days before it automatically uninstalls or you can use the program for a limited number of times before it deactivates. Books about digital imaging often include CDs with demo software; and check out the software company’s website. If there are demos available, download them and give’em a try.
|
Freeware and Shareware |
|
|
Some programs are available in demo or trial versions that can be downloaded from the Internet and work for a limited number of days. Shareware is a variation of the “demo” concept and allows you to download the program and, if you find it useful, can send the almost always modest fee to the programmer. The difference between it and a demo program is that it is fully functional, but may be limited by a time period or how many times you can use the product. Shareware is based on two ideas: The talented people who create these utilities and applications believe users |
should be able to try their programs before they pay for them. The second part is an honor system that trusts users to pay for any program they use regularly. If you keep any shareware programs on your hard disk, remember to send in your shareware payment. Only your support, in the form of a check, will make sure these authors improve their programs and create new ones. Freeware is shareware without a price tag and is available from companies that produce commercial software, as well as individuals who produce useful imaging utilities. |
Image File Formats Handled?
Almost all image-editing programs handle all of the popular image file formats, such as TIFF (Tagged Image File Format), BMP (Windows Bitmap), JPEG (Joint Photographic Experts Group), or Kodak’s not-so-popular Photo CD. This is less a problem than it used to be, but you should take the time to make sure that the program supports formats you work with. Look for this information on the outside of the software box or visit the company’s website to find out what formats the program accepts. The more formats a program supports—both import and export—the more capabilities it has to serve as an image file converter. This feature will be especially important when moving image files back and forth between Mac OS and Windows computers.
|
Whatever Happened to Flashpix? |
|
|
In 1995, Kodak, Microsoft, Hewlett-Packard, and Live Picture designed a new image file format called FlashPix. FPX is a multi-resolution format where the photograph is stored as a series of independent arrays, each representing the image at different resolutions. The only problem was that FlashPix died leaving many of us holding discs of images in FPX format that couldn’t be opened. Being too lazy to rescan my negatives, I looked for an easier solution |
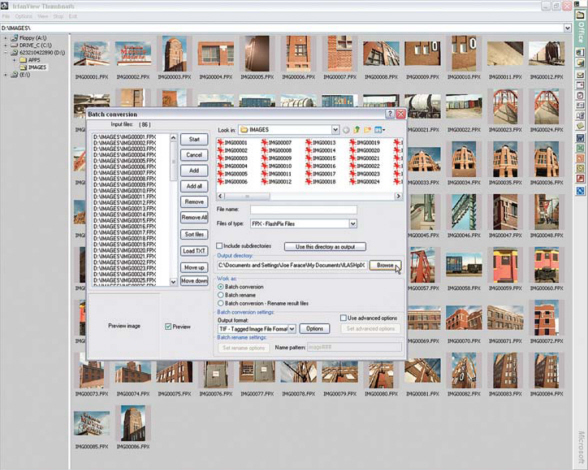
and found a free one! IrfanView (www.irfanview.com) is a fast and innovative freeware graphic viewer for Microsoft Windows that not only lets me view my FlashPix files but can batch convert them into other formats including TIFF. Some programs, such as ACDSee 7 let you view FlashPix files and will convert them, but only extract the low-resolution array. IrfanView gives you the original FlashPix scan’s full resolution. |
IrfanView is a freeware graphic viewer for Microsoft Windows that not only lets me view my old and obsolete FlashPix files but can batch convert them to other image file formats as well. © 1996 Joe Farace.
Does it Accept Photoshop-Compatible Plug-Ins?
One of the best features of many digital imaging programs is they are designed with an open architecture allowing them to accommodate small software modules called “plug-ins,” to extend the host program’s features. Plug-ins are stored in a specific folder or directory on your hard disk that your image-editing program checks each time the software loads. That’s why, when you launch a program like Adobe Photoshop, you see the names of the plug-ins briefly displayed on its “welcome screen.”
Adobe Systems created the most popular plug-in standard for Photoshop. Compatible plug-ins can be used with many other programs, including Ulead Systems’ PhotoImpact, Corel’s Painter and PhotoPaint, and MicroFrontier’s Color-It!, Enhance, and Digital Darkroom. Even freeware image-editing programs, such as NIH Image support Photoshop-compatible plug-ins. The judicious choice and use of plug-ins lets you increase the functionality of many off-the-shelf image-editing programs, allowing you to customize them to fit your specific kind of projects. Demo versions of many plug-ins are available for download from the companies’ websites, so be sure to test drive any plug-ins that appeal to you. Be sure to read my Digital Innovations column each month in Shutterbug magazine, where a “Plug-in of the Month” is named each month.
There are eight classes of plug-ins, but only four really impact the average user: Import, Format, Filter, and Export. Import plug-ins open image files. Some programs call them “Acquire” but they accomplish the same thing, allowing you to interface scanners, frame grabbers, digital cameras, even other image file formats. Format plug-ins provide support for reading and writing additional image formats your digital imaging program may not support. These appear in the pop-up menu in the Open, Save As, and Save dialog boxes. Filters modify selected areas of an existing image. Special effect plug-ins appear in the program’s Filter menu, which is why these plug-ins are often called “filters.” Export plug-ins can output an image to printers lacking driver support or save images in compressed file formats for use of the Internet. Since some export plug-ins relate to color separations, they usually appear in the graphics program’s Export menu. There’s more on using plug-ins, or as I call them “power tools,“ later in Chapter 9.
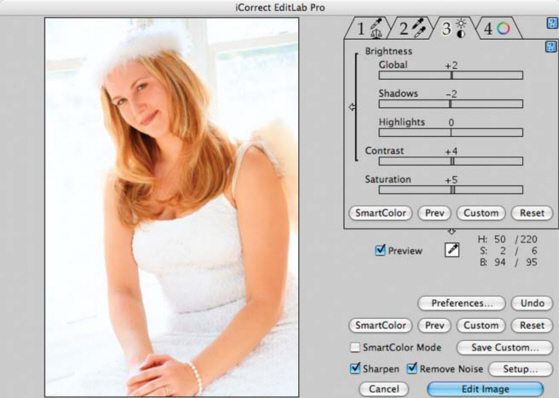
PictoColor’s (www.pictocolor.com) iCorrect EditLab Pro 5.0 is available as both a Photoshop-compatible plug-in and a standalone application, eliminating the frustration often associated with color-correcting photographs. Its SmartColor Wizard uses four toolsets. As you progress through from left to right, the tools will not, and cannot affect any tools applied on the left. This step-by-step process alleviates the frustration of correcting one part of the image while throwing off another. After one pass through the tools, you’re finished. © 2005 Joe Farace.
Using Digital Imaging Software
Often overlooked in the rush to get new software is what to do after you’ve installed it. In order to get the most from your digital imaging software, you have to spend some time learning how to use it. The secret? When my friend Vern asked how I learned so much about Photoshop, here’s what I said:
A guy goes up to a street person in New York City and asks him how to get to Carnegie Hall. Instead of a flood of expletives, the person tells him “Practice, man, practice.” That’s what I did with Photoshop: I spent 1 hour a day just playing with the software. My goal was to have no goal and to experiment with every one of the program’s features using my own images, but not caring if I produced anything usable—only seeking experience. “The journey,” as Steve Jobs once noted, “is the reward.” After 18 months of practice I learned a heck of a lot about Photoshop. You should practice with your image-editing program of choice too. You don’t have to spend 5 to 7 hours a week pulling menus and applying filters, but you should take the time to learn about creating digital images that are fun to make and fun to look at.
Taking all of the time to specify what your digital imaging goals are means that your chance of finding the perfect image-editing program is a goal that can realistically be reached. Spending time learning how to use all of the program’s capabilities means you will be able to extract the maximum value out of your investment, but don’t be afraid to periodically evaluate your objectives and look for another, more capable program as your skills increase.
Adobe Photoshop is at once apparently simple and complex to use. The tools are there but after you open and image, waddaya do? Hang in there, partner, that’s what we’re gonna do next. © 2004 Joe Farace.
A Peek Inside the Toolboxes
Like a real toolbox, digital imaging software usually contains tools for creating and editing images. The first time you start the application, a toolbox appears somewhere on the screen. Some programs let you move the toolbox by dragging it or even hiding it. Some tools in the toolbox let you type, select, paint, draw, sample, edit, move, annotate, and view images. Other tools in the toolbox allow you to change foreground and background colors or work in different modes. Many times you can expand some tools to show hidden tools by clicking on a small triangle, or something similar that indicates the presence of hidden tools. These tools often appear as a “flyout” menu that, like the name implies, flies out to reveal other tool choices. You can also often find information about any tool by positioning the mouse pointer over it.
Some of the most important and yet easy-to-overlook tools are the selection tools. While special effects filters may be more sexy to discuss first, most digital imaging programs almost always require that all or part of an image needs to be isolated, or selected, before an effect can be applied. The Standard or Rectangular Marquee tool is used to make a rectangular selection. This simple but useful tool is sometimes called the marquee tool because of the dashed lines that it makes around a selection (looking like the flashing lights around an old movie marquee). Let’s use the Standard (Rectangular) Marquee to combine two images into one better one.
Photographing outdoor holiday lights can be a challenge, because some parts of the image are always going to be brighter than others. In just a few steps we’ll use the Standard (Rectangular) Marquee to combine the best parts of two images to make an even better one where the sum of the parts will really be better than the whole.
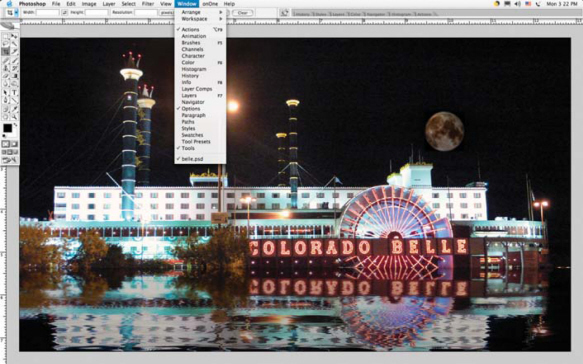
Toolboxes almost always look something like this one used by Ulead’s PhotoImpact, a Windows-only image-enhancement program. Here you see the flyout window for the Selection tool showing the Standard (rectangular) Selection Tool, because that’s the first topic we’re gonna discuss and demonstrate.
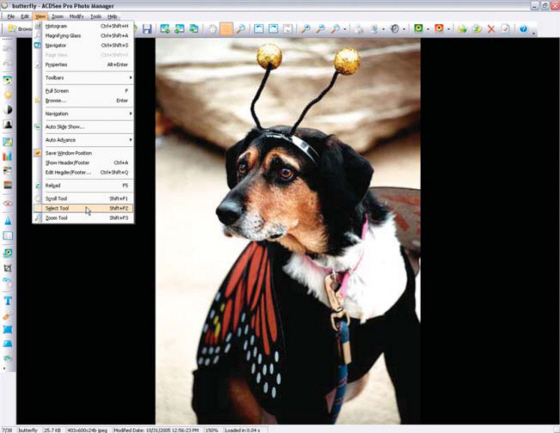
Sometimes the Selection or Select tool is in a menu, as it is in ACDSee Pro (www.acdsystems.com), and is available as a rectangular selection tool as compared to irregular selection tools that will be coming up later. ©2005 Joe Farace.
Step 1: Open the first image files.

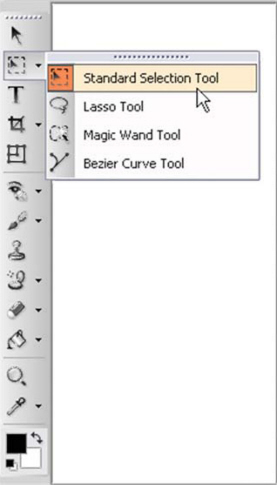
This image of Brighton Colorado’s City hall was captured with a Canon EOS 1D Mark II at ISO 200 with an exposure of 8 seconds @ f/13 at an ISO of 200. © 2005 Joe Farace.
Step 2: Open the second image files.

This image of Brighton City hall was made at 2.5 seconds because the tree and city hall sign were too overexposed in the first exposure. © 2005 Joe Farace.
Using Photoshop’s rectangular Selection tool, I selected an area covering the space from right of the trees to the flag pole then copied the selection onto the Clipboard.
Step 3: Using the Standard (Rectangular) Marque I selected an area that covers everything from right of the large tree on the flagpole. Then I used the Copy command to copy the selection to the Clipboard.

Using Photoshop’s Paste command, I placed the copied section on top of the first image in an new layer. Next I used the Eraser tool to blend the top and bottom layers.
Step 4: I then used the Paste command to place the new section on top of the first image file. This creates a new Layer; but don’t freak out yet, there will be lots more on Layers in the following chapter. Because it is a Layer, you can use the Eraser tool to erase the edge where the two images overlap, combining the best of both images into a single believable one. The only other tweaking of the image was a little burning and dodging as you might do in a traditional darkroom. © 2005 Joe Farace.
|
Other Selection Tools |
|
|
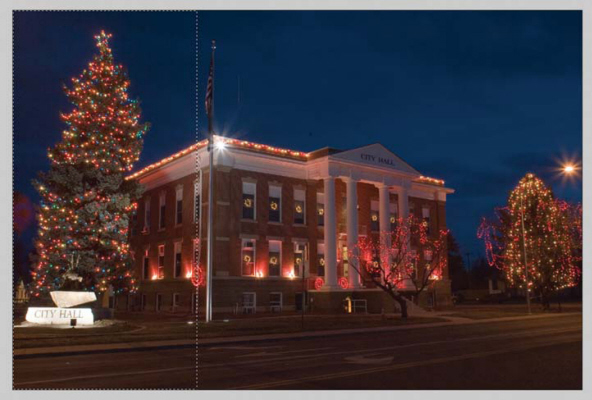
The Lasso Tool is another selection tool that is useful for drawing freeform segments of a selection. Adobe Photoshop also offers Polygonal Lasso and Magnetic Lasso tools that let you switch between drawing freehand and straight-edged segments. The Magnetic Lasso tool is |
especially suited for making freeform selections because it traces the edges of an object and consequently works best on areas with clearly defined edges. The Polygonal Lasso tool is useful for drawing straight-edged segments of a selection border. |
This toolbox in Adobe Photoshop CS2 shows the Lasso tool options that are available, but the Lasso has been accessible in Photoshop and other imaging programs since its earliest version. You don’t have to use the latest version of any software program, as you will see in the next segment.
Painting Tools?
Painting tools such as the brush and the eraser may not be considered “photographic” tools in the strictest sense of the word, but they are useful for both their stated purposes and for working with selections; and as we’ll see in the next chapter, with layers.
The Brush tool, a.k.a. Paint Brush tool in Adobe Photoshop, and the Pencil tool work like traditional drawing tools by applying color with brush strokes. Brush strokes are softer. In most image-editing programs you double-click the Brush Color swatch to open a Color Picker to select a color, but my favorite method is to select the Eyedropper tool and click in the preview image to a choose a specific color. Drag in the image to paint. The options bar for the Brush tool contains many other options. You can customize the brush by entering values for the size (diameter) and hardness. Specifying Opacity determines to how much of the image, under the brush stroke, remains visible. In selection mode, after you create a rectangular selection with the Marquee tool, you can enter Quick Mask mode in Photoshop and use the Brush (press B: Mac OS or Win) tool to expand or decrease the selection.
The Air Brush tool is a good choice when even the soft edges of a Brush tool aren’t soft enough. For some programs the Air Brush is a separate tool, in others it is an option available in the Brush palette. It applies gradual tones to an image, simulating traditional airbrush techniques.
The Eraser tool is one of my favorites and has many uses. While on the surface it may seem like a simple tool—it erases what it touches—there’s more to it than that. In practice, the Eraser tool changes pixels in the image as you drag through them. If you’re working in the background or in a layer with transparency locked, the pixels change to the background color; otherwise, pixels are erased to transparency. A variation, called Magic Eraser, is available in Adobe Photoshop CS2 that automatically changes similar pixels. If you’re working in the background the pixels change to the background color; otherwise, the pixels are erased to transparency. You can choose to erase contiguous pixels only or all similar pixels on the current layer or image file.
The Magic Wand
So I ask my friend Bob, “What version of Photoshop do you use?” and he says “two.” “Ya mean CS2,” I reply. “Nope,” he says, “I use Photoshop 2.01!” So as you can see there’s different digital imaging strokes available for different folks, as you will see in this explanation of how the Magic wand tool worked in Photoshop 5.5, and continues to work today in many different imaging applications.
The Magic Wand tool lets you select a consistently colored area (e.g. a blue flower) without having to trace its outline using the Lasso tool. You specify a color range, or tolerance, in color tones for selection.
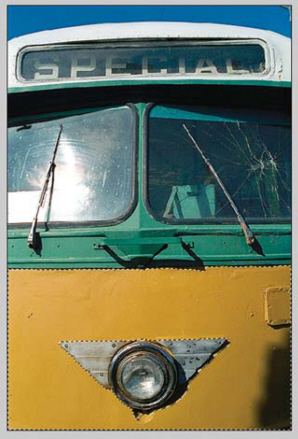
Step 1: Using Adobe Photoshop and the Photo CD Acquire Module, I opened an image of a vintage streetcar.

This Photo CD image of the front of an old streetcar was originally photographed on color negative film and digitized with Kodak’s Photo CD process. The Magic Wand tool was used to select the yellow background area. Photo © 2000 Joe Farace.
Step 2: You can use any selection tool to select the part of the photograph you want to alter. In this case I used the Magic Wand tool to select part of the vintage streetcar. While the Magic Wand is usually a pretty good selection tool, it works best when the area selected is more homogenous than this one. You will notice that some smaller, light areas were not selected, nor was the shadowed area in the lower right-hand corner. Not to worry. That’s why Quick Mask mode, a powerful but little understood Photoshop selection tool, was used.

The Magic Wand, with Tolerance set at 32, was used to select as much of the yellow area as possible. © 2000 Joe Farace.
Step 3: Click on the Quick Mask button (or press the Q key) that is located just below the foreground and background color boxes near the bottom of Photoshop’s tool palette. When you do that are not selected will be covered with a color overlay which covers the unprotected area.
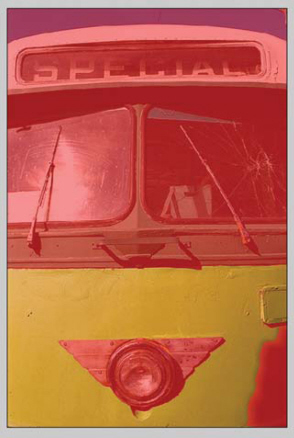
After clicking the Quick mask button, the unprotected (and not selected) area of your image is covered in a mask-like overlay. © 2000 Joe Farace.
Step 4: Now we get to the real power of masking. This mask area can be expanded by using any of the painting tools or contracted by using the Eraser. When you create a Quick Mask, Photoshop creates a temporary channel in the Channels Palette to indicate that you’re working in Quick Mask mode, but the joy of Quick Masking is that you do all editing in the standard working window. To edit this mask, I chose the Eraser (press E) tool and used it to remove portions of the mask I wanted uncovered. I started with the shadow area in the lower right-hand corner, and then used the eraser to remove small bits of mask that covered the front of the streetcar. For the really small parts, I increased magnification with the Zoom (Magnifying Glass) tool, so I could get into all of the nooks and crannies.

Using the Eraser tool, I removed portions of the image file that I wanted exposed. © 2000 Joe Farace.
Step 5: When the mask covers just the areas that I wanted, I clicked the Standard Mode button (next to the Quick Mask button) to turn off the Quick Mask. When you do that the unprotected area of the Quick Mask is now surrounded by the standard selection marquee—a.k.a. “marching ants.”
Step 6: At this point, you can apply any changes that you want to the selected area. Using the Selective Color dialog box (found under Image/Adjust/Selective Color) I tweaked the primary yellow color to produce a golden yellow that’s similar to what was used by the streetcars of the Baltimore Transit Company in their heyday.
After cleaning up the mask, the author clicked the Standard Mode button converting the mask into a selection. © 2000 Joe Farace.

Using the Selective Color (Image > Adjustments > Selective Color) command the author manipulated the original color of the streetcar.
Step 7: When the colors are how I wanted them, I clicked OK to finish the Quick Masking and color adjustment process. While only subtle changes were made using this technique, an effect—or plug-in—could be applied to any Quick Masked area.
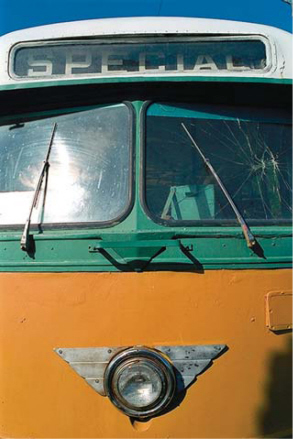
The final image created with Quick Mask has a bolder yellow color suited to the author’s vision for the photograph. © 2000 Joe Farace.