Power Tools
It’s true! The camera does put on pounds! Memo to myself: Move up liposuction appointment.
Power Tools are small bits of software that can be Photoshop-compatible plug-ins, Photoshop Actions, or graphics utilities that make a digital photographer’s life a little easier for creating practical or special effects. Much like an electric screwdriver makes household projects faster than an old-fashioned hand tool, software Power Tools let you produce imaging projects quicker and with less fuss, than doing it “the hard way.”
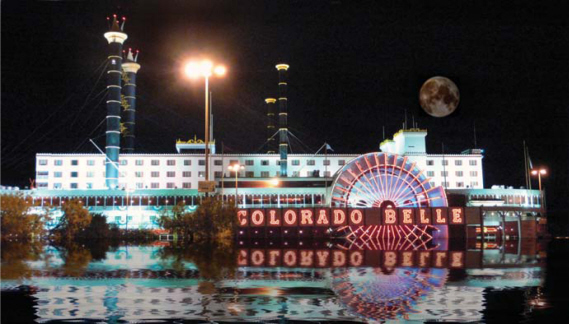
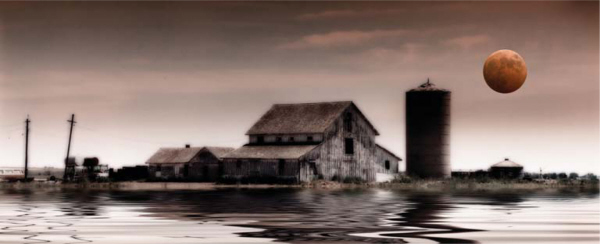
This photograph of the Colorado Belle hotel in Laughlin, Nevada was made with a Leica D-Lux2 point and shoot camera. The moon was made from a separate exposure made at a different time and place and was placed on a separate layer. The “digital water” was created using Flaming Pear Software’s Flood, a Photoshop-compatible plug-in. © 2005 Joe Farace.
One of Adobe Photoshop’s most useful features is an open architecture that lets it accommodate small software applications—called plug-ins—that extend the program’s capabilities. The use of plug-ins lets digital imagers increase the functionality of graphics programs and allows them to customize their software to match whatever kind of projects they’re working on. But don’t let the name fool you. You don’t need Adobe Photoshop or even Photoshop Elements to use compatible plug-ins. Adobe Systems defined the standard, but compatible plug-ins can be used with many other image-editing programs including Ulead Systems’ PhotoImpact, Corel’s Painter, PhotoPaint, and PaintShop Pro. Even many freeware image-editing programs support Photoshop-compatible plug-ins. No matter which program’s menu they appear under, the interface for the plug-ins that you see in this and all of the other chapters will remain the same.
There are eight different types of plug-ins, some you might care about, some not, and even two that don’t have a traditional interface. Color Picker plug-ins are used in addition to the program and system color pickers and appear whenever a user requests a unique or custom color. Import, formerly called “Acquire,” plug-ins interface with scanners, video frame grabbers, digital cameras, and even other image formats—such as Kodak Photo CD. Import plug-ins are accessed through Photoshop’s File/Import menu. Export plug-ins appear in the program’s File/ Export menu and are used to output an image, including creating of color separations. Export plug-ins can also be used output an image to printers that lack driver support or to save images in compressed file formats. Filter plug-ins appear in the Photoshop’s Filter menu, but may appear under different menus in different programs. They are used to modify all or a selected part of an image. Format, sometimes called File or Image Format, plug-ins provide support for reading and writing additional image formats than are not normally supported by the program and appear in the Format pop-up menu in the Open, Save As, and Save A Copy dialog boxes. Selection plug-ins appear under the Selection menu and are used to create shapes or paths—especially when used with text.
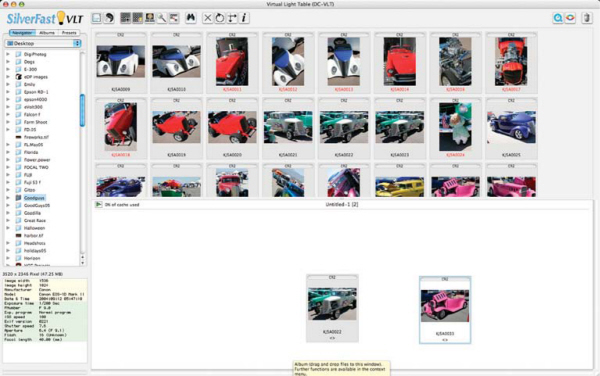
LaserSoft’s (www.silverfast.com) SilverFast DC VLT is an Acquire plug-in that also lets you archive your photos, add comments to image files, lay out albums and contact sheets, and print pictures in variable sizes. DC VLT works with JPEG, TIFF, and RAW files to adjust the color balance, saturation, smoothness, and sharpness instead of using the camera’s automatic settings. In addition to these formats, DC VLT also supports the now all-but-forgotten Photo CD as well as the emerging DNG formats. © 2005 Joe Farace.
The “secret” plug-ins such as extension are not accessible by the average user and permit implementation of session-start and session-end features, such as when initializing devices connected to the computer. They are only called at program execution or quit time and have no user interface. Parser is another class whose interface isn’t public and performs similarly to Import and Export plug-ins by providing support for manipulating data between bitmapped programs and other formats.
In addition to some of the other plug-ins that have been introduced in previous chapters, here’s a look at several kinds of plug-ins that you will find will allow you to put together an indispensable toolkit.
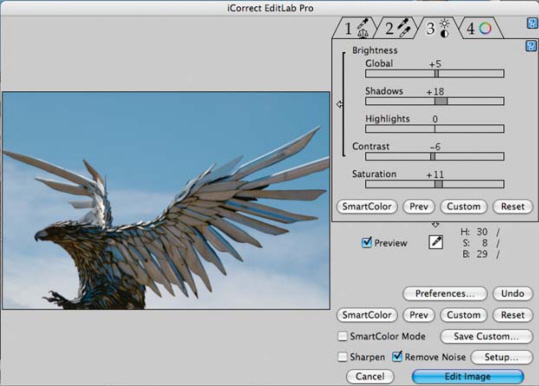
iCorrect EditLab Pro will let you convert a batch of images from one file format to another and is Photoshop Actionenabled (we’ll get to Actions in the next section) so each color correction can be recorded as an Action. © 2005 Joe Farace.
After initially acquiring an image, I like to start by making it look as good as it possibly can. Plug-ins help me do that fast. Let me show you some of my favorites.
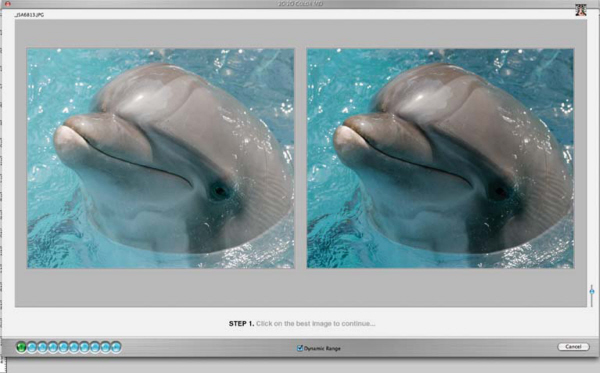
PhotoTune’s (www.phototune.com) 20/20 Color MD works like an eye exam. During each step of the process, you’re presented with two preview images and you just pick the rendition you like and 20/20 Color MD analyzes the feedback to determine what you want, and then shows you another pair. In about 15 seconds, the plug-in produces a corrected image you can fine-tune in 1% increments. If you spend 10 minutes fixing an image using Photoshop’s Curves, Levels, Hue & Saturation, or Variations, it’ll take you 16 hours to correct one hundred images. With 20/20 Color MD, you’ll be done in less than an hour.
The step-by-step Color Wizard in 20/20 Color MD has nine steps and contains 6144 different solutions. Once the Color Wizard has finished, you’ve got access to several tools and sliders, so fine-tuning is quick and easy. © 2005 Joe Farace.
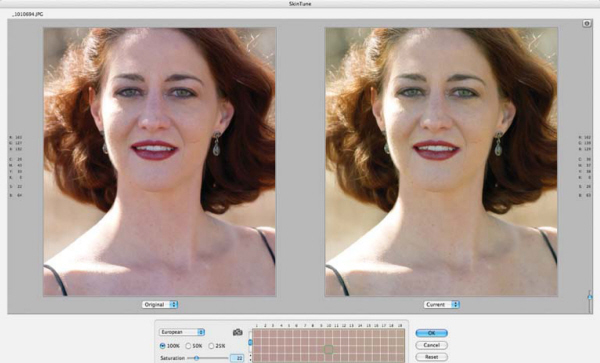
If there is anything that drives people crazy when working with fashion, portrait, or wedding images it’s correcting skin tone. SkinTune is a Photoshop-compatible plug-in for Mac OS and Windows computers that was specifically designed for correcting skin color. PhotoTune compiled a series of skin tone libraries for different skin types, including African, Asian, European, Latin, and Middle Eastern. Each library contains approximately 45,000 different colors that encompass the entire flesh tone spectrum for that particular library. After opening an image in Photoshop, select SkinTune from the Filter menu and after two mouse clicks it will find the nearest acceptable skin color from the library and automatically correct your image.
After SkinTune does its magic, you can tweak the final image by using the built-in tools to adjust hue, brightness, and saturation, and (here’s the kicker) all these adjustments stay within the boundaries of the library so you can’t accidentally introduce stray colors. © 2005 Joe Farace.
Manipulating Images
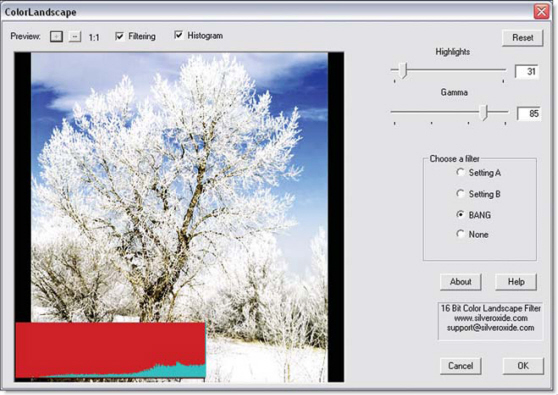
Silver Oxide (www.silveroxide.com) is well known for their black and white Photoshop-compatible plug-ins (see Chapter 10) and recently announced their first color product called Color Landscape. It builds on their monochrome Landscape filter and includes a BANG (Blue Algorithm Neutral Gray) setting. The BANG setting reacts to the blue content of each pixel and acts like a polarizer deepening the sky and water and gives greater depth to trees. If you need a less dramatic contrast, red and orange color filter settings are available. Silver Oxide’s Bill Dusterwald told me that “You can get a similar effect by fooling around with curves, but this is faster, less intimidating.” The Color Landscape plug-in includes a histogram function that lets you to see if you’re clipping highlights and works with 8- and 16-bit images including 16-bit layers supported by Adobe Photoshop CS and CS2. I tested a Windows copy, but a Mac OS version will also be available by the time you read this.
There are lots of free plug-ins out there, but virtualPhotographer (http://www.optikvervelabs.com) is so good I would actually pay for it if they offered a Mac OS version. virtualPhotographer’s structure should be familiar to traditional film photographers. It can simulate the film type as “Film” or “Slide,” adjust grain effect to match film speed, and lets you apply digital filtration, as well as lots of cool darkroom effects and tints that can be applied via presets. The best way to use virtualPhotographer is apply some of the Presets to your image to see which ones look best. Then, fine-tune the other controls to get the exact results you want. To see the original image, click and hold the left mouse button on the image in the Preview Window.
The histogram in Silver Oxide’s Color Landscape plug-in represents the entire image, regardless of the enlargement in the preview window. You can move the histogram display by Right-Clicking and dragging it wherever you want. © 2004 Joe Farace.
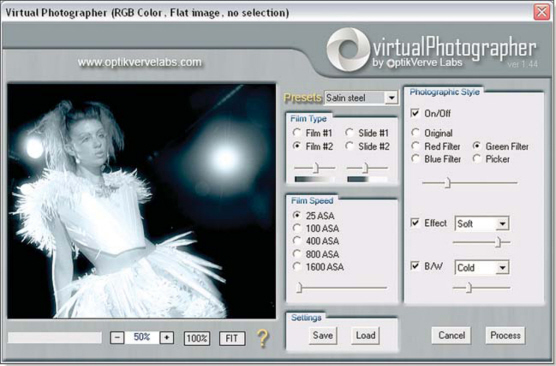
virtualPhotographer is a double rarity in the world of Photoshop-compatible plug-ins: It is Windows-only and is free. © 2004 Joe Farace.
Alien Skin Software’s (www.alienskin.com) Eye Candy 5: Impact contains 10 plug-in filters for Photoshop and compatible programs. This third update to Eye Candy 4000 features three new filters—Backlight, Brushed Metal, and Extrude—and seven updated oldies but goodies. Backlight projects light beams and spotlight effects behind any selection. Bevel carves and embosses, creating text with custom bevel shapes and textures. Brushed Metal simulates textured metal surfaces, and filter produces a reflective, embossed effect, simulating chrome, liquid metal, and other shiny surfaces. Extrude gives 2D objects a 3D look, adding thickness and perspective. Glass renders a colorful, gel layer over selections and Gradient Glow creates soft glows or hard outlines around any selection, including single colors or complex gradients. Motion Trail creates the illusion of rapid movement, even in a curved line. Perspective Shadow renders an array of drop, perspective and cast shadows. Super Star generates shapes, including stars, flowers, and gears.
Impact works with 16-bit and CMYK images making color transitions smoother, with less banding. Unlimited undo and redo make experimentation painless, while context-sensitive help answers your questions.
Alien Skin Software’s Eye Candy 5: Nature is a set of Photoshop-compatible plug-ins that simulate natural phenomenon. Corona creates solar flares, gradient glows, and wispy auroras while drip melts images, melding colors, and rendering “oozing drops” from selections. Fire creates incendiary effects ranging from blue flames to rocket exhaust. Ripples produces refractive ripples around any shape, as well as reflective waves. Rust tarnishes and corrodes images and text with rust, moss, and mold. Smoke simulates anything from voluminous clouds of smoke to murky haze. Squint mimics poor or wet vision, defocuses images, and adds highlights and halos. Water Drops splashes images with a variety of drops and spills. Nature works with 16-bit images; so transitions are smoother, with less banding, and photographs print with more accurate color. Its street price is $99 and a free demo can be downloaded from Alien Skin’s website.
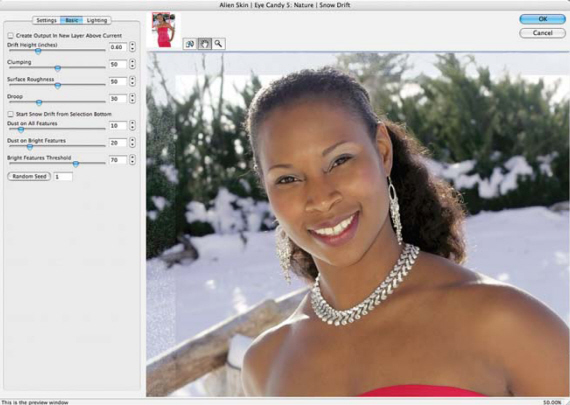
The icicles filter drips translucent icicles from any selection and works great with the Snow Drift filter that piles snow on text and lightly dusts images with snow or frost. © 2004 Joe Farace.
The number of plug-ins in your toolkit will vary based on the kind of image you create and how you output them. In addition to all of the above plug-ins, you’ll find a few more with illustrations showing what their dialog looks like giving you an insight into how they work. Plug-ins are fun to use and also make your digital imaging easier.
Where There’s Smoke There’s Fire
Like a lot of kids, I loved fire trucks. As I got older, I began photographing them and still do to this day. While their size, color, and abundance of details make fire trucks wonderful subjects, sometime I feel, like Emeril, that a particular image needs to be “kicked up a notch.”
When I received a copy of Alien Skin Software’s Eye Candy 5, a new package of Photoshop-compatible plug-ins that lets you apply natural effects like ice, smoke, and fire to a digital image, I decide to apply some fire to a fire truck. Here’s how I did it:
Step 1: I opened the file in Adobe Photoshop CS2 but any image enhancement program that supports layers and compatible plug-ins will work. Although I used the Mac OS version of the products mentioned, they are also available for Microsoft Windows.

My original fire truck photograph was made on location at SVI Trucks in Loveland Colorado using a Canon EOS D60 with Ukrainianmade 16mm Zenitar f2.8 lens. Image was made at f/11 at 1/250 second at ISO 400 and was captured as a JPEG file.
Step 2: My first step when working with any image file, even those that may look perfectly color balanced, is to run them though PhotoTune’s (20/20 Color MD Photoshop-compatible plug-in). In PhotoTune, you are presented with a series of pairs of images in a dialog box. You click the one that looks best as the process homes in on a desired result. I’m often amazed how this simple plug-in can make minor changes in color and contrast that produce major improvements to a photograph. When the image’s color is really bad, this indispensable plug-in really comes to the rescue.

The way that PhotoTune’s 20/20 Color MD works is that you are presented with a series of pairs of images in a dialog box. You click the one that looks best as the process homes in on a desired result.
Step 3: In my continuing effort to make any digital file look as good as it can before I lay on the effects, my next step is to use Pixel Genius’ Sharpener Expert to sharpen the photograph. Unlike other one-size-fits-all software products, Capture Sharpener Expert lets you choose the type of sharpening that’s applied from a menu of options based on the image’s method of capture, including film or digital, and even the resolution of the original capture.
Step 4: Since my original background was pretty bland, I wanted to add separate effects to it later. To make the process simpler, I created a Duplicate Layer (Layer > Duplicate Layer) for effects that would be applied to the fire truck. Working on that duplicate Layer, I used the Extract tool (Filter > Extract) to separate the fire truck from its background so that the flames could be added to it.
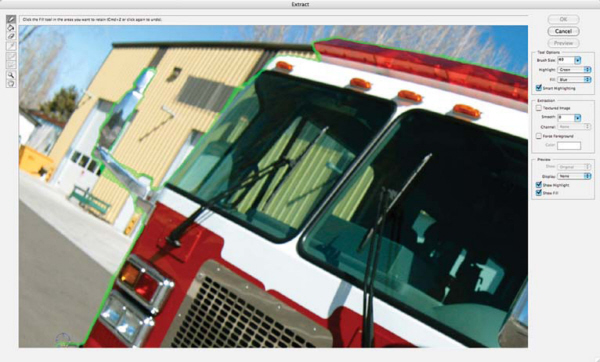
Extract has a dialog box giving you all the tools you need to separate an object from its background, but here are a few tips that might make the process less stressful: Start by outlining the truck using the Highlighter tool; but unless you’re good at freehand drawing I suggest clicking the Smart Highlighting check box to help guide the tool along areas of varying color or contrast. It’s also a good idea to work with a small brush on enlarged sections of the image, using short easy strokes to trace the truck’s outline. It’s easier to undo mistakes this way.
When you’re finished outlining, select the Paint Bucket tool and click the middle of the outlined subject filling it with color. When you click the Extract button, the truck will be removed from its background.
When you’re finished outlining, select the Paint Bucket tool and click the middle of the outlined subject to fill it with color. After you click the Extract button, the truck will be removed from its background.
Step 5: Working on the extracted truck on the duplicate layer, I selected Filters > Alien Skin Eye Candy 5: Nature > Fire. The Nature package includes over 500 presets for frequently used effects so you can find the perfect effect quickly. You can choose from big fires to small, smoky to blazing, and the plug-in offers sliders to let you tweak specific attributes of the flames (no matches required).
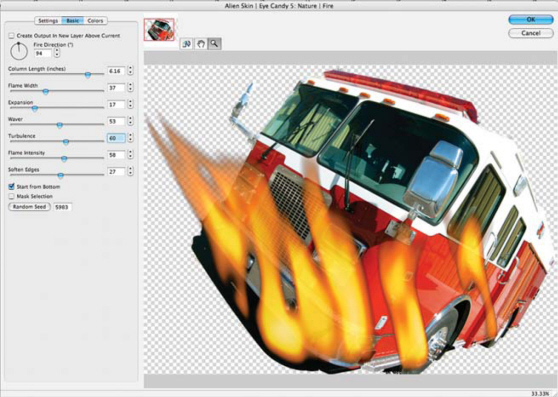
As with all special effects, it’s a good idea to apply different presets to see what kind of effect you like best. Tire Fire was too black and sooty for me, but Large High temp was just right. To finish up, I used the plug-in’s sliders to change the flame intensity, width, and waver. Here’s your chance to play with fire and Dad won’t paddle your bottom.
Step 6: My last step was changing the color of the background layer to give it a warmer look.
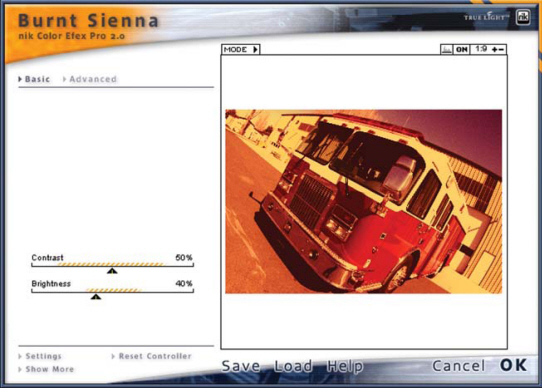
For this step I used nik Color Efex Pro’s Burnt Sienna filter (Filter > nik Color Efex Pro 2.0: stylizing Filters > Burnt Sienna) to give the background an overall orange color to the photograph that looked better, to me anyway, than the cool, bland tones of the original file.

Here is the finished result.
All digital cameras add noise to images. Like film grain, it’s worse at high ISOs and more noticeable in areas of uniform color, such as skies and shadows. Since noise can be objectionable, there are lots of digital noise reduction applications available to help you solve that problem. I’ve tested quite a few of them and here’s a short list of some noise reduction products in my personal order of my preference. Keep in mind that your cameras and the kind of images you make may be different from mine, so download a demo version of each product and try it yourself.
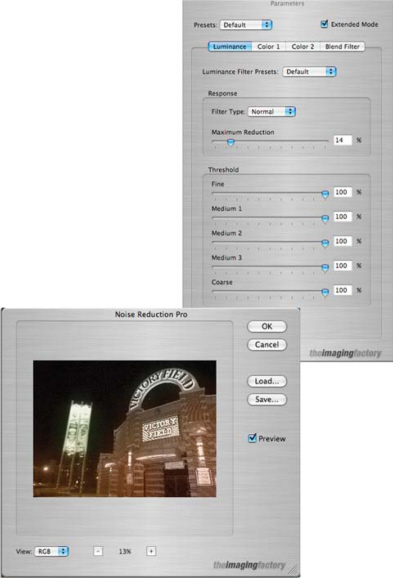
For less than a hundred bucks, Noise Reduction Pro (www.imagingfactory.com) is the first tool I reach for to reduce high ISO noise, CCD color noise, JPEG artifacts, and color fringing. Unlike the less expensive non-Pro version, it features separate controls for luminance (brightness) and color noise. Noise Reduction Pro is not the strongest grain removal product available, but its application avoids the mushy look some noise reduction solutions produce. Which version of the product do you need? Download 30-day demo versions of both plug-ins and try each of them. © 2005 Joe Farace.
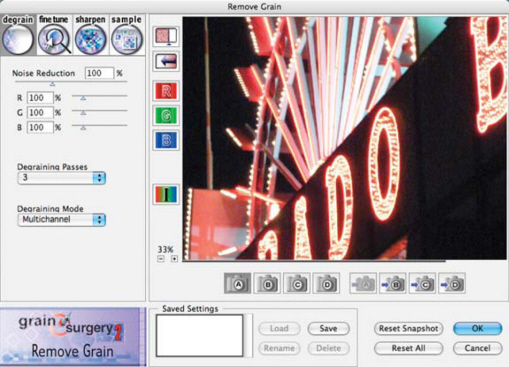
Grain Surgery (www.visinf.com) reduces digital noise and film grain, reduces JPEG compression artifacts, and will even remove halftone patterns from scans. The interface provides easy access to all settings, provides a wonderfully useful split-screen comparison window, and lets you save your settings and reload them later for similar image files. It even lets you add grain from built-in samples or your favorite grainy film, such as Ilford’s Delta 3200. © 2005 Joe Farace.
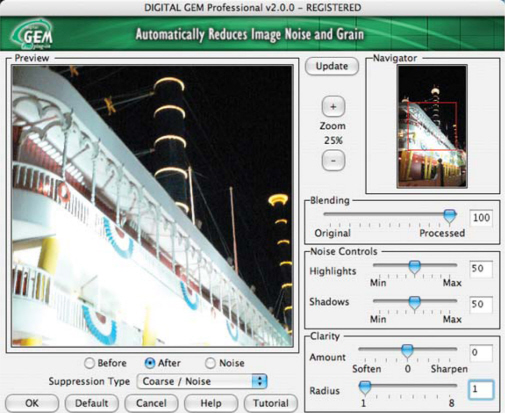
Eastman Kodak’s (www.asf.com) Austin Development Center offers a $99 Digital GEM Professional Plug-In that also supports 16-bit images produced by high end digital capture devices. The Clarity control in its dialog box lets you customize the effects by providing additional sharpening or softening to the overall image while a Radius slider controls the area of surrounding pixels that are affected by the sharpening/ softening. A Noise Preview Screen shows the actual image noise/grain that’s affected by your setting choices. © 2005 Joe Farace.
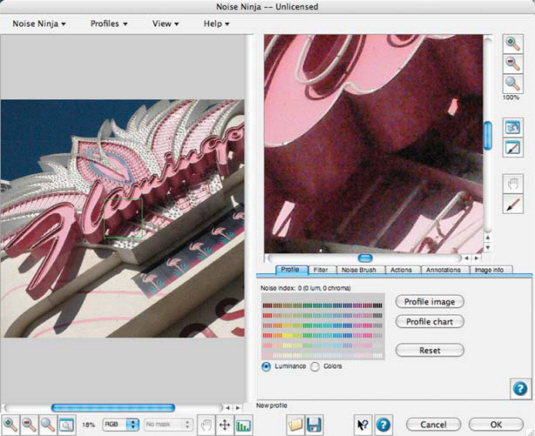
PictureCode’s (www.picturecode.com) Noise Ninja is available either as a stand-alone application or a Photoshop-compatible plug-in, which is the way I like to use it. Noise Ninja uses a proprietary type of wavelet analysis that avoids introducing artifacts, such as ringing or blurring edges to the final image file. To refine its noise reduction capabilities, it also uses camera profiles that are offered free on its website. © 2005 Joe Farace.
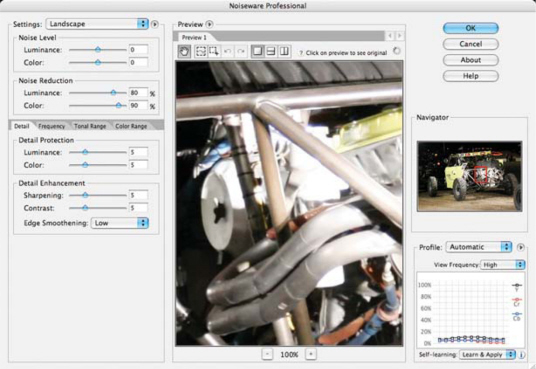
Noiseware (www.imagenomic.com) uses heuristic techniques to rescue noisy images by learning about your camera or image acquisition device as it works. It removes high and low ISO noise and film grain from scanned images, JPEG compression artifacts, and moiré patterns, and is available as a Photoshop-compatible plug-in or stand-alone application. Both versions’ programming continuously perfects the processing every time you process an image; the more you use it, the better the results. © 2005 Joe Farace.
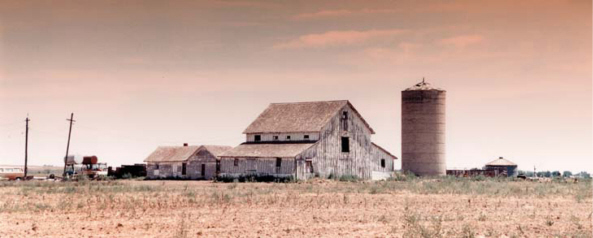
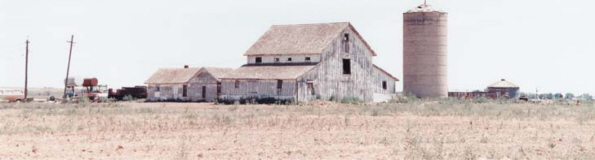
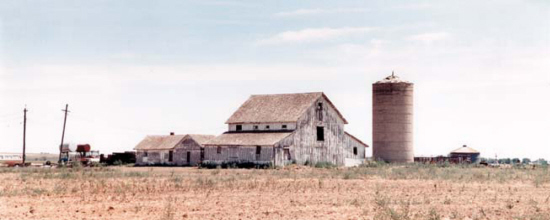
Landscape images are where you find them. I just happened to find this one around the corner from where I live and started photographing the farm—because someday it would be gone. That day is now. By the time you read this, a six-lane highway with a median strip will replace the two-lane country road the farm now faces. I’ve chosen this image to remember it as it was:
Step 1: The original image was captured on Kodak color negative film with a Canon EOS IX SLR and EF 22–55mm zoom lens. The camera uses the near-obsolete Advanced Photo system film format, but any camera that still has media available for it and lets you make photographs is not obsolete. Film was processed and printed at a local camera store but while the overall color and density approximates the hot day when I made the photograph, it captures little of the mood.
Step one was scanning the image, which was accomplished using an Epson Perfection 4870 PHOTO flatbed scanner.
Step 2: I think it’s a good idea to make an image look as good as possible before starting any manipulations and in this case with making sure the horizon line is straight.
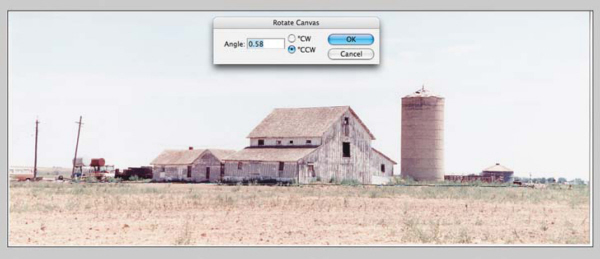
Using Adobe Photoshop’s Measure tool, I rotated the photograph to straighten the horizon. Next, I used the Crop tool to straighten any exposed (white) edges that were caused by the rotation.
Using Adobe Photoshop’s Measure tool (it’s in the Eye Dropper tool’s fly-out menu; press and hold over the tool to bring up the fly-out) I drew a line across the horizon. Next, I rotated (Image > Rotate > canvas Arbitrary) the photograph and Photoshop automatically inserted the exact amount of rotation need to straighten the horizon in the Rotate Canvas dialog box. Then I used the Crop tool to remove any exposed edges cause by rotation.
An Adjustment Layer was used to punch up the contrast and make the landscape image appear less “flat”.
Next, I applied an Adjustment Layer—Curves (Layer > Adjustment > Layer Curves) to punch up the contrast and make the landscape image appear less “flat.”
Step 3: I’m a big fan of using graduated density filters, even colored ones, to improve the drama of landscape photographs. Although I didn’t use one on the camera for this particular shot, I can digitally apply one later with a product like nik Color Efex Pro filters, which offers a choice of colors.

I selected the Graduated Coffee filter from (Filter > nik Color Efex Pro 2.0: Traditional Filters > > Graduated Coffee). The plug-in’s interface lets you make changes in the amount of filter density, color, transition, and even how it’s is rotated—as if it were on the front of your lens. Play with the various sliders to produce an effect you like then click OK.
The nik Color Efex Pro Graduated Coffee filter produces an image that’s different, and I hope, better than what was originally captured.
Step 4: But I don’t want a mid-day look; I wanna night photograph! Part of nik’s Color Efex Pro package is a family of Midnight filters that lets you add varying amounts of blur, contrast, brightness, and color to create pseudo moonlight.
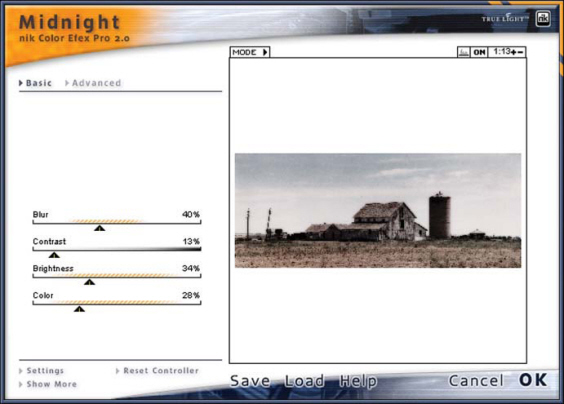
I selected the Midnight filter from (Filter > nik Color Efex Pro 2.0: Stylizing Filters > Midnight) and experimented with different settings to give the landscape a “day for night” (La Nuit Américaine) look.
What’s moonlight without a moon? I didn’t have any sharp moon photos, so I borrowed a digital file from my friend and Pulitzer prize-winning photojournalist Barry Staver (www.barrystaver.com) who gave me permission to use it for this project.
You can shoot your own Moon shot by using the longest lens you have and photographing a full moon with your camera mounted on a tripod just as Barry did during a recent lunar eclipse.
Using Photoshop’s Elliptical selection tool I selected the moon, copied it (Edit > Copy) to the Clipboard, then pasted it (Edit > Paste) into the farm file, thus adding the moon as a separate layer.

After you select “Show Bounding Box” in the Options bar, clicking the Move (Arrow) tool shows manipulation handles on the moon layer. To resize it and maintain proportion, hold the Shift Key and drag one of the layer’s corners to get your size, then click on the moon and drag it where you want it.
Step 5: I wanted the final image to include water effects and selected Flaming Pear’s (www. flamingpear.com) Flood plug-in to produce a lake effect. The interface has controls that let you change the kind of digital water and its reflection, but the most important tool is Horizon to sets the water’s level. Try different levels to see what works best with your particular image.
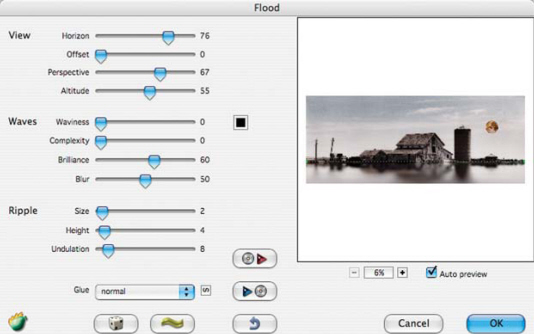
In this case I brought the digital water up to the farm building to give it a “on the lake” look. Next, play with the sliders, and I encourage you to so do. Or do what I do: Click on Flood’s Dice icon and be presented with random choices of all the variables. Keep clicking until you find something you like. Go ahead and do it; it’s fun.
For the final image I used Photoshop’s burn tool to darken the sky even more to give the image an overall early dark, moonrise look. Sure this isn’t the way the farm actually looked, but it’s the way I would prefer to remember it. It sure beats the heck out of a six-lane blacktop.
Just remember that when creating digital landscapes there are no rules except to have fun!
While I used Adobe Photoshop CS to create this digital landscape, any image enhancement program that supports layers and compatible plug-ins will work. I also used the Mac OS version of the products mentioned, but all of this software is available for Microsoft Windows too. In additional, trial versions of all the plug-ins are available for download, so give one or more of them a try for your next landscape photograph.
Photoshop Actions
Do Actions speak louder than . . . software? Photoshop Actions are not applications or even plug-ins; they are simply a series of instructions that direct the host program to produce a desired effect. The Photoshop Actions palette lets you record a sequence of image-editing steps that can be applied to a selection in an image, another image file, or to a batch operation on hundreds of different image files.
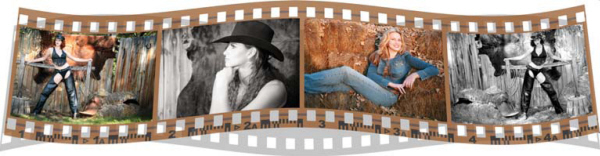
Panos Efstathiadis’ Film Machine Action set has the ability to combine four images in horizontal or vertical filmstrips. It contains three sets with 15 different Actions. Each one produces five different effects: The flat real version has the look of a real filmstrip including color and markings, a black flat version replicates the look of a black filmstrip frame, the 3D real version produces an eye-catching 3D filmstrip, the 3D black version produces a 3D filmstrip with a black frame. © 2005 Joe Farace.
Mac Os? Windows? doesn’t Matter!
As I mentioned in another chapter, Actions are cross-platform and can be shared with others. If you create an Action on your Mac OS computer, anyone using the Windows version of Photoshop can load and apply your original Action to his or her images. In Mac OS or Windows form, Actions files use the .ATN extension. Let’s get right to the Action(s).
The Actions Palette (Windows > Actions) is your key to creating and using Photoshop Actions. The palette has two modes: List View and Button. List mode lets you create and edit Actions starting with the New Action command that’s accessed from the fly-out menu in the upper right-hand corner of the palette. Choosing “Button Mode” from the same menu activates playback or Button Mode.
Before you can record an Action, the palette must be in List View. To do that, access the Action menu and deselect Button Mode. To play an action, no matter where it came from, the Actions palette must be in Button Mode
To create a New Action, click the Record button from the fly-out menu. The circle icon at the bottom of the Actions palette will now turn red. At that point, work through a series of manipulations on an image or portion of an image. When you’re finished, click the Stop button (the square icon) at the bottom of the palette. Afterwards, the order in which tasks are executed can be edited by dragging-and-dropping in any order you wish.
Although Actions apply creative effects, they are not filters, and don’t have to be treated like plug-ins. Some pundits recommend you store Actions in a folder or directory and load them as you need them. I don’t think that’s a good idea. One of the main attractions of Actions is that they’re convenient.
Since the Actions palette is scrollable, you should keep all of your favorite actions stored there, ready for use. The trick is not to blindly accumulate Actions, but to explore and test to find ones that fit the way you work. If you uncover a marginal Action, you can store it in an “Inactive Actions” folder or dump it in the trashcan or recycling bin.
This is a Recording
Pre-recorded Actions can be found on the Photoshop CD-ROM. Some of them include downsampling images to 72dpi for use on the World Wide Web, saving GIF and JPEG files with optimal Web settings, and adding drop shadows to text. On versions released before the current Photo CS you could even find “secret” Actions on the CD-ROM stored in the “Goodies” folder or directory. The best source for pre-recorded Actions is the Adobe Studio Exchange (http://share.studio.adobe.com). Since most actions require less than 10K, you don’t have to be worried about download time (or hard disk space).
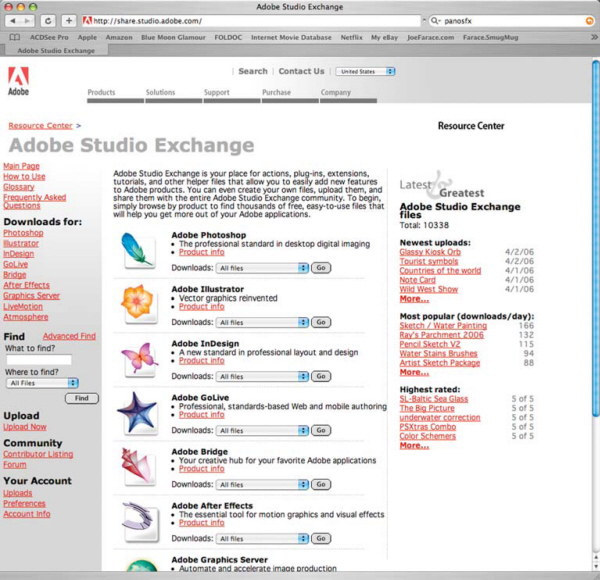
The Adobe Studio Exchange site has a section that lists all of the Actions that are available for download, along with a sample image showing what the effect looks like. To install pre-recorded Actions, use the Load Actions command in the fly-out menu.
Commercial and Freeware Actions
Panos Efstathiadis has created many impressive Actions, some of which can be found on Adobe Studio Exchange as well as his own website (www.panosfx.com). B&B Filmstrip is a set of Actions that frame your image as a strip of film. The author urges you to take a minute to play the Read Me action first to get some useful information. Then it’s just a matter of clicking a few buttons to choose from the basic effect or a more sophisticated, text-decorated one including optional sepia and negative effects.
Craig Minielly’s Actions (www.craigsactions.com) offer increased productivity and creativity in four separate Volumes, available at the click of a button. Production Essentials contains four sets of Actions providing control over image sharpening, dust removal, advanced image retouching, facial feature enhancements, custom logo insertion, copyright and proof watermarking, and image effects such as cross-processing and monochrome. Creative Effects can add a softening effect to your images including grain enhancement. When running these Actions there are stops (with hints provided) allowing you to interact and customize the effect. The stops can be unchecked for continuous operation. CMYK Production and Ad Image Producers offers professional applications for CMYK Conversions for business card, brochure, or ad production, while StoryTellers1 contains 32 Actions with artistic effects such as infrared, soft pastels, and selective color.
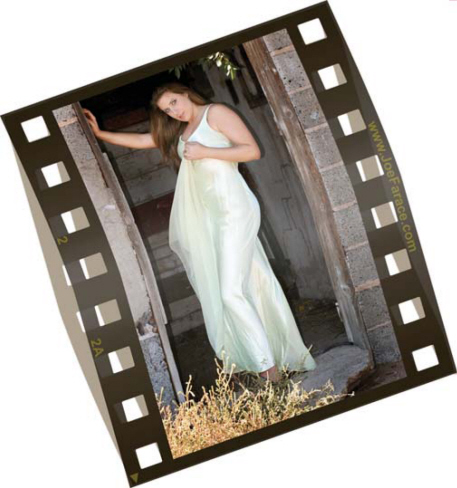
While most Actions are just one-click process, the author urges you to take a minute to first play the Read Me Action for B&B Filmstrip to get some useful information. © 2004 Joe Farace.
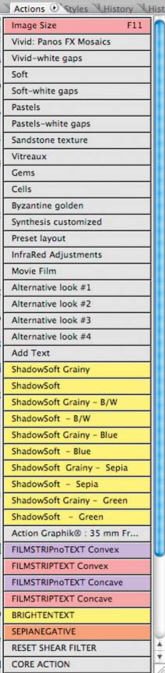
PanosFX Mosaics is a set of Photoshop Actions that produces 11 mosaic effects. The first group contains Soft, Vivid, and Pastels. They differ in the color of the tesseras (tiles) they produce, which vary from neutral to colorful. Other Actions differ in the color of the gaps between the tesseras. The full set contains five another effects, including Sandstone Texture, Vitreaux, Gems, Cells, and Byzantine Golden.
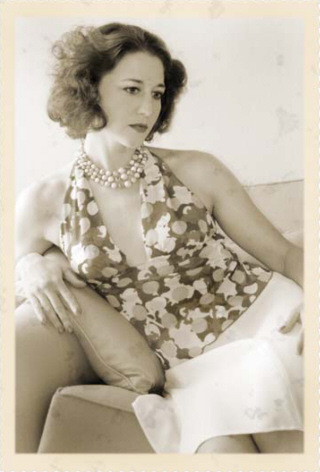
This original photograph of Tia Stoneman was made with a Canon EOS 20D and an EF 28–135mm IS zoom lens set at 63mm. Exposure was 1/60 at f/4 and ISO 800, and the pop-up flash was fired for fill. Image was captured as a color JPEG file and converted to monochrome and digitally aged using Panos Efstathiadis’The Vintage Photo Photoshop Action set. © 2005 Joe Farace.
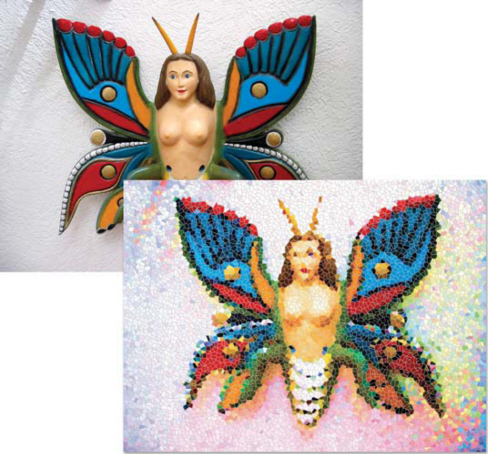
If you’ve ever wanted to see your photographs on a postage stamp, try the Stamp Action from Panos Efstathiadis, whose website features inexpensive commercial and free Actions including the wonderful Stamp. © 2005 Joe Farace.
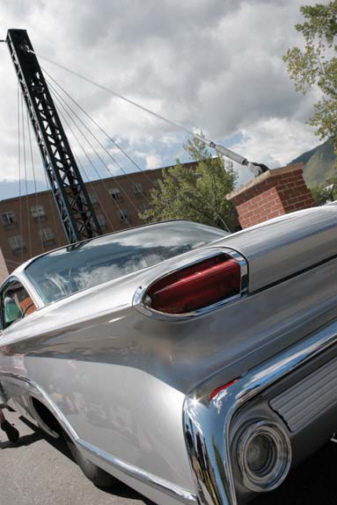
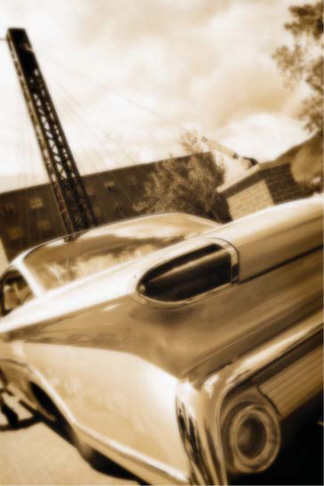
This photograph of “your father’s Oldsmobile” was made with a Canon EOS 20D with an 18–55mm EF-S zoom lens attached. ISO was 200 and exposure was 1/320 second in Program mode with a minus one-third stop Exposure compensation. © 2005 Joe Farace.
After opening the image in Adobe Photoshop the ShadowSoft Grainy Sepia from Craig’s Actions (Volume 2) was applied giving it a film noir look that matches the style of the car. This was accomplished with one button click and no pixels were harmed during the process. © 2005 Joe Farace.
The Norphos Blur Set by Norbert Esser can be downloaded for free from Adobe Studio Exchange (http://share.studio.adobe.com). He explains it this way: “This set of three different kinds of blurs will help you to have a photo look instead of the ‘normal’ CG blur look.” The set contains three Photoshop Actions: Hamilton Blur is based on the dreamy photographic stylings of David Hamilton; Loop Blur is a mixture of “bloom” blurring techniques that can be applied (“looped”) many times until you get the desired effect; and Overbloom is designed to mimic the kind of blur created by overexposure and overdevelopment of film images. Norbert tested the Action set on a German version of Photoshop CS but I found that it performed equally well on Photoshop CS2.
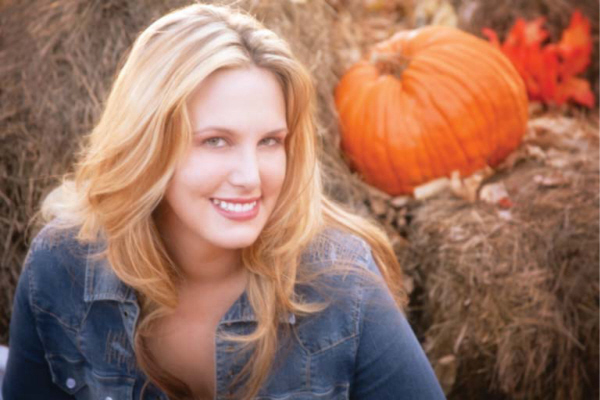
Brenda from North Platte, Nebraska is a beautiful and vivacious model that I photographed last Halloween in a most sincere pumpkin patch. The original image was captured with a Canon EOS 5D with an EF135 f/2.8 SF lens that was set for sharp focus. The soft focus effects were added with Norbert Esser’s free Norphos Blur Action Set, specifically the Hamilton Blur Action. © 2005 Joe Farace.