The Wii comes from a company known specifically for games (Nintendo), so what could be “beyond gaming” on a system such as the Wii? As it turns out, the Wii can do a fair bit that’s outside the realm of gaming, and with the inclusion of the Forecast Channel, the News Channel, the Photo Channel, and the Everybody Votes Channel, the Wii has immediate and obvious nongaming uses.
Even with the excellent channels that come with the Wii (or that you can download quickly), quite a few other aspects of the Wii make it a useful electronic appliance. Heck, the Wii has even started to become a weight-loss device—and that in itself is worth weighing in on.
Nintendo has gone out of its way to ensure that the Wii is capable of being the Internet appliance for a household. The Wii has many uses that are not game related, from checking weather and news to exchanging mail with friends and enemies. I’m going to look at these uses in this section, so hang on to your hat.
The key to this “Internet appliance” theory of mine is, of course, having a reliable Internet connection. I outline getting connected in detail in Chapter 2, so I won’t cover it again here. That said, you must have a connection to the Net, and a high-speed connection is most desirable.
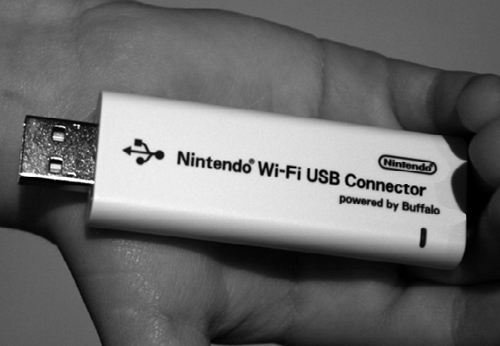
At this writing, you have three ways to connect via high-speed Internet: wireless connection, wireless connection with a Nintendo Wi-Fi USB Connector (Figure 6.1), and direct Ethernet connectivity via a USB LAN connector. Unfortunately, the USB LAN connector is not available yet, but I assume that it will be available in the coming months.
Simply put, the WiiConnect24 feature allows the Wii console to communicate with the Internet even when the Wii’s power is turned off. As a result, the Wii can receive system updates and traveling Mii characters at any time; it can also run, in the background, games that require connection to the Internet (such as Animal Crossing).
The other major bonus of WiiConnect24 comes to light in the Forecast, Everybody Votes, and News channels. When WiiConnect24 is up and running, the Wii can update information in all these channels around the clock. You won’t have to wait to get today’s forecast when you power up your Wii; the forecast should be sitting there waiting for you (Figure 6.2).

Setting up WiiConnect24 is a breeze. When your Internet connection is working, follow these steps:
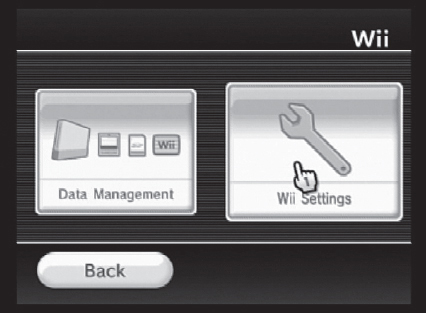
Click the Wii Options button in the main screen (Figure 6.3).
Click the Wii Settings icon (Figure 6.4) to go to the Wii System Settings screens.
Go to the Wii System Settings 2 screen, and click the WiiConnect24 button (Figure 6.5).
In the next screen, click the WiiConnect24 button again (yes, the same button is in two consecutive screens).
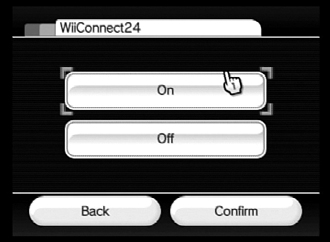
You see the WiiConnect24 screen and two options: On and Off.
Click On (Figure 6.6); then click the Confirm and Back buttons to exit the screen.
That’s it. You’ve turned on the WiiConnect24 service.


The most common activity on the Internet is perusing the World Wide Web. Fortunately for Wii owners, the Internet Channel is a Web browser. Currently in beta form and available for free from the Wii Shop Channel, the Internet Channel Web browser will cost a nominal fee eventually (around 500 to 1,000 Wii Points, or about $5 to $10).
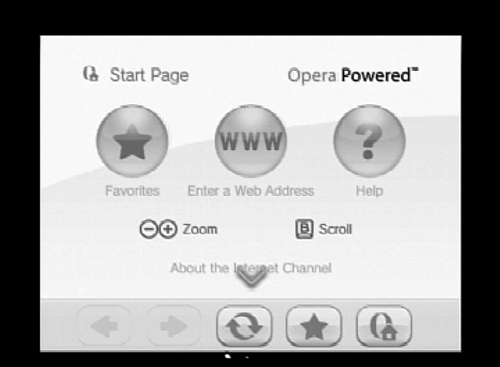
The Opera Web browser powers the Internet Channel. Opera is a slick, functional browser with a start page (Figure 6.7) that contains three options: Favorites, Enter a Web Address (WWW), and Help. I explain these three options in the following sections.
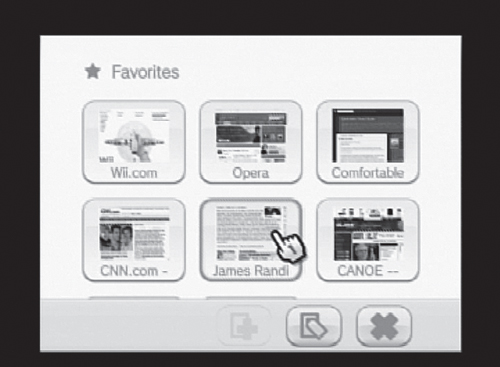
In the start page, you can click the Favorites button to access the Favorites area (Figure 6.8). This area starts out with two preset favorites: the Wii Web page and the Opera Web page.
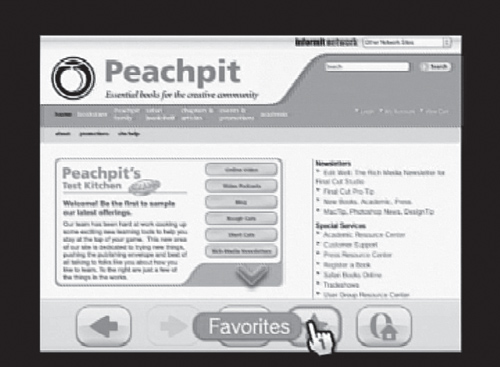
To add a Web page to the Favorites area, first click the Favorites button at the bottom of the page (Figure 6.9), and then, when you get to the Favorites area, click the Add Favorite button (which has a plus sign on it).
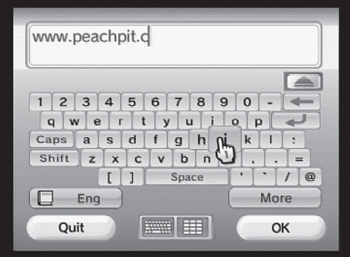
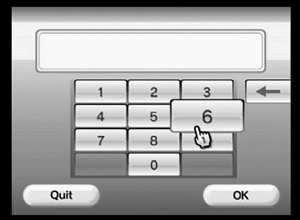
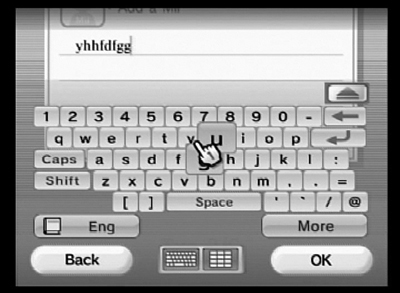
This button takes you to a text-entry screen where you can type a particular Web address that you’d like to go to. This screen (Figure 6.10) contains a keyboard with all the letters and symbols you need to access any Web page. Entering an address one keystroke at a time can be a tad cumbersome, but you get used to the process quickly (and can enter most Web addresses quickly too).
Note
When you’re entering a Web address, you don’t need to enter http:// at the beginning. Enter just www at the start, and the page will display perfectly.
After you enter the address, click the OK button to bring up that particular page.
To navigate a Web page, press the B button (the trigger on the Wii Remote), and scan the Wii Remote up or down. The remote glides your viewpoint over the Web page in a nice, smooth manner. To zoom in and magnify the text, press the plus (+) key on the remote. Not surprisingly, pressing the minus (–) key zooms back out.
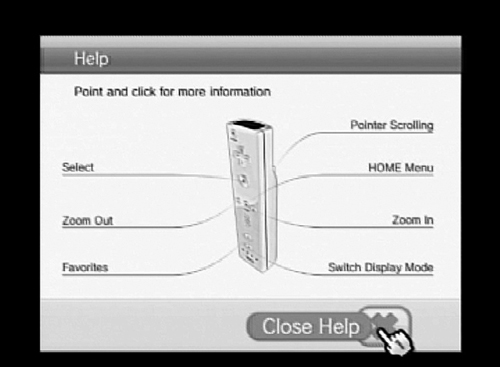
The last button in the start page is Help. Clicking this button brings up a nice graphic of the Wii Remote with an explanation of what each button does in the Opera browser (Figure 6.11).
Parents grow concerned when they consider the Internet content their preteen children may have access to. Who can blame them? In fact, I’m one of them.
When it comes to the Wii, some may think that because Nintendo is a family-oriented company, its Internet Channel has built-in filters that prevent users from viewing controversial content, such as pornography. But those people would be dead wrong, because the Internet Channel has no filter at all.
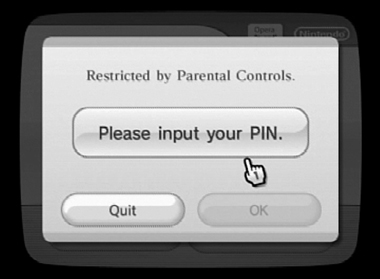
I don’t think that the lack of a filter is a bad thing, though, because the Wii has parental controls. These controls (Figure 6.12) allow parents to password-protect access to the World Wide Web, the Wii Shop Channel, the News Channel, and Internet Mail—and thereby to control their children’s minds as much or as little as their hearts desire.
To turn on parental controls, follow these steps:
Click the Wii Options button in the main screen.
Click the Wii Settings icon.
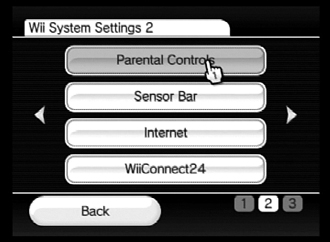
Go to the Wii System Settings 2 screen, and click Parental Controls (Figure 6.13).
If you haven’t already done so, set up a password and the question-and-answer pair for retrieving a forgotten password (Figure 6.14).
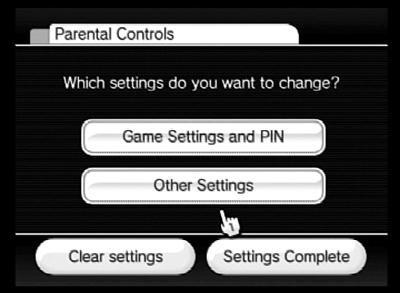
After you set a password, click one of the two buttons in the Parental Controls area—Game Settings and PIN, or Other Settings (Figure 6.15)—and choose the controls you want to apply.
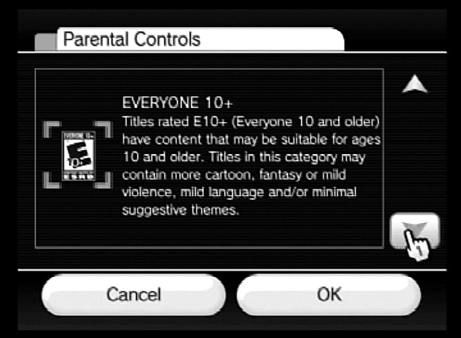
The Game Settings and PIN option lets you change your PIN (personal identification number) and set the highest level of game rating that you will allow the Wii to play without asking for the password (Figure 6.16).
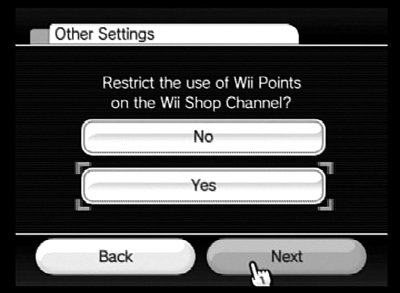
The Other Settings option gives you access to the following yes/no settings (Figure 6.17):
Restrict the use of Wii Points on the Wii Shop Channel?
Restrict the exchange of mail or other content over WiiConnect24?
Restrict the use of the Internet Channel?
Restrict the use of the News Channel?
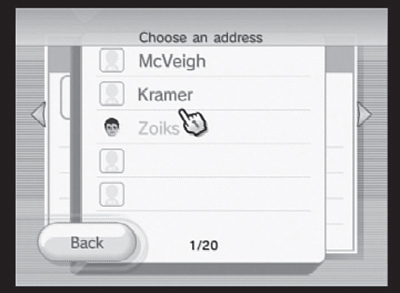
The last main use of the Wii as an Internet appliance is sending and receiving mail. In the main screen, click the Wii Message Board button; then click the Create Message button in the next screen. From there, you can create messages to send to other registered Wii members (Figure 6.18). Currently, you can’t send Wii messages to outside email accounts, although I imagine that it won’t be long before that feature is available.
The Wii is a fantastic Internet appliance, but it also has some great household uses as a memo taker, a daily organizer, and an exercise machine. (Yes, you read that correctly.) In this section, I look at these areas of usefulness that the Wii offers its owners.
In the Create Message area of the Wii (which you get to by clicking the Create Message button in the main Wii screen), you find a Memo button. Click the Memo button to reach the memo area, shown in Figure 6.19, where you can enter a memo to yourself or others who use your Wii. This memo shows up as mail in the bottom-right corner of the main Wii screen and in the Create Message area; simply click a memo to read it.
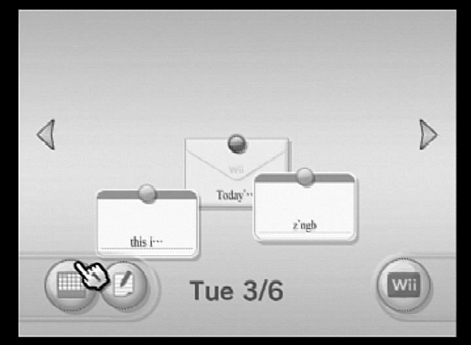
Another tool in the Create Message area is Calendar; to get to it, click the miniature calendar button at the bottom of the screen (Figure 6.20). When you click this button, a full-size version of a month-view calendar pops up.
To move forward or back month by month, use the + and – keys on the Wii Remote. If you want to move forward to 2009 to see what day October 30 is going to fall on, for example, just press the + button enough times to get the calendar up to that month.
One of the great features of Calendar is that you can add memos to any day (past, present, or future) simply by clicking that day, clicking the Memo button, and entering the memo text. It’s that simple.
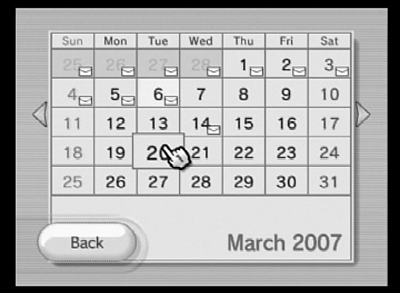
You can put all your key dates—such as birthdays, dinner dates, doctor’s appointments, and hair-removal sessions—into Calendar for future reference. Indeed, when you start your Wii and go to the main screen, if Calendar has memos in memory for that day, you see a message icon in the bottom-right corner of the screen, telling you how many memos/messages are waiting for you. Likewise, in calendar view, each day that has a memo attached to it displays a little envelope to show you that something’s up that day (Figure 6.21).
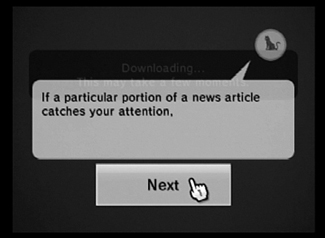
The Helpful Kitty
Every once in a while, you may notice a small cat running along the top of the Wii’s screen. This often happens when you’re waiting for something to load off the Internet—when the News Channel is loading, for example. If you click this little cat, you get a tip about some aspect of using the Wii (Figure 6.22). What tip you get is random, but this feature is a cute and fun way to get little tidbits of information.