Music and television have always been separate experiences for me, mostly because my college bookshelf stereo system sounded much better than the so-so speakers in my old TV. But now, the speakers are pretty good in many widescreen televisions and I’ve set my audio/visual system so that the movies’ sound comes through a home theater speaker system.
Given its easy-to-use visual interface, why not turn the Apple TV into the living room jukebox? It can play all your music and audiobooks and stay current on your favorite podcasts.
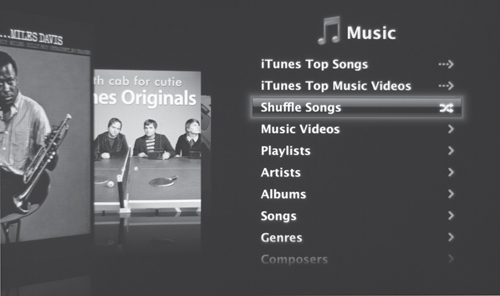
From the Apple TV’s main screen, highlight Music and press Select/Play/Pause to switch to the Music screen (FIGURE 6.1). A random selection of album covers appears at left to entertain you. (Okay, so I’m easily entertained.)
The two options at the top of the screen, iTunes Top Songs and iTunes Top Music Videos, let you connect to the iTunes Store and sample 30 seconds of each title.
Tip
If you’re curious about the current bestselling albums, or to view top sellers in various categories, you’ll need to go to the iTunes Store by way of the iTunes application on your computer. The songs listed here on the Apple TV can merely whet your appetite; you can’t order them directly.
The rest of the options on this screen all represent different methods of listing the contents of your iTunes music library.
Before the MP3 age, the way to listen to a random selection of music involved either creating your own mix tape (which wasn’t necessarily random) or buying a multidisc CD player that could load a disc, play a song at random, unload the disc, load another disc, play a song at random, and so forth. Or, if you were really cool, you owned a genuine jukebox that would do the same thing with CDs or (for you kids out there) vinyl records.
From the Music screen, scroll down to Shuffle Songs and press the Select button. The Apple TV picks a song at random from your entire library and plays it.
Playing a music video is just like playing a movie or TV show, which I covered in Chapter 5. As with TV shows, the greater-than symbol (>) at the end of the line indicates a screen with more options, in this case a list of artists with music videos. Pressing Select on an artist’s name takes you to a list of videos, and pressing Select on a video title plays it.
When you choose Playlists from the Music menu, you can select one of the iTunes playlists from your computer. See “Set up playlists,” later in this chapter, for more information.
Choose an artist’s name to view a list of albums by that performer, which in turn leads to songs on the album. Press Select/Play/Pause to play the song you want to hear.
If you know the name of the album you want to listen to, choose Albums from the Music screen and scroll to the title. Choosing the album brings up a screen containing the album’s songs; press Select on the first song to start playing the album.
Every once in a while, I get a snippet of a song in my head that won’t leave unless I hear the real thing. Go to the Songs screen to locate the song’s title, and then press Select to start playing it (and hopefully banish it from the soundtrack loop in my brain).
Although people debate about assigning genres to music—is it wrong to categorize music according to some marketing label? And can an album be both “alternative” and “pop” or “rock” at the same time?—I find the classification most helpful when applied broadly. Selecting the Classical or Soundtrack genres, for example, significantly narrows my choices so I can find what I’m looking for faster.
Speaking of classical music, the Composers category is especially helpful when you know you want to listen to something by Bach, because most recordings assign the conductor or symphony’s name to the Artist category. Choosing Composers leads to a list of composers, which in turn takes you to the albums and songs by that composer.
One challenge with any interface is how to easily navigate among hundreds or thousands of items.
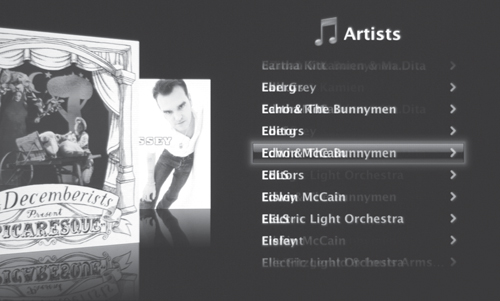
As you’d guess, press the Menu-up/Scroll (+) and Menu-down/Scroll (–) buttons to scroll the lists. When you press and hold one of the buttons, the items scroll by faster until the words become a blur (FIGURE 6.2). Thanks to persistence of vision, your eyes should still see which letter you’re at in the alphabet (I find it helps to focus just on the first letter). Release the button when you get close to the item you want, which slows the scroll, and then press the buttons to fine-tune your selection.
Tip
The biggest annoyance when fast scrolling is that the selection box overshoots; for example, you could be looking for The Shins but end up at U2. To counteract the acceleration, when you release the held-down button, press the opposite scroll button once. The list will pop closer to your intended target.
Note
This is one area where I’d like to see some of the recent iPod enhancements applied. The latest iPod displays a large letter to indicate where you are in the alphabet. Similarly, it would be helpful if the Apple TV had the capability to enter letters as a search term. It wouldn’t surprise me if these features are added in an update.
As a song is playing, the Apple TV displays the album artwork, the song title in white, and the artist and album name below that in gray (FIGURE 6.3). A progress bar indicates how much time has elapsed and how much time remains. If you’re playing in shuffle mode, you’ll also see a crossed-arrow icon indicating the playback is random.

Also noted is the song position: When playing in shuffle, song, or playlist modes, a number such as “6 of 1,232” tells you that the piece is listed as number 6 out of 1,232 total songs in your library; admittedly, that’s not very helpful. However, when you’re playing an album, the number can give you an idea of whether you’re at the beginning or end of the album (such as “7 of 10”).
Note
As noted in Chapter 3, pressing the Menu button takes you back one level in the menu hierarchy. When you press Menu during playback (let’s say you want to find a different album), the song continues to play. However, music stops if you go back to the main screen.
While a song is playing, you can do the following:
Play/Pause. Press the Select/Play/Pause button to pause and resume playback.
Scan. Press and hold the Previous/Rewind button to scan backward at high speed, or press and hold the Next/Fast-forward to zip ahead. Unlike movie playback, there’s only one speed for scanning through songs. However, song snippets play to help to get your bearings.
Skip. To skip to the previous or next song, press the Previous or Next button once.
Tip
Contravening common sense, the Menu-up and Menu-down buttons do not affect playback volume. I understand why—the TV or stereo is usually the device that dictates volume—but you’d think Apple would let you make an adjustment from the Apple Remote. Alas, no.
Tip
So, what are those buttons good for during playback? Press either one while the screen saver is running to bring up the Now Playing screen without taking action (like skipping to the previous or next song).
The Apple TV includes two settings that affect all music playback. From the main screen, choose Settings to find Repeat Music and Sound Check.
Press the Select button on this item to toggle its setting between Off and On. When enabled, an album or playlist will start over from the beginning after the last song is played. This feature doesn’t affect single songs, however.
Tip
Well, by default you can’t loop a single song. To work around that limitation, go into iTunes and create a new playlist containing just that song (see “Set Up iTunes Playlists” on the next page). Then, instead of locating the song using the Song menu on the Apple TV, you can play just that playlist from the Playlists menu and listen to your favorite song over and over.
Due to the way music is mastered, some songs end up sounding softer or louder than others when you rip their CDs into iTunes. Sound Check attempts to even out the volume level so that you don’t need to turn up the volume for a soft song and then get your ears blown out later by a loud song. Press Select to toggle this feature between Off and On.
Being able to scroll through your music library is handy enough, but there’s a better way to choose music. One of the most powerful features in iTunes is the capability to create playlists that contain music of your choosing. This approach also helps when your music library is larger than will fit on the Apple TV’s hard disk.
Playlists come in two flavors: a regular playlist that is essentially a container for the songs you drag into it, and a Smart Playlist that gets populated automatically according to criteria that you establish.
Your playlists transfer to the Apple TV during the next sync. (See Chapter 8 for more on syncing, including how to specify which playlists sync.)
To create a regular playlist, do the following:
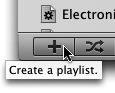
In iTunes on your computer, click the plus-sign (+) button in the lower-left corner of the window (FIGURE 6.4). Or you can also choose File > New Playlist (or press Command-N on the Mac or Ctrl+N under Windows).
A new untitled playlist appears in the sidebar. Type a name for it and press Return or Enter (FIGURE 6.5).
Click the category of media you want to include (such as Music) and select the songs that will go into the playlist.
Drag the selected items to the playlist name you created.
Tip
Double-click the playlist’s icon to open the list in a new window. This can be helpful if you want to see what’s in the playlist as you add to it.
Tip
If the iTunes Browser is visible, you can drag a genre, artist, or album name to a playlist to add all applicable songs. (Click the eyeball icon in the lower-right corner of the window, choose View > Show Browser, or press Command-B or Ctrl+B to view the Browser.)
Another method is to build a playlist based on what you’ve already selected:
Select the items you want in iTunes.
Choose File > New Playlist from Selection, or press Command-Shift-N (Mac) or Ctrl+Shift+N (Windows). A new untitled playlist appears in the sidebar.
Rename the playlist. Since this is a standard playlist, you can add more material to it later by dragging it to the playlist name.
Feel free to drag the items within the playlist to change their playback order. If you have an exercise routine you perform every morning in the living room, for example, you can choose music according to when you’re active or cooling off.
Tip
It’s often helpful to display the list of songs according to criteria such as artist, album, or time: Click the appropriate column header to change the appearance in iTunes. However, keep in mind that this is merely a different way to look at your list and doesn’t change the playback order. To view the playback order again, click the first column header (the one above the numbers).
Now it’s time to get tricky. A Smart Playlist enables you to define a playlist based on criteria that can change dynamically. For example, I tend to listen to a new album multiple times in the first few weeks after I buy it, so I’ve created a Smart Playlist on my computer that displays items added to the library within the last two weeks.
A Smart Playlist can also automatically exclude items. In a fit of nostalgia one night, I created a Smart Playlist called “Ah, High School,” which collects all music in my library dated with the years I roamed the halls of my high school. However, it also grabbed a number of symphonies that were recorded during the same time period. Granted, I listened to classical music back then, but it doesn’t invoke the same memories as, say, “Haunted When the Minutes Drag” by Love and Rockets.
So, before I embarrass myself with the other items in that playlist, let’s move on to the steps required to create a Smart Playlist.
I mentioned earlier that a Smart Playlist can help if your iTunes library is larger than the Apple TV’s hard disk. Let’s set one up that transfers 5 gigabytes (GB) of your favorite music by way of example.
Hold down the Option (Mac) or Shift (Windows) key and click the plus-sign icon that we used to create a standard playlist. With the modifier held down, the plus turns into a gear icon.
You can also choose File > New Smart Playlist, or press Command-Option-N (Mac) or Ctrl+Alt+N (Windows). A new Smart Playlist dialog appears.
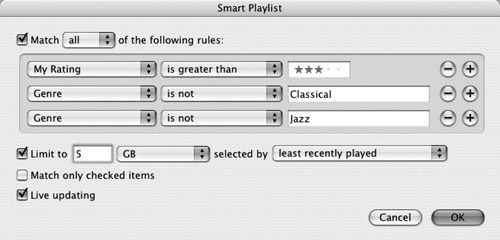
Under “Match the following rule,” choose the criteria that will define your Smart Playlist.
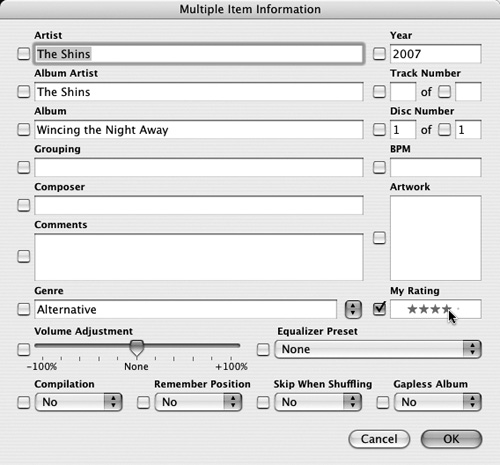
In this case, choose My Rating from the first pop-up menu; choose “is greater than” from the second pop-up menu; and set the number of stars to 3 (FIGURE 6.6). This combination grabs songs that you’ve rated as 4 or 5 stars.
Let’s assume you don’t want classical or jazz music in this Smart Playlist. Click the plus-sign button to the right of the criteria to add another selector to the rule. And in this case choose Genre, “is not,” and type “Classical”. Repeat those steps to add another selector that excludes the Jazz genre.
Note
When you add more selectors, the statement at the top of the dialog reads “Match [all] of the following rules,” which means every criterion must be met for a song to appear in the list. You can change “all” to “any” if you want to include more songs that might not otherwise be added to the list.
Just below the rules, mark the “Limit to” checkbox, change the number to 5, and choose GB from the first pop-up menu. This option is the key to keeping a lid on the total number of songs that get copied to the Apple TV. Also choose how the 5 GB of material is chosen in the last pop-up menu; this tells iTunes what to include if the rules catch more than 5 GB of qualified songs.
Lastly, enable the “Live updating” checkbox if you want the list to change based on new information—for instance, if you added a new album of high-rated music.
Click OK to save the Smart Playlist.
Give the playlist a name.
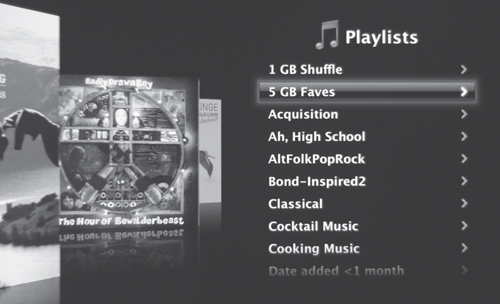
After you sync the Apple TV, the new playlists appear in the Playlists screen (FIGURE 6.7).
Note
You can include music videos in your playlists, but they won’t play along with your music. And because of a bug, multiple music videos can’t play in succession.
To adjust the settings for a Smart Playlist, select it in the sidebar and choose File > Edit Smart Playlist, or bring up the contextual menu (right-click, or Control-click on a Mac without a two-button mouse) and choose Edit Smart Playlist.
To remove a standard playlist or Smart Playlist, select it in the sidebar and press Delete, or choose Delete from the contextual menu.
Tip
As you creat more playlists, you’ll want a better way to organize them other than alphabetically. In iTunes, choose File > New Folder to create an empty folder that you can drag playlists and Smart Playlists into. However, the Apple TV doesn’t recognize the folder structure and displays all playlists as a single alphabetized list.
Tip
Want to know the secret weapon of Smart Playlist generation? You can create Smart Playlists that are based on other Smart Playlists. This feature enables you to set up one Smart Playlist containing early 20th century jazz, for example, and then another that includes just instrumental pieces from the former.
Smart Playlists wouldn’t work at all if it weren’t for the metadata stored with each music and video file. Metadata are supplemental information such as the year a song was released, its place in the order of the album on which it appears, and the composer. When you purchase a track from the iTunes Store, that information is already assigned, but it’s not always consistent. That goes double for music you rip from CD, which gets its metadata from an online service.
More often, I find myself changing the Genre tag so that all albums of one band are on the same page, since genre is a handy criteria for my Smart Playlists. Here’s how you can change metadata in iTunes:
Select one or more songs to edit. If you select multiple tracks, the changes you make apply to all of them (such as making one edit to all songs on an album).
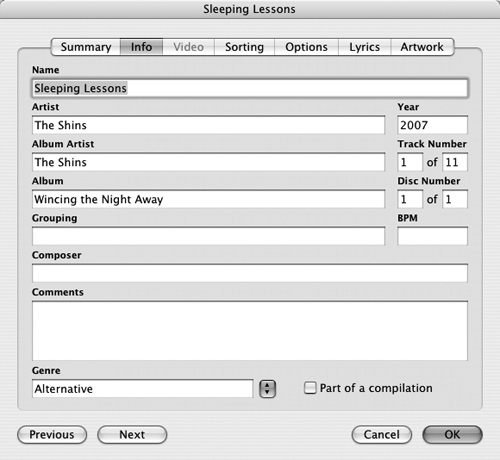
Choose File > Get Info, or press Command-I (Mac) or Ctrl+I (Windows). (That’s an “i” by the way.) The Info dialog appears (FIGURE 6.8).
Enter or change information in any of the fields. In the case of multiple selections, making a change enables the checkbox beside the field, indicating that the edit applies to all selected items (FIGURE 6.9).
Press OK to apply the changes.
Tip
Feel free to organize your library any way you wish. My friend Mark, for example, likes to assign custom genres for use with Smart Playlists, especially around the holidays. So instead of Holiday or Christmas, his library includes genres such as Christmas Traditional Choral and Christmas Ancient.
When Steve Jobs announced support for podcasts in iTunes, he described them succinctly as being like “TiVo for radio.” Instead of tuning in to a radio program at a certain time of day on a specific channel, the most recent episode is downloaded automatically to your computer for you to listen to (or watch, in the case of video podcasts) when it’s most convenient for you.
Thousands of podcasts are now available online, most of them created by hobbyists and other non-professionals (though the big players are also taking advantage of podcasting), covering almost every topic you can imagine. And most of them are free!
Tip
Podcasts hold one other advantage, at least for the time being: some are broadcast in HD video, a claim that movies and TV shows from the iTunes Store can’t yet make. If you’re looking to take full advantage of your high-definition television, search for podcasts that claim to be “Apple TV HD” compatible.
So where do we find podcasts? The iTunes Store provides a podcast directory, but you can also find them on the Web. When you find one you like, you subscribe to it as you would a magazine or a TV Show’s Season Pass (covered in Chapter 5). When a new episode is posted, iTunes downloads it to your hard drive and then syncs it to the Apple TV.
Follow these steps to locate and subscribe to a podcast from within the iTunes Store:
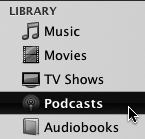
In iTunes, click the Podcasts icon in the sidebar (FIGURE 6.10).
In the lower-right corner of the window, click the Podcast Directory link, which brings up Apple’s storefront for podcasts.
Find a podcast that interests you. Unlike songs for sale at the iTunes Store, double-clicking an episode plays the entire episode, not just a 30-second preview.
Click the Subscribe button to add the podcast to your list of subscriptions (FIGURE 6.11). iTunes asks you to confirm that you want to subscribe and then downloads the most recent episode.

When the next episode appears, it is automatically downloaded.
The iTunes approach to subscribing to podcasts is really just a nice front end for what’s really happening. The magic technology behind podcasting is RSS, or Really Simple Syndication, a protocol also used for delivering news headlines in your Web browser or in a dedicated RSS reader application.
Not all podcasts are listed in the iTunes Store directory—you may find a podcast on the Web that lists its RSS feed. If that’s the case, follow these steps:
Locate the podcast’s RSS link, which often appears as an image that says “Podcast RSS” or is presented as a more direct link.
Copy the link: Depending on your Web browser, you should be able to right-click (or Control-click on a Mac with a one-button mouse) the link and choose Copy Link Location (or similar).
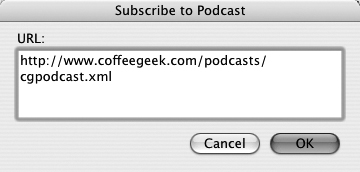
In iTunes, choose Advanced > Subscribe to Podcast, which brings up a dialog.
Paste the RSS link into the URL field (FIGURE 6.12): choose Edit > Paste or press Command-V (Mac) or Ctrl+V (Windows).
Tip
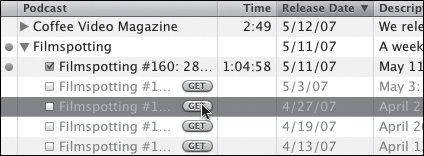
In your Podcasts list in iTunes, some older episodes appear in gray to indicate they’re available but not downloaded (FIGURE 6.13). Click the “i” icon to view more information about an episode. To grab one, click its Get button.
If you no longer wish to receive new episodes of a podcast, select it in the Podcasts list and press the Unsubscribe button.
Any previously downloaded episodes remain on your hard drive, however. To get rid of them, select the name of the podcast and press the Delete button.
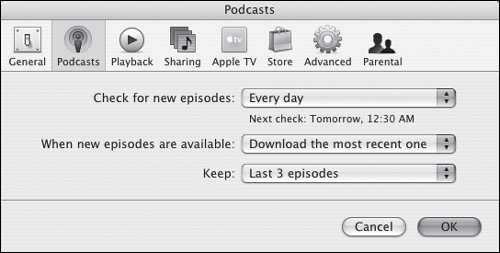
Subscribing to many podcasts, especially video podcasts, can quickly fill up your hard disk. Plus, once you’ve listened to an episode, you may not want to keep it forever. The Podcasts settings in iTunes control how the application manages podcasts. To set these options, do the following:
On the Podcasts screen in iTunes, click the Settings button.
You can also choose iTunes > Preferences on a Mac or choose Edit > Preferences under Windows. Then, click the Podcasts icon or tab in the dialog that appears (FIGURE 6.14).
From the first pop-up menu, choose how often iTunes should automatically check for new episodes: every hour, every day, every week, or manually (in which case you must click the Refresh button in the Podcasts screen).
The second pop-up menu determines the action to be taken on new episodes: download all, download the most recent, or do nothing.
Lastly, the third pop-up menu specifies how many episodes to keep before automatically deleting them to make room for more.
Press OK when you’re done.
Note
See Chapter 8 for information on controlling which podcasts get synced to the Apple TV.
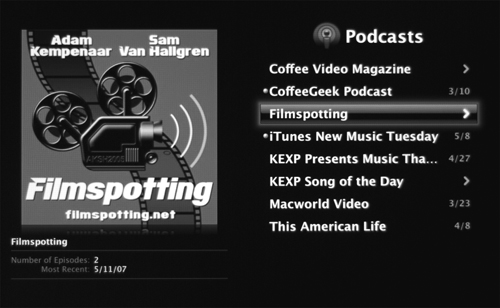
Now that the episode is on the Apple TV, you can play it as you would any other song or video:
From the main screen, choose Podcasts to view the Podcasts listing (FIGURE 6.15). Podcasts with new unplayed episodes appear with a blue dot next to their titles.
Highlight the episode you want and press Select/Play/Pause to start playing it.
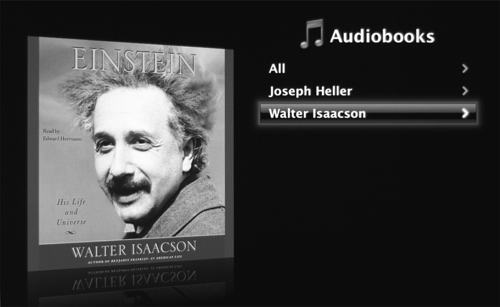
An audiobook is basically a music file, but with the capability to save a paused location—a bookmark—so you don’t have to search for where you left off the last time you listened. When you sync the Apple TV, this information is transferred to the computer and also to any iPods that may sync with the computer. The audiobooks sold through the iTunes Store include this capability.
To listen to your audiobooks, go to the Music screen and choose Audiobooks. The books are listed according to author (FIGURE 6.16).