
4. The iPod’s Stores
You know that constant use gives you the power to drain your iPod touch’s battery. In what some people might view as a turnabout-is-fair-play situation, your iPod has the power to drain your wallet. Its means for doing so are two Apple-owned online emporiums accessible from your iPod touch: the iTunes Store and the App Store. The former lets you browse, purchase, and download music, videos, podcasts, and iTunes U content over a Wi-Fi connection with nothing more than your iPod and an iTunes account linked to your credit card. The App Store is where you find free and commercial add-on applications (made by Apple as well as third parties) that you can also download over Wi-Fi.
In this chapter, I examine the workings of each store.
Prepare to Shop
Ready to shop? Great. You’ll first need to sign up for an iTunes account, and I’ve found that easiest to do from within the iTunes application on your computer. Here’s how.
What you need
Naturally, you need a Mac or a Windows PC and a copy of iTunes. It’s not necessary to have an iPod to take advantage of The Store. Media purchased at The Store can be played on your computer; music can be burned to CD; and because Apple now sells music free of copy protection, the music you purchase there can be played on any device that supports the AAC format (discussed in Chapter 3).
Also, although you can access The Store via any Internet connection, you’ll find it far more fun to shop with a reasonably speedy broadband connection. A 4-minute song weighs in at around 8 MB. Such a download takes next to no time over a DSL, cable, or fiber-optic connection but can be terribly slow over a poky Wi-Fi connection or—heaven forbid!—a slothlike dial-up modem. Even with a moderately fast broadband connection, you could wait up to an hour to download a full-length movie from The Store.
As these pages go to print, The Store is available in 77 countries. Which store you’re allowed to purchase media from depends on the issuing country of your credit card. If you have a credit card issued in Germany, for example, you can purchase media only from the German iTunes Store (though you don’t physically have to be in Germany to do this; again, the credit card determines where you can shop).
Sign on
You’re welcome to browse The Store the first time you fire up iTunes, but to purchase media, you must establish an account and sign in. Fortunately, Apple makes the process pretty easy.
With your computer connected to the Internet, launch iTunes, and click the iTunes Store entry in iTunes’ Source list; then click the Sign In button in the top-right corner of the iTunes window. If you have either an Apple ID and password or an AOL screen name and password, enter them and click the Sign In button; otherwise, click the Create New Account button.
When creating an account, you’ll be required to agree to the iTunes Store’s terms-of-service agreement, enter a valid email address, and create a password. Along the way, you’ll enter some personal information so that Apple can identify you, if need be.
Finally, you’ll be asked for a credit card number and your name, address, and phone number. Click Done and . . . you’re done. You’re now a member in good standing.
The iPod’s iTunes Store
At one time, the iPod touch’s version of the iTunes Store was called the iTunes Wi-Fi Music Store, so named because you could shop only for music (to obtain videos or podcasts, you had to use iTunes on your computer), and you could do so only over a Wi-Fi connection. iPod touch owners are still confined to Wi-Fi, as the iPod doesn’t support any other wireless networking protocol. (iPhone owners can download content via EDGE and 3G networks.)
Today’s iTunes Store is far more capable. Now you can download almost any content offered by the iTunes Store directly to the iPod; the sole exception is HD movies (see the following note).
![]() Although you can’t download HD movies to your iPod touch, you can purchase them on your iPod. When you do, an iPod-compatible standard-definition version of the movie is downloaded to your iPod touch (if you’re on a Wi-Fi network), and the HD version is made available to you within the copy of iTunes on your computer.
Although you can’t download HD movies to your iPod touch, you can purchase them on your iPod. When you do, an iPod-compatible standard-definition version of the movie is downloaded to your iPod touch (if you’re on a Wi-Fi network), and the HD version is made available to you within the copy of iTunes on your computer.
Although this store’s face is far less crowded than that of the full-size iTunes Store, the selection is no different. You can choose among the same millions of tracks, podcasts, TV shows, music videos, movies, and iTunes U content in this pocket-size version of The Store and in the iTunes Store available via iTunes. The feature works this way.
Browsing the little store
Tap the iTunes icon on the iPod touch’s Home screen while you’re connected to a Wi-Fi network, and the iTunes Store screen appears. Across the bottom of the screen, you see Music, Videos, Podcasts, Search, and More icons. Tap More, and you see Audiobooks, iTunes U, and Downloads. Here’s what to expect.
Music
Tap Music, and you’re taken to The Store’s music section. Across the top of the screen are three buttons: New Releases, Top Tens, and Genres. These buttons work much as they do in the same-named areas of the full-grown iTunes Store’s home page (which I hope you’ll take the time to explore).
New Releases. Here, you see a list of the week’s coolest additions—singles as well as albums. To preview or purchase one of these items, tap it to move to that item’s screen. (I discuss the workings of this screen shortly.) In addition to the week’s new releases, you’re likely to see buttons for accessing free tracks and music videos and for viewing the hottest items currently available. At the very bottom of the screen is an Account button that displays your iTunes account email address—[email protected], for example—along with the amount of any credit you have ($25 Credit, for example, if you’ve redeemed an iTunes gift card). Tap that, and you’re offered the option to view your account details, sign out, or forget the whole thing by tapping Cancel.
At the bottom of the list of new releases, you’ll see a Redeem item. As its name hints, you tap this item to access the Redeem screen, where you enter the code for an iTunes gift card or gift certificate. Just tap in the Code field, and the iPod’s keyboard appears. After you enter the code, tap the Redeem button in the top-right corner of the screen to send the code to Apple.
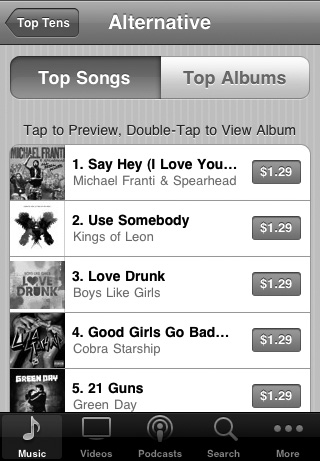
Top Tens. This section features top songs and albums organized within particular genres. Tap Alternative, for example, and the next screen includes two large buttons: Top Songs and Top Albums (Figure 4.1). Tap one to see the top ten items of that kind. To see the complete list of Top Ten genres, tap the More Top Tens button near the bottom of the screen.
Genres. This section lists popular genres (Pop, Alternative, Hip-Hop/Rap, Rock, and Country, as I write this chapter). To view the complete list of genres, tap the More Genres button near the bottom of the screen. What you see when you tap a genre depends on the genre. When I tap Rock, for example, I see new releases. When I tap Soundtrack, I see titles offered below an In Theaters heading. Tapping Classical, Singer/Songwriter, or Jazz displays a list of albums. The top of each screen includes a couple of buttons that you can tap to go to albums that The Store believes worthy of your attention.
Videos
The Videos area of The Store is where you can rent or purchase movies, purchase TV shows or entire TV seasons, and buy music videos. Tap the Videos button at the bottom of the screen, and you see a layout similar to the Music screen, with three buttons across the top: Movies, TV Shows, and Music Videos.
Movies. The Movies screen displays a couple of featured movies at the top (hot new releases, as I write this chapter). Below is a New Releases area with 30 entries; below that are Top Tens and Genres entries. Each entry lists the movie’s genre (such as Comedy or Drama), its title, its user rating (1 to 5 stars, including half-stars), and the number of ratings it has received (128 Ratings, for example).
Tap a movie, and you see that movie’s screen, where you can buy or rent it (if rental is an option—not all movies are for rent), as well as watch a preview of the movie. To do one of these things, tap the appropriate button. Below the buttons is a Reviews button that displays a five-star scale, reflecting the average rating given by people who chose to submit reviews. These people may or may not have purchased or rented that movie from iTunes (and may not have seen it at all, so take some reviews with a grain of salt). Tap that button, and you’ll see the average rating and the number of people who have rated the movie. Below are user reviews, complete with title, text, date, and rating.
If you’d like to write a review of your own, tap the Write a Review button at the top of the screen. You’ll be prompted for your iTunes password. Enter it, and you go to the Submit Review screen, where you can enter a rating, title, and review. To submit the review, just tap Send.
TV Shows. This section works almost exactly the same way as the Movies area. The main difference is that the items in this window are entire series (The Wire, for example) rather than single episodes. Tap a show, and you’re taken to the season screen, where you can purchase individual episodes and, sometimes, entire seasons. These screens carry no Preview button. Instead, just tap an episode title, and the movie-player window displays a preview. TV Shows screens also have a Reviews button.
Music Videos. Same idea here. You see a couple of featured items at the top of the screen, a list of music videos below, and Top Tens and Genres menus. Tap a video, and you see the Buy and Preview buttons, along with the tapworthy reviews entry. In most cases, you also find a More by This Artist button. Tap it to see a screen listing other music videos by that artist.
Podcasts
We’ve been through all this before, right? The Podcasts screen has its own three buttons: What’s Hot, Top Tens, and Categories. If you read the section on the Music and Videos areas, you have a solid idea of how The Store works. These buttons show you exactly what they say they do: popular podcasts of the day, the top ten podcasts in specific categories (News & Politics, Sports & Recreation, Technology, Comedy, Music, and More Top Tens, at this writing), and featured podcasts in the same categories I just listed. Podcasts come in both audio and video form, and all of them are free.
Search
Search is very iPod touch-like. Tap this button, and a Search field appears. Tap this field, and the iPod’s keyboard appears. Type a song title, album title, or artist name in the Search field; as you type, suggestions appear below. When the result you desire appears, tap it.
The resulting screen displays a variety of media—including some that you may not expect. I searched for Led Zeppelin, and the results screen included “Stairway to Heaven” (of course), the Mothership album, two popular songs (“Kashmir” and “Black Dog”), two albums, three TV episodes (the TV show NewsRadio used “Led Zeppelin” in the title of three of its episodes), two movies, a couple of podcasts, two TV seasons (NewsRadio again), and two audiobooks. As you can see, a search can pull up a lot of unexpected results.
More
When you tap the More button at the bottom of the screen, you see three entries: Audiobooks, iTunes U, and Downloads. I needn’t walk you through the first two. Just understand that The Store, like Audible.com, sells audiobooks that you can play on an iPod, iPhone, or your computer. Like music tracks, audiobooks can be burned to CD. You already know that iTunes U is the educational area of The Store, where you can download lectures, classes, and concerts offered, for the most part, by universities and colleges. Again, iTunes U content is free.
Downloads. As you might expect, this area is where you can watch the progress of the content you’re downloading. It works like this: When you tap a price, it turns into a Buy Now button. Tap that button, and the item swoops down onto the Downloads icon, at which point you’re prompted for your iTunes password (the same password that you use at the iTunes Store).
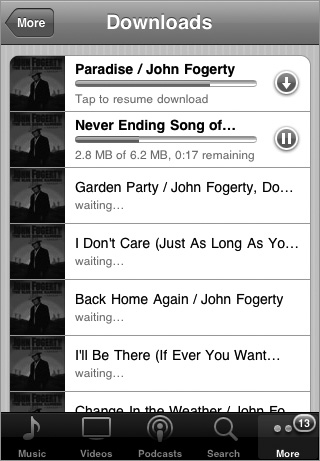
An icon on the Downloads button blinks, indicating the number of items that the iPod is downloading. Tap this icon, and a screen shows you the progress of the download (Figure 4.2 on the following page). After the item has downloaded, you can play it on the iPod. When you next sync your iPod, the tracks you’ve purchased will be transferred from the iPod to your computer.
Figure 4.2 The Downloads screen lets you watch the progress of music coming to your iPod.
When these tracks are downloaded for the first time, a new playlist appears below the Store heading in the computer-based version of iTunes’ Source list. That playlist is called Purchased on nameofiPod, where nameofiPod is the name of your iPod. After these tracks are in your iTunes Library, they behave like any others you own. You can burn music tracks to disc, and you can play any media on any of your authorized computers or any iPods and iPhones you own.
![]() If an album you purchase on the iPod is bundled with extra content (such as a digital booklet and/or videos), when you sync the iPod with your computer to download the music to it and connect to the iTunes Store, the extra content will download to iTunes automatically.
If an album you purchase on the iPod is bundled with extra content (such as a digital booklet and/or videos), when you sync the iPod with your computer to download the music to it and connect to the iTunes Store, the extra content will download to iTunes automatically.
The Downloads screen also offers a shortcut to just those music tracks you’ve purchased on your iPod since you last synced the iPod. Tap the Purchased arrow in the top-right corner of the Downloads screen, and the iPod application opens and displays the Purchased on iPod playlist, which contains those purchased tracks.
Browsing at Starbucks
Walk into a Starbucks outlet and tap the iTunes application, and your iPod is likely to display a Starbucks button. When you tap that button, your iPod will tell you the name of the track that’s currently playing in that store, as well as recently played tracks. Using the Starbucks interface, you can purchase any of these tracks.
The App Store
The App Store is a service, hosted by Apple, that lets you download applications created by Apple and third-party developers to your iPod touch, iPhone, or (via the iTunes Store) computer.
The App Store offers applications that you must pay for as well as scads of free ones, so even the most cheapskate iPod touch owners among us will find lots to like at this store. In this section, I show you how it works.
Browsing the App Store
The App Store offers an interface similar to what you find at the iTunes Store. Tap the App Store icon on the iPod’s Home screen, and along the bottom of the resulting App Store screen, you’ll see the five icons necessary to make your shopping experience as enjoyable as possible. The icons break down this way.
Featured
Tap the first icon in the row, and you move to the Featured screen. You’ll find three buttons at the top: New, What’s Hot, and Genius.
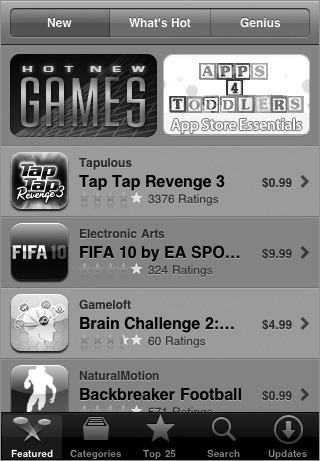
New. Tap New, and you’ll see a list of notable applications—some free, some for sale—that have been added to the App Store recently (Figure 4.3). Each entry includes the application’s name, its maker, its user review rating (one to five stars), the number of reviews it’s received, and its price. At the bottom of this list, you’ll find the now-familiar Redeem entry, which works exactly as it does in the iTunes Store app.
Figure 4.3 Featured apps from the App Store.
What’s Hot. When you tap What’s Hot at the top of this screen, you see a list of the most-downloaded applications on the service. Each application bears the same information: name, maker, rating, number of reviews, and price.
Genius. This button, which is new with iPod touch software 3.0, operates very much like Apple’s Genius playlists. You volunteer to participate by switching Genius on for apps. You do this by tapping Genius, tapping the Turn On Genius button in the resulting screen, entering your Apple ID password, and agreeing to the terms of service by tapping Agree at the bottom of the agreement. Then you see a list of 15 applications, recommended to you based on the other applications that you currently have on your iPod touch. To see another 15 recommendations, tap the More Recommendations button at the bottom of the list.
![]() That’s correct—Genius makes its recommendations only on the apps that you have on your iPod. You could have hundreds more in iTunes, but those apps may as well not exist as far as the App Genius is concerned.
That’s correct—Genius makes its recommendations only on the apps that you have on your iPod. You could have hundreds more in iTunes, but those apps may as well not exist as far as the App Genius is concerned.
As I write this chapter, the top of the New and What’s Hot screens show two applications or categories (Hot New Games, for example) in a banner. In Apple’s estimation, these applications (or classes of applications) are too cool or too popular to miss.
Categories
If you’d like to browse the App Store for particular kinds of applications—games, finance, or productivity, for example—tap the Categories icon that appears in the second position at the bottom of the screen. The Categories screen is where you’ll find applications listed in categories, including (at this writing) Games, Entertainment, Utilities, Social Networking, Music, Productivity, Lifestyle, Reference, Travel, Sports, Navigation, Healthcare & Fitness, News, Photography, Finance, Business, Education, Weather, Books, and Medical. Tap any of these categories except Games, and the resulting category screen includes three buttons that make it easier to find the apps you want: Top Paid, Top Free, and Release Date. When you tap Games, you’re offered a screen that includes game genres, much like the one in iTunes. Tap a genre of game—Arcade, for example—and you’ll see the Top Paid, Top Free, and Release Date buttons, along with a list of 25 games below.
Top 25
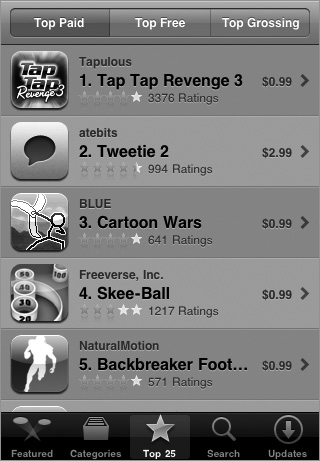
Featuring Top Paid, Top Free, and Top Grossing buttons at the top of the screen, Top 25 is what it says—a list of the 25 most-downloaded or most-money-generating applications at the App Store (Figure 4.4 on the following page). Scroll to the bottom of any of these lists to find a Show Top 50 entry. Tap it, and another 25 entries appear, slightly less “top” than the first 25.
Search
Search is for those times when you think, “Hmm . . . Priscilla said something about a cool new app, but the only part of its name I remember is monkey.” Just tap Search, tap in the Search field, and type monkey on the iPod’s keyboard. You’ll be sure to find the application you’re after in the list that appears. Tap the application’s name, and you’ll see its listing along with the usual information—name, company, yada, as well as yada.
![]() Search produces results not only for product names, but company names too. If you know the company but not the name of the application, no worries—just search for the company name and tap it. Any applications offered by that company appear in the list of results.
Search produces results not only for product names, but company names too. If you know the company but not the name of the application, no worries—just search for the company name and tap it. Any applications offered by that company appear in the list of results.
Updates
Just like the applications you have on your computer, iPod touch applications are updated by their developers to fix problems and offer new features. When an application you’ve downloaded has been updated—and Apple has made that update available—the Update icon at the bottom of the App Store screen bears a red circle with a number inside it, indicating how many updates are available. The App Store icon on the Home screen also adopts this icon.
When updates are available, you can choose to update single applications or click the Update All button in the top-right corner of the screen. Your iPod moves to the Home screen, and the updated versions of the applications begin to download. The progress of the download is shown in the form of a blue progress bar at the bottom of the application’s icon.
Managing applications
Now that you’ve found the applications you’re after, you’ll want to learn more about them and then start downloading the ones you want.
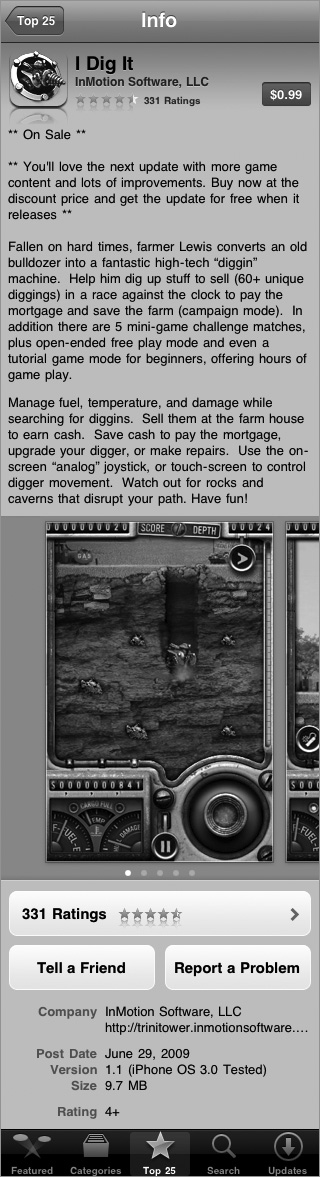
Figure 4.5 Elongated view of an app’s Info screen.
Navigating the Info screen
An application’s Info screen is both the gateway to downloading the thing and a source of information about it (Figure 4.5). Here, you’ll find the name of the application, the name of the developer, a star rating based on user reviews, the number of reviews, a price button that you tap to purchase the app, a link to those reviews, a description and screen shots of the application, developer contact information, post date, version, size, and rating.
A Tell a Friend button also appears in this screen. Tap it, and a new unaddressed email message opens, containing the name of the application in the Subject field and the words Check out this application: followed by a link to the application in the message body. The recipient of this message need only click the link; as long as he has a current copy of iTunes installed on his computer, iTunes will launch and take him to the iTunes Store page that’s devoted to this application. (I discuss the iTunes Store’s relationship with iPod touch and iPhone applications shortly.)
Reviews work similarly to the reviews for music in the iTunes app. The difference is that you’re not allowed to review an app unless you’ve actually downloaded it. This helps prevent useless “This costs too much!” or “I hate cheese!” reviews that can drag down an app’s rating.
Finally, there’s the Report a Problem button. Tap it, and a Report a Problem screen appears, offering three choices: The Application Has a Bug, This Application Is Offensive, and My Concern Is Not Listed Here. These choices are followed by a Comments field where you can express yourself more thoroughly. Tap Report to send your report to Apple.
Downloading applications
Tap the entry for the application you want to download. Tap its price (yes, even if it’s marked Free) and then tap Install. You’ll be prompted for, at the very least, your iTunes password. (I say at least because if you were signed in to the iTunes Store the last time you synced your iPod, you won’t be prompted for your iTunes account when you attempt to download something from the App Store. If you’re using the App Store for the first time and aren’t signed in to your iTunes account within iTunes, you’ll be prompted for both your account address and password.)
Enter your password with the iPod’s keyboard, and tap OK. The iPod moves to the Home screen, shows a dimmed icon for the application you’re downloading, and displays Loading and then Installing progress bars at the bottom of the screen. When the application is fully loaded, the Installing progress bar disappears, and the icon takes on its full color and brightness. To launch the application, do as you do with any application on the iPod: Tap its icon.
The next time you sync your iPod with iTunes, any applications you’ve added to it—or that have been updated on the iPod—will be copied to iTunes’ Applications area.