
So, you posted all your holiday and vacation photos in an online gallery and made enough photo books, slide shows, flipbooks, and greeting cards to keep your family and friends content for months to come? Sounds like you may be ready to take a crack at some other projects. In this chapter, you find ideas for using your inventory of digital images to make your life more productive, more organized, and more fun. Remember that this chapter just scratches the surface. With a little imagination, before you know it, there won't be anything left in your life that doesn't include your photos.

If you like an image so much that you want to gaze at it while you're toiling away at your computer, why not use that image for the background of your computer, better known as the desktop wallpaper? If you can't choose just one favorite image, you can use several to create a multi-image screen saver.
Note
If you're serious about image editing, you really should have a neutral gray background. But as long as your wallpaper isn't showing while you do your color corrections, feel free to decorate your desktop with your favorite colorful photo. Follow these two easy steps to turn a photo into wallpaper:
From the Organizer, select the photo you want to use.
Choose Edit
Set as Desktop Wallpaper.
That's all there is to it! Your photo has now been transformed into desktop wallpaper.
If you have two or more photos you want to use, you can create a Windows screen saver. Follow these steps in Windows Vista:
Select the desired photos from the Organizer.
Choose File
Export As New File(s). In the Export New Files dialog box that appears, choose JPEG as the file type.Select your photo size and choose a quality setting, as shown in Figure 18-1.
We recommend using a size that matches the resolution setting you're using for your monitor. Use a quality setting of 12 for maximum quality.
Click the Browse button.
Click the Make New Folder button, save the photos as JPEGs to that folder, and name the folder something appropriate, such as Screen Saver. Click OK.
Choose whether to use the Original Names of your files or a Common Base Name, such as screen 1, screen 2, and so on.
Click Export.
If all goes well, Elements informs you that it has executed the command.
Click OK.
In Windows Vista, choose Start
Control Panel.Click Appearance and Personalization in the Control Panel window. Under Personalization, click Change Screen Saver.
In the Screen Saver Settings window, choose Photos from the Screen Saver drop-down list. Click Settings.
In the Photos Screen Saver Settings window, select Use Pictures and Videos From. Click Browse and navigate to the folder containing your desired images.
Click OK and Save.
Specify your other options, such as wait time, power settings, and so on.
Click Apply and then OK to close the window. Close the Control Panel window as well.

Mac users can create custom screen savers even easier:
Choose System Preferences from the Apple menu.
Click Desktop & Screen Saver and then click on the Screen Saver tab.
The list of possible screen savers is listed on the left. To choose one of your photos, select the Choose Folder option. Locate the folder with your images and choose your desired image or images.
Specify your options, such as Display Style, if you want the clock to show with the screen saver.
Click Test to see a preview. If you're happy simply close the window by clicking the Close button in the top left.
Everyone knows that a picture is worth a thousand words. Whether you're selling puppies or advertising an open house, adding a photo to an ad or flyer really helps to drive home your message.
Here are the abbreviated steps to quickly create an ad or flyer:
In Edit Full mode, choose File
NewBlank File.In the New dialog box, enter your desired document specifications and then click OK.
Note that you can choose a preset size, such as U.S. Paper, from the Preset drop-down menu.
We recommend entering the final dimensions and resolution for your desired output. If you want to print your ad or flyer on your desktop printer or at a service bureau, a good guideline for resolution is 300 pixels per inch (ppi). For more on resolution and sizing images, be sure to check out Chapter 3. Leave the color mode as RGB and the Background Contents as White.
If you want to fill your background with color, as we did in Figure 18-2, choose Edit
Open your photos and then drag and drop them onto your new canvas with the Move tool. Make sure to choose Window
ImagesCascade to view all your canvases at the same time.Your image is automatically put on a separate layer. For more on layers, see Chapter 8. If you want to use only a portion of the image, as we did with the puppy in Figure 18-2, use your favorite selection method to pluck out your element. For more on selections, see Chapter 7.
Select the Type tool, click the canvas, add your desired text, and then position your type with the Move tool.
Note that your type will also reside on its own layer.
When you're done, choose File
Save.Name your file and choose Photoshop (.PSD) from the Format drop-down menu and make sure that the Layers and Color check boxes are selected.
If you want to take your document to a service bureau or copy shop, such as FedEx Kinko's, you should save your document as a Photoshop PDF (
.pdf) file. That way, you don't have to worry about fonts, compatibility issues, or printing snafus.If you want to save a copy of your ad or flyer in the Organizer in Windows, select the Include in Elements Organizer option. In addition, select Layers, ICC Profile, and Use Lower Case Extension options and click Save. Mac users can choose from the Layers and Embed Color Profile options.

Tip
If you're preparing photos for online auction sites, such as eBay or Yahoo! Auctions, be sure to keep your images at a low resolution — 72 ppi, to be exact — and at 100-percent scale. Save the file as a JPEG to ensure that your file stays lean and mean while preserving colors. Be sure to check the image specifications posted on your online auction site.
Many local copy shops, retail stores, and Web sites (such as Zazzle.com or Cafepress.com) enable you to add photos to T-shirts, hats, tennis shoes, tote bags, ties, mouse pads, and many other items. If you can produce it, they can put a photo on it. But it's easy, and less expensive, to tackle this project yourself.
Buy plain white T-shirts at your local discount store or plain aprons and tote bags at your craft or fabric store. Then, buy special transfer paper at your office supply or computer store. Print your photos on the transfer paper (be sure to flip the images horizontally first), iron the print onto the fabric, and you've got yourself a personalized gift for very little cash.
What do you get for the person who has everything? How about a blanket of memories? You can transfer photos onto patches of fabric and create unique memory quilts. What grandmother wouldn't love to have a quilt with photos of her children and grandchildren?
Tip
Costco, the bastion of everything from A to Z, now sells 54 × 70 inch woven photo blankets for a mere $60.
For special events, important announcements, or maybe just your favorite family photos, you can get posters and large-size prints at many copy shops and service bureaus. Call and talk to a knowledgeable rep at your copy shop or service bureau so that you know exactly how to prepare your file. Here are a few questions to ask:
In addition to printing large prints, many service bureaus mount prints on foam core or the sturdier gator board. These service bureaus also can laminate prints to protect them from scratches and UV rays.
Tip
Again, at Costco, 20 × 30 inch posters sell for $10 while 20 × 24 inch prints on canvas (think wedding gift) sell for around $70.
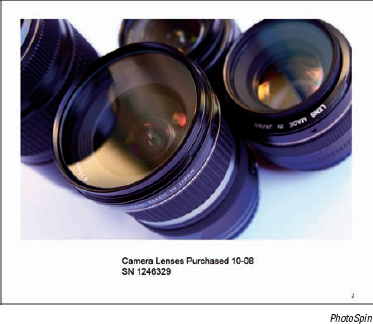
Don't wait for a natural disaster or theft to get you motivated to prepare an inventory of your household or business assets. Take your digital camera and shoot pictures of your items. In Windows, double-click your selected image and add text to describe the items in the caption section of the Organizer. You can also select the image and choose Edit
Then, create a single PDF document from those multiple files by creating a slide show, as shown in Figure 18-3. Chapter 15 explains how to create the slide show PDF.
After the PDF is finished, you can upload the PDF file to a Web storage site, or burn a CD or DVD and place it off-site in a safety deposit box or other secure location. If the need arises, your insurance agent can view the PDF by using the free Adobe Reader software. For more on outputting to slide shows and writing to CD and DVD, see Chapter 15.
Nothing helps to document a process like images. The spoken word and the written word are great, but showing how something comes together is even more effective. Consider using your photographs to help document your projects from beginning to end. Whether it's a project involving home improvement, furniture building, crafts, or cooking, take photos at each stage to record the project. If you're taking a class or workshop and the instructors don't mind, take your camera to class. Documenting the positions or steps of that new yoga, pottery, or gardening class can help you practice or re-create it on your own later, either for yourself or to explain to someone else.
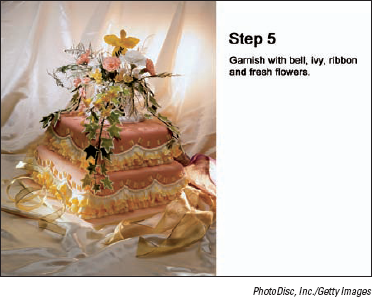
Import your desired photos into the Organizer and create notes on each step of the project in the caption area. You can also create your text on the image itself by using the Type tool in the Editor. Output the images to a PDF (described in Chapter 15), as shown in Figure 18-4.
Tip
Not into killing trees? Not to worry. You don't have to print every project you make. Any file you create can be left as a purely digital file and e-mailed to other users. For details on sharing files, see Chapter 16.
There's nothing like some interesting photos to jazz up the obligatory school report. Doing a botany report? Include some close-ups of a flower with text labels on the parts of the flower. Have to write a paper on the habits of the lemurs of Madagascar? Trek down to your local zoo and have a photo shoot. Create a simple collage of lemurs eating, sleeping, and doing the other things that lemurs do. You can use the Photo Collage command on the Create panel. (See details about this command in Chapter 16.) Or you can create your own custom collage by making selections (see more in Chapter 7) and dragging and dropping them onto a blank canvas. In fact, buying your children their own inexpensive point-and-shoot cameras may give them a little more enthusiasm for school work.
Before you start taking your photos to the next dimension, here are a few extra ideas: Make fun place cards for dinner party guests, create your own business cards or letterhead if you need only a few, design your own bookplates and notepads, or label storage boxes with photos of their contents. Check out www.kodak.com for a slew of projects, such as party kits (from invites to gift tags), kids' mobiles and door hangers, photo recipe cards, and magnets. The possibilities are endless.