Throughout this book, you’ll watch me go back and forth on what was my favorite feature to test. But I can say without a doubt that there was no other feature I wanted to get my hands on more badly than the editor. Hey, it is the one feature that everyone uses all the time. How could I not want to test it and break it?
Chapter 1, focuses on basic editing tips that can be applied for any file type—even a plain text file. This chapter focuses on basic coding tips for any language file. Here, you will find tips for Microsoft IntelliSense, outlining, and code snippets.
This section covers tips you should be aware of when coding. These tips present additional ways to select code, keyboard shortcuts for commenting code, quick mechanisms for formatting your code, and more!
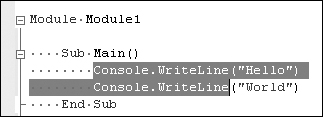
There are numerous ways to select code beyond the standard mouse drag.
The editor offers two different selection models: stream and box. There’s also line selection, but that’s only in Brief emulations. (See Tip 2.15: How to enable Emacs and Brief editor emulations for more information on editor emulations.)
Stream selection, using Shift+Arrow key, is what everyone is familiar with. But box selection allows you to manually select columns and lines at the same time.
Just hold down Shift+Alt+Arrow key and you’ll quickly get the feel for box selection. You can also use box selection using the mouse by holding down the Alt key while you select text. Cut, Copy, Paste still works, but just keep track of where you started to select the text. Ah, the memories of having to test all this functionality.
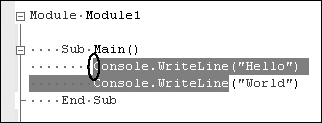
I hope this tip’s title makes sense. The idea is that you select some text and then hit Escape. Now where do you want the cursor to go?

If you want it to stay where it is, that’s the default behavior. But if you want it to jump to the beginning of the selection (that is, the selection anchor), go to Tools–Options–Text Editor–General and check Go To Selection Anchor After Escape.
See Tip 1.16: How to navigate forward and backward in the editor all because of go-back markers for more information about go-back markers.
The keyboard shortcut used to select code from the current cursor location to the last go-back marker is Ctrl+=, and the command is Edit.SelectToLastGoBack.
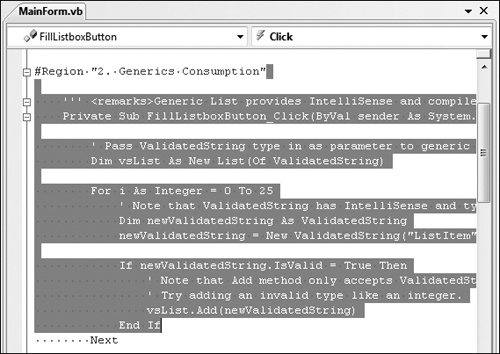
In the previous graphic, I started the cursor at the end of the #Region line and then clicked the mouse about 17 lines down to drop a go-back marker. Then I pressed Ctrl+= to select all the text back to the last go-back marker.
Now that you know how to quickly select code, you can quickly comment or uncomment the selected lines through keyboard shortcuts.
Ah, it really is the simple things in life, isn’t it?
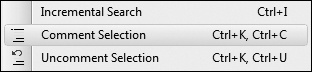
Use Ctrl+K, Ctrl+C to comment code and Ctrl+K, Ctrl+U to uncomment code. All the default development settings have these commands bound to these keyboard shortcuts.
You can find these commands under the Edit–Advanced menu as shown here:
You can have more control over your cut-and-paste scenarios, whether you are cutting code from a Web site and pasting it into your editor or pasting code into your favorite blog editor. This section presents numerous ways to quickly format your code as needed for a particular language.
Important
To enable guidelines, you need to modify your registry settings. Please be aware that you use guidelines at your own risk and should do so only if you are comfortable modifying your registry settings. You will need to restart Visual Studio after modifying the registry for the changes to take affect.
Go to HKEY_CURRENT_USERSoftwareMicrosoftVisualStudio9.0Text Editor.
Create a String (RG_SZ) key called Guides.
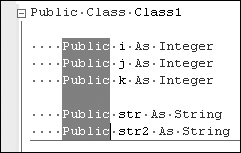
The value is in the format of RBG(x,y,z) n1,...,n13, where x,y,z are the RBG values and n is the column number. You can have at most 13 guidelines. For example, RBG(255,0,0) 5,20 will put two red guidelines at column positions 5 and 20, as illustrated here:
Ever been typing in the editor and, for whatever reason, the text isn’t indented properly on the line? Instead of manually pressing Backspace or Tab for each line of text, just press Ctrl+K, Ctrl+D, which performs the Format Document command.
For larger files, you might just want to select the region that isn’t justified correctly and use Ctrl+K, Ctrl+F. This keyboard shortcut formats the current line if you have nothing selected.
These commands are found under the Edit–Advanced menu.
Go to Tools–Options–Text Editor–<Language>–Tabs to switch between using tabs and inserting spaces.
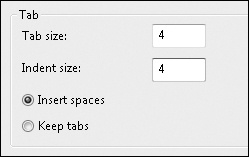
Note that you can set this for all languages on the Text Editor–All Languages page, but usually this is something you want to set for each individual language.
There are four commands that involve converting spaces to tabs and tabs to spaces. The first two commands are found on the Edit–Advanced menu:
Tabify Selected Lines. Replaces the leading white space on a line that contains the selection with tabs.
Untabify Selected Lines. Replaces the leading white space on a line that contains the selection with spaces.

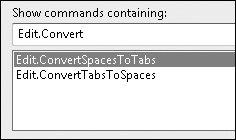
The last two commands are not found on the Edit menu but are available for you to either bind to a keyboard shortcut or manually add to the Edit menu or Text Editor toolbar:
Edit.ConvertTabsToSpaces. Converts selected white space to spaces.
Edit.ConvertSpacesToTabs. Converts selected white space to tabs.
Note that you may have to uncheck Tools–Options–Text Editor–Basic–VB Specific–Pretty Listing (Reformatting) of Code to use Edit.ConvertTabsToSpaces and Edit.ConvertSpacesToTabs.
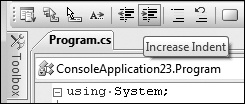
With either a single line or several lines selected, you can use either the Increase Indent or Decrease Indent command found on either the text editor toolbar or the Edit–Advanced menu (where it is listed as Increase/Decrease Line Indent).
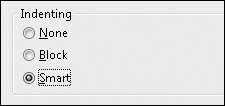
Smart indenting is the option you want, provided you want the cursor to be properly indented whenever you press Enter or the up and down arrows in the code. An example is when you create a new method called Method1() and then hit Enter. You’ll notice the cursor automatically indents itself. If you continue to hit Enter, the cursor will remain indented. Not all languages support this smart indenting, but if the language you’re using does, this should be the default setting for that language.
Block indenting is similar to a document editor. Using Visual Basic as an example, the difference here is when you type in Method1() and hit Enter, only that first new line is automatically indented. The next new line places the cursor at column 0.
Selecting None will not indent any new lines. You will have to indent everything manually.
Take control of outlining, whether you want to quickly collapse or expand your code, or remove it altogether.
There are five commands for outline toggling; they can be found on the Edit–Outlining menu.
Toggle Outlining Expansion
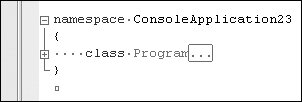
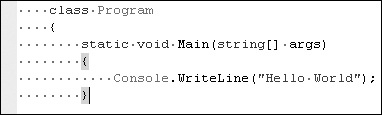
By pressing Ctrl+M, Ctrl+M anywhere within the code block, you can toggle between collapsing a given block of code (as shown here)
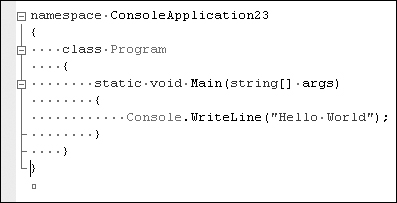
and expanding it (as shown next)
Toggle All Outlining
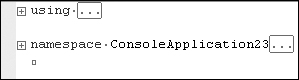
By pressing Ctrl+M, Ctrl+L anywhere in the editor, you can toggle between collapsing and expanding the entire file.
Completely collapsed:
Stop Outlining
By pressing Ctrl+M, Ctrl+P anywhere in the editor, you can turn off outlining.
Start Automatic Outlining
Unfortunately, start outlining and stop outlining are not the same command, so you can’t toggle between one state and the other. Additionally, using the General Development Settings, start outlining is not bound to a keyboard shortcut. So you need to go to Edit–Outlining–Start Automatic Outlining to turn on outlining again.
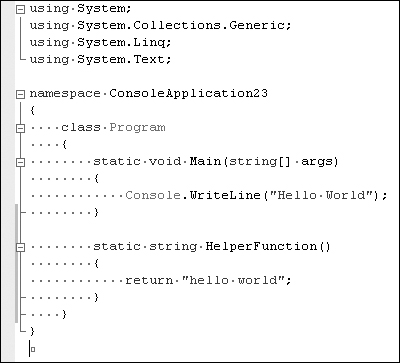
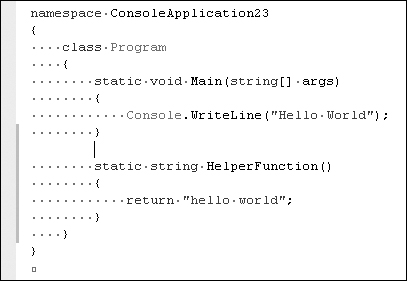
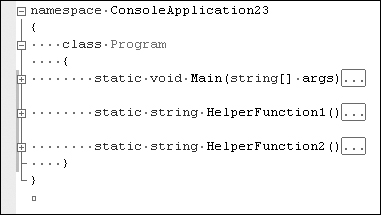
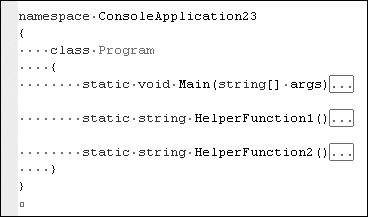
In my opinion, Collapse To Definitions is is the most useful of all the outlining commands (mostly because it was the only one I used, except for when I had to test the others). This command allows you to quickly glance at all of your functions.
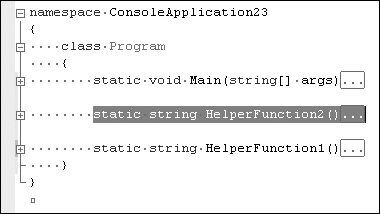
With a block of code collapsed, as indicated to the right of the code lines shown in the preceding illustration, select the block and cut or just cut the line via your favorite mechanism for cutting a line. Now navigate to the desired location and paste.
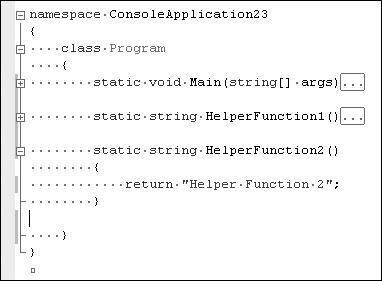
Note the code will be automatically expanded upon pasting.
The idea behind this tip is that you want to quickly cut and paste an entire function, but the function is quite long. You can use the approach shown in the previous tip (specifically, Ctrl+M, Ctrl+M to toggle between expanding and collapsing a block of code) to collapse the function to just the function name. Then press Ctrl+L to cut the current line. Now you can paste the function wherever you want.
Back in the day, during a summer research program at the University of Massachusetts, I was fortunate enough to use GNU Emacs every day all summer long. I use the word "fortunate" because five years later, I would be trying to "page-in" everything I learned about Emacs to test the Emacs editor emulations in Visual Studio.
The other emulation I tested was Brief. I didn’t have any prior experience with Brief, so I was on my own to take a crash course. Fortunately, there was someone in the Visual Studio building who had used Brief, so I got to bounce a lot of ideas and questions off of him. However, this meant that I had to learn three different sets of keyboard shortcuts! I decided to cycle through the editor emulations, where one week I focused on Emacs, the next week I focused on Brief, and then I had a sanity-check week with the default editor. It was a very confusing time for my muscle memory.
But don’t get me wrong, testing editor emulations was a tester’s corner case heaven. Having been a program manager for a couple of years now, I completely understand what I put the developer and the program manager through by having them figure out what to do with all those bugs I found. But, it was still pure joy.
In Visual Studio 2005, we introduced Emacs and Brief emulations into the editor.
Go to Tools–Options–Environment–Keyboard, and then drop down the Apply The Following Additional Keyboard Mapping Scheme list. Then choose either Brief or Emacs.
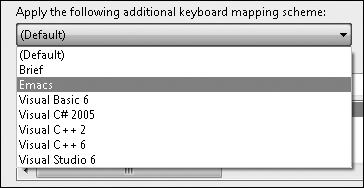
To return to the standard editor, just select (Default).
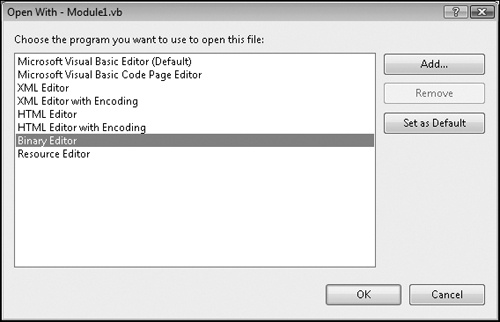
You can use the binary editor to edit any resource, provided you want to edit it bit by bit. Yes, I came up with this bad joke all by myself.
Ever needed a quick visual check to ensure you are lining up your code correctly? You can use the Automatic Delimiter Highlighting and Brace Matching features to give you that visual cue.
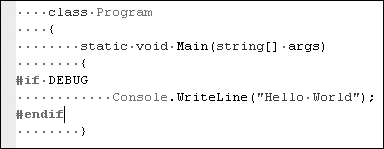
Whenever you have code construct pairs (that’s what the documentation calls them), when you finish typing either the start or end pair, both pairs of words become bold. To turn off this feature, go to Tools–Options–Text Editor–General and uncheck Automatic Delimiter Highlighting.
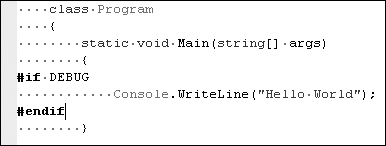
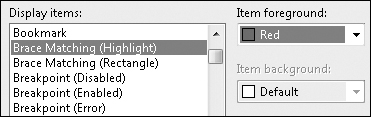
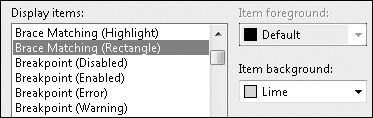
You can customize the color for the bolding by going to Tools–Options–Environment–Fonts And Colors and selecting Brace Matching (Highlight).
And now the #if and #endif appear in bold and in red.
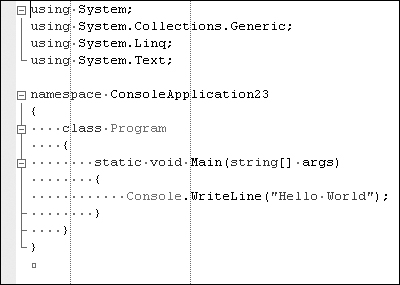
C# provides several interesting features for getting control back over your using statements.
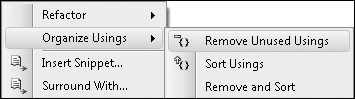
In C#, there’s the option to remove any of your unused using statements. This option is especially helpful if you’re reusing some sort of template over and over again. Instead of having to comment out each line, compile, see whether the compile was successful, and then either remove or uncomment the line, you can bring up the editor context menu (just right-click in the editor) and choose Organize Usings–Remove Unused Usings. This will do all the hard work for you.
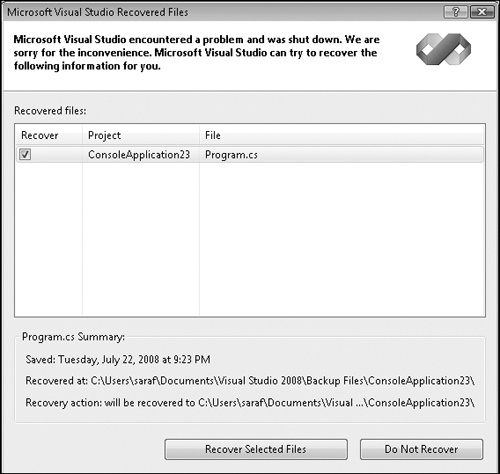
Visual Studio provides an AutoRecover feature to keep you going in the case of an unexpected shutdown, power failure, or some other unfortunate event.
Under Tools–Options–Environment, you’ll find the AutoRecover page.
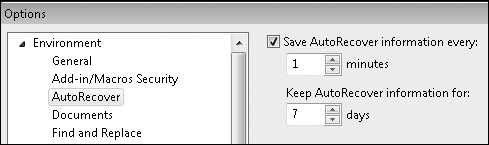
Note that you can opt out of the AutoRecover feature by unchecking the Save AutoRecover Information Every check box.
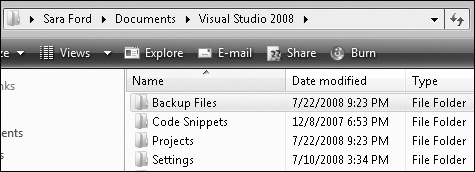
The rest of the page is self-explanatory, but did you know where Visual Studio saves these autorecovered files? They are saved in My DocumentsVisual Studio <version>Backup Files<projectname>.
In case you (hopefully) have never seen the AutoRecover dialog box, here’s what it looks like. It’ll pop up the next time you launch Visual Studio after an unexpected shutdown. You have the options to either use the backup files or ignore them.
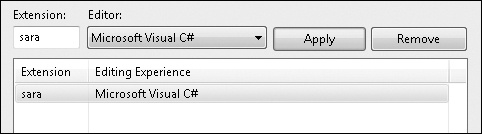
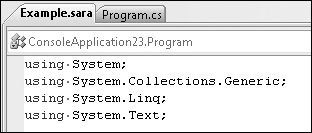
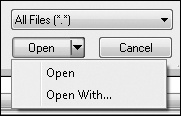
If you ever find yourself editing source code files that use a different file extension, it’s good to know that you can still get syntax highlighting.