
Understanding Project Structure
Congratulations again! You created your first application. You even did it without coding. It's nice that the ADT provides you with the tools to fire up a quick application, but that's not going to help you create your next blockbuster application. The beginning of this chapter walks you through how to create a boilerplate Android application with the New Android Project wizard. From here on, you will use that application's file structure that the Android wizard created for you.
 The following sections discuss the files and folders in this structure. You shouldn't skim these sections — trust me, they're important! — because you spend your entire Android development career navigating them. Understanding what they do and how they got there is a key aspect of understanding Android development.
Navigating the app's folders
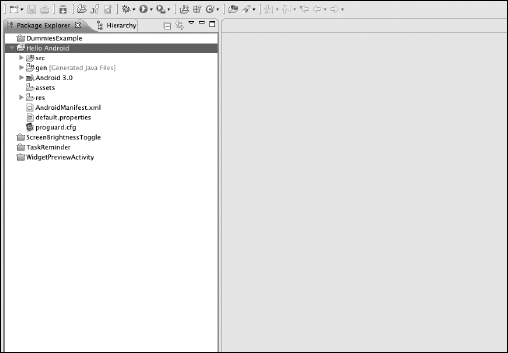
In Eclipse, click the Package Explorer tab and this will display the Hello Android project's folder structure so that it resembles Figure 5-20.
When the Hello Android project's file structure is expanded, the list of subfolders includes
- src: This folder contains the Java source code for your project.
- gen: This folder contains generated code that Eclipse contains.
- The Target Android library folder (in this case, Android 3.0): This folder includes the android.jar file, which is the current version of Android.
- assets: This folder stores data files and other application “assets.”
- res: This folder contains the bitmap, layout, and additional string resources your application utilizes.
Figure 5-20: The Package Explorer with the Hello Android project folder structure expanded.
These folders aren't the only ones that you can have inside an Android project, but they're the default folders created by the New Android Project wizard. Other folders include bin, libs, and referenced libraries.
You won't see the bin folder initially, because in the latest version of the ADT it's hidden from view. (This may change in future versions of the ADT.) The libs and referenced libraries folders don't show up until you add a third-party library and reference it in your project. I cover this process in detail later in this chapter.
Also in this project are two files:
- AndroidManifest.xml: This file helps you identify the components that build and run the application.
- default.properties: This file helps you identify the default properties of the Android project (such as Android version).
I discuss all these folders and files in the following sections.
Source (src) folder
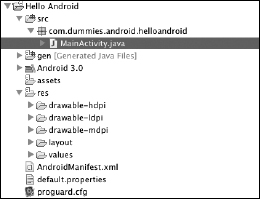
The source folder — known as the src folder in Android projects — includes your stub MainActivity.java file, which you created in the New Android Project wizard earlier in this chapter. To inspect the contents of the src folder, you must expand it. Follow these steps:
- Select the src folder, and click the small arrow to the left of the folder to expand it.
You see your project's default package: com.dummies.android.helloandroid.
- Select the default package, and expand it.
This step exposes the MainActivity.java file within the com.dummies.android.helloandroid package, as shown in Figure 5-12.
Figure 5-21: The expanded src folder.
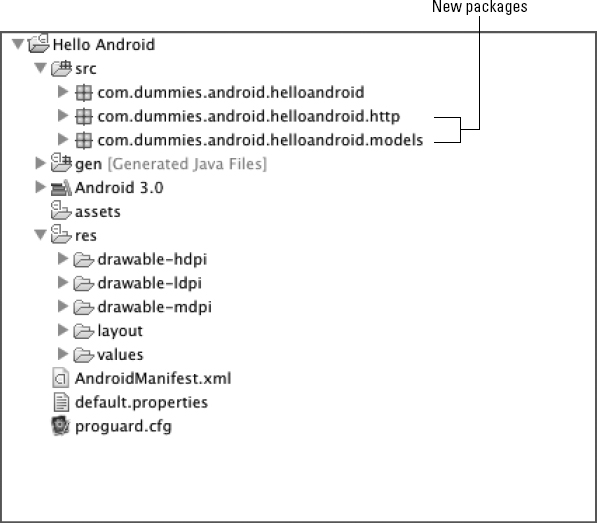
 You aren't limited to a single package in your Android applications. In fact, separating different pieces of core functionality in your Java classes into packages is considered to be a best practice. For example, if you had classes whose responsibility was to communicate with a Web API through eXtensible Markup Language (XML), you could combine them into a single package. And if your application had several customer domain model classes represented by Customer objects that were retrieved through the Web API classes, you could combine those classes into a single package, too. Then you would have two additional Java packages in your Android app:
- com.dummies.android.helloandroid.http: Containing the HTTP-related Java classes (Web APIs)
- com.dummies.android.helloandroid.models: Containing the domain model Java classes
An Android project set up this way would look similar to Figure 5-22.
Target Android Library folder
I know — I skipped the gen folder! I delve into that folder later, when I discuss the res folder. For now, I want to focus on the Target Android Library folder, which isn't really a folder per se, but is more along the lines of an item in Eclipse generated as a symbolic link through the ADT. This item simply gives you a visual queue to what Android framework you're targeting.
Figure 5-22: Java classes organized into multiple packages within the src folder.
This item includes the android.jar file that your application builds against. The version of this file was determined by the build target that you chose in the New Android Project wizard. Expanding the Android 3.1 item in the project exposes the android.jar file and its installation path, as shown in Figure 5-23. The android.jar file is the android framework.
Figure 5-23: The Android 3.0 version of the android.jar file with its location.
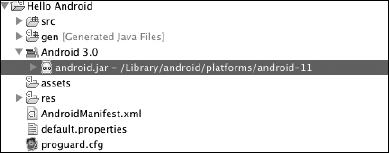
You may notice that the SDK is installed in the /Library/android/ folder, which illustrates the fact that you don't have to install the SDK in any given location. It can go anywhere in your file system (on Windows, Mac OS X, or Linux).
Assets (assets) folder
The assets folder is empty by default. This folder is used to store raw asset files.
A raw asset file could be one of many assets you may need for your application to work. A great example would be a file that contains data in a proprietary format for consumption on the device. Android has the Asset Manager class, which can return all the assets currently in the assets directory. Upon reading an asset, your application would consume the data in the file. If you were to create an application that had its own dictionary for word lookups (for autocomplete, perhaps), you may want to bundle the dictionary into the project by placing the dictionary file (usually, an XML or binary file such as a SQLite database) in the assets directory.
Android treats assets as a raw approach to resource management (think bits and bytes). You aren't limited in what you can place in the assets directory. Note, however, that working with assets can be a little more tedious than working with resources (see the next section), because with assets you're required to work with streams of bytes and to convert them to the objects you're after — audio, video, text, and so on. For detailed information on assets, please see the Android documentation here: http://d.android.com/guide/topics/resources/index.html.
Assets don't receive resource IDs like resources in the res directory. You have to work with bits, bytes, and streams manually to access the contents.
Resources (res) folder
The res folder contains the various resources for your application. Always externalize any resources (such as strings and images) that your application needs. As an example, instead of placing strings inside your code, you can create a string resource and reference that resource from within the code. (I show you how to do this in Chapter 9.) Group such resources in the res subdirectory that suits them best.
Make sure to provide alternative resources for specific device configurations by grouping them in specifically named resource directories. At run time, Android determines which configuration the application is running in and chooses the appropriate resource (or resource folder) from which to pull its resources. By structuring your resources this way, you can provide different user interface (UI) layouts for different users' screen sizes, or display different strings according to the user's language setting, for example.
After you externalize your resources, you can access them in code through resource IDs that are generated by the ADT in the R class (see “The mysterious gen folder,” later in this chapter.
You should place each resource in a specific subdirectory of your project's res directory. The subdirectories listed in Table 5-1 are the most common types of resource folders under the parent res directory.
Table 5-1 Supported Subdirectories of the res Directory
 Never save resource files directly in the res directory — always place them in a subdirectory. If you fail to do this, a compiler error occurs.
The resources that you save in the resource folders listed in Table 5-1 are known as default resources — that is, they define the default design and layout of your Android application. Different types of Android-powered devices may need different resources, however. If you have a device with a larger-than-normal screen, for example, you need to provide alternative layout resources to account for the difference.
The resource/ mechanism inside Android is very powerful, and I could easily write a small book on it alone, but I'm going to cover only the basics in this book to get you up and running. The resource/ mechanism can help with internationalization (enabling your app for different languages and countries), device size and density, and even resources to determine the orientation that the tablet may be in. If you want to dive into the ocean that is resources, you can find out more about them by reviewing the “Providing Resources” section in the Dev Guide of the Android documentation, located at http://d.android.com/guide/topics/resources/providing-resources.html.
Bin, Libs, and Referenced Libraries folders
Did I say ribs? No! I said libs, as in libraries. Even though this folder (the libs directory) isn't shown in the display of your Hello Android application's file structure, you need to be aware of it anyway. The libs directory contains private libraries and isn't created by default. If you need it, you have to create it manually by right-clicking the project in the Package Explorer and choosing Folder from the context menu. Eclipse asks you for the name of the folder and the name of the parent folder. Choose Hello Android, type libs, and click Finish.
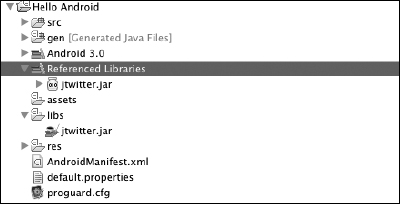
The private libraries storied in the libs/ directory usually are third-party libraries that perform some function for you. A good example is jTwitter, a third-party Java library for the Twitter API. If you were to use jTwitter in your Android application, you would need to place the jtwitter.jar library in your libs directory.
After a library is placed in the libs directory, you need to add it to your Java build path — the class path that's used for building a Java project. If your project depends on another third-party or private library, Eclipse should know where to find that library, and setting the build path through Eclipse does exactly that. For example, you can add the jtwitter.jar library to your build path easily by right-clicking the jtwitter.jar file and choosing Build Path![]() Add to Build Path from the context menu. When you do this, the Referenced Libraries folder, as shown in Figure 5-24, is created. This folder exists to let you know what libraries you have referenced in your Eclipse project.
Add to Build Path from the context menu. When you do this, the Referenced Libraries folder, as shown in Figure 5-24, is created. This folder exists to let you know what libraries you have referenced in your Eclipse project.
You can find out more about jTwitter at www.winterwell.com/software/jtwitter.php.
Figure 5-24: The Referenced Libraries folder with jtwitter.jar.
I don't use the libs directory in an examples in this book, but I discuss it here because developers — myself included — commonly use third-party libraries in Android applications. This information may be useful if you ever need to reference a library in your own Android project.
The mysterious gen folder
Ah, you finally get to witness the magic that is the gen folder. When you create your Android application, before the first compilation, the gen folder doesn't exist. Upon the first compilation, ADT generates the gen folder and its contents.
The gen folder contains Java files generated by ADT. The ADT creates an R.java file (more about this in a moment). I cover the res folder before the gen folder because the gen folder contains items that are generated from the res directory. Without a proper understanding of what the res folder is and what it contains, you have no clue how to use the gen folder.
Because you've externalized the resources in your Java code, you will eventually need to reference these items in the res folder. You do this by using the R class. The R.java file is an index to all the resources defined in your res folder. You use this class as a shorthand way to reference resources you've included in your project. This approach is particularly useful with Eclipse, whose code-completion features allow you to quickly identify the proper resource.
Expand the gen folder in the Hello Android project and the package name contained within the gen folder. Now open the R.java file by double-clicking it. You can see a Java class that contains nested Java classes. These nested Java classes have the same names as some of the res folders defined in the preceding res section. Under each of those subclasses, you can see members that have the same names as the resources in their respective res folders (excluding their file extensions). The code in your Hello Android project's R.java file should look similar to this:
/* AUTO-GENERATED FILE.  DO NOT MODIFY.
 *
 * This class was automatically generated by the
 * aapt tool from the resource data it found.  It
 * should not be modified by hand.
 */

package com.dummies.android.helloandroid;

public final class R {
    public static final class attr {
    }

    public static final class drawable {
        public static final int icon=0x7f020000;
    }
    public static final class layout {
        public static final int main=0x7f030000;
    }
    public static final class string {
        public static final int app_name=0x7f040001;
        public static final int hello=0x7f040000;
    }
}
Whoa, what's all that 0x stuff? I'm happy to tell you that you don't need to worry about it. The ADT tool generates this code for you so that you don't need to think about what's happening behind the scenes. As you add resources and the project is rebuilt, ADT regenerates the R.java file to contain members that reference your recently added resources.
Never edit the R.java file by hand. If you do, your application may not compile, and then you're in a whole world of hurt. If you accidentally edit the R.java file and can't undo your changes, just delete the gen folder and build your project by choosing Project![]() Clean. At this point, ADT regenerates the R.java file for you.
Clean. At this point, ADT regenerates the R.java file for you.
Viewing the application's manifest file
You keep track of everything you own and need through lists, don't you? Well, that's exactly what the Android manifest file does. It keeps track of everything your application needs, requests, and uses to run.
The Android manifest file is stored at the root of your project and is named AndroidManifest.xml. Every application must have an Android manifest file in its root directory.
The application manifest file provides all the essential information to the Android system — information that it must have before it can run any of your application's code. The application manifest file also provides the following:
- The name of your Java package for the application, which is the unique identifier for your application in the Android system as well as in the Android Market
- The components of the application, such as the activities and background services
- The declaration of the permissions your application requires to run
- The minimum level of the Android API that the application requires
The Android manifest file declares the version of your application. You must version your application. How you version your application is very similar to how the Android OS is versioned. Determining your application's versioning strategy early in the development process, including considerations for future releases of your application, is important. The versioning requirements are that each application have a version code and version name. I cover these values in the following sections. I cover versioning in more detail in Chapter 10.
Version code
The version code is an integer value that represents the version of the application source code. This value helps other applications determine their compatibility with your application. Also, the Android Market uses the version code as a basis for identifying the application internally and for handling updates.
You can set the version code to any integer value you like, but you should make sure that each successive release of your application has a version code greater than the previous one. The Android system doesn't enforce this rule; it's a best practice to follow.
Typically, on your first release, you set your version code to 1. Then you monotonically increase the value in a given order with each release, whether the release is major or minor. This means that the version code doesn't have a strong resemblance to the application release version that's visible to the user, which is the version name (see the next section). The version code typically isn't displayed to users in applications.
Upgrading your application source code and releasing the app without incrementing your version code causes different code bases of your app to be distributed under the same version. Consider a scenario in which you release your application with version code 1. This is your first release. A user installs your application through the Android Market and notices a bug in your application, and she lets you know. You fix the bug in the code, recompile, and release the new code base without updating the version code in the Android manifest file. At this point, the Android Market doesn't know that anything has changed because it's inspecting your version code in the application manifest. If the version code had changed to a value greater than 1, such as 2, the Market would recognize that an update had been made and would inform users who installed the version-code 1 app that an update is available. If you didn't update the version code, users would never get the update to your code base, and they would be running a buggy app. No one likes that!
Version name
The version name is a string value that represents the release version of the application code as it should be shown to users. The value is a string that follows a common release-name nomenclature that describes the application version:
An example of this release-name nomenclature is 2.1.4 or, without the <point> value (4, in this case), 2.1.
The Android system doesn't use this value for any purpose. This value is only used to help users distinguish between versions.
The version name may be any other type of absolute or relative version identifier. The Foursquare application, for example, uses a version-naming scheme that corresponds to the date. An example of the version application name is 2011–06–08, which clearly represents a date. The version name is left up to you. You should plan ahead and make sure that your versioning strategy makes sense to you and your users.
Permissions
Assume that your application needs to access the Internet to retrieve some data. Android restricts Internet access by default. For your application to have access to the Internet, you need to ask for it.
In the application manifest file, you must define the permissions your application needs to operate. Table 5-2 lists some of the most commonly requested permissions. Permissions are covered in more detail in Chapter 15.
Table 5-2 Commonly Requested Application Permissions
| Permission | Description |
| Internet | The application needs access to the Internet. |
| Write External Storage | The application needs to write data to the Secure Digital Card (SD Card). |
| Camera | The application needs access to the camera. |
| Access Fine Location | The application needs access to the Global Positioning System (GPS) location. |
| Read Phone State | The application needs to access the state of the phone (such as ringing). |
Viewing the default.properties file
The default.properties file is used in conjunction with ADT and Eclipse. It contains project settings such as the build target. This file is integral to the project, so don't lose it!
The default.properties file should never be edited manually. To edit the contents of the file, use the editor in Eclipse. You can access this editor by right-clicking the project name in the Package Explorer and choosing Properties from the context menu. Doing this opens the Properties editor, shown in Figure 5-25.
Figure 5-25: The Properties editor in Eclipse.
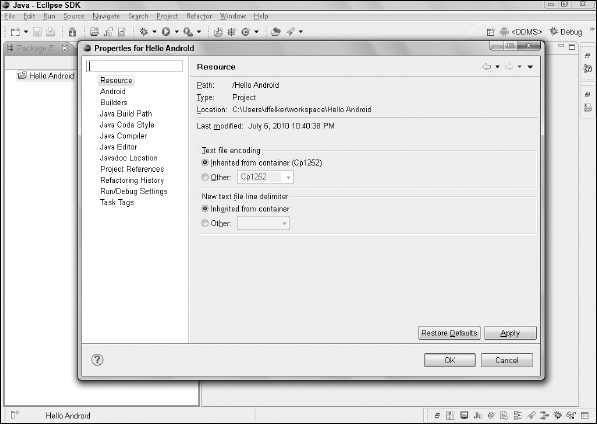
This editor allows you to change various properties of the project by selecting any of the options on the left. You could select the Android property and change the path to the Android SDK, for example.