
![]()
Automating Your Workflow with Node.js and Grunt
Insanity: doing the same thing over and over again and expecting different results.
—Albert Einstein
As developers, we tend to do a lot of repetitive tasks. We are constantly compiling code, packaging it, and deploying it to different places. As the project scales, the complexity of these processes continues to grow. If there is one constant among humans, it’s that we are not great at doing repetitive tasks, especially complex ones. Sure, we can do one single task over and over again, but anything more complicated, and the system quickly breaks down. This isn’t anything new; Henry Ford realized it when he took advantage of the assembly line to lower the cost of making cars. We can do the same thing for our own code by taking advantage of automation.
Automating Your Workflow
If you come from working with other programming languages, such as Java or ActionScript, the idea of automation may not be alien to you. When compiled, these languages rely on Java, and, as such, it is easy to integrate them into build-script languages, which are built on the same languages, such as Ant, Maven, and even Scala. As JavaScript developers, we can take advantage of Node.js to handle the running of all our automation scripts. Node.js is incredibly powerful, and, when paired with a build system, such as Grunt, , we can attain results similar to those other languages.
Right now you may be thinking, “How can a build script help me with my game?” JavaScript isn’t compiled like Java, and, in order to package it, you simply upload it to the server. However, if you have tried to support multiple platforms before, or looked for ways to compress and optimize your code, you know that there is more involved than just sending your code up to a server via file transfer protocol (FTP) to get it running. Let’s take a look at some of the unique advantages to automating your workflow, which will be the focus of this chapter.
Optimize and package your game: Games are the biggest abusers of resources when running. Games usually have thousands of lines of code, hundreds of assets, and lots of additional files that need to be loaded at runtime. You can minimize and compress your game’s code to shrink its size and combine the requested files to cut down on load time.
Deploy to multiple platforms: HTML5 games live in more than one place nowadays. You may want to publish the game to your server, submit it to a Web store, or put it in a wrapper to run natively.
Create a reproducible build process: If you are working as part of a large team, or even on your own, you will want to make sure that you can quickly set up and run the game’s code at the same time whenever you set up a project from scratch or share it with another developer.
As you can see, there is a lot that you can take advantage of with automated build scripts, but it’s not easy work. It requires you to sit down and map out your process and how to optimize that process. In this chapter, I will walk you through the basics of how I create my own build scripts and give you suggestions on how to apply these solutions to your own project. To get started, you will need to download and install Node.js.
Installing Node.js
One of the reasons I picked Node.js to build my automation solution was because of how easy it is to install locally. When most people hear “Node,” they think “server side.” Little do they know that Node.js features a powerful command-line integration with an operating system (OS) that can be run locally. Moreover, Node.js runs on Windows, MacIntosh, and Linux, making it ideal for any developer’s coding platform of choice. To get started, you will need the correct installer for your OS. You can get it from the official Node.js web site (http://nodejs.org). As you can see in Figure 23-1, you simply click the Downloads button, and the site will automatically detect your OS.
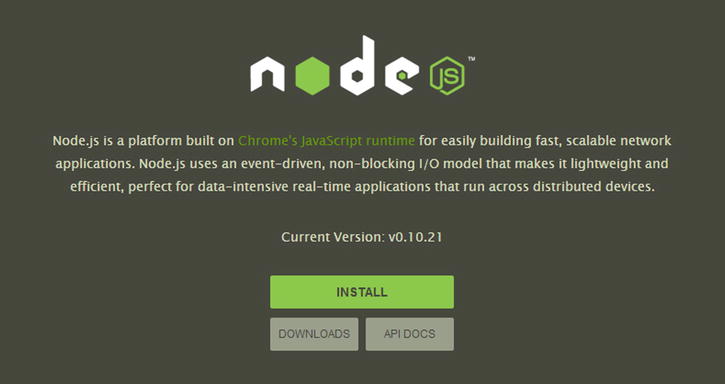
Figure 23-1. You can get the latest build of Node.js at http://nodejs.org
Once the installer has downloaded, run through the installer wizard, leaving the default settings, as shown in Figure 23-2.
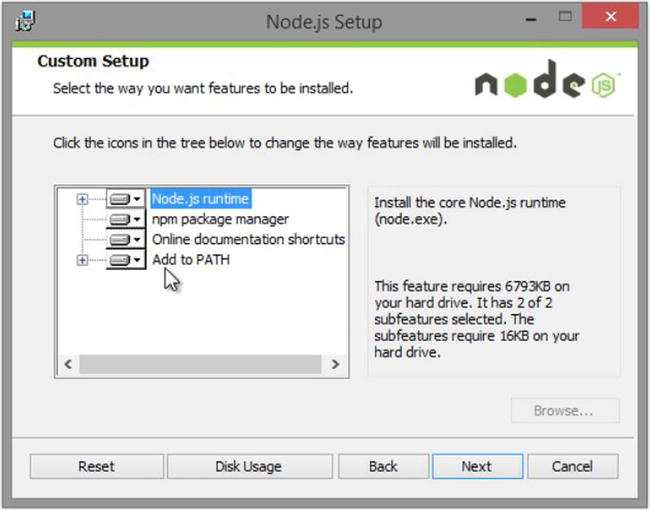
Figure 23-2. Make sure to install all the default features so that Node.js works properly for your build script project
There is one important thing to note if you are on Windows. I am not a big fan of the command prompt on Windows, because I come from a Linux background. That being said, I have had great success with Git Bash, which comes installed with Git. You can get them both from http://git-scm.com. If you want to use a Bash command line for Node.js on Windows, it is critical that you install Git Bash before Node.js.
Once you start the installation process, there are two things that you will want to make sure to configure. The first is Windows Explorer integration, which you will enable with the Git Bash Here option, as demonstrated in Figure 23-3.
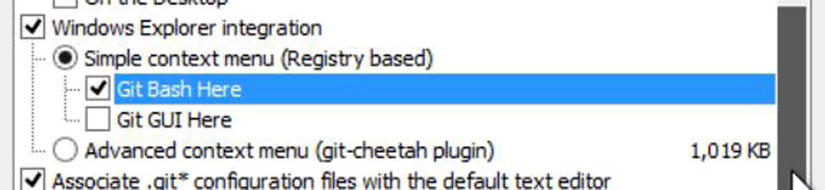
Figure 23-3. Make sure to add the Git Bash Here option when installing Git Bash
This allows you to right-click any folder and open Git Bash in that directory. This saves you a bit of time, as opposed to trying to find it via the command line. Next, you must adjust the PATH environment by selecting the Use Git Bash only option, as shown in Figure 23-4.
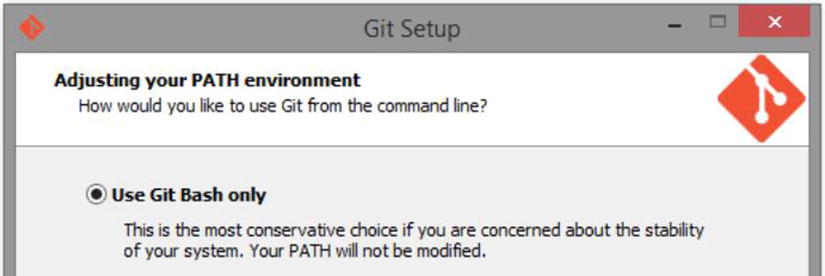
Figure 23-4. This will make Git Bash the default command prompt for Git and the other command-line tools that you will be using in this chapter
This option will ensure that Git Bash is your main application (app) for running Git and Node.js (once you have it installed) from the command line. For the rest of this chapter, I will be using Git Bash on Windows. If you are on a Mac, because it uses Bash by default in the Terminal, everything should be the same.
By now, you should have Node.js installed on your computer. Simply open Git Bash on Windows, or Terminal on Mac; enter the following command at the prompt; and then press Enter:
>npm
You should see something similar to the screen shown in Figure 23-5.
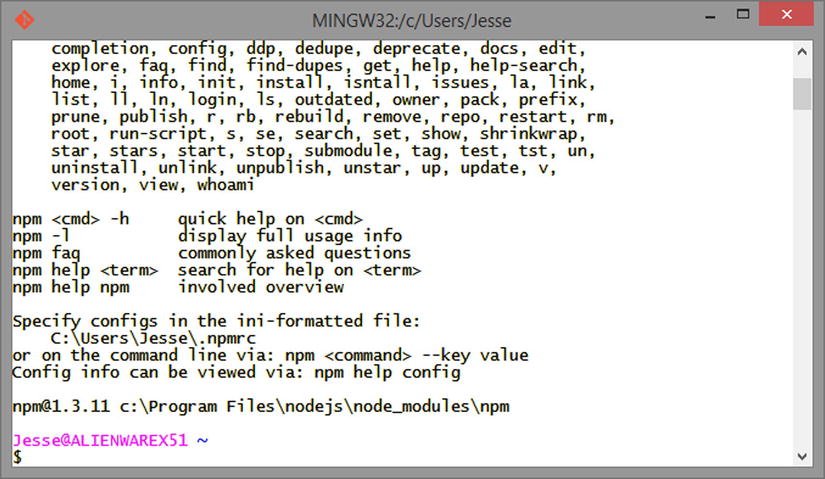
Figure 23-5. If you don’t pass npm any commands, it will print out the instructions
Here, you are just testing that Node Package Manager (npm) is working and correctly installed. If you don’t see instructions to run npm, you may need to restart your computer or try reinstalling Node.
I could have brought this up at the beginning, but I didn’t want to scare you off. If you haven’t noticed by now, you will be using the command line a lot for running your build script. Some people are terribly afraid of the command line, so I thought I would just cover the basics here. The first thing to keep in mind is that nothing bad will happen, so long as you take your time and are careful about what you enter at the prompt. The command line is an incredibly powerful tool, and, as a Web developer, you should become very familiar with it, especially as you go deeper into code automation and working with servers. For reference, Table 23-1 contains a few of the most common Bash commands that you will be using plus descriptions of how they work:
Table 23-1. Common Bash Commands and Examples
Action |
Command |
Description |
|---|---|---|
Print working directory |
> pwd |
This will show you your current path on the file system. |
List contents of directory |
> ls |
This will let you see everything inside the current directory you are in. |
Change directory |
> cd /path/to/new/folder |
This will let you navigate into a new folder. |
Go back |
> cd ../ |
This navigates back one directory. |
Make new folder |
> mkdir FOLDER_NAME |
This allows you to make new folders on the file system. |
Delete |
> rm FILE_TO_DELETE |
This allows you to delete and file a folder on the system. |
Delete all files |
> rm –rf FOLDER_TO_DELETE |
If you are trying to delete a directory with multiple files and folders inside it, you will need to force it to perform the delete recursively. |
Clear console |
> clear |
This command will clear the console window. |
Stop running command |
Ctrl+C |
Some commands that you run will require input or will continuously run and need to be stopped manually. |
There are lots of great resources on the Web that cover how the command line works. It’s important to note that these are Bash commands, so if you are not using Git Bash on Windows, and instead favor the default command line, some of these will be different.
To get your feet wet, let’s create a new folder for your test project. In the command line, you will use the following commands to create a new directory, move into it, and then make sure that you are in the right place:
> mkdir NodeSampleProject
> cd NodeSampleProject
> pwd
You can see these commands being run in Figure 23-6.
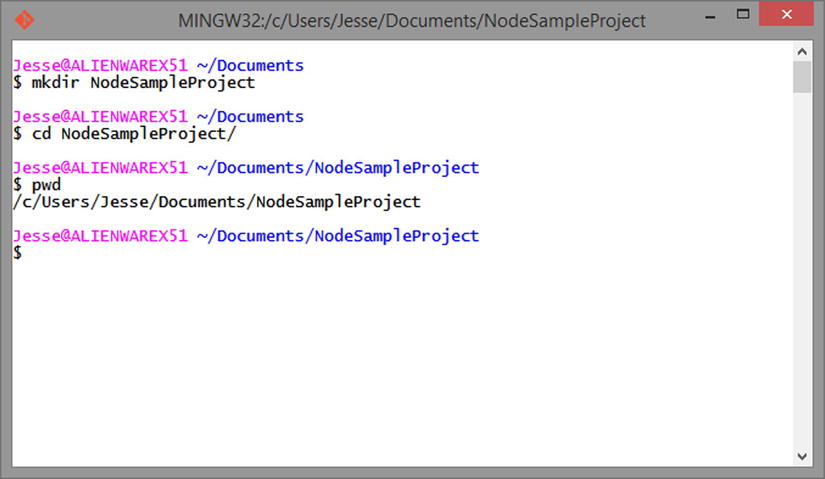
Figure 23-6. Here, you can see that you have created a new directory, navigated into it via the cd command, and printed the working directory to make sure that you are in the right place
Now that I have covered installing Node.js and how to use the command line, you are ready to look at npm, which is at the core of Node. npm allows you to add new features and functionality to your vanilla installation of Node.js. On its own, Node doesn’t do much outside of allowing you to run it via the command line. There are literally hundreds of packages that you can download from http://npmjs.org that can be added to Node to make it more powerful. It is really easy to install new packages. You simply use the following command:
> npm install PACKAGE_NAME
Over the rest of this chapter, I will discuss different types of packages that you will need to install to create more powerful build scripts. The biggest advantage that npm affords is its ability to help you manage your package dependencies. By tracking which packages you install in your project, it becomes easier to share this list with other team memebers or reinstall a specific version when setting up a project from scratch. To do this, you will have to create a package JavaScript Object Notation (JSON) file for your own project. At this point, you should be inside the new folder that you created in the previous section. Run the following command to activate npm’s project setup wizard:
> npm init
You should see the screen displayed in Figure 23-7.
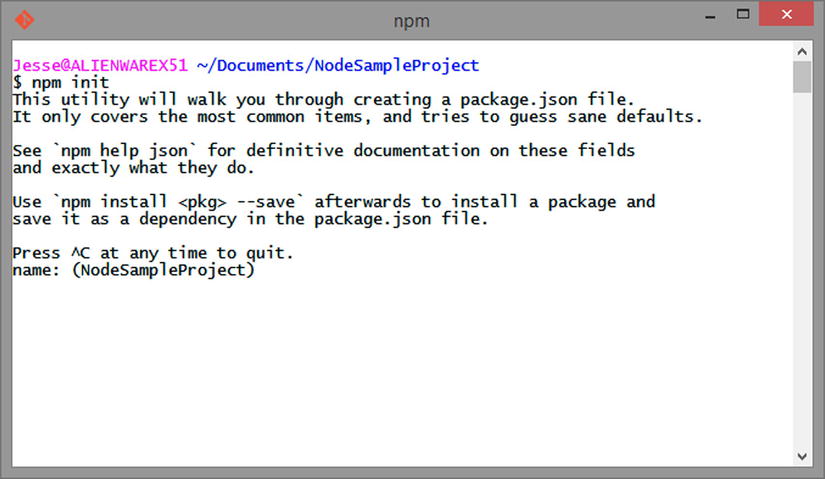
Figure 23-7. Entering “npm init” will begin the process of creating the package.json file
As you can see, the wizard will automatically create the package JSON for your project. Simply answer the questions the wizard asks. To start, you must give the package JSON a name. Once this is done, the wizard will ask you to confirm all your values, as illustrated in Figure 23-8.
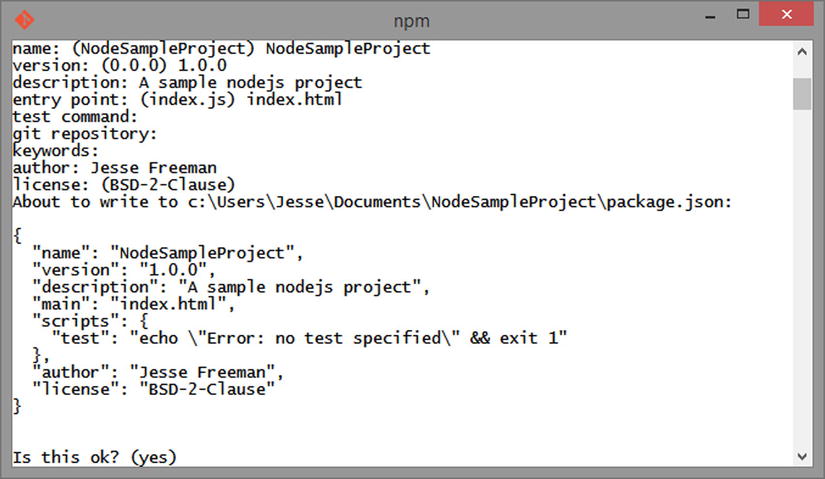
Figure 23-8. Answer all the questions, and you will see a sample of the package.json file before you save it
Now, if you look in your directory, you will see a package.json file. Open it with your text/code editor of choice, and it should have the following structure:
{
  "name": "NodeSampleProject",
  "version": "1.0.0",
  "description": "A sample nodejs project",
  "main": "index.html",
  "scripts": {
    "test": "echo "Error: no test specified" && exit 1"
  },
  "author": "Jesse Freeman",
  "license": "BSD-2-Clause"
}
Over time, as you add new packages to your project and continue to flesh out your build script, this file will automatically populate with anything you install via npm. You will come back to this file later on, when you start adding more Node modules to your project. For now, let’s focus on installing the first package, which is Grunt.
Installing Grunt
Grunt is a JavaScript task runner. This means that you can define a set of tasks, similar to macros in other programs, that can run in order and be strung together to build more complex operations, which will become your final build script. To get started, you will need to install Grunt’s command-line tools globally on your computer, which will allow Grunt to work in any project you create moving forward. To do this, enter the following command at the prompt:
> npm install –g grunt-cli
As the tools install, you should see the downloaded output, as shown in Figure 23-9.
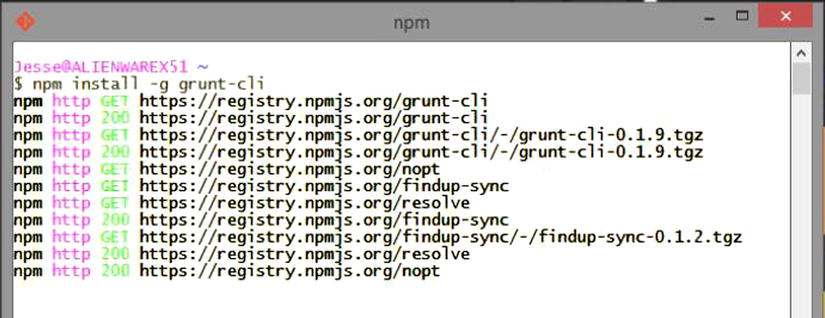
Figure 23-9. As each part of the package is downloaded, it will be displayed at the command prompt
Basically, npm is downloading and installing everything required to run Grunt on the command line.
![]() Tip One thing to note is the –g you used in your command for installing Grunt. This flag indicates that it will be installed globally.
Tip One thing to note is the –g you used in your command for installing Grunt. This flag indicates that it will be installed globally.
In the next section, you will install your packages locally to the project. Grunt is the only one you want to be able to access in any project on which you’re working.
At this point, you are ready to create your build script. Grunt requires a case-specific file named GruntFile.js ×in the root of your project. Let’s create that in your code editor of choice, and I will go over how each part of the script works plus how you can add onto it.
Once you have created your GruntFile.js, open it, and add to it the following code:
module.exports = function (grunt) {
    grunt.initConfig({
        pkg: grunt.file.readJSON('package.json')
    });
}
This is the basic template for your script. There is not much you can do, so let’s set up a basic server and have it display an index page with “Hello World” on it. Create an index.html file in your project. Next, you will want to install a simple Node server module, called connect. Grunt has its own standard library of modules, called tasks. You can see a full listing of these at http://gruntjs.com/plugins. You can install them throughnpm. Switch back to the command line, and enter this:
> npm install grunt-contrib-connect --save-dev
There are a few things to point out here. Recall how you used npm to install Grunt on the command line. Here, though, you will notice that you are not using the global flag –g and instead add --save-dev. This is a special flag that tells npm not only that you are going to install this module locally, but also that you want to save a reference to it in your project.json file. This is very important, as it will allow you to manage module dependency as your project grows. Let’s open the project.json file and take a look at what was added there. You should now see the following code toward the bottom of the file:
"devDependencies": {
    "grunt-contrib-connect": "∼0.3.0",
}
Keep in mind that you may be using a different version from what I show here, as the plug-ins are constantly being updated by their authors. Pretty cool, right? Anything you install with --save-dev will automatically be added to your dev dependencies in your project.json file. Now, when you distribute your project, or if ever have to set it up again from scratch, npm will simply read these dependencies and install them for you. We’ll talk about how that works later in this section. For now, you will need to set up the connect module in your GruntFile. Switch back to the GruntFile.js, and add the following code just above the grunt.initConfig line:
grunt.loadNpmTasks('grunt-contrib-connect'),
This is how you load tasks into Grunt. The module you just installed into your script will now be imported. To configurethe module, you will need to make a new task. Add the following code below the line with pkg: grunt.file.readJSON. Make sure that you add a comma to that line first, because you are adding the code to an existing JSON object. The code should look like this:
pkg: grunt.file.readJSON('package.json'),
        connect: {
            server: {
                options: {
                    port: 8080,
                    base: './',
                    keepalive: true
                }
            }
        }
As you can see, the connect task has its own configuration object. You name the configuration after the task name, and, in this case, you call it connect. Connect accepts several configuration objects. For this example, you are simply going to register a port number and base it on where the root of the server should host. Here, this will be inside the current directory. Also, for this example, you need to set the keepalive property to true. Connect will only run so long as Grunt is running, so without this, the build script would execute, and the server would be shut down.
Now, at the end of the line of code, just before the closing curly brace, add the following code:
grunt.registerTask('default', ['connect']);
To run a task, you have to set a task name. Here, you are using default and an array to list the tasks to run, and you are only calling connect. Default is the main task that this script will run, and, as you can probably guess, it will run whenever you call the script. You can create all kinds of tasks with their own unique names. Later on, I’ll show you some ways to configure and run them. Before you can run this script, you need to create an index.html page for the server to load. Add the following code to the document:
<!DOCTYPE html>
<html>
  <meta charset="utf-8" />
  <head>
    <title>Grunt Demo Project</title>
  </head>
  <body>
    <h1>Hello World</h1>
  </body>
</html>
Now that you have a file to load, go back to the command line, and enter the following command:
> grunt
This is how you run the build script. The code will automatically call the default task. You should see the server start up at the command prompt, as shown in Figure 23-10.
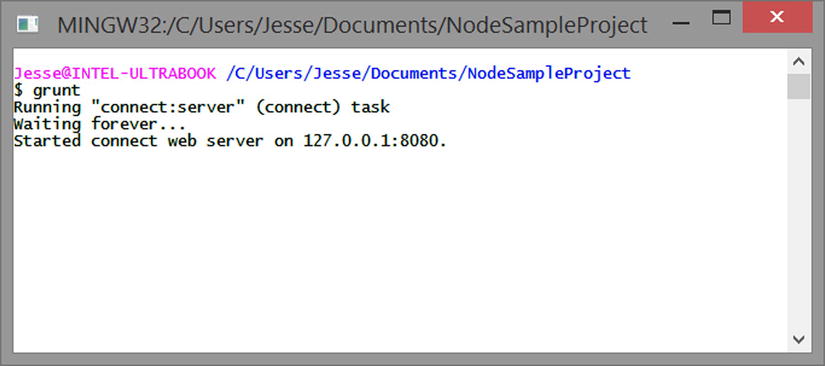
Figure 23-10. Here, you can see that connect is starting the web server at 127.0.0.1 and port 8080; your specific Internet protocol (IP) address may be slightly different
This tells you that you have a server running at localhost on port 8080. Open your browser, and enter http://localhost:8080. You should now see your Hello World page, as illustrated in Figure 23-11.
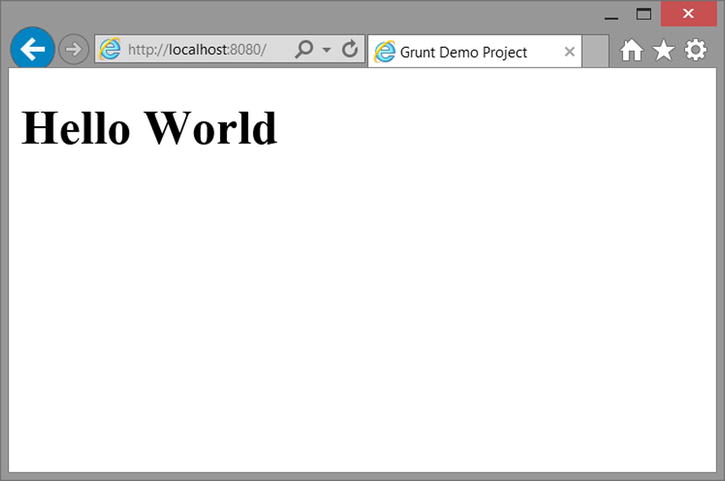
Figure 23-11. You should now see the Hello World page when you go to http://localhost:8080
As you can see, it’s incredibly easy to sett up a server and host a file with Grunteasy. If you have ever had to install and configure Apache, you will appreciate how simple this is. Of course, the server is really basic. It’s not running PHP or anything else, but merely hosting the page. For most HTML5 games, this is all you need to do your local testing. Now, let’s stop the server. Go back to the command prompt, and press Ctrl+C. This will end the server.
At this point, you have seen the basic steps for creating a build script with Grunt. You find the task module you want to install with npm, import it into your GruntFile, create a configuration object for it, and then add it to your task or make a new one for it. Next, I’ll talk about the process I go through when creating a build script and what is useful for HTML5 games.
What Should Your Build Script Do?
Sometimes, the most difficult part of creating a build script is just figuring out what you need it to do without trying to boil the ocean. At the heart of all my HTML5 game build scripts are the following tasks:
- Copy source code to a tmp folder so that I don’t make changes to the original source code or mess anything up.
- Combine all JavaScript into a single JavaScript file.
- Inject JSON and other external data into my combined code to cut down on unnecessary external connections and additonal load times.
- Uglify and minimize to a single JavaScript file.
- Delete any unnecessary files.
- Perform builds for each platform to which I want to deploy the game.
As you can see, there isn’t a lot here. Each step is critical to the end result, which is packaging the game and getting it ready to publish to a server or app store. From here, there may be subtle variations that you want to do, based on the framework that you are using.
To see how this sort of build script works with an actual project, I suggest you see Chapter 19 . This chapter walks you through how to build a simple, rogue-like game, using TypeScript. Its build process is fully automated, taking advantage of all the content covered in this chapter.
Conclusion
Creating build scripts, or any kind of automated workflow, takes a good deal of work. It’s not difficult work, mind you, just a lot of planning and thought on how to build out a robust automation plan as well as how to scale up or down to fit your ever-changing needs.
Over time, you will start to understand better how to break apart your scripts to make them more modular and reusable across all your projects. Creating build scripts is an art form all its own and an integral part of any serious developer’s workflow. The time saved on packaging and deploying games alone is worth the up-front investment in making the build script. I wouldn’t work on a single HTML5 game without some form of build script, even if it only compressed the JavaScript and minified it before uploading.