
Building Your First watchOS App
Ahmed Bakir
Introduction
In late 2014, Apple replied to the vocal concerns of many of its critics and consumers by introducing a completely new “product category” — the Apple Watch. This came as a surprise to (almost) everyone, why would the most profitable computer company in history enter the smart watch market, a “fad” that had yet to achieve a killer app? Similarly, how would they address people’s bias as to how watches should look and work (they’ve only been around for a few thousand years)? And what would they do to make it an app platform?
The answer was to apply the lessons they had learned about mobile computing (low energy, low memory, limited screen size) to a device that was even smaller than the original iPhone. Much like the iPhone, the Apple Watch runs an operating system based on another in their family (watchOS, a subset of iOS), it has an open API (Application Programming Interface) that anyone can develop software for, and it has an App Store that users can access through iTunes. Due to the limited screen size and input devices on a watch (a touch screen and digital crown), watchOS apps are not intended to be as fully featured as iOS apps and as distributed as “extensions” of iPhone applications on the App Store. This has the positive side effect of allowing you to share data and pass off tasks to the parent application.
As the name implies, watchOS is a complete operating system, allowing watch applications to run independently when an iPhone is not present, such as when you are at the gym. Many of the frameworks on watchOS are taken directly from iOS, such as Core Data, Core Motion, and Core Location, but with a limited featured set. One of the key concepts in developing a resource-limited computer system, such as a smart watch, is that you should only include the functionality you need to make it fit in the resources you have; e.g., a smart watch does not need the advanced home screen of a phone to launch an app.
In this chapter, you will learn how to get started in Apple Watch development by adding an Apple Watch extension to the CarFinder application from the first chapter. As shown in Figure 6-1, the extension exposes a table view that allows users to view a list of their logged locations and details about each, including a map and the GPS coordinates. This exercise is intended to help you learn the basics of watchOS app architecture and how to use Xcode to develop watchOS apps. In the following chapters, you will learn more advanced features to make the app even more useful, such as logging location from the watch, adding speech-to-text to the app, and accessing data sources from the Internet directly on the watch. The completed version of the project is available in the Ch7 folder of this book’s source code bundle on the Apress website.

Figure 6-1. Mock-up of CarFinder Watch App
Before moving into how you build a watchOS app, it is good to know how watchOS apps differ architecturally from iOS apps (aside from running on a different operating system.) To reduce the learning curve for developers coming from iOS and OS X, Apple aimed to make both platforms functionally similar (even retaining some of the same class names and API calls), but changes had to be made to fit the operating system on the watch’s limited resources.
The most significant difference between watchOS and iOS that will help you understand the delta between the platforms is that you cannot create new user interface objects at runtime on watchOS. Although both platforms adopt Model-View-Controller (MVC) as their main design pattern for user interface development, on watchOS, you can only update or present existing element at runtime. More simply put, this means, if an element or view controller is defined on the storyboard for your watchOS app, then you can access it at runtime. Since you cannot instantiate new user interface elements, you will learn new tricks to work around this limitation, such as setting elements to “invisible” during runtime. For better or worse, watchOS implements storyboards in the same manner as iOS and OS X (where you define the layout and tie it to parent classes in Interface Builder.)
The lack of runtime user interface changes in watchOS is also reflected in how watchOS apps are built and distributed on the App Store. When you compile an iOS or OS X app, the source code files are compiled into object code and all of the resources (storyboards, images, and any other files you manually add to your project) are bundled into one .app file. When you download an iOS or OS X app, the entire .app file is installed on the device. On the other hand, watchOS apps produce two output files (a “WatchKit app” and a “WatchKit extension”), which are packaged and inside of your iOS app’s .app file. There is a bit of term overloading here, which I will explain. A WatchKit app refers to the storyboard file and other static resources that you include in your project file. A WatchKit extension contains all of the compiled source code for your watchOS project. When you choose to install a watchOS app on your Apple Watch, iOS grabs these files from the iOS app’s bundle and copies them over to your watch. You can take advantage of this bundling to create “shared groups”, which allow you to share files between your iOS app and watchOS app.
Note WatchKit refers to the base framework for watchOS app development. watchOS includes another similarly named framework called ClockKit, which is used to build a complication, or plug-in, for Apple Watch’s built-in watch faces.
In the introduction, I mentioned that watchOS includes many of the frameworks you are familiar with from Cocoa Touch. Some of these frameworks, and their intended uses, are listed in Table 6-1. In watchOS 2.0 and higher, these frameworks are installed on the watch, allowing your watchOS app to execute commands from these frameworks without being connected to the phone. It also has the side effect of allowing you to access the Apple Watch’s hardware, such as the heart rate monitor, accelerometer and GPS directly.
Table 6-1. Cocoa Touch Frameworks Available on watchOS
Framework | Intended Purpose |
|---|---|
Contacts | Access to the user’s contacts, including all relevant metadata |
Core Data | Database operations |
Core Location | Access to the user’s current location |
CoreGraphics | Lightweight drawing and graphics operations. |
EventKit | Access to the user’s calendars and reminders |
One important omission you will note is UIKit. watchOS only supports a limited subset of user interface elements, which are managed by the WatchKit. Since you can not instantiate new elements at runtime or perform more complicated actions on them, such as rotation, animation, or modifying how they are drawn, many of the functions of UIKit are extraneous on the Apple Watch. The primary WatchKit class you will use in this book is WKInterfaceController, which takes the place of UIViewController. The WatchKit user interface class names all start with WKInterface (ex, WKInterfaceLabel, WKInterfaceButton, WKInterfaceMap).
A final note to make about watchOS apps is the nature of its interfaces. Unlike an iOS app, a watchOS has three distinct user interfaces: the main interface for the app, a “glance” interface, and a “notification” interface. As the name implies, the main interface is what shows up on the screen when the app is launched. The glance interface is a single-page dashboard for your app that users can install in their “glance” menu, which comes up when the user swipes up from the bottom on their Apple Watch screen. The notification interface is another single-page interface that is initiated when the user receives a notification from your watchOS app’s iOS counterpart. As these interfaces are initiated by three separate events, your storyboard will reflect this with three “entry points” and three “scenes”, or workflows, as opposed to the single scene you are used to from traditional iOS development.
Setting Up Your Project
To create a new Apple Watch app, you will need to add it as a new build target of an iPhone application. A build target in Xcode is a set of configuration instructions that tell it how to build your project, such as which files to compile, what the target OS is, and what constants to apply. On large applications, it’s common to have “debug” and “release” targets to build a log-message heavy version of the application that sends data to a test server, and another performance-optimized version that sends it to the “production” server. For this project, the Apple Watch app target tells Xcode to bundle the Apple Watch-specific source files together into an application that can be run on watchOS.
The project for this application extends the CarFinder project from Chapter 1, so duplicate it and open it up in Xcode. To add a new target, go to the File menu in Xcode and select New ![]() Target, as shown in Figure 6-2.
Target, as shown in Figure 6-2.
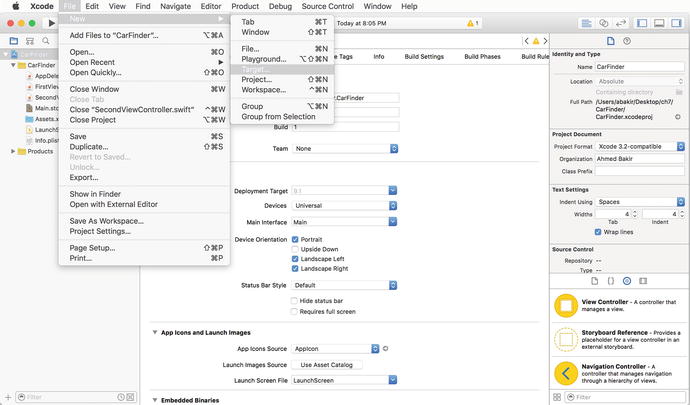
Figure 6-2. Xcode menu for creating a new build target
You will be presented with the modal dialog shown in Figure 6-3, asking you to select a platform and application type. Select watchOS as your platform and WatchKit Application as your target type.

Figure 6-3. Creating a new build target
Caution The Apple Watch target under the iOS hierarchy tree builds an app for watchOS 1. All of the examples in this book are written for watchOS 2 to take advantage of its expanded feature set and more performant application architecture.
In a similar manner to an iOS application, you will be asked to name your WatchKit application and select some template options. As shown in Figure 6-4, I have chosen to give the name the WatchKit app “CarFinder - watchOS.” The WatchKit app takes the iOS app’s name when it runs on the user’s watch, so the actual name of the target is only used internally. A unique target name will make it faster for you to navigate between code in your project.
I have also enabled the checkbox for “Include Notification Scene”. Apple recommends selecting “Include Notification Scene” even if you are not implementing a notification for a while, as their template will generate a scheme (an additional run-time configuration that is applied to a target) and local file you can use to test notifications (as opposed to setting up and connecting to an Apple Push Notification Service-enabled server).
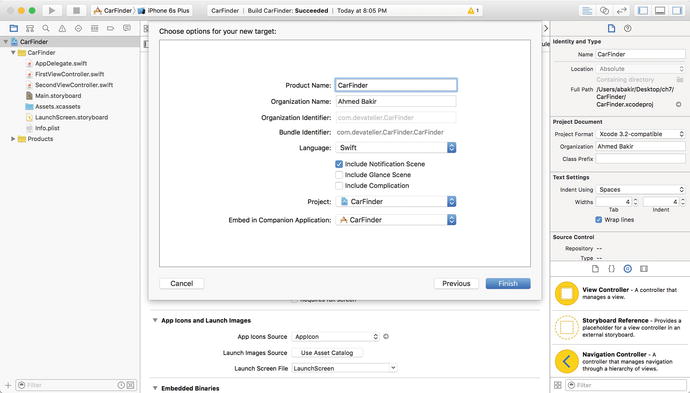
Figure 6-4. Configuring your WatchKit target
The first time you set up a WatchKit target for a project, you may be presented with the dialog box in Figure 6-5, which asks you to activate the scheme. Select Activate.

Figure 6-5. Activating the watchOS app build scheme
When working with Xcode projects that target different platforms (like watchOS + iOS), activate the schemes that you are actively developing on. Disable schemes for targets you are not using to speed up your compile time.
After activating the scheme, Xcode will take you back to the default view for your project. As shown in Figure 6-6, you will notice “CarFinder - watchOS” and “CarFinder - watchOS Extension” folders have been added to the project hierarchy, corresponding to WatchKit’s definition of the two pieces of an app. The Interface.storyboard file contains the scenes (or storyboard entry points) for the app’s main interface and its notification interface; you will make all your storyboard changes in this file. In the same manner as a new iOS application, it comes pre-configured with parent classes tied to each view controller.

Figure 6-6. Changes to the CarFinder project
Debugging your watchOS App
The process of running a watchOS application is much like that of running an iOS application: after selecting your build scheme, you pick a target device to run it on. As shown in Figure 6-7, you select your run target by clicking on the Active Scheme drop-down menu, next to the run/stop buttons in the top left corner of the Xcode main window.

Figure 6-7. Selecting a run target for your watchOS application
Just like on iOS, you can run your watchOS app on a physical device or in a simulator. Since an Apple Watch must be paired to an iPhone to run apps, all of the watch simulators are paired to an iPhone simulator. Similarly, your iPhone must be plugged into your development computer and your Apple Watch must be paired, unlocked, and in range to debug on it. If these requirements are not met, your iPhone will be marked as an “ineligible device (no paired watch)”.
Once you have initiated a run session on an Apple Watch, you can perform all of the debugging operations you are used to, including setting breakpoints and viewing live console output.
Adding a Table to your watchOS App
Now that your watchOS app is part of the CarFinder project, you are ready to start development. To begin, you will add a table view controller to the main screen for the app and populate its data with content from the iOS app. This first is intended to introduce you to working with watchOS storyboards, initializing a table view controller on watchOS, and transferring data between an iOS device and the Apple Watch. In the next section, you will learn how to build a detail view for each item in the table view controller, and in the next chapter, you will learn how to pull in data from the Internet.
There are two primary layout types for an Interface Controller (WatchKit’s equivalent of a View Controller from iOS): tables and pages. A WatchKit table implements the same concept as a table view controller in iOS: a single-column list of rows (elements) that is populated by a data source and can scroll up and down. A page implements the same concept as a page view controller from iOS: a series of single-page screens that you navigate through by swiping left or right on the touch screen. For this project, you will use a table for the list of locations and a page to represent the details screen. By default, the main interface controller for your app will be blank. To add a table to this interface controller, which will act as the location list, find the Table element from Object library in Interface Builder (the bottom-right scrolling pane) and drag it onto the interface controller, as shown in Figure 6-8. Remember to select Interface.storyboard from the Project Navigator to edit the storyboard for your watchOS app.

Figure 6-8. Adding a table to your main interface controller
Your result will look like Figure 6-9, where your blank interface controller is replaced with a placeholder for a table row. Your view hierarchy will show a table on top of the interface controller, which contains a table row controller, and a group.

Figure 6-9. View hierarchy after adding a table
Referring back to iOS programming terminology, your interface controller class acts as the “table view delegate” and provides the functions that define how many rows and sections the table will have, as well as how to populate each row with data from the data source. The table row controller is a separate class that allows you to define a custom layout for each row. Unlike iOS, there are no styles (templates) for row types (e.g., default, subtitle), so you must always define a custom table row controller. For the CarFinder WatchKit app, each row should have two labels: one containing the latitude and longitude of each location and another representing the time when the location was saved. To implement this, drag two labels from Interface Builder’s Object Library onto the table row placeholder in your interface controller. The result should look like Figure 6-10, where the labels are located adjacent to each other in the row.

Figure 6-10. Result of adding labels to your row
To make the row match our mockup in Figure 6-1, you need to change the configuration of the row’s group layout to vertical. Groups in WatchKit implement a concept similar to tables in HTML, they are blank slates you use to position user interface elements relative to each other. To position the labels below each other, select the group in your table’s view hierarchy, and switch the Layout attribute to “Vertical’” in Interface Builder’s Attributes Inspector (the second to last tab in the right pane), as shown in Figure 6-11.

Figure 6-11. Switching group layout to vertical
To finish polishing the row, increase the height of the row by dragging on its bottom edge. Use the Attributes Inspector to change the style of the second label to “Subhead”, as shown in Figure 6-12. Using font styles allows your app’s text to resize relatively, a useful feature for accessibility, where a user may increase the size of the text on their devices globally, to adjust for vision issues.

Figure 6-12. Completed table row
Note You do not need to worry about adjusting the width of each label, as the default behavior for a label is to resize it to fill the width of the screen.
Defining the Table
Having visually laid out the table, you can begin defining it in code. To start out, begin by creating a subclass of NSObject named LocationRowController to represent the table row controller, as shown in Listing 6-1. Save the file as LocationRowController.swift. As of this writing, WatchKit does not define a parent class for table row controllers, so you need to use Swift’s generic parent class for objects, NSObject.
The only elements on the row are the labels representing the coordinates and time, add these to the class, as shown in Listing 6-2. The parent class for a label in WatchKit is WKInterfaceLabel. Remember to use the @IBOutlet keyword to indicate the properties connect to Interface Builder elements. For memory management, use the weak keyword to indicate that the property does not need to be modified after it is initialized, and define it as an implicitly-wrapped optional, using the ! operator, to indicate that the value is expected to always remain non-nil.
As with any other Interface Builder-backed class, your next step is to connect user interface elements and parent classes. Although the interface controller is already connected to the InterfaceController class via Xcode’s default project settings, you will need to manually connect the table row controller you added. To perform this operation, select the table row controller in your view hierarchy and then navigate over to the Identity inspector in Xcode (the third middle tab in the right pane.) As shown in Figure 6-13, select the LocationRowController class as the parent class.

Figure 6-13. Assigning the parent class for the table row controller
The delegate methods for populating the table refer to table row controllers as “types”, which are represented through their storyboard “Identifiers”. As shown in Figure 6-14, navigate over to the Attributes Inspector, and set “LocationRowController” as the identifier for the class.

Figure 6-14. Setting a row type
Next, you need to tie the user interface elements to the LocationRowController class. While the location row controller is still selected in the view hierarchy, navigate over to the Connections Inspector (the last tab in the right pane). As with an iOS storyboard, click down on the CoordinatesLabel outlet radio box and release it over the label on the storyboard to connect the two, as shown in Figure 6-15. Repeat the process for the TimeLabel.

Figure 6-15. Connecting WatchKit user interface elements to a class
Now that the table row controller elements have been assigned, you need to define the behavior for the table in the InterfaceController class. First, add properties representing the table and its data source to the InterfaceController class (InterfaceController.swift), as shown in Listing 6-3. To keep things simple, use a single dimensional array of CLLocation objects, just like the data provided by the DataManager class. Remember to import the CoreLocation framework class to resolve these symbols; including a framework in your iOS project does not automatically include it in your watchOS target.
As with any other Interface Builder object, connect the LocationTable property to the InterfaceController class via the Connection Inspector, as shown in Figure 6-16.

Figure 6-16. Connecting the LocationTable property
Just like with iOS, there are three key behaviors you need to implement to fully define a WatchKit table: the number of rows in the table, how to configure each row, and what action to perform when a row has been selected. You will implement the final behavior (selection) in the next section, for now, the focus is populating the table.
To specify the number of rows in the table, in the InterfaceController class’s entry method, awakeWithContext(_:), call the method, setNumberOfRows(_:withRowType:), specifying the length of the locations array as the row count, and “LocationRowController” as the row type, corresponding to our earlier definition in Figure 6-10. Your awakeWithContext(_:) method should look like the example in Listing 6-4.
You can access each row via the rowControllerAtIndex(_:) method. To configure the entire table at once, I have created a convenience method named configureRows in the InterfaceController class (InterfaceController.swift ), shown in Listing 6-5. This method accesses each row in the table, pulls the corresponding item from the data source, and configures the labels accordingly. To make the output fit the screen, I shortened the latitude and longitude to two decimal places using a string formatter, and created a DateFormatter object to convert the timestamp Date object to a string.
You will need to configure the table when the table view appears on the screen or any time the data source is updated. To intercept the event when the table view appears, add the call to configureRows at the bottom of the willActivate(_:) method for the InterfaceController class, as shown in Listing 6-6. You will handle data source updates in the next chapter.
Note The awakeWithContext(_:) method is called when an interface controller is loaded from a storyboard for the first time. This is the first event to fire when an interface controller is loaded and only fires once, whereas willActivate: fires every time the interface controller is presented, such as when you are coming back from a detail screen or menu.
Fetching Data from your iOS App
Now that the table view is configured to display data, it’s time to populate the locations array with data from the CarFinder iOS app. The primary method for sharing data between an iOS app and WatchKit app in watchOS 2 is through the WatchConnectivity framework. Following Apple’s pattern of “availability”, or performing an operation only when a resource is available to your application, WatchConnectivity provides a subscription-based service that negotiates the link between your iPhone and Apple Watch and transmits messages when the link is stable. Similar to notifications, you need to establish sending and receiving endpoints in each of your applications, and messages are only received when you declare yourself as a “receiver.”
To enable both of your applications as WatchConnectivity-compatible, you need to subscribe to WatchConnectivity’s “default session”, after checking if the feature is available on your device (this is defined as an Apple Watch being paired to your phone, with your watchOS app is installed on it.) In the CarFinder iOS app, place this block of code in the viewDidLoad method of FirstViewController class, as shown in Listing 6-7. The view controller with the closest access to the main data source should be the one you use to handle WatchConnectivity messages.
To send and receive WatchConnectivity messages, you need to set your class as a delegate of the WCSessionDelegate protocol. In Listing 6-7, this is indicated by adding WCSessionDelegate to the list of protocols in the class definition and by setting the class as a delegate object in your setup block.
In your WatchKit Extension, you need to follow the same steps. The main difference will be that you will use the awakeWithContext(_:) method in the InterfaceController class. See Listing 6-8.
In this chapter, to provide a positive experience for your users, you will use WatchConnectivity to fetch the latest list of locations from the CarFinder iOS app as soon as the CarFinder watchOS app is launched on the watch. To provide the best experience, the method you select should be fast (users don’t want to wait for data the first time they load the app) and non-blocking (users don’t want to wait for a frozen app to resolve itself.) To enable this, you will use WatchConnectivity’s updateApplicationContext(_:) method to transfer a Dictionary object from the CarFinder iOS app to the CarFinder WatchKit extension. As shown in Listing 6-9, you should send this event every time the data source is updated, which is after a new location has been added to the list. In this example, I converted the array into a dictionary by storing it as the value for the Locations key.
Application contexts in WatchConnectivity are instantaneous transfers as soon as the link is established with the subscribing counterpart application. Additionally, for data sources that update frequently, only the most recent version of the dictionary is sent; old versions are discarded.
To receive the dictionary, you need to implement the session:didReceiveApplicationContext: delegate method in your WatchKit extension. As shown in Listing 6-10, you implement this in the InterfaceController class. After receiving the message, override the existing locations array with the new version from the received dictionary and call the configureRows method to update the user interface.
Note This example saves locations in memory; they will not persist between multiple sessions. To persist data, we suggest using Core Data or saving your data to a plaintext file.
Building a Detail Page with a Custom Layout
To make the CarFinder WatchKit app even more useful, you will implement the detail screen for each item in the location list. In addition to teaching you how to implement the selection action for the WatchKit table element, this section will also focus on building a page-based interface controller with a custom layout.
The first step in building a detail controller is to place it on your storyboard. To add a new interface controller to your watchOS app, drag an Interface Controller object from the Interface Builder’s object library onto your storyboard. Similarly, you need to create a new subclass of WKInterfaceController to define its behavior; for the CarFinder WatchKit app, this file is called LocationInterfaceController. As with previous examples, use the Identity Inspector to set the parent class to LocationInterfaceController.
Referring back to the mockup for the app in Figure 6-1, the detail screen for the CarFinder WatchKit app displays the timestamp for the location on the first line, next to a GPS icon. The coordinates for the location are displayed on a line beneath this, and under that is a map with a pinpoint indicating the recorded location. By default, a Group in WatchKit can only display items by positioning them adjacently, horizontally or vertically. To implement your custom interface, you can get around this limitation by placing two groups on your interface. As shown in Figure 6-17, drag two groups on to your interface controller. Your view hierarchy will be updated to reflect these new groups.
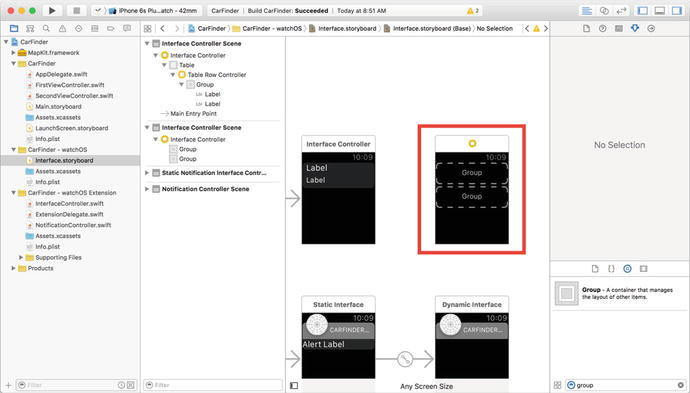
Figure 6-17. Adding multiple groups to your interface controller
Note You can place as many groups as you want on a page-based interface, but only one for a table interface.
Now that the groups are ready, you can start adding user interface elements onto them. Start out by setting the layout of the group at the top to Horizontal, using the Attributes Inspector. Next, drag an Image and Label onto the group. Unfortunately, by default, your Label will be hidden, as shown in Figure 6-18.

Figure 6-18. Default behavior when adding multiple items to a vertically aligned group
To fix this, grab the right-edge of the image placeholder and drag it to the left, until it becomes square shaped, matching the general shape of the icon from the mockup. After adjusting the image’s size, the label reappears in the group, as shown in Figure 6-19.

Figure 6-19. Group after adjusting image size
Like an iOS app, watchOS apps can run on multiple screen sizes (the 38mm and 42mm watches). Unfortunately, watchOS storyboards do not yet support auto-layout. To resolve this, the default size settings for user interface elements in WatchKit are set to “Size to Fit Content.” This setting works opposite to the ScaleAspectFill content mode for UIView objects in iOS. Instead of the content resizing to fill the container, the container resizes to fill the content! When you manually size an item, this switches the size attribute to “Fixed” along with the pixel width or height of your adjustment, as shown in the Attributes Inspector screenshot in Figure 6-20.

Figure 6-20. Attributes inspector after adjusting image size
When you have multiple elements in a horizontal group, use this limitation to your advantage by fixing the size of certain elements and keeping others flexible. Automatic resizing can be troublesome for images, but users expect to see text sizes and padding decrease with labels.
A side-effect of adjusting the size of the image is that your label will be aligned to the top edge of the group. To fix this, select the label and change the vertical position attribute to Center, as shown in Figure 6-21.

Figure 6-21. Changing the vertical position of an item in a group
Luckily, the group containing the map and time stamp label is a bit easier. Change the layout to vertical and drag Label and Map objects into the group. Your final user interface should look like the screenshot in Figure 6-22. You will notice that the size of the interface controller has increased to reflect that there is more content on the screen than can fit at once. By default, interface controllers work like UIScrollViews in iOS, where everything inside of the scroll view scrolls. I have included a graphic in the source code bundle named compass.png that you can use in your project for the compass icon.

Figure 6-22. Final user interface for detail interface controller
As you would expect, to make this all work, you need to define these elements in your class. You can find the definition for the LocationInterfaceController class, including the properties for the user interface elements in Listing 6-11. As always, after adding these items to your class, connect them to your storyboard in Interface Builder.
Presenting the Detail Interface Controller
There are three steps required to present the Detail interface controller: connecting the push segue, implementing the table controller delegate method for the selection event, and initializing the detail controller with the correct data. You connect the push segue from a table row in WatchKit the same way you would in iOS: by CTRL+clicking from a table row to your destination interface controller. As shown in Figure 6-23, when prompted to select the segue type, select Push. As with all segues, use the Attributes Inspector to specify an identifier (name). In my example, I call this the “DetailSegue”.

Figure 6-23. Connecting the push segue
The push segue presents the detail interface controller after catching the selection event in the main interface controller. There are two primary ways to handle selection events in WatchKit: the table(_:didSelectRowAtIndex:) method, which allows you to perform an action based on a table’s selected row, and the contextForSegueWithIdentifier(_:inTable:rowIndex:) method, which sends a context (object) to your destination interface controller, based on the selected row of your table. This fits the requirements perfectly. Luckily, the implementation is quite simple too. As shown in Listing 6-12, in your InterfaceController class, upon catching a segue named “DetailSegue”, return the location specified by the selected row in the table. For all other segue identifiers, return nil.
Now that you have successfully created the logic and handler for the selection event, you are ready to use this information to initialize your detail interface controller. In Listing 6-12, the object you passed back from the contextForSegueWithIdentifier(_:inTable:rowIndex:) method was called a context. By no coincidence the method that fires when an interface controller is loaded for the first time is called awakeWithContext:. As shown in Listing 6-13, to initialize a LocationInterfaceController with from a context, check if the input object is a CLLocation object like you expect, and then use it to set the values for your user interface elements.
Further emphasizing the similarities of watchOS to iOS, you will notice that the process of initializing a WKInterfaceMap was exactly like that of initializing an MKMapView: first you define a pin and then you set the region.
At this point, you now have a functional CarFinder app! Your user interface should look like the example in Figure 6-24 when you run it on an Apple Watch. The user can select an item in the location list table to view its details, which include a map of the area, coordinates, and the time saved.

Figure 6-24. User Interface for CarFinder when running on an Apple Watch
Summary
In this chapter, you learned the ins-and-outs of building an Apple Watch app by creating the CarFinder WatchKit app, which pulls the list of saved locations from the CarFinder iOS app on the user’s iPhone. After a quick introduction to the Apple Watch and its basic application architecture, you began to explore the similarities between watchOS and iOS development by setting up your watchOS build target. Building the user interface in Interface Builder and tying its outlets to classes you defined in code strengthened the extent of these similarities. To round things out, you explored different user interface elements and layout styles, and learned about key WatchKit event delegate methods, giving you a good foundation for future chapters, where you will explore more advanced elements and behaviors.